|
|
 04-07-2017, 06:30 AM
|
#331
|
|
Senior Member
Join Date: Nov 2015
Location: Vacaville, just east of the San Francisco Bay Area
Posts: 1,062
|
Thanks for the tip, I most certainly will do!
__________________
Flint - 2016 SMB Sprinter 4x4 144" RB 150S w/ PH
KN6BJX
|

|

|
|
04-07-2017, 01:54 PM
|
#332
|
|
Senior Member
Join Date: Aug 2013
Posts: 344
|
x2 on BroncoHauler's advice. Keep a close eye on the alignment of those u bolts and listen for any unusual squeaks. Our u bolts came loose as the RIP kit settled.
__________________
2014 Ford RB-50
|
|
|
|
|
04-08-2017, 08:52 AM
|
#333
|
|
Senior Member
Join Date: Nov 2015
Location: Vacaville, just east of the San Francisco Bay Area
Posts: 1,062
|
Flint's Big Brother
I have one more set of pictures from my last trip to Van Compass, but I do have one more trip there planned, thus more pictures to look forward to in the future!
If you follow what these guys are up to you know that they have a 2" lift kit for the 2wd Sprinter, with many examples running around out on the road. Not long ago they developed a prototype 2" lift kit for the 4wd Sprinter and installed it on Rob's 2015 4wd Sprinter. They currently have a bit over 2,000 miles on the mod, and Rob reports no issues and no adverse handling characteristics. I plan to give it a test drive the next time I am in their shop.
Our van on the left sitting on 265-70R17's, VC's van on the right sitting on 315-75R16's.
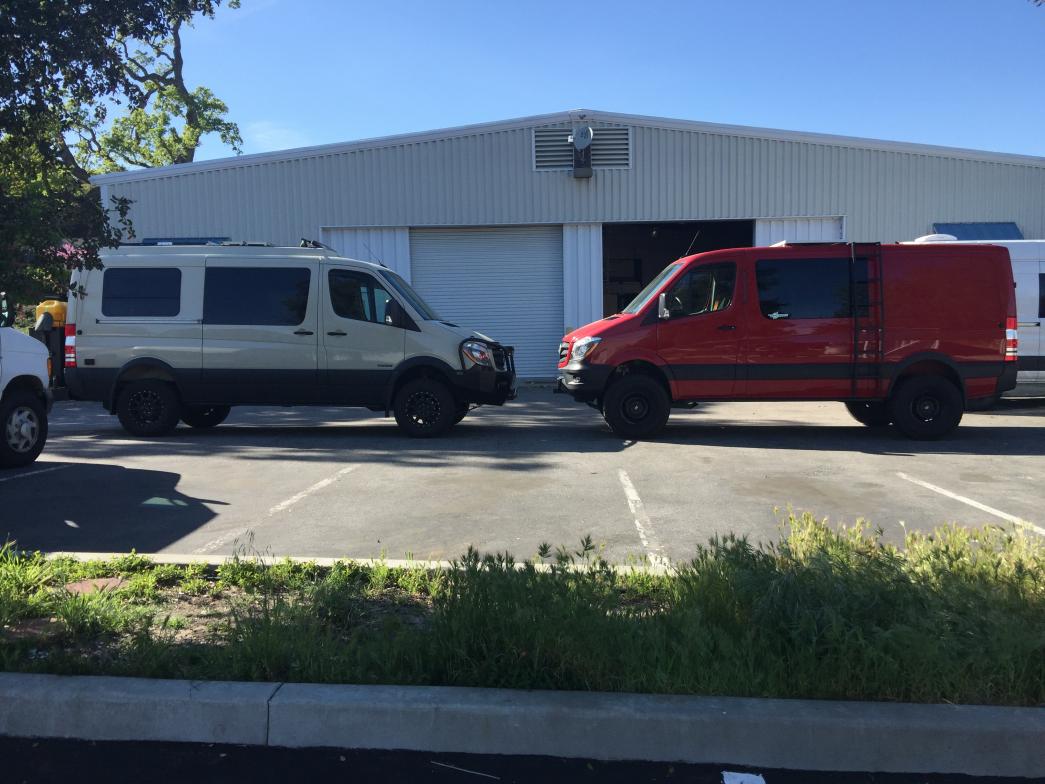
The change puts the front drive shaft at an angle. The front drive shaft doesn't move as the suspension cycles and Rob reports no vibration, but they are going to run it in test mode for a while longer before releasing the kit for production. As for making everything fit, nothing was required in the rear and as for the front, they cut a bit off the bumper and inner fender plastic (not required with an Aluminess front bumper, it looks like all will clear in that case), removed the mud flaps, trimmed the pinch seam and added Agile off-road wheel spacers.
Here it is a bit closer up. To look at it in person is impressive, with nothing looking out of place or unbalanced.

In these pictures both vans have the rock sliders in place, thus we used them as the common point to measure the height difference. The addition of the lift kit and the larger tires resulted in a full 3" gain in height, impressive and very noticeable with the two vans side-by-side.
__________________
Flint - 2016 SMB Sprinter 4x4 144" RB 150S w/ PH
KN6BJX
|
|
|
|
|
04-09-2017, 09:44 PM
|
#334
|
|
Senior Member
Join Date: Nov 2015
Location: Vacaville, just east of the San Francisco Bay Area
Posts: 1,062
|
Post #204 Update
Quote:
Originally Posted by Fitz

What do you call soon-to-be SMB Sprinter owners who have deposits down, build dates (tentatively - it all depends on MB delivery dates...) scheduled, and who are learning all about the patience required to get their new SMB? I'll go with Future SMB'ers until someone comes up with a better name!
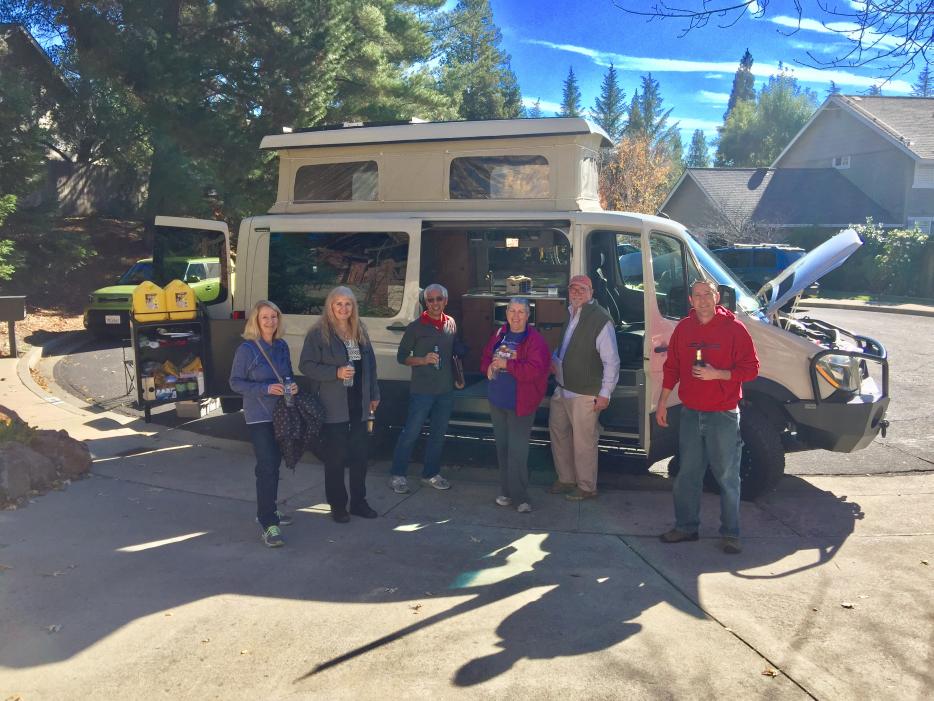
Today Laura and I met with velo47 (Albuquerque NM), Mer1039 (Danville CA) and michaelf (Santa Rosa CA) and we went through Flint top to bottom, inside and out. It was a great time with like-minded people all doing something we enjoyed. Here is the group:
|
Update to Post #204
Today Mer1039 (otherwise known as Ron & Barb) dropped by with their 2 day new SMB! Beautiful vehicle, here are the new owners with their brand new (no name as of yet) SMB.

A 15 minute visit turned into three hours of looking, comparing and just plain having fun talking about SMB's. A great way to spend a Sunday afternoon, it could only be better if we were out using the vans! They have trips planned, we will all have to stay tuned for trip reports in the future....
Congratulations Ron & Barb!
__________________
Flint - 2016 SMB Sprinter 4x4 144" RB 150S w/ PH
KN6BJX
|
|
|
|
|
04-18-2017, 11:54 PM
|
#335
|
|
Senior Member
Join Date: Nov 2015
Location: Vacaville, just east of the San Francisco Bay Area
Posts: 1,062
|
BFG KO2 265 70R17 Treadwear Update
At just over 10k on the new tires I did the first rotation. (I know, 5k is the recommended interval...)
Heavy van, 50 psi in the front, 70 psi in the rear
New: 15/32"
Front: 14/32"
Rear: 13/32"
Tread wear was even side to side, so far everything is looking good!
Torque on the lug nuts is 133 ft-lbs., that's a good number to know and to remember.
BTW, after rotating the tires the computer will turn the tire pressure display red. It's simply telling you to reset the computer, a fairly simple procedure following the instructions in the manual. What the manual doesn't clearly tell you is that the van needs to be driven 2 or 3 miles before it finishes the re-set and begins to display correctly.
Does anyone know what the low pressure setting for the TPS system is? I'm curious to know, but not quite curious enough to experiment by letting air out in measured increments until the computer tells me of a problem condition.
__________________
Flint - 2016 SMB Sprinter 4x4 144" RB 150S w/ PH
KN6BJX
|
|
|
|
|
04-19-2017, 12:39 AM
|
#336
|
|
Senior Member
Join Date: Aug 2010
Posts: 752
|
Hey Fitz, is that a setting for all Sprinters or is the computer reprogrammed to a higher pressure to take into account the extra weight on the SMB build?
|
|
|
|
|
04-19-2017, 08:41 PM
|
#337
|
|
Senior Member
Join Date: Nov 2015
Location: Vacaville, just east of the San Francisco Bay Area
Posts: 1,062
|
Restarting the Tire Pressure Monitor
Quote:
Originally Posted by TomH
Hey Fitz, is that a setting for all Sprinters or is the computer reprogrammed to a higher pressure to take into account the extra weight on the SMB build?
|
Tom,
From page 255 of the 2016 Sprinter manual:
When you restart the tire pressure monitor, the currently set tire pressures are taken as reference values for monitoring.
In most cases, the tire pressure monitor detects the new reference values automatically, e.g. after you have:- changed the tire pressure
- changed wheels or tires
- installed new wheels or tires
However, you can also define the reference values manually as described here.
The manual then goes on to tell you how to restart the tire pressure monitor, with instructions for vehicles with or without steering wheel buttons.
In my case I had to restart (BTW, I would use the word reset, MB uses the word restart, so I stayed with it here) the tire pressure monitor after changing the pressure in the tires and rotating them. The sensors are in the tires and by changing pressure and location the restart became required. Not a big deal, read the manual and follow the directions.
As to your specific question, MB or SMB set the tire pressure and the system learned it. I do not know what the variation in low and high set points is, I have only seen literature that speaks to the % difference that sets off the monitor. As it says in the manual, you can also define reference values. In my case I redefined from 50 to 70 and vice versa with no problem, but like you I am also curious how far we can go.
If you are curious, here are the B-Pillar tire info stickers on my van.
The MB Factory sticker:

And the SMB Texas sticker:

I assume MB sets to these high pressures as a matter of policy for all new vans. My van is heavy and it rides well at these high maximum weight settings, but I can't imagine running the tires at these high pressures in an empty cargo van with no load. I know many don't, thus they must restart the TPMS to define new lower values.
My son-in-law loves to take his long travel Tacoma out on the sand at Pismo Beach. I'll go with him next time and air down to 20 psi or so and see if I can restart the TPMS down that low.
__________________
Flint - 2016 SMB Sprinter 4x4 144" RB 150S w/ PH
KN6BJX
|
|
|
|
|
04-22-2017, 02:58 PM
|
#338
|
|
Senior Member
Join Date: Nov 2015
Location: Vacaville, just east of the San Francisco Bay Area
Posts: 1,062
|
Owner Supplied Breaker Bar vs. MB supplied lug wrench
From Post #335 above.
[QUOTE=Fitz;201261]
Torque on the lug nuts is 133 ft-lbs., that's a good number to know and to remember.
QUOTE]
Thinking more about the above, I just wanted to pass on a reminder. When I first got the van I looked over the supplied lug wrench and immediately put a 1/2" drive breaker bar and deep well sockets in the van.
The supplied lug wrench is 1' long. At a torque setting of 133 ft-lbs, that means a best-case minimum of 133 lbs of force will be required to break the nut loose (it will most likely take more).
The 1/2" drive breaker bar I have in the van is 17" (1.42 ft) long. At this length 133 lbs is reduced to 93.7 lbs. This is still a lot of force, but it is much more manageable, especially with a breaker bar that is much easier to stand on or get a good grip on vs. the small diameter round profile of the supplied lug wrench.

__________________
Flint - 2016 SMB Sprinter 4x4 144" RB 150S w/ PH
KN6BJX
|
|
|
|
|
04-24-2017, 09:47 PM
|
#339
|
|
Senior Member
Join Date: Aug 2010
Posts: 752
|
Good ole PHYSICS!!
|
|
|
|
|
05-01-2017, 10:48 PM
|
#340
|
|
Senior Member
Join Date: Nov 2015
Location: Vacaville, just east of the San Francisco Bay Area
Posts: 1,062
|
PH Top Preventative Maintenance
I received the following message from Forum member Davidboco:
I recently bought some "poptop tape" from the sportsmobile store. It goes between the poptop and the roof to protect the roof. I had a little spot already worn to bare metal- probably from movement of poptop against the roof. I'm thinking with all the off roading you do you might want to install it too. Easy install too -just prep the area with alcohol (not the jack stuff).
Davidboco's observation was a good one, here's what I found after 7 months and 11,000 miles:


The wear was pretty well distributed, with the worst as evidenced by shiny metal spots at three of the four corners. I cleaned up the spots and painted them with genuine MB touch-up paint (it seemed like a good time and place to test the color match for the future, which was very good) and then as Davidboco suggested I cleaned all of the original paint with rubbing alcohol.
Next came the PH tape, which can best be described as a thin piece of plastic with an extremely aggressive adhesive on the back. Application was fairly straight forward, with particular emphasis paid at the corners where the typical rub points were.


There was just enough tape to run one strip front and back and two on each side. And by just enough I mean with less than 2" to spare!
Here is what the final product looks like:
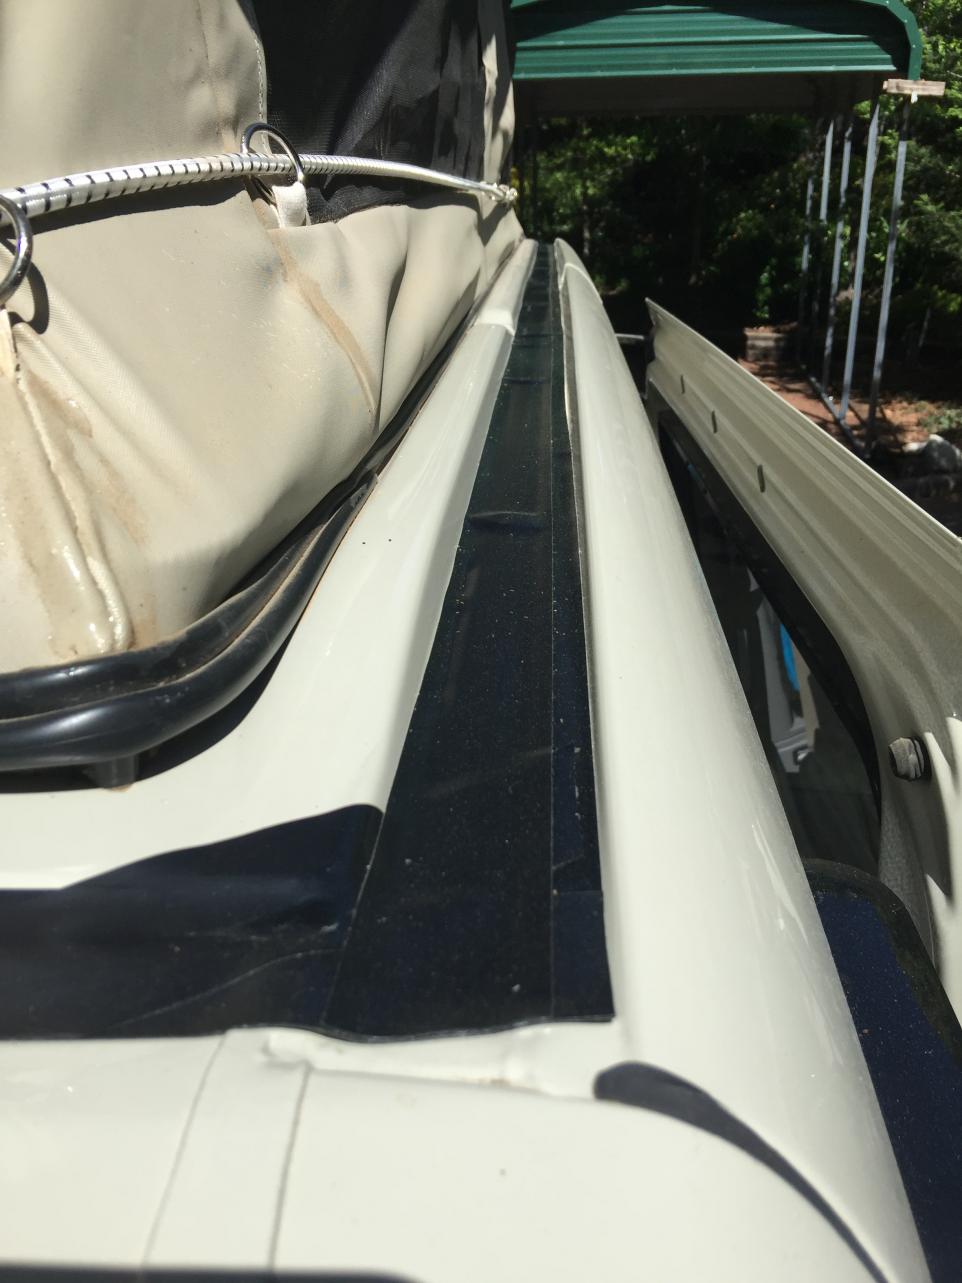

Time will tell how this repair holds up, but thanks to Davidboco for making the suggestion. I feel that this is a good addition for any SMB with a PH top, and based on my experience I would consider doing it sooner rather than later.
__________________
Flint - 2016 SMB Sprinter 4x4 144" RB 150S w/ PH
KN6BJX
|
|
|
|
|
|
| Thread Tools |
|
|
| Display Modes |
 Linear Mode Linear Mode
|
 Posting Rules
|
You may not post new threads
You may not post replies
You may not post attachments
You may not edit your posts
HTML code is Off
|
|
|
|
 » Recent Threads
 |
|
|
|
|
|
|
|
|
|
|
|
|
|
|
|
|
|
|
|
|
|
|
|
|
|
|
|
|
|
|
|
|
|


 2014 Ford E-350