Journey with Confidence RV GPS App RV Trip Planner RV LIFE Campground Reviews RV Maintenance Take a Speed Test Free 7 Day Trial ×


Reply
 
Thread Tools Display Modes
 
Old 06-28-2017, 11:48 PM   #391
PvT
Junior Member
 
PvT's Avatar
 
Join Date: May 2016
Location: Vancouver, BC
Posts: 24
Another example of why this continues to be my favourite thread on this forum. I think I'll just submit this entire thread as a future Sprinter SMB order.

PvT is offline   Reply With Quote
Old 06-29-2017, 10:30 AM   #392
Junior Member
 
Dawghandler's Avatar
 
Join Date: Oct 2016
Location: California
Posts: 13
Aluminess Bumper Issue

[QUOTE=Fitz;206545]A current finding is that a small percentage of Aluminess winch bumper installations on Sprinters results in an issue with high intercooler temperatures. My installation is not one of these cases, but another Forum member’s installation is – or I should say was.

Hello! My van is the other van in Fitz's post - test vehicle #1. Her name is Kong.

I do NOT have a winch installed on my Aluminess bumper so it was surprising that Kong was having the air intake temperature issue and Fitz's was not because the winch blocks more air!

Here is a little bit more background.

I purchased a 2016 MB Sprinter 4x4 144" High Roof Sportsmobile.
Click image for larger version

Name:	Bumper1.jpg
Views:	17
Size:	26.4 KB
ID:	16918


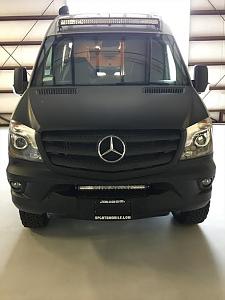
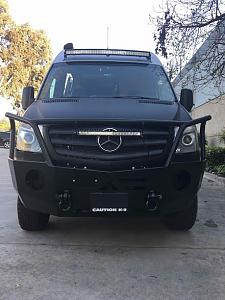
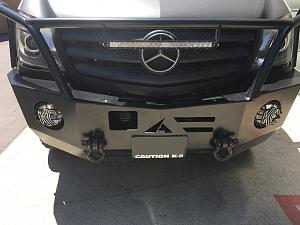
I drove to Santee, CA to have Aluminess install the bumper. My bumper is just their standard bumper with holes for fog lights. They did not put the lights in when they installed the bumper.
Click image for larger version

Name:	Bumper2.jpg
Views:	18
Size:	39.0 KB
ID:	16919


The next day I drove home from Santee (475 miles) in 70-80 degree temps without lights in the holes and had no problem.

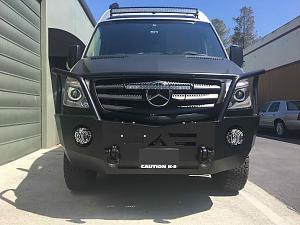
A week later we installed 6" KC HiLites Gravity LED Daylighter Driving Lights (KC 653) in the holes.
Click image for larger version

Name:	Bumper4.jpg
Views:	15
Size:	53.4 KB
ID:	16921


The first time I drove Kong after putting the 6" lights in (40 miles in 50 degree temp) the "check engine" light came on.

I had no idea why the check engine light came on so I immediately texted Tim and we referred to the manual that said if the check engine light comes on and it stays on it is an emissions problem.

So I brought Kong to the Mercedes dealer. That's when Lance said it was not an emissions issue, it was an air intake temperature problem caused by the aftermarket bumper. I was also told that if I kept having the issue because of the aftermarket bumper it would void my warranty.

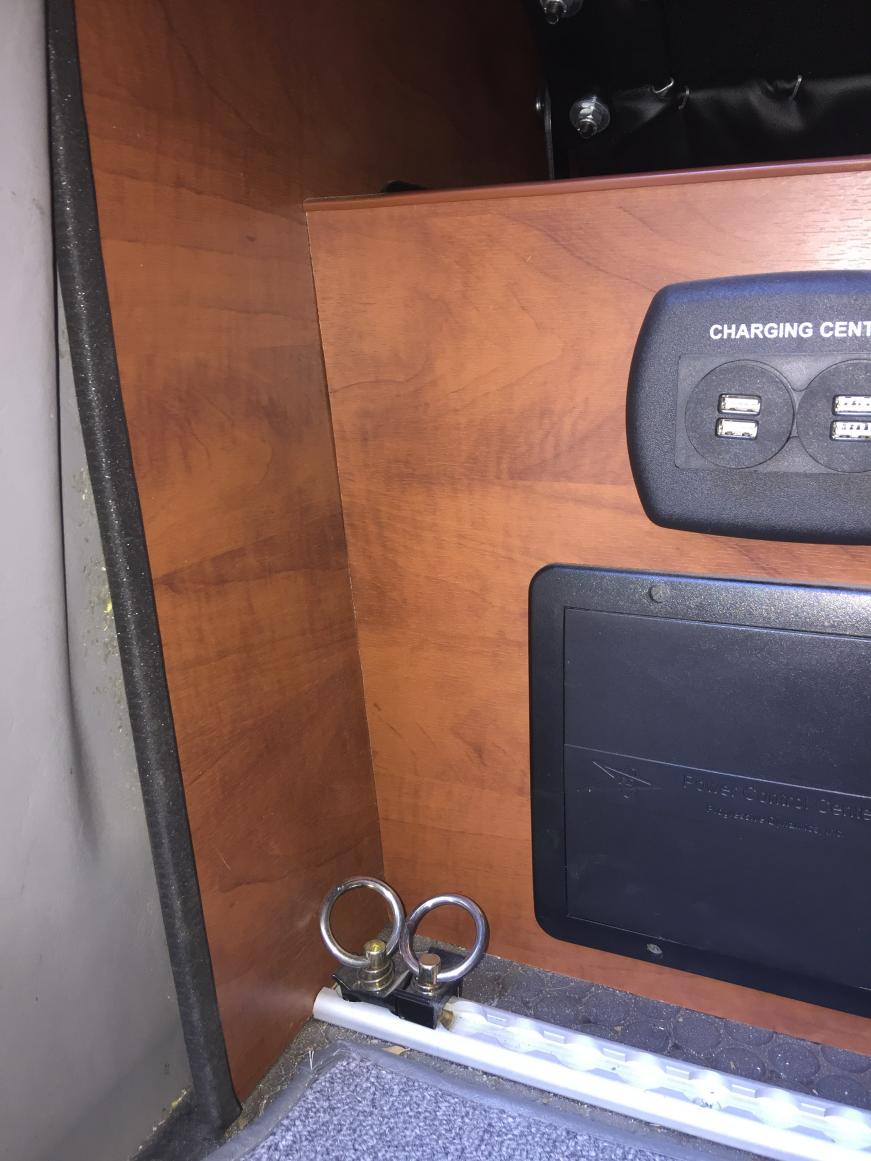
I contacted both Aluminess and Tim and that's when we began experimenting with things. That is also when Tim suggested I get the Blue Driver so we could monitor readings during the different test drives and I could also turn the "check engine" light off without having to return to the dealer to do it.

Tim suggested I remove the winch access doors on the top of the bumper. That didn't help, the check engine light came on. Tim suggested I also remove the plastic collision sensor cover on the front of the bumper...that didn't help either, the check engine light came on again.
Click image for larger version

Name:	Bumper3.jpg
Views:	15
Size:	100.4 KB
ID:	16920


I then took the lights out and that worked! The check engine light stopped coming on! But I didn't want to drive around with a bumper with all the holes in because everything had to be removed in order for Kong to operate properly!

3 months after the problem first came up, and after Tim sent Aluminess all the data he obtained during all of my test drives and his test drives (but remember, he wasn't having the high intake air temp problem that I was), Aluminess came up with the solution to put a scoop underneath the bumper.

I drove down to their shop again to have them install the scoop.
Click image for larger version

Name:	Scoop1.jpg
Views:	17
Size:	103.1 KB
ID:	16922


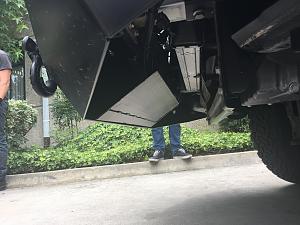
We put everything back on - the winch access doors, the plastic collision sensor cover and the lights. The next day I drove the 475 miles home in 80-90 degree temps....and it worked!

I have ABSOLUTELY NO DOUBT that this issue could not have been solved so quickly without Tim's help!
Dawghandler is offline   Reply With Quote
Old 07-02-2017, 09:06 PM   #393
Senior Member
 
Fitz's Avatar
 
Join Date: Nov 2015
Location: Vacaville, just east of the San Francisco Bay Area
Posts: 1,063
A little Additional Light...

I haven't been able to come up with much when asked previously what I would do differently in the SMB portion of the build. One thing I have commented on was the lack of indirect light in the van, something to use when you don't want too much light.

This came up for me again this weekend while camping at Pinnacles National Park, a great place for a hike and a great place to meet up with other SMB owners, in this case Mark & Karen, otherwise known as mkkbven here on the forum. Thanks for meeting us for an enjoyable time!

Where I wanted some light was at floor level, easy to turn on or off when standing outside the van and easy on the eyes when inside the van.

Here is what I started with, the corner adjacent to the sliding door on the face of the fixed lower portion of the rear seat.


And here is my simple addition, a switched LED fixture with a lightly frosted lens.


I've had the fixture for months waiting to get a couple of extra hours to do the installation, cleaning up the van after getting home this afternoon presented the perfect opportunity.
__________________
“Flint” - 2016 SMB Sprinter 4x4 144" RB 150S w/ PH
KN6BJX
Fitz is offline   Reply With Quote
Old 07-05-2017, 07:48 PM   #394
Senior Member
 
Fitz's Avatar
 
Join Date: Nov 2015
Location: Vacaville, just east of the San Francisco Bay Area
Posts: 1,063
Front Suspension Upgrade

Post #329 above describes the addition of the Van Compass rear leaf spring pack and tuned rear Fox shocks. At the time VC was working on a new design for the front upper shock mount, so we got in line and waited for the final product.

Our patience was rewarded and last week we took Flint down to Atascadero (soon to be Washington State, VC is packing up to move) for the front end suspension upgrade.

What was done:

1. Replaced the existing MB stock bump stops with new Sumo bumps stops. The Sumo stops are longer and provide dampening over a wider range of travel, vs. the stock units that are nothing more than hard rubber stops that make contact when the front suspension bottoms out.

Here is what the original MB stock bump stops look like:


And here is what the installed Sumo Bump Stop looks like:


2. Added new tuned Fox Shocks. Our van is right at the weight limit, and any help handling the load is appreciated.

Here is the front shock bottom mount:


Here is the front shock top mount:


And here is an overall shot, showing both the front Fox shock and the Sumo bump stop:


The result: We only have about 300 miles on the new configuration, but it is immediately noticeable how much better the van handles crosswinds, curves and bumps, both at speed and when going slow. Simply put, the van is much more stable and it is noticeable from the first moment behind the wheel. There is much less body lean and roll when on a road with curves; the van doesn’t continue to bounce when hitting a bump at freeway speed, and the overall feel is much stiffer and more in control. We haven’t tried out the new configuration off road (yet!), but that will come soon enough and I am confident the improvement will be noticeable.

If you are going to have a heavy build I would suggest giving the suspension upgrade package strong consideration. I’m looking forward to the next washboard road to really give it a test!
__________________
“Flint” - 2016 SMB Sprinter 4x4 144" RB 150S w/ PH
KN6BJX
Fitz is offline   Reply With Quote
Old 07-11-2017, 10:03 AM   #395
Senior Member
 
Join Date: Jun 2016
Location: Denver, CO
Posts: 242
Awesome! Do you know if this is the same setup that Agile is doing?

It looks like they left the strut boot in place since that's where the spring is? And then they added a different location for the fox shock?
Wrinkledpants is offline   Reply With Quote
Old 07-11-2017, 10:08 PM   #396
Senior Member
 
Fitz's Avatar
 
Join Date: Nov 2015
Location: Vacaville, just east of the San Francisco Bay Area
Posts: 1,063
Wrinkledpants,

I should have added one more picture, a full perspective of the entire assembly:


In this view you can see that the original unit is left in place, the original bump stop is replaced with the Sumo. and the new Fox shock is a complete new addition.

I have only seen one Agile build, and from what I recall the original unit is replaced with a coil-over spring unit with no Sumo and the rear consists of a complete leaf spring replacement. I do not recall if Agile replaces the rear shock as part of the package, but I expect that they do. Easy enough call to make to find out!
__________________
“Flint” - 2016 SMB Sprinter 4x4 144" RB 150S w/ PH
KN6BJX
Fitz is offline   Reply With Quote
Old 07-12-2017, 07:13 AM   #397
tlg
Senior Member
 
tlg's Avatar
 
Join Date: Aug 2013
Posts: 344
Garage
Fitz, thanks again for all your posts. A fascinating window into a Sprinter build. Curious about the addition of the Fox shock up front and why the original unit wasn't replaced. How does the additional shock help (and not hinder) articulation/travel? Seems like all that resistance would make things too stiff. Curious to learn more about why Van Compass went this route.
__________________
2014 Ford RB-50
tlg is offline   Reply With Quote
Old 07-12-2017, 01:48 PM   #398
Senior Member
 
Fitz's Avatar
 
Join Date: Nov 2015
Location: Vacaville, just east of the San Francisco Bay Area
Posts: 1,063
Sprinter Front Suspension

tlg,

Rather than answer your question incorrectly, I went straight to the source. This is from Mark Hesser at Van Compass:

"The Sprinter front suspension is built with a lower control arm and strut to control the suspension movement. The strut controls the horizontal forces an upper control arm would normally take on. Fox does not manufacture a replacement strut that we can tune for the van. We place a secondary Fox shock next to the strut to add more damping to the suspension system. The Fox shock does not limit or increase wheel travel, or make the ride harsh. The secondary shock up front equates to a redundancy should a strut blow out. Also, the extra oil capacity of the fox shock up front means the van will have damping longer over extended rough roads and not be reduced to shock fade as easily with just the single front strut.
>
> We use a compression damping technique to allow the shock to move easily over very small bumps like expansion joints so the ride does not get harsh. The compression damping ramps up over larger, high speed bumps to control bottoming out and give the van more control and a more direct, sporty feeling. The shocks are tuned with a lot of rebound damping to control the front sway bar and to limit body roll in corners. The sway bar builds up spring force as the suspension articulates and the sway bar wants to pull the van back to the bar's neutral position. The struts do not have enough rebound damping to control the bar as it springs back to neutral. This is most noticeable when driving at low speeds over uneven terrain. The van will shift side to side repeatedly from the front and rear the sway bars fighting to get back to their neutral positions. The additional damping in the Fox shocks helps to control the sway bar spring back, creating a much more enjoyable and controlled ride on and off road."

I hope this answers your question, I know I learned something by reading it. I also know that the van rides MUCH better for doing it!

Mark and Rob are in the process of moving their homes and their shop, thus time is scarce and responses may be delayed. I have found them to be very prompt, as evidenced by Mark's timely response to this question, look for them to be back up and running the first part of August.
__________________
“Flint” - 2016 SMB Sprinter 4x4 144" RB 150S w/ PH
KN6BJX
Fitz is offline   Reply With Quote
Old 07-12-2017, 08:50 PM   #399
Junior Member
 
Van Compass's Avatar
 
Join Date: Mar 2016
Location: Post Falls, ID
Posts: 14
Quote:
Originally Posted by Wrinkledpants View Post
Awesome! Do you know if this is the same setup that Agile is doing?

It looks like they left the strut boot in place since that's where the spring is? And then they added a different location for the fox shock?
The spring that suspends the van's weight sits transversely under the suspension subframe and attaches to the lower control arms. The strut controls the horizontal loads on the suspension, sets camber and dampens the spring. Agile adds a coil spring around the strut for additional spring rate. We use a Sumo Spring to accomplish the same goal. The secondary shock works in conjunction with the strut to control the spring, sway bar and it helps reduces body roll.

We do an add-a-leaf spring under the factory leaf springs on sagging vans and rear shocks to round out our kit. Just as Fitz has pictured in previous posts.

Please feel free to reach out to us for further explanation.

Thanks for posting up Fitz!

- Mark
__________________
Vancompass.com

Mercedes Sprinter Overland Products
Van Compass is offline   Reply With Quote
Old 07-12-2017, 08:59 PM   #400
tlg
Senior Member
 
tlg's Avatar
 
Join Date: Aug 2013
Posts: 344
Garage
Awesome stuff. Steep learning curve on that one no doubt. Thanks Fitz and Mark for the quick replies.
__________________
2014 Ford RB-50
tlg is offline   Reply With Quote
Reply

Tags
carport, molding trim clips, recovery ramps, skid plates, suspension upgrade


Posting Rules
You may not post new threads
You may not post replies
You may not post attachments
You may not edit your posts

BB code is On
Smilies are On
[IMG] code is On
HTML code is Off
Trackbacks are Off
Pingbacks are Off
Refbacks are Off

» Featured Campgrounds

Reviews provided by

Powered by vBadvanced CMPS v3.2.3
Disclaimer:

This website is not affiliated with or endorsed by Sportsmobile SIP or any of its affiliates. This is an independent, unofficial site.


All times are GMT -6. The time now is 01:42 AM.


Powered by vBulletin® Version 3.8.8 Beta 4
Copyright ©2000 - 2024, vBulletin Solutions, Inc.