Journey with Confidence RV GPS App RV Trip Planner RV LIFE Campground Reviews RV Maintenance Take a Speed Test Free 7 Day Trial ×


Reply
 
Thread Tools Display Modes
 
Old 01-11-2012, 09:42 AM   #11
Senior Member
 
BajaSportsmobile's Avatar
 
Join Date: Sep 2011
Location: Rancho Nuevo (Cabo/Todos Santos) B.C.S. and San Diego, CA
Posts: 1,952
Re: ARB Twin Compressor

An Air Tank is nothing more than a reservoir; and the point of a reservoir is to store a resource so that more of that resource can be accessed at peak demand than is available from the source.

That is a very nice compressor, but very pricey.

We almost all have 110V access in our SMB's (shore power, generator, inverter) and could easily power a small "Pancake" or standard compressor with greater performance. That was the choice I made and it works great at a third the price but half the cool factor.

__________________
Four time Baja 1000 winner, four time Baja 500 winner. Solo'ed the Baja 1000 to LaPaz/Cabo twice.
4-Wheeling since 1972, Desert Racing since 1989.

AgileOffRoad.com
BajaSportsmobile is offline   Reply With Quote
Old 01-11-2012, 11:26 AM   #12
Senior Member
 
Tapatio's Avatar
 
Join Date: Nov 2010
Location: California
Posts: 1,012
Garage
Re: ARB Twin Compressor

I thought about mounting it to the frame but didn't want to expose the compressor to the elements. I've seen numerous threads of problems with Viair and Extreme Air compressors due to corrosion. It is pricey and I want it to last for a long time.

This compressor will also be doubling as the actuator for the ARB lockers that I am planning to install this year, two birds one stone.

A majority of our camping is in the local deserts around Southern California, lots of loose sand. A good compressor is a necessity not an option.
__________________
2006 E350 6.0PSD 5R110, SMB 4X4, RB-50, ARB lockers front/rear, Aluminess galore, AMP steps.
Callsign KK6GIY
Tapatio is offline   Reply With Quote
Old 06-05-2012, 02:18 AM   #13
Senior Member
 
coyotearms's Avatar
 
Join Date: Jan 2010
Location: Seattle, WA
Posts: 188
Re: ARB Twin Compressor

After a two-month trip in the SW Deserts (http://lugnutlife.wordpress.com) a compressor was high on my list of mods, so I drank the Kool-Aid and went for the rather expensive ARB CKMTA12. Unfortunately, I was not able to find one on eBay for a great price. Since I am stubbornly resisting going to 4x4 unless it appears absolutely necessary, I still have some change for things like this. I also got the ARB 1 gal aluminum tank. It was clear from researching this compressor that if you connect a hose directly to the compressor, it has to withstand high temperatures, so I copied what ARB does in a kit they sell that includes a manifold on which relays to pneumatic lockers are mounted and connected the compressor to the tank with stainless steel braided tubing. According to ARB the tank is recommended for extended use filling tires and for using pneumatic tools. I am not planning to use compressor for lockers.


I was able to squeeze the compressor and tank into space remaining in the battery cabinet after moving the battery isolator from the floor to the wall and shifting the position of the solar controller's shunt. There was even room for hose storage, so the entire system utilizes zero additional space outside that cabinet! That was the primary reason for NOT going with a standard 110V AC compressor. Although I have two such compressors for tools---one has too small of a capacity to be very useful even on small car tires and the other is a Hitachi monster with a 3-gal tank. So if I wanted a compressor for the van, I was going to have to buy one.

The system works off of the house batteries, and I used the wiring harness provided although it is a do-everything harness for up to two lockers. It came with a pair of 40 A Maxi fuses and holders (one holder opened in the photo above showing an orange fuse), one for each compressor. I did not use the ARB switch, which was designed more for dash mounting and instead went with a simple LED rocker switch. I added a 10 A fuse between the battery and the switch as the installation instructions calls for at least 8 A. That fuse can be seen attached to the rear battery. The switch just controls the relay, and the pair of compressors gets power through the 40 A fuses. I got all the hoses and fittings between the compressor and quick disconnect from Fittings, Inc.. a local outfit in Seattle. The universal quick disconnect for the hose was mounted on the rear wall of the battery cabinet and is connected to the tank with standard rubber pneumatic hose. By mounting it this way, connecting/disconnecting is very convenient, but in retrospect I probably could have just laid it loose with a foot or two of slack in the cabinet for a prettier installation. Also mounted where it is with a hose connected prevents the door from being closed as far as it could compared to the alternate way.

Unlike most compressor tanks, the ARB does not have a bleed valve to open for draining water which can cause problems with steel tanks for which it is usually recommended to drain at the end of each day such compressors are used. Since this tank is aluminum it should not corrode, but what about water continually collecting inside? In my case I could not mount it any other way but vertically, which puts the outlet at the bottom, so this is not an issue to worry about.

After this install, the battery compartment bristles with fuses going from zero as delivered by SMB to seven! Yes, SMB installed a nice 200A circuit breaker before the inverter which is convenient to use to shut down the inverter and house 12V circuits, but it is too far away from the batteries to be smart, especially with that 1/0 cable going right next to the mechanism that turns the bench seat into a bed that often carries 150A---chop chop! The seven are:
* 250A at the battery bank for 1/0 cable going to SMB's 200A breaker and then to the inverter.
* 125A at the battery bank for the #4 cable going to the battery isolator
* 50A between solar panel and controller
* 50A between controller and battery bank
* 40A x 2 for the compressors
* 10A for the compressor switch circuit
Except for the three associated with the compressor, SMB should have done the other four as part of the build IMHO.
__________________
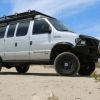
2008 E-350 6.0L diesel: Bought new in 2010, 4x2, 4.10 LSD, HD spring-lift all 'round,
Cruiser II Top, 6'7" inside, full-time upper bed w/ kind'a EB50 layout, cozy 4-season rig
Solar: 540 W of Kyrocera w/ Blue Sky 3024iL, 3x100 AmpHr AGM's
Electrical: 4 cf fridge, nuker, water heater, compressor
Propane: stove top, furnace Travel: https://www.lugnutlife.wordpress.com
coyotearms is offline   Reply With Quote
Old 06-05-2012, 07:20 AM   #14
Senior Member
 
BrianW's Avatar
 
Join Date: Apr 2012
Location: Philadelphia, PA
Posts: 4,206
Re: ARB Twin Compressor

Very nice job on that compressor install, Coyotearms! For your battery bank, is that three batteries? Are they in sealed, vented boxes (or box)? Hard to tell. I need to redo my battery bank (2 batteries) from the OEM SMB build of two plastic boxes that are showing their age. The current boxes are separate but connected by a vent hose, with the rear box then venting to the outside through the van wall. Both boxes are not really sealed, though, so the vent really isn't doing anything.
BrianW is offline   Reply With Quote
Old 06-05-2012, 07:57 AM   #15
Site Team
 
BroncoHauler's Avatar
 
Join Date: May 2007
Location: Southern New Mexico
Posts: 10,178
Re: ARB Twin Compressor

I would look carefully at the question raised about venting. Batteries can off-gas and those gasses can be explosive in certain situations. Adding an electrically switched item like a compressor in the same space only increases the odds that you could have an explosive situation.


Herb
__________________
SMB-less as of 02/04/2012. Our savings account is richer, but our adventures are poorer.
BroncoHauler is offline   Reply With Quote
Old 06-05-2012, 08:22 AM   #16
Senior Member
 
Join Date: Nov 2011
Location: Las vegas
Posts: 280
Re: ARB Twin Compressor

I found this article on building your own using a York AC compressor.
http://www.offroaders.com/info/tech-cor ... rd-air.htm
__________________
"What'$ that funny noi$e?
Vegasrandall is offline   Reply With Quote
Old 06-05-2012, 08:27 AM   #17
Site Team
 
BroncoHauler's Avatar
 
Join Date: May 2007
Location: Southern New Mexico
Posts: 10,178
Re: ARB Twin Compressor

Quote:
Originally Posted by Vegasrandall
I found this article on building your own using a York AC compressor.
http://www.offroaders.com/info/tech-cor ... rd-air.htm
I've had a York sitting in my garage for about 6 years now, waiting to be installed in my Bronco for just this reason. One of these days...


Herb
__________________
SMB-less as of 02/04/2012. Our savings account is richer, but our adventures are poorer.
BroncoHauler is offline   Reply With Quote
Old 06-05-2012, 09:30 AM   #18
Senior Member
 
ridintall's Avatar
 
Join Date: Jun 2012
Posts: 144
Re: ARB Twin Compressor

I too went with the dual ARB compressor. I mounted mine in the rear Aluminess bumper and used a Kilby manifold and 2.5 gallon air tank kit. Since I didn't have an ignition on source in the rear of the van and didn't want to run a long wire to the front, I'm using two switches...one to arm the compressor and the other to turn it on. The manifold has a gauge, pressure relief valve, air chuck and feeds the 2.5 gallon tank which has a line running to the front bumper with another air chuck inside it. I'm very happy with how it all turned out. This pic I took is right before running the last air line to the tank which is mounted under the van on the other opposite side of the bumper where the compressor is. Switches are mounted inside as soon as you open the rear door. The arming switch has a safety cover so it can't be turned on accidentally.
Attached Thumbnails
ARB_Comp_Bumper.jpg  
ridintall is offline   Reply With Quote
Old 06-05-2012, 10:54 AM   #19
Senior Member
 
Gnarvan's Avatar
 
Join Date: Dec 2011
Location: Washougal, Wa
Posts: 1,047
Re: ARB Twin Compressor

Quote:
Originally Posted by ridintall
I too went with the dual ARB compressor. I mounted mine in the rear Aluminess bumper and used a Kilby manifold and 2.4 gallon air tank kit. Since I didn't have an ignition on source in the rear of the van and didn't want to run a long wire to the front, I'm using two switches...one to arm the compressor and the other to turn it on. The manifold has a gauge, pressure relief valve, air chuck and feeds the 2.5 gallon tank which has a line running to the front bumper with another air chuck inside it.
Thanks for the picture and info on your compressor install. I've been thinking about doing something like this ever since I mounted an Aluminess rear bumper. What gauge of wire did you run from your battery to the compressor? Do you have any pictures of the 2.4 gallon air tank? I'll make the assumption you take the cover off the bumper before you run the compressor to allow enough air flow for the ARB. Have you noticed any additional heat buildup problems in the compressor by having it mounted inside the bumper box? I also noticed you are using a rubber airhose between the compressor and manifold. Any problems with heat from the compressor melting the hose?

Shouldn't air line routing be....compressor to the tank and then to the manifold? Would the placement of the manifold on either side of the tank make a difference? Anyone?????
__________________
John

Gnarvan 1992 E350 Clubwagon
Advanced 4WD Systems Conversion

Sotar Legend 12.5' X 22" Cataraft
2003 BMW R1150GS-Adventure
2013 BMW R1200GS-Adventure
Gnarvan is offline   Reply With Quote
Old 06-05-2012, 11:15 AM   #20
Senior Member
 
ridintall's Avatar
 
Join Date: Jun 2012
Posts: 144
Re: ARB Twin Compressor

I used the wiring harness that came with the compressor. I was lucky in that I didn't have to extend the power wires at all. I have dual coach batteries and was able to run the wiring to the passenger side coach battery using the same access holes that SMB drilled into the floor of the van.

The cover comes off when I need to run the compressor and it's a tight fit. I basically used a couple pieces of cardboard underneath the compressor when mocking it up so that it wasn't sitting on the bottom of inside of the bumper nor does it touch the lid. If you notice I had to reroute the power wires coming from the compressor motors b/c I was worried about them chaffing over time on the lid. It all fits snugly. As far as heat, since I run it with the lid off, it's not a problem. I spent quite a bit of time deciding where to put the compressor before deciding on the bumper. I didn't want it in the vehicle b/c of noise and taking up space and didn't want it under the vehicle b/c of weather and road debris.

The rubber hose does get hot, but so far no problems airing up 4 tires. If it does become a problem I'll use some SS braided hose. In regards to where the manifold should be located, I followed the instructions that came from Kilby, although I did reach out to ARB to see if I needed to run a check valve like Kilby recommends. ARB said I didn't need to, but I do have one just in case. I wanted everything mounted on the manifold and it to be mounted some place easily accessible which is why I mounted it there.

I did have to modify the air tank slightly in that the mounting feet needed to be relocated further out and shortened in order to mount to the back side of the bumper. My buddy is a welder so it was easy to cut, move, re-weld and paint the tank.

I'll take a couple more pics of my setup and post them.
ridintall is offline   Reply With Quote
Reply

Thread Tools
Display Modes

Posting Rules
You may not post new threads
You may not post replies
You may not post attachments
You may not edit your posts

BB code is On
Smilies are On
[IMG] code is On
HTML code is Off
Trackbacks are Off
Pingbacks are Off
Refbacks are Off

» Sportsmobile Registry

Babe

Babe

Bruce

Sboring35
Add your Sportsmobile
» Featured Campgrounds

Reviews provided by

Powered by vBadvanced CMPS v3.2.3
Disclaimer:

This website is not affiliated with or endorsed by Sportsmobile SIP or any of its affiliates. This is an independent, unofficial site.


All times are GMT -6. The time now is 08:31 AM.


Powered by vBulletin® Version 3.8.8 Beta 4
Copyright ©2000 - 2024, vBulletin Solutions, Inc.