Hi all! I got a wonderfully yellow 2002 quigley e350eb used this spring, and I've been using and modifying steadily since then. So far I've added a solar panel, put on an aluminess ladder, swapped the house batteries, replaced a bunch of fuses that blew when I messed that one up spectacularly, upgraded the head unit and speakers, put in a back up camera, fixed a step that lost a battle with a rock in mexico, swapped the latch that held a rear platform in for one that stays shut, retrofitted one of my fluorescent fixtures with LEDs based on post here, and probably a few other things. But the most work by far went into my roof rack.
I have a penthouse top with the artificial gutters already installed, but the previous owner kept the fiama racks he had. I knew I needed something up there, because I already had a habit of bringing enough 2" schedule 40 steel pipe to build a swing set with me before I upgraded from pickup to SMB. Fiama is bloody expensive and doesn't hold much, so these seemed to fit the bill well:
http://www.prolineracks.com/proline-...ks-3-bars.html Cheap, light (no electric lift here), easy enough to install. I had to replace the stock bolts on the ears with shorter ones, but it worked out fairly well. Still, I wanted something better.
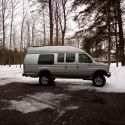
Here it is with just those, and too much stuff on top. Also, you can see the somewhat distressing upward angle it's always had. I'm not sure what to do about that...

The first alteration was to add stainless pipe along the length of each - I got some 1" 16g from industrial metal supply, added slots at the spacing of the rack ears so they would sit down to the original holes (the standard abrasive chop saw blade was -perfect- for this), and welded that in place. (I don't own a machine but I know a few people that do)
I put those there for a couple of reasons - easier to strap to, and also given a smooth top to pull shade cloth over, for when I'm in super-hot desert adventures.
I didn't get pictures of that process, but you can see them here as I prepared to add the next step:

The next step was adding a partial floor. I didn't want to always put things right on the fiberglass forever, so I made a mesh of 3/4"x1/8" slats. They come in 144 inch lengths, which gave me two lengths and 1 cross per piece. Just using those in a mesh turned out to be not nearly thick enough to not be far too flexible across the 55" length between the rear two rails, so I turned some of the cross slats vertically, and used a couple of them lengthwise.

That turned out to be poorly engineered, because the nice stiff section in the middle was connected to the rails with a not-so-strong length. So I added some more angle iron at those connecting parts-
One of four sized up and ground:

Lots of filth from insufficiently cleaned paint burning off:

But ground and painted looks fine!

And that worked pretty well!

There are definitely things I would do differently, but it's pretty strong for its weight, and I hadn't welded in far too long so it was a fun project. Of course, the distance between now and any fabrication work was also why I had to adjust so many times, but so it goes.
If y'all are interested, I can write up some of the other projects I've done as well. Some, but not all, have picture documentation. I'm also going to be installing a yaesu 8800 ham radio some time soon, and documentation amuses me so I'll probably do so with that project. This is pretty much my intro post, but I've lurked for a bit and learned a lot of useful information, so I wanted to share stories!


 Linear Mode