Ok, so this mod will only apply to those that have Starcool, although it may be of use to the newer Danhard owners. Sportsmobile made a mod to the original Starcool that enabled you to engage the Starcool while in the drivers seat.

As long as you had the rear switch turned on to low, med, or high you turn the Starcool on or off. While certainly a good mod, the location is still difficult to get at while driving, and you can't change the blower speed. Doing some research I found that Ford does sell the van with on option to have a rear heater of cooling unit, so there is a stock control unit and switch available.
Before modification
 After modification

It cost around $100.00 for all of the supplies, if you choose to go down that route make sure you order the knob, it doesnt come on the switch and you pay as much to ship as you do for the knob.
Silverstate Auto Parts
Qty 1): Hvac, Controls, Blower motor switch, Blower motor switch, e150-350 vans, auxiliary Price: $11.25
Qty 1): Hvac, Controls, Dash control unit, Dash control unit, e150-350 vans, w/ac, w/auxiliary Price: $23.84
Qty 1) Blower Motor Switch (Knob) Part # F8UZ18513AA Price: $06.72
Waytek
Qty 4) Relay Connector (panel) Stock # 75280 Price $0.6792 (minimal quantity 10) Total $06.79
Qty 4) Relay SPDT 12 Volt Stock # 75413 Price $4.40 (minimal quantity 2) Total $17.60
Qty 50) Relay Terminals ¼ push-on,, 16-14 ga. wire Stock # 31073 (min quantity 50) Total $06.63
Qty 50) Relay Terminals ¼ push-on,, 12-10 ga. wire Stock # 32074 (min quantity 50) Total $04.38
Misc 16GA wire Total $20.00
Total $97.21
The problem is that the original switch is a DP rotary switch and the new on is a Single pole. The existing switch has one pole Off & On, the second pole is Off, On,On, & On.

The new factory switch is a SP switch with On, On, On & On. To mimic the action of the existing switch I used 4 SPDT relays.

All off the relays have 12 Volts supplied by the existing 10GA red wire, this is used for both the output and the actual coil voltage. The relays also have the added feature of keeping the power wires short. The new switch just connects ground to the coli to pick the appropriate relay. The low, medium and high switch settings were a direct correlation to the relays Normally Open contact. To create the second pole of the existing switch I used the first position of the switch as it is labeled off I tied the 14ga black wire to the Normally Closed contact of the relay. So when the switch is in the off position the relay is picked and the 12 volt circuit is left open. When moving to low, med or high the relay is not picked the 12 volt input goes out the Normally Closed output. The existing Sportsmobile mod is still in place, when that is in the off position, there is no power to the relays. If you are dry camping or parked for long times you should leave that switch in the off position to eliminates any current being used to engage the relay to keep the Starcool off.
First I needed to wire up the relays, the 10Ga red wire was now shorter going from the Starcool panel to the new switch panel versus the old switch, so that wire was reused.

The Starcool relay panel is under my side mounted Gaucho, I actually mounted my relays on the other side of the divider for a clean and short run,

With the old switch removed, I coated a carriage bolt with black plastic coat and filled the whole left by the switch.
Old Switch
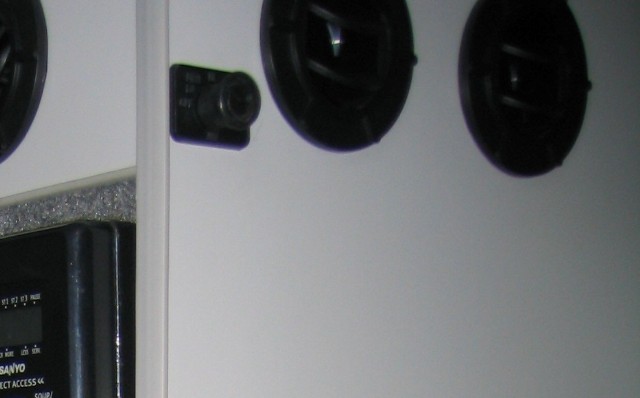 hole replacement

With that done now I had to run the wires up to the dash, I chose to tuck the wires behind the wall on the drivers side and under the step.

Now it was time to remove the dash panel. First you need to remove the light switch; next there are two bolts under the gauge display.

Ever so gently you need to start pulling the dash panel off, you will need to disconnect the lighter and pull the radio out also. If you have a stock radio you will need the Din removal tool.

Unfortunately this is where I ran out batteries for the camera, but once you get the dash off there are three screws to remove the HVAC control panel, you need to remove the knobs, and disconnect all the wires and vacuum tube connectors from the back

You will need to remove all the switches and stuff from the old panel and install it on the new panel. You also install the new switch for the rear unit.

The connector for the rear switch was there, I wanted to reuse the housing so I cut off the wires and sealed the ends with shrink tube, adhesive lined works well for that. Of course the connectors were a special kind to fit into the housing that I didn't have. I choose to use the same ¼ relay terminals. They would at least slide into the housing, when they were mounted on switch I filled it in with silicone. After replacing the old hardware on to the new panel it was pretty much in reverse from their. I also attached the ground wire to the new switch to a ground location under the dash. I now have full control of the Starcool from the dash.
-Greg


 Linear Mode