|
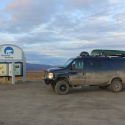
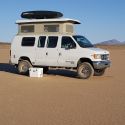
7.3 e350 leader ambulance wiring
Looking to buy dometic CFx 18
2 agm 100ah batteries
Radio and backup camera ( on switch to also use while driving rear veiw and surveillance ) powered by house batteries .. any opinions ? On brands ?
Currently have 2x 115 watt panels .
The goal is to be able to flip switch for ambulance flood lights from the back or use any house batteries application separate from starting batterys .
Without having to put key on accessory Im ignition .
This Involves a lot of rewiring and a little bit of work under driver seat.
I found a van called boltline van . And ambulance just like mine and the guy sent me this message .
Hey Trenton! We made several changes to the system which massively improved its usefulness as a camper.
The main place you'll need to work is under the driver's seat. I checked to see if I had some photos, but I only found a "before" photo, so I marked it up a bit. This is how it was *before* my changes:
B+h (house battery positive) - I had already disconnected this before snapping the photo, but it was connected to the post where the arrow is drawn. This went to the "hot spare" battery bank (the rear two in the side box). We rewired the side battery box so that all 3 are in parallel.
B+s1 (starting battery positive 1) - This connected to the under-hood battery. With our conversion, we replaced the upfront battery with the biggest one we could fit, and this became the *only* starting battery.
B+s2 (starting battery positive 2) - This connected to the front-most battery in the side box, and was in parallel with the under-hood starting battery. Since we wanted 3 batteries in our house bank, we removed this wire entirely.
A - This solenoid is controlled by the module on/off switch above the driver.
B - This is the manual module disconnect switch.
We didn't want to power a solenoid just to have the ability to use the house system, so we put these switches in parallel instead of series... and we never really use the solenoid.
C - This is a timer that allows the lights/etc to run for a configurable amount of time after the keys are pulled. Ours malfunctioned and we didn't want it anyhow. I'd highly recommend sending it to the trash.
D - This is actually a battery isolator (2 diodes) but it's being used instead as a huge single diode (notice the bridge). This takes power from the center post (which is connected to the starter battery and alternators), and sends it to the "hot spare" (aka house) batteries without letting electricity flow back the other way.
This kind of setup is only relevant with a "spare" battery bank, and is useless if you want 2 independently functioning systems. You'll want to remove all of this.
E - This solenoid is for "emergency start" and connects the "hot spare" system to the starting system. We kept this, and have used it on several occasions (really cold starts)!
---
Essentially what we wanted were 2 separate systems, where the starting battery powered all the Ford stuff (except the stereo), and the house batteries powered everything in the module *and* the stereo.
We removed C and D, which freed up room on the board to add another big post, giving us 1 post for the starting circuit and one for the house circuit. IIRC, a few of the smaller wires on the board are tied to Ford things (blinkers, etc) and you'll want to make sure they're driven by the starting circuit to avoid bridging the systems over a small wire, but in general just make sure most things are connected to B+h, and that B+h and B+s are only connected at the emergency start solenoid.
In addition to the above, we added a 240A-rated battery isolator so that the alternators charge both systems. Since the systems are fully-functioning and independant, this means splicing into the alternator returns such that power flows out of them and is split between the battery banks. We really couldn't find room under the hood for the isolator, so we ran another 00-guage wire (probably > $100 worth of copper) to the side battery box where the splitter and a disconnect switch sit.
Fortunately, Leader did a better job with their wiring (and labeling of the wires!) than anyone I've ever seen. It's not a trivial project, but with the right tools and a basic understanding of electricity it's totally doable (I'm not an electrician or anything). Make sure you have:
1. A good multimeter. I've had this one for 5+ years and it's awesome: https://www.amazon.com/Innova-3320-Auto-Ranging-Digital-Multimeter/dp/B000EVYGZA?tag=boltline-20)
2. Wire crimper that can handle large guage wire. I have this, which is a bit under-sized, but was cheap and did the job: https://www.amazon.com/IWISS-Terminal-Crimping-6-50mm%C2%B2-Electrician/dp/B017S9EINA?ref=boltline-20
3. Wire cutter that can handle large guage wire. I have this one, which works great: https://www.amazon.com/Channellock-911-Cable-Cutting-9-5-Inch/dp/B00004SBDG?tag=boltline-20
If you can find a local shop to buy crimp ends and auto/marine wire at a good price, your life will be easier. We ended up buying most of ours from our local West Marine which was convenient but cost about twice as much as it could haver.
Theres also a picture Ill attach after work . And Ill get a picture of the set up I have now... let me know if what doing now is safe and useful and also once o start tearing out my old electrical I would like to k ow Im doing the right thing... any advice would be greatly appreciated .. Ive learned a lot fe this thread and plan on leaving to Alaska from Texas Im a year road trip Im october ..
|


 Linear Mode