Journey with Confidence RV GPS App RV Trip Planner RV LIFE Campground Reviews RV Maintenance Take a Speed Test Free 7 Day Trial ×


Reply
 
Thread Tools Display Modes
 
Old 02-23-2018, 09:12 AM   #1
Member
 
Join Date: Feb 2018
Location: Raleigh, NC
Posts: 46
2008 E250 Quigley conversion

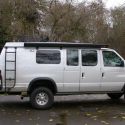
I started my post in the Welcome Mat and am picking up in the forum suggested to me. I recently purchased a 2008 E250 Quigley conversion. After a harrowing drive from the Indianapolis area to my home here in Raleigh, I am in the process of stripping everything out of it to expose rust and any other issues before I convert it to a “beach buggy”. I plan to build out the interior as a light duty camper/surf fishing overnighter. I am not doing the full “off the grid” conversion (solar electricity, heater, etc.), but do plan on a dedicated 12v system for lighting and appliances. I have actually found a “box” under the frame at the r/h side door and positive and negative heavy duty wires coming out of the floor in front of the rear RH wheel well. I think the “box” may house electronics for a secondary battery charging system. Haven’t put a volt meter on the wire ends yet. (The positive terminal is heavily wrapped in electrical tape. Aside from doing a lot of rust repair, I have contacted agile about better shocks and help with a bad sway at highway speeds. I have uploaded a few photos and can post more as the project progresses. I have read a bunch of posts here and the amount of good information will certainly take the worry out of the project.
Attached Thumbnails
Exterior LF.jpg   Interior from rear doors.jpg   Front B-4 work.jpg  

flyr6105 is offline   Reply With Quote
Old 02-23-2018, 09:48 AM   #2
Member
 
Join Date: Feb 2018
Location: Raleigh, NC
Posts: 46
Ray,
I have started using Corroseal for the rust instead of POR15. I think they pretty much do the same thing. After I neutralize all the rust, I will coat the entire underside with 3M rubberized undercoating. Got that tip from the forum also. DON'T buy the undercoating from Amazon. After checking pricing, Advance Auto has it for $6 less than everywhere else. I have hit every auto store in the area and have a collection of cans. OK, now the tough part. I have uncovered a lot of rust in the cab in front of the driver and passenger seats and will probably have to make a replacement floor pan/patch. What worries me is the shape of the RH chassis mount at the front wheel well. I don’t have any welding equipment, but have contacted a local custom shop who can do the work. I’ll add a photo of the mount bracket. I think the other frame to chassis mounts are OK if I make sure all the rust is neutralized and sealed. Looks like I’ll be spending some quality time with wire brushes and Corroseal under the van this weekend.
Attached Thumbnails
Bryant frame rusted support closeup.jpg   Rust driver side front.jpg   Rust driver side front closeup.jpg   Rust RH chassis mount aft wheel well.jpg  
flyr6105 is offline   Reply With Quote
Old 02-23-2018, 10:22 AM   #3
Site Team
 
BroncoHauler's Avatar
 
Join Date: May 2007
Location: Southern New Mexico
Posts: 10,179
Love that exterior color, and would love to see a good profile pic with the van in the sun.


Herb
__________________
SMB-less as of 02/04/2012. Our savings account is richer, but our adventures are poorer.
BroncoHauler is offline   Reply With Quote
Old 02-23-2018, 11:31 AM   #4
Member
 
Join Date: Feb 2018
Location: Raleigh, NC
Posts: 46
It might take awhile for a picture in the sun since it is up on jack stands underneath the deck. I had to buy a floor jack to get this beast up. Yeah, The color is good for a beach buggy. I'll have to get it touched up after I fix some of the rust spots that were painted over.
flyr6105 is offline   Reply With Quote
Old 02-26-2018, 01:45 PM   #5
Member
 
Join Date: Feb 2018
Location: Raleigh, NC
Posts: 46
Spent a lot of time under the van this weekend. Besides brushing away as much rust as possible, I also removed the running boards and brackets. I have loosened all of the seat mount Torx PLUS bolts except one on the passenger seat. That was the bolt I first tried to remove with the Torx instead of the Torx PLUS. Hopefully PB Blaster will do its thing if I give it some time. I have sent emails to agile about shocks and their RIP kits. I tried to remove the rear bumper, but am not sure what to do about the black plastic strap covering the bolt heads. It feels like the bolt head is rotating inside the cap, but it sure doesn’t look like the caps will come off easily. I would really appreciate help with this enigma. Maybe brute force is the answer? Another question: It really looks like I have a house battery charging set up. What I thought was a second battery box under the side door houses electronics with heavy gage positive and negative leads come through the floor just before the r/h wheel well. Was this a factory option? Posting a few photos for your viewing pleasure.
Attached Thumbnails
2-24 Running boards off.jpg   Front suspension.jpg   Front stabilizer.jpg  
flyr6105 is offline   Reply With Quote
Reply


Posting Rules
You may not post new threads
You may not post replies
You may not post attachments
You may not edit your posts

BB code is On
Smilies are On
[IMG] code is On
HTML code is Off
Trackbacks are Off
Pingbacks are Off
Refbacks are Off

» Featured Campgrounds

Reviews provided by

Powered by vBadvanced CMPS v3.2.3
Disclaimer:

This website is not affiliated with or endorsed by Sportsmobile SIP or any of its affiliates. This is an independent, unofficial site.


All times are GMT -6. The time now is 10:04 PM.


Powered by vBulletin® Version 3.8.8 Beta 4
Copyright ©2000 - 2024, vBulletin Solutions, Inc.