Journey with Confidence RV GPS App RV Trip Planner RV LIFE Campground Reviews RV Maintenance Take a Speed Test Free 7 Day Trial ×


Reply
 
Thread Tools Display Modes
 
Old 04-24-2014, 06:03 PM   #21
Senior Member
 
Join Date: May 2013
Location: Portland
Posts: 106
wheel weight

an interesting note, these wheels and tires are much lighter than the stock steel wheel/tire combo i had on there, it was really evident at the tire shop with them side by side.

ive adjusted mph on the scanguage II so well see what it does to the mpg.

Next im looking into making a fiberglass top like the 24" bubbletop from fiberine, i have the space and a little time. we will see. a plywood jig should do the trick with some support ribs and indents for fans and solar panel, it could be fun, and cheap.

Also, anyone have a line on a two seat Z style bed like you would find in a westfalia? Thats the route im, going to start with on the inside. once io have the bed then i can layout everything else. i stopped into Van Specialties yesterday but they only have three seater, full width seats. not what im looking for.

later

hammerhome is offline   Reply With Quote
Old 05-14-2014, 05:45 PM   #22
Senior Member
 
Join Date: May 2013
Location: Portland
Posts: 106
Re: First build

I added a grab handle to the A pillar on the passenger side for my lovely wife, here is the link to the write up in the body part of this forum.

viewtopic.php?f=5&t=13665&p=129263#p129263

Attached Thumbnails
handle17.JPG  
hammerhome is offline   Reply With Quote
Old 05-15-2014, 11:55 PM   #23
Senior Member
 
Join Date: May 2013
Location: Portland
Posts: 106
Re: First build

For those that have asked about my drivers side window install. Here is a link to the write up of the installation of the opening mechanisms and some pictures of what the installed window looks like.

viewtopic.php?f=5&t=13672&p=129375#p129375

Attached Thumbnails
window12.JPG  
hammerhome is offline   Reply With Quote
Old 05-16-2014, 12:04 AM   #24
Senior Member
 
Join Date: May 2013
Location: Portland
Posts: 106
Re: First build

I also shortened my sliding door lock knob so that it was less likely that someone with skinny long fingers could reach in and unlock it if I wanted to leave the slider window open.

knob in locked position before


knob in locked position after shortening it and the arm that goes to the locking mechanism in the door.


and Im playing around with one that might not have the bump on top to make it even harder to get ahold of.

Attached Thumbnails
lock1.JPG   lock2.JPG   lock3.JPG  
hammerhome is offline   Reply With Quote
Old 05-21-2014, 04:22 PM   #25
Senior Member
 
Join Date: May 2013
Location: Portland
Posts: 106
westfalia

I found a donor van a few days ago, and yesterday I went to pick it up.


Unfortunately the trailer I was borrowing was just purchased the day before, so a trip to les schwab was needed to replace a suspicious looking tire. Nothing like a 4 hour shake down on a new trailer. Note. make sure you check the lug nuts on any vehicle/trailer you buy. You never know how smart the previous owner was/wasn't.


And to continue on the mode of better to be safe than sorry, I stopped and got a trailer brake controller installed. BTW if you have factory towing, its just a plug and play thing, no wiring. The hardest part is deciding where you want to mount the bracket for the controller. After some running around town I found an awesome RV shop that had one(or 100) on the shelf and time to put it in. It is definitely something that is an easy DIY, but I didn't have the time, space, tools or patience to work on the van. I was thinking of the 4+ hour drive home, and how I spent 2 hours at les schwab for a trailer tire The trailer controller was 20 minutes and out the door.

Overall the van felt good towing the trailer with the errr van... on it, and I was surprised by how well the 5.4 did. Im not sure what the total weight was, but I know the VW weighed 3600lbs. The van really settled down with the weight, and I am looking forward to adding my camper interior etc to get some weight in it for a smoother ride.

For reference, towing the trailer empty I got 12.5mpg. On the return trip home with the van on it I got 9.5mpg. Normally I would get around 15mpg on I-5. I can live with these numbers.

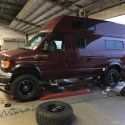
Finally arrived to the vans(vw) resting grounds for the next few weeks while I transfer over some parts and make my ford into a westy.


Operation can opener is about to begin.
Attached Thumbnails
loading copy.jpg   trailertire copy.JPG   home copy.jpg  
hammerhome is offline   Reply With Quote
Old 05-21-2014, 04:36 PM   #26
Senior Member
 
86Scotty's Avatar
 
Join Date: Jul 2011
Location: TN
Posts: 10,220
Re: First build


Van's lookin' good!
86Scotty is offline   Reply With Quote
Old 05-22-2014, 11:17 PM   #27
Senior Member
 
Join Date: May 2013
Location: Portland
Posts: 106
Re: First build

Quote:
Originally Posted by 86Scotty


Van's lookin' good!
Thank you.....its about to be looking better Always loved my older westies
hammerhome is offline   Reply With Quote
Old 05-27-2014, 11:49 PM   #28
Senior Member
 
Join Date: May 2013
Location: Portland
Posts: 106
Re: First build

Ive been digging into the eurovan, getting all the parts taken out that will be sold off, and clearing the way for the top removal.

The top was easier to take off than the hardware and sheet metal surrounding the hole that westfalia cut into the roof. The hole was generally pretty clean, though there were a couple areas where they might have been getting back from a lunch break at the beer garden and wandered a little.

From what I can tell, westfalia vans are just a regular eurovan with the top cut open. They are not specially made for the westfalia treatment(some have stated that they are different). Jagged cuts, and support members removed just like SMB or any other upfitter, just a little cleaner in their cuts.

I removed all the interior trim that was surrounding the hole and then started on the top. Westfalia used some sticky stuff, and it took some prying, even some use of the sawzall the clear it out. I was careful to aim the blade down as I dont care if I mess up the roof of the vw at all.


After I got all the lower attachment parts loose I used a rope and tied the "skirt" up so that I could work on the hardware.


I took a bunch of pictures, if anyone needs any information let me know.

There are some small rust issues with this top hardware that I will address in a few days, but for now the goal was to get it off the van and start exposing the bare metal of the roof so that I could try and save some of the installation pieces, but also get as many measurements as I would need to make my cut.

Attached Thumbnails
toprem3.JPG   toprem7r copy.jpeg   toprem1r copy.jpeg  
hammerhome is offline   Reply With Quote
Old 05-28-2014, 12:04 AM   #29
Senior Member
 
Join Date: May 2013
Location: Portland
Posts: 106
Re: First build

Next before I started removing things, I marked where everything was and took measurements. I can probably come back and look at where some holes are, but I wanted to make it easy. I made a storyboard of all the measurements so that I can go on top my van with my piece of cardboard and trace out where to cut.

Its important to me that this top work as it did on the vw. This may include some welding and in-setting some of the pieces so that all hardware work and the seal seats down completely where it should. One thing that I feel is very important is the latching mechanism. I will carefully align this so that it works in the ford.


You can see in these photos that the feet of the raising arm prop are sitting below the elevation of the van roof, in what was a factory rail on the eurovan.

This same rail is that the springs sit in, and also what the bed platform hangs off of. This is where the meat of making this fit into the ford comes into play.
Attached Thumbnails
toprem4r copy.jpeg   toprem5r copy.jpeg  
hammerhome is offline   Reply With Quote
Old 05-28-2014, 12:15 AM   #30
Senior Member
 
Join Date: May 2013
Location: Portland
Posts: 106
Re: First build

With the help of a friend, I was able to get the top off and placed on some sawhorses. This will allow me to clean up the aluminum tracks to place it on my roof.


Then it was a few hours of using a heat gun, drill and pry bars to remove the sheet metal that trims out the rough cut hole and allows mounting of the top hardware and the bed platform. It is really impossible to remove this metal without bending it. I gave up on trying to get it out as it was put in because of all the body adhesive and butyl used. I did use a hammer and wood to shape it back to near its original shape after it was removed.

Each piece had an equal amount of weight in glue and body adhesive keeping it firmly bonded to the roof structure, along with rivets and screws.


Attached Thumbnails
toprem13r copy.jpeg   toprem22.JPG   toprem17.JPG  
hammerhome is offline   Reply With Quote
Reply

Thread Tools
Display Modes

Posting Rules
You may not post new threads
You may not post replies
You may not post attachments
You may not edit your posts

BB code is On
Smilies are On
[IMG] code is On
HTML code is Off
Trackbacks are Off
Pingbacks are Off
Refbacks are Off

» Featured Campgrounds

Reviews provided by

Powered by vBadvanced CMPS v3.2.3
Disclaimer:

This website is not affiliated with or endorsed by Sportsmobile SIP or any of its affiliates. This is an independent, unofficial site.


All times are GMT -6. The time now is 03:44 AM.


Powered by vBulletin® Version 3.8.8 Beta 4
Copyright ©2000 - 2024, vBulletin Solutions, Inc.