Journey with Confidence RV GPS App RV Trip Planner RV LIFE Campground Reviews RV Maintenance Take a Speed Test Free 7 Day Trial ×


Reply
 
Thread Tools Display Modes
 
Old 06-19-2015, 10:59 AM   #21
Senior Member
 
rockbender's Avatar
 
Join Date: Sep 2010
Location: Bend, OR
Posts: 800
Re: Gruffalo the Family Adventure Van - Build Thread

Your plan sounds good. Your cabinet layout will be more or less like a '50' or Westy plan then, right?

Where did you source your swivel? I like the way it looks.
cheers!
josh

__________________
Josh
2009 Express AWD, CCV Top & 50-ish home build. Daily driver/camper/kid hauler
rockbender is offline   Reply With Quote
Old 06-19-2015, 11:49 AM   #22
Senior Member
 
Jboles's Avatar
 
Join Date: Apr 2015
Location: Chattanooga, TN
Posts: 104
Re: Gruffalo the Family Adventure Van - Build Thread

Quote:
Originally Posted by rockbender
Your plan sounds good. Your cabinet layout will be more or less like a '50' or Westy plan then, right?

Where did you source your swivel? I like the way it looks.
cheers!
josh
I had meant to put the source in my original post. I bought it from Shop4seats.com. Initially I ordered it on whim and unfortunately I got the wrong one. They were easy to work with and made certain I got the right one the second time. Make sure you indicate whether you have factory OEM seats or after market seats. Also, for my model year, 2006, I have the sensor box under the seat for the airbag sensor. The 2006 model swivel base they sold didn't accommodate for that. They had to order the 2007 year for this seat base. It worked. I advise giving them a call to place your order and talking through exactly what you need.

Yeah, my layout would be very similar to a 50 style or Westy, just add a queen size bed behind it all. I just need to get these seats figured out, as far as which to buy. I'm checking local salvage yards but haven't found the right thing yet. May have to do an ebay order.

Regards,
Justin
Jboles is offline   Reply With Quote
Old 06-19-2015, 12:10 PM   #23
Senior Member
 
rockbender's Avatar
 
Join Date: Sep 2010
Location: Bend, OR
Posts: 800
Re: Gruffalo the Family Adventure Van - Build Thread

Thanks for the info Justin, and glad to hear you had a better Shop4seats experience than I did! I guess I should have called. I ordered swivel plates for my Chevy van and they were drilled completely incorrect. Additional steel would have been needed for them to work correctly so I just ended up sending them back. If I could get a swivel like yours in the GM pattern I think it would work well.

I spoke with a guy that got some nice looking captains chairs with seatbelts built in for his Sprinter, and he purchased them at Shop4seats. Not sure what shipping would be - he was able to pick them up from their store. He was happy with the quality and pricing, FWIW.
__________________
Josh
2009 Express AWD, CCV Top & 50-ish home build. Daily driver/camper/kid hauler
rockbender is offline   Reply With Quote
Old 06-23-2015, 08:13 AM   #24
Senior Member
 
Jboles's Avatar
 
Join Date: Apr 2015
Location: Chattanooga, TN
Posts: 104
Re: Gruffalo the Family Adventure Van - Build Thread

Anyone familiar with aftermarket bench seats? I found this photo on an old thread on the Expedition Portal forum but no luck contacting the original poster.

I'm trying to figure out where to source a bench seat like this or similar to this. The type I'm looking for folds flat but move forward as you convert to the bed.

Anyone have any input?


Thanks,
Justin
Jboles is offline   Reply With Quote
Old 06-23-2015, 01:56 PM   #25
Member
 
Join Date: Feb 2015
Posts: 57
Re: Gruffalo the Family Adventure Van - Build Thread

I had a the princess model in our last van from shopforseats.com. It moved forward when folded down. It was one of their cheaper models but the shipping was extremely high(nearly the cost of the seat). Last time I was at my local salvage yard I noticed they had a manual sofa bed in a conversion van. Not sure which way it folded out. I'll be glad to go and check it out for you seeing as I'm just about an hour away from you. If I remember right it would need recovering ,but if it can be had cheap enough it would probably be worth it.
thestoneman is offline   Reply With Quote
Old 07-06-2015, 11:43 AM   #26
Senior Member
 
Jboles's Avatar
 
Join Date: Apr 2015
Location: Chattanooga, TN
Posts: 104
Re: Gruffalo the Family Adventure Van - Build Thread

Quote:
Originally Posted by thestoneman
I had a the princess model in our last van from shopforseats.com. It moved forward when folded down. It was one of their cheaper models but the shipping was extremely high(nearly the cost of the seat). Last time I was at my local salvage yard I noticed they had a manual sofa bed in a conversion van. Not sure which way it folded out. I'll be glad to go and check it out for you seeing as I'm just about an hour away from you. If I remember right it would need recovering ,but if it can be had cheap enough it would probably be worth it.
If you happen to be there at the salvage yard for something else and can take a look at the sofa bed that would be great. I'm still trying to find the best salvage yard around Chattanooga, I've been to one but need to check out a few others.

Thanks for the help.

Justin
Jboles is offline   Reply With Quote
Old 11-29-2015, 01:54 PM   #27
Senior Member
 
Jboles's Avatar
 
Join Date: Apr 2015
Location: Chattanooga, TN
Posts: 104
Re: Gruffalo the Family Adventure Van - Build Thread

Hello Everyone,
I've been on idle with the van for a while but I've finally made some headway. I've been quenched by all the great builds on this forum and biding my time for when my budget allowed me to keep going.

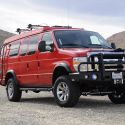
My build is a lot different than most. With the fiberglass top on my van I've only got about 60" of clearance, not much room to stand, I'm 6'-3". We have the full queen size permanent bed in the back and now we've acquired a bench seat out of 2014 GMC Denali. I have removed almost all of the plastic molding in the back of the van. I'm adding 3/4" plywood for base flooring and having the seat mount fabricated. Once the mount is completed and I get the van back I'll strip it all out, prep the floor (fill holes) and start the insulation. My plan is to use th 3/4" plywood on the floor for sound deadening and insulation. On the sides of the van I plan to insert non-backed insulation in the voids and reflectix throughout.

Ultimate plans include two frame mounted AGMs, charge controller, solar panels, DC fuse panel, wiring for Engel or ARB fridge, lighting, outlets, etc. You can see the cabinetry I plan to install behind the drivers seat and along the drivers side adjacent to the bench seat, I've mocked it up with cardboard in a few photos below. It's basically a 50 style layout but shorter based the rigid bed platform in the back. Plans also include Vantech raingutter roof rack mounts and cross bars with a full length/width custom roof rack with ladder. Also included in the build will be a MaxAir Vent near the back. To do this I'll need to redo the factory headliner and reroute the A/C ducting, as well as trim out the roll cage. This van came with a heavy duty roll cage between the roof and headliner. Still working on those details.

If budget allows I'd like to be complete with all of this by February or March. I just dropped the van off at the fabricator this morning and should have it back late this week. The fabricator is a good friend of mine, his shop in middle/southern TN near the town of Pikeville. He does great work and is looking do more of this type of work if anyone in the area is looking for a shop. I'll post up details of the install and can provide his contact information if needed.

Here are some photos of the progress so far.

Seat when delivered: Cost was $425 shipped. Found it on ebay from a guy in Texas.


Mock up of interior. The bigger box behind the driver seat will have the top loading frig on top and drawer on the bottom for storage:


From the front:


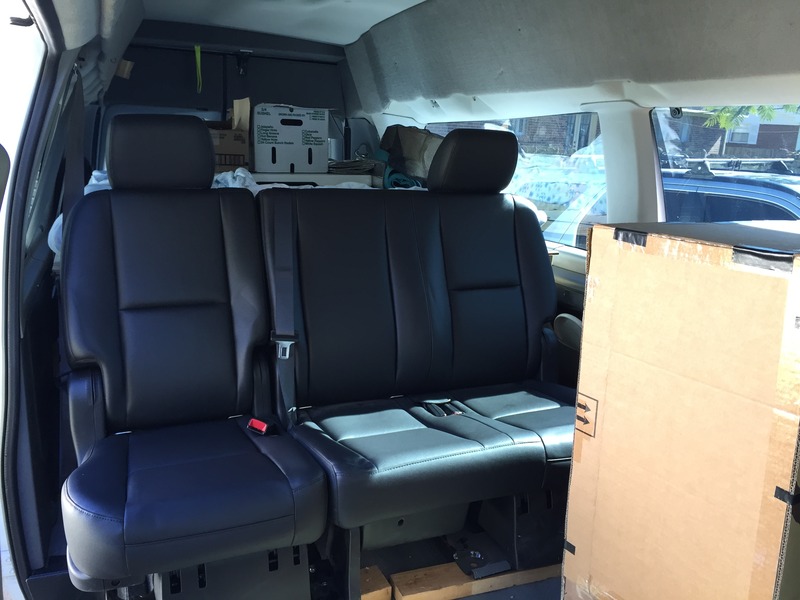
Seat rotates up to allow for gear access. A must for the way the bed is seat up. Plus I'll have child seats on the 60 seat so it won't move much. Crucial that I found the 60/40 seat. Well this this more like a 70/30.


More of seat rotated up:


I'm still not certain how I will install the reflectix on the sides of the van and still be reinstall some of the plastic paneling. I won't reinstall the factory paneling behind the cabinets along the driver's side but I do plan to reinstall the paneling in the back area.

I still need to cut out the last piece of plywood for the very back of the van, that will be on the list as soon as I get the van back from the shop. I didn't get good picture of the flooring that I've cut and installed, was too busy getting things ready to deliver the van this morning.

I'm excited to finally be moving forward on this build. It took me a while to find the right seat, order it, shipped, etc. More to come soon, hopefully.

Cheers,
Justin
Jboles is offline   Reply With Quote
Old 11-29-2015, 01:56 PM   #28
Senior Member
 
Jboles's Avatar
 
Join Date: Apr 2015
Location: Chattanooga, TN
Posts: 104
Re: Gruffalo the Family Adventure Van - Build Thread

More photos:

Both seats rotated:


I used this 1/2 ply and 2x4s to mock the seat position.
Jboles is offline   Reply With Quote
Old 11-29-2015, 01:56 PM   #29
Senior Member
 
Jboles's Avatar
 
Join Date: Apr 2015
Location: Chattanooga, TN
Posts: 104
Re: Gruffalo the Family Adventure Van - Build Thread

More photos:

Heater/AC Unit
Jboles is offline   Reply With Quote
Old 11-29-2015, 02:06 PM   #30
Senior Member
 
Jboles's Avatar
 
Join Date: Apr 2015
Location: Chattanooga, TN
Posts: 104
Re: Gruffalo the Family Adventure Van - Build Thread

I was having trouble with the size of the one of these photos so I had to divide it up until I found the one that wouldn't work. Here are more from my recent progress:

It's hard to store all these oddly shaped panels:


Just after a cut with the table saw. I chose this hardwood 3/4" ply over the standard pine plywood mostly because it was all flat and true to size.


I used the carpet for a basic template and then used newspaper to get a more detailed shape for the cut outs.


This is passenger side front of the second piece. This corner will be right inside and to the left of barndoors.
Jboles is offline   Reply With Quote
Reply


Posting Rules
You may not post new threads
You may not post replies
You may not post attachments
You may not edit your posts

BB code is On
Smilies are On
[IMG] code is On
HTML code is Off
Trackbacks are Off
Pingbacks are Off
Refbacks are Off

» Featured Campgrounds

Reviews provided by

Powered by vBadvanced CMPS v3.2.3
Disclaimer:

This website is not affiliated with or endorsed by Sportsmobile SIP or any of its affiliates. This is an independent, unofficial site.


All times are GMT -6. The time now is 08:11 PM.


Powered by vBulletin® Version 3.8.8 Beta 4
Copyright ©2000 - 2024, vBulletin Solutions, Inc.