Journey with Confidence RV GPS App RV Trip Planner RV LIFE Campground Reviews RV Maintenance Take a Speed Test Free 7 Day Trial ×


Reply
 
Thread Tools Display Modes
 
Old 09-11-2011, 07:52 PM   #391
Site Team
 
WVvan's Avatar
 
Join Date: Jul 2009
Posts: 1,293
Re: Hal The Van

The Jage Light in action:


Works like a charm.


My weekend project. Modifying the rear hinges so I can hang the spare tire off them and not put the weight on the door.


The usual write-up when I get farther along.

Did I mention I now have a metal lathe? Used it on the new hinge pins.


__________________
Open the pod bay doors Hal.

Once I exit Hal, this is what I do.
https://larry.wvnet.edu/~van/pics/lic...late-small.jpg
WWW.WVBIKE.ORG
WVvan is offline   Reply With Quote
Old 09-12-2011, 09:56 AM   #392
Senior Member
 
Ford_6L_E350's Avatar
 
Join Date: May 2007
Location: Washington - Ridgefield
Posts: 4,728
Re: Hal The Van

Beware when you get a milling machine - you will spend much more on accessories than you ever did on the mill.

Lathes are much cheaper to tool up and use. And a little safer, since the sharp tools don't move.

You can get creative with the lathe, chuck up an end mill and locate the part on the slide to do some rudimentary milling.

One word of caution for anyone using machine tools - no cloth rags allowed! Use only paper towels near the machines. If a paper towel gets caught in a moving tool or part, it will rip apart while a cloth towel will pull you in.

Second word of caution. Safety glasses. Eyes don't grow back.

Have some more fun!

Mike
__________________
Alaska to Key West, Labrador and more
Prostate cancer survivor. See Thread Prostate cancer and Sportsmobiles
2015 VW GTI 2020 Fiat 124 Spider
2012 E250 Hitop camper
Ford_6L_E350 is offline   Reply With Quote
Old 09-19-2011, 10:06 PM   #393
Site Team
 
WVvan's Avatar
 
Join Date: Jul 2009
Posts: 1,293
Re: Hal The Van

Thanks for the tips Mike. All kinds of ways to hurt yourself with these things.

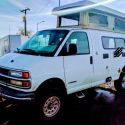
With the undervan storage box in place I need to find a way to mount the spare tire. I've been carrying it around inside the van since I removed it's mounting bracket under the van. It's always in the way. Especially when camping.

So I ordered a Surco brand Ford tire carrier. It's around $70. Pretty basic. Didn't even come with any instructions. Just the carrier and a few nuts and bolts.

You have to drill four holes in the door. Here's how it looks after I installed it.


There are two bolts that go through the edge of the door above and below the hinges.


Two more bolts go through to the inside of the door. I added the metal plate as a reinforcement.


After installing it I didn't really care for it. My spare tire weighs around 79 lbs and this carrier didn't feel very substantial. It puts the tire weight onto the door and other people who have a similar carrier report that over time it will cause the door to sag.

Another problem is that the carrier is designed such that there is a four inch gap between the back of the tire and the door.

I believe that gap is to allow the door to swing fully open with the tire attached. If there wasn't that gap the edge of the tire will contact the back of the van when it's opened.

With the tire sticking that far out it will interfere with my bike rack.


There are a couple different ways to tackle this. In retrospect if I'd known how much time and effort I'd spend I might have chosen a different path. Or maybe not.

I noticed that with the Surco carrier if I lowered the tire it would rest partway on the rear bumper. Got me to thinking.


So why not build a new carrier which keeps the tire closer to the back of the van, so it doesn't interfere with the bike rack. Design it so the tire rests on the back bumper to keep the weight off the door and a way to raise and latch the tire when opening the door.

This is the beginnings of version 1.


Didn't like that one so started again with version 2.


Here's what the tire would be bolted to.


With this design a good part of the tire would be resting on the bumper as planned.


I worked on this carrier off and on for several weeks.


Then something happened. I bought a metal lathe.


Having the lathe along with my new mill meant I could kick my fabrication ideas to the next level. This caused me to rethink my design. Instead of hanging the tire off the door have it hanging off the hinges. Time to scrap version 2 and start on version 3.


I'd have to modify both the door hinges. Something I have no experience with. I was afraid this was beyond me but figured I could always get a couple replacement hinges from the junkyard if I screwed it up.

Start with the top hinge. The part on the left bolts inside the door. Other side bolts to the door frame.


Grind off the bottom of the hinge pin and see if I can punch it out.


That didn't work. The hinge pin is in too good. Use the mill to drill down into the center of the pin. The black clamps are to hold the hinge steady and vertical as it is drilled.


After drilling into each end of the pin I was able to use a punch to pop it out.


Inside the inner hinge, the part that bolts to the van frame, were these two bushings. Not sure what they are made of.


Next up fabricate new hinge parts and pin.
__________________
Open the pod bay doors Hal.

Once I exit Hal, this is what I do.
https://larry.wvnet.edu/~van/pics/lic...late-small.jpg
WWW.WVBIKE.ORG
WVvan is offline   Reply With Quote
Old 09-23-2011, 11:31 AM   #394
Site Team
 
WVvan's Avatar
 
Join Date: Jul 2009
Posts: 1,293
Re: Hal The Van

Tire Carrier continued:

Here is a quickly done drawing of my hinge plan. Not exact.


I'll start with four 1" long blocks cut from a 3/4" square bar of 1018 cold rolled steel. These will go on the top and bottom of the factory hinge. I measured the pin that came out of the hinge and it was very close to 11/32" in diameter. I'll use that size of a drill bit on each of the blocks.

UPDATE: Ford_6L_E350 brought it to my attention that I'm not using the mill clamps correctly. The clamp should always be higher at the support and lower at the part. That way, if the part moves it stays just as tight. Live and learn.
Thanks Mike.

For a hinge pin I'll use some W-1 Tool Steel (AKA Drill Rod). I don't know that this is the absolutely best material for this application but I have some 3/8" rod on hand and I think it will work. The hole I drilled is 11/32". 3/8 = 0.375 11/32 = 0.343 So I have to remove 0.032". That's about the thickness of 8 sheets of copier paper.

I'll use the metal lathe to do this. It's only the second time I've ever used one so I'm sure there are some mistakes being made. Cut off the appropriate length of drill rod along with some extra and clamp it in the lathe. Use a carbide cutting bit moving back and forth to slowly reduce the diameter of the drill rod. The drill rod is so tough I can't take a lot of material off at once. Have to move the cutting bit forward .001" at a time. This operation took some time.


After awhile I got the new pin to fit both the new hinge blocks...


and the original hinge.


Set it up on the van. Note that the hinge pin will be trimmed down.


Need to figure out the size and shape of the 1/4" plate that I'll be welding to the two hinge blocks. Using the level you can see in the picture to line up the hinge with the one of the two holes I already drilled in the door for the first carrier I bought. Use a piece of posterboard to stand in for the 1/4" plate. I really need to wash the van.


Here is the posterboard laying on my total supply of 1/4" plate. I got this particular plate when I got a tour of the machine shop a few weeks back. They allowed me to take some leftovers from their metal shear. Both hinge plates will have to come from this one piece.


I've trimmed the posterboard template down to what I think is the right shape. Laying on top is a sample of the 1-1/4" 16 gauge square tube that I'll be using to make the tire carrier. The square tube cost $1.50 per foot.


I cut the 1/4" plate using my band saw. Need the clamps to hold the plate in place. I've found the hard way that on a long cut like this the saw will pull on the material harder than you can hold it.


Here is the plate after cutting. By using this trapezoidal shape I'll be able to get both hinge plates from the one piece of steel I have. You can see on the posterboard template where I've marked the planned position for the 1-1/4" square tube.


How the plate looks with the hinge.


I'll have to make adjustments to the plate where it meets the original hinge. There is a conflict. Need to remove some of the metal from along the edge. Use the mill for this.


How it looks after.


Set everything up to weld.


After welding.


The heat from the welding caused the holes I drilled through the hinge blocks to change. The hinge pin would no longer fit. Used the hand drill to re-do the holes. The distortion to the holes wasn't extreme so the re-drilling wasn't too hard.


Cut a groove in the lower end of the hinge pin for the C clip using the lathe.


I had cut the hinge pin longer than needed since it gives the lathe something to clamp too when machining. Don't need that extra anymore so cut it off.


One hinge done.


To do this one hinge took me most of the weekend. Some of the metal I'm using here was bought from Online Metals. They have online Product Guides that I've been reading to try and learn something about the different metal alloys.

continued -
__________________
Open the pod bay doors Hal.

Once I exit Hal, this is what I do.
https://larry.wvnet.edu/~van/pics/lic...late-small.jpg
WWW.WVBIKE.ORG
WVvan is offline   Reply With Quote
Old 09-23-2011, 04:38 PM   #395
Senior Member
 
Nomadcat's Avatar
 
Join Date: Nov 2009
Location: Greenwich Village, NYC
Posts: 568
Re: Hal The Van

you're having way too much fun with all those new tools, dude...

;-)
__________________
2009 E350 5.4 Quadvan Homebrew
One day at a time
Nomadcat is offline   Reply With Quote
Old 09-25-2011, 05:54 PM   #396
Site Team
 
WVvan's Avatar
 
Join Date: Jul 2009
Posts: 1,293
Re: Hal The Van

Nomadcat you're right about the fun part. I do enjoy this.

So I'm far enough along on the tire carrier to start thinking about a cover. Did a search here on the subject and found [url=http://www.sportsmobileforum.com/viewtopic.php?f=2&t=7662&hilit=tire+cover]this thread where Zeta posted about custom tire covers.

Due to copyright issues they probably wouldn't do it but what do you think of this design?
__________________
Open the pod bay doors Hal.

Once I exit Hal, this is what I do.
https://larry.wvnet.edu/~van/pics/lic...late-small.jpg
WWW.WVBIKE.ORG
WVvan is offline   Reply With Quote
Old 09-25-2011, 06:27 PM   #397
Senior Member
 
Ford_6L_E350's Avatar
 
Join Date: May 2007
Location: Washington - Ridgefield
Posts: 4,728
Re: Hal The Van

I love it!

Especially if the flat part of the cover is red acylic and you put a light inside it and actually light it with running and brake lights.

It looks fantastic and anyone seeing it would know it was you.

Mike
__________________
Alaska to Key West, Labrador and more
Prostate cancer survivor. See Thread Prostate cancer and Sportsmobiles
2015 VW GTI 2020 Fiat 124 Spider
2012 E250 Hitop camper
Ford_6L_E350 is offline   Reply With Quote
Old 09-25-2011, 07:14 PM   #398
Senior Member
 
larrie's Avatar
 
Join Date: Apr 2011
Location: Oregon Ciry Oregon
Posts: 2,854
Hal The Van

Sweet. No harm in asking them about it. You could also design a similar one that was enough different that they would make.


Larrie
89 Ford RB
__________________
Larrie
Read detailed trip reports, see photos and videos on my travel blog, luinil.com.
Current van: 2002 Ford E350 extended body camper with Colorado Camper Van pop top and Agile Offroad 4WD conversion.
larrie is offline   Reply With Quote
Old 09-27-2011, 10:13 PM   #399
Site Team
 
WVvan's Avatar
 
Join Date: Jul 2009
Posts: 1,293
Re: Hal The Van

Tire Carrier continued:

After mounting the hinge on the van I found that the door was loose on the pin. The hinge that bolts to the van frame, the "frame wing", had the pieces of bushing fall out when I first disassembled it. To stop the door wobble I'll have to replace those bushings.


I'm going to make my first ever bushings from a brass rod. I don't know that brass would be the best possible material in this application but I do know you can buy brass bushings so I'm guessing it will work. Also I had the brass rod on hand.

I took a 0.4375" C360 brass rod and cut off a short section. Enough for the bushing length along with extra so the lathe would have something to clamp onto. Reduce the OD of the rod till it fits the inside of the hinge.


Once the OD is the correct size drill out the inside of the bushing to match the hinge pin. First use a center drill to make a starter hole for the regular drill. Without this step the end of the drill bit might "wander" and not be centered.


Then use a 11/32" drill. Notice that the drill bit is held steady while the bushing is what spins.


Reverse the bushing in the lathe chuck and use a parting tool to cut off the extra part of the brass rod. Just to the left of the groove the parting tool is cutting is the "lip" that I'm leaving on the top of the bushing.


Finished bushings. Not bad for a first try.


The gap between the two different parts of the hinge is pretty tight. On the left is the frame wing and on the right is the "door wing". I had to do some slight filing on the lip of one of the bushings before they would line up.


That finishes the first hinge. Before starting on the second hinge I removed the rear door off the van. It will be easier to make measurements for the second hinge and do the layout of the tire carrier with the door on sawhorses.


The rear door weighs 47 lbs.


Work out the size and shape of the second hinge plate.


Here's the second hinge finished and mounted on the door. It went a lot faster than the first one.


Tiger giving his opinion, like always.


continued -
__________________
Open the pod bay doors Hal.

Once I exit Hal, this is what I do.
https://larry.wvnet.edu/~van/pics/lic...late-small.jpg
WWW.WVBIKE.ORG
WVvan is offline   Reply With Quote
Old 10-03-2011, 10:24 PM   #400
Site Team
 
WVvan's Avatar
 
Join Date: Jul 2009
Posts: 1,293
Re: Hal The Van

Tire Carrier continued:

With the new hinges done and the van door on sawhorses I started cutting and laying out the pieces of square tube for the carrier.


I'm lining up each of the square tubes so it is centered over one of the two holes already drilled in the door.


Where the two pieces meet near the door edge will be reinforce it with a section of 1-1/4" angle iron.


Cut the angle iron to fit. Use a grinder with a wire wheel to clean off this and the other steel pieces before welding.


I wanted the alignment of everything to be just right so I carefully set it all up on the door. Then use the welder to tack weld the pieces together. I couldn't do the actual welding over the door because I'd drop hot metal sparks onto the paint and mark it up.


Gently move the tack welded pieces to the work table and complete the welding.


While waiting for the welds to cool put the rear door back on the van. Take the carrier and mount it on the hinges.


The carrier fit perfect. It swung back and forth smoothly and without any wobble. To test it I started lifting and putting my weight on it till I got the van rocking.


The door also moved without binding or wobble. The carrier and door pivoted together without any shifting movement between them.


To say I was very pleased is a understatement.

continued -
__________________
Open the pod bay doors Hal.

Once I exit Hal, this is what I do.
https://larry.wvnet.edu/~van/pics/lic...late-small.jpg
WWW.WVBIKE.ORG
WVvan is offline   Reply With Quote
Reply

Thread Tools
Display Modes

Posting Rules
You may not post new threads
You may not post replies
You may not post attachments
You may not edit your posts

BB code is On
Smilies are On
[IMG] code is On
HTML code is Off
Trackbacks are Off
Pingbacks are Off
Refbacks are Off

» Featured Campgrounds

Reviews provided by

Powered by vBadvanced CMPS v3.2.3
Disclaimer:

This website is not affiliated with or endorsed by Sportsmobile SIP or any of its affiliates. This is an independent, unofficial site.


All times are GMT -6. The time now is 06:26 PM.


Powered by vBulletin® Version 3.8.8 Beta 4
Copyright ©2000 - 2024, vBulletin Solutions, Inc.