Journey with Confidence RV GPS App RV Trip Planner RV LIFE Campground Reviews RV Maintenance Take a Speed Test Free 7 Day Trial ×


Reply
 
Thread Tools Display Modes
 
Old 01-04-2014, 06:03 PM   #331
REF
Senior Member
 
REF's Avatar
 
Join Date: Jan 2009
Location: Boulder, CO.
Posts: 2,554
Send a message via MSN to REF
Re: Polar Bear 1

Thanks, yes, drive it almost daily. Done a couple of mods since that pic, but more or less looks the same. Was out of town for 2 months this past summer, made it back in time for the epic floods, was nice to have the rig for that. See you around....

__________________
'03 Ford E350 7.3L Diesel
(de)SMB'd Custom RB-50
Quigley 4X4 w/Deavers & Agile Offroad's R.I.P. package
CCV High Profile Pop Top
REF is offline   Reply With Quote
Old 01-05-2014, 07:29 PM   #332
Member
 
Yodavan's Avatar
 
Join Date: Jul 2013
Location: Lakewood, CO
Posts: 72
Re: Polar Bear 1

Quote:
Originally Posted by Zaskoda
Quote:
Originally Posted by dudewithvan
I like the video. That should be the new trend where we all take video of our projects!
I would definitely dig that!

Meanwhile, I caught a nice shot of the bear as my Apogaea base camp last week:

Hey Zaskoda we may have a mutual friend(smooth)who sent me the pic of your bear at Apogaea. We were there in 2012.
__________________
99 Dodge B3500 Magnum 360 Salem Kroger 4x4
96 Ford Ranger
02 Suzuki DRZ400
Yodavan is offline   Reply With Quote
Old 01-26-2014, 09:41 PM   #333
Senior Member
 
Zaskoda's Avatar
 
Join Date: Sep 2009
Posts: 421
Re: Polar Bear 1

Quote:
Originally Posted by Yodavan
Hey Zaskoda we may have a mutual friend(smooth)who sent me the pic of your bear at Apogaea. We were there in 2012.
If it's the "Smooth" I know, he's our Quartermaster! =D
Zaskoda is offline   Reply With Quote
Old 06-25-2016, 09:37 PM   #334
Senior Member
 
Zaskoda's Avatar
 
Join Date: Sep 2009
Posts: 421
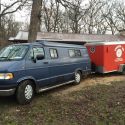
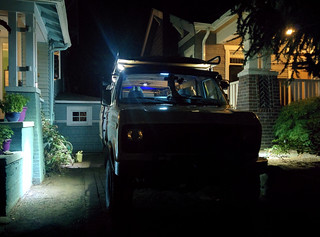
So it's been a long time since my last post. I moved to Seattle into an apartment complex and had to park in the parking garage. I wasn't able to do any work there. Recently I've relocated to a house an I'm able to actually work on her again. Hooray!

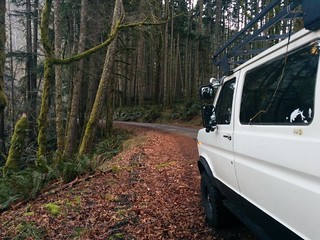
Here's a pic I took in Yellowstone on the way from CO to WA:


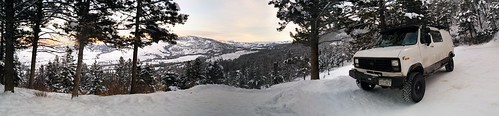
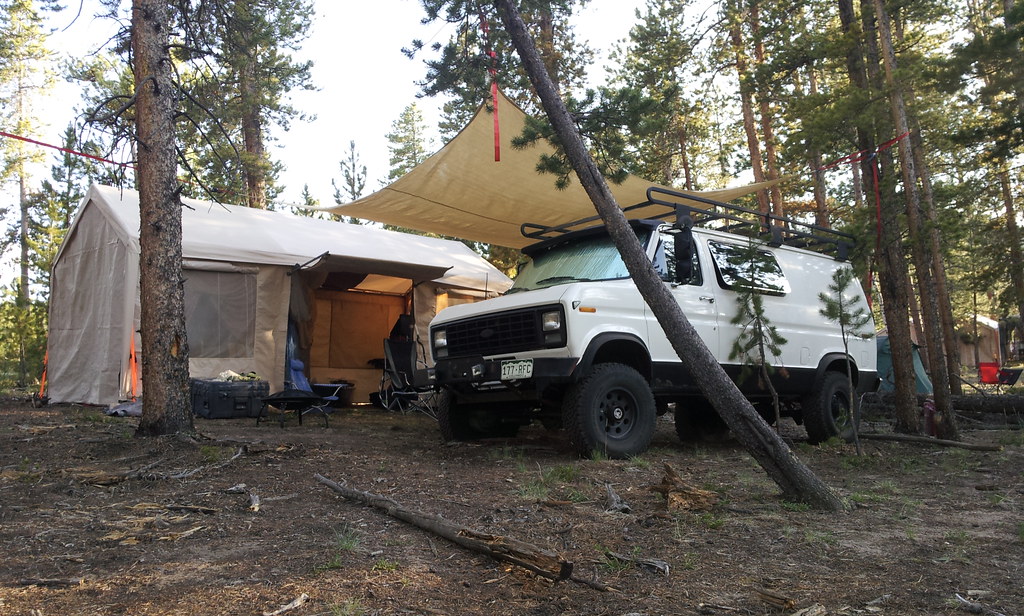
The heater I got from Nomadcat worked GREAT. It was way into the negative double digits and we stayed toasty warm all night long. =)

This has been such a long running project. More than a few times I've thought about selling her and cutting my losses. But things have changed so maybe I can actually get this done?

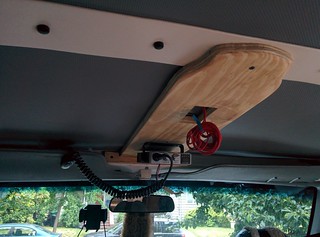
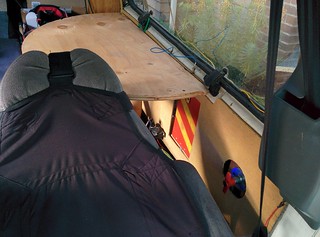
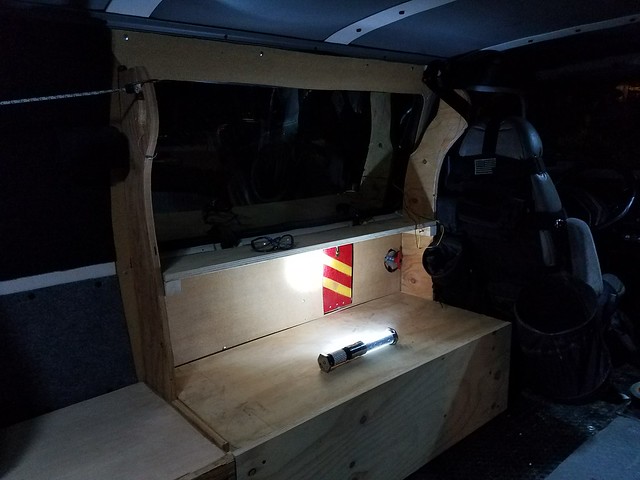
I just put the very first board int he van since moving here well over a year ago! I've started in the overhead shelf for the front. I needed a solid surface to anker to. I came up with this:


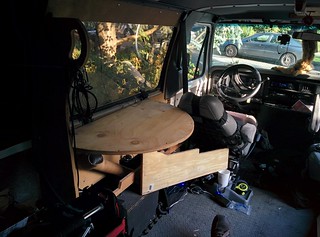
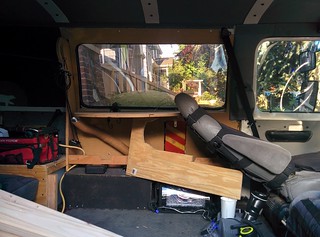
I decided to take the radio down as I think I want to put a screen for a backup camera there instead. I might put the radio behind the driver or just get a handheld.

I also started thinking about the last cabinet, the one behind the driver. I decided I didn't want to hinder my reclining front seat if I can help it. A few scraps of wood balanced in place suggest it's totally reasonable:


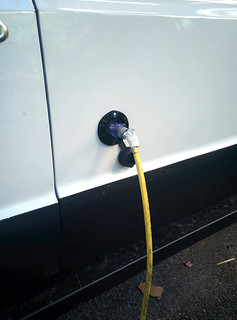
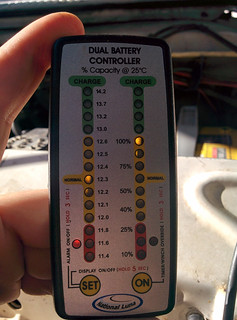
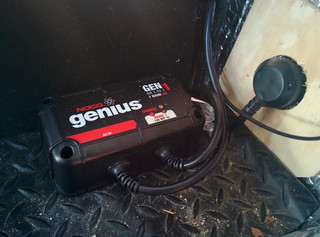
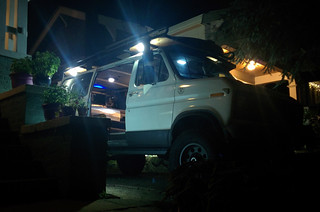
Otherwise, mostly I've been fixing stuff that's broken in the last couple of years. That's a lot of stuff. I gotta say, there's a lot about Washington that makes it worth having a van:


So maybe next time I post I'll have something interesting to show off.
Zaskoda is offline   Reply With Quote
Old 06-26-2016, 02:13 PM   #335
Senior Member
 
86Scotty's Avatar
 
Join Date: Jul 2011
Location: TN
Posts: 10,249
Good to have you back around Zaskoda. I've always enjoyed your creativity and contributions. Glad you can get back in to it again.

86Scotty is offline   Reply With Quote
Old 08-15-2016, 12:45 AM   #336
Senior Member
 
Zaskoda's Avatar
 
Join Date: Sep 2009
Posts: 421
Thanks98Scotty =)

My biggest news with this post is the addition of a battery charger. I cut the sidewall and dropped a 110v plug through to the inside that connect to a power strip and a genuis 4amp battery charger with a lead heading back to the house battery. I now have the most basic form of on-board power.


I also previous posted photos of lights attached to my rack using some complicated brackets. I thought I over-built them, but but they didn't last long against branches on the trail. I took them all down and today Jen helped me install 4 new flood lights. I put 3/4" plywood down on the rack as a temporary platform for Burning Man (yeah, I'm taking her there again). So we just bolted the flood lights right into the platform. I'm trying to find that sweet spot between having the lights out far enough that they are still useful yet set back enough that branches won't harm them. We'll see how this iteration does.

Zaskoda is offline   Reply With Quote
Old 10-17-2016, 09:07 PM   #337
Senior Member
 
Join Date: Sep 2013
Posts: 211
Just wondering how you bent the aluminum angle iron around the step area? I am in the process of finishing off my side step area and want to do the same thing and want to make a nice smooths curve to the angle iron to follow the smoothie curve I put in the plywood. I didn't want to make a 90* corner and cut and bend the angle iron bc I like the curve of the step. Just can't figure out how to do that curve myself lol
Gh0ztkid21 is offline   Reply With Quote
Old 10-17-2016, 09:27 PM   #338
Senior Member
 
Zaskoda's Avatar
 
Join Date: Sep 2009
Posts: 421
Quote:
Originally Posted by Gh0ztkid21 View Post
Just wondering how you bent the aluminum angle iron around the step area? I am in the process of finishing off my side step area and want to do the same thing and want to make a nice smooths curve to the angle iron to follow the smoothie curve I put in the plywood. I didn't want to make a 90* corner and cut and bend the angle iron bc I like the curve of the step. Just can't figure out how to do that curve myself lol
Do you mean the front door steps? I used the factory metal for trim on the curve. I may have even had to find it in the junk yard. Here's a shot:

Finish Door Well
Zaskoda is offline   Reply With Quote
Old 10-17-2016, 10:31 PM   #339
Senior Member
 
Join Date: Sep 2013
Posts: 211
Ok great. Thank you I didn't know that was the factory trim edge like that. I guess they did away with that style and went with the plastic molded step. I want to build my edge like yours in aluminum and have seen guys take 1"X1" angle iron and bend curves in it just not sure how. That's what I thought you did there.
Gh0ztkid21 is offline   Reply With Quote
Old 07-09-2017, 06:05 PM   #340
Senior Member
 
Zaskoda's Avatar
 
Join Date: Sep 2009
Posts: 421
I thought I would make an update and it turns out it can really be summed up in two photos.

There's been a little of this happening:

Enclosed Heater and Sub

And a whole lot of things like this broken dipstick. It was a real trick to retrieve the piece still in the tube.

Broken Dipstick
Zaskoda is offline   Reply With Quote
Reply


Posting Rules
You may not post new threads
You may not post replies
You may not post attachments
You may not edit your posts

BB code is On
Smilies are On
[IMG] code is On
HTML code is Off
Trackbacks are Off
Pingbacks are Off
Refbacks are Off

» Featured Campgrounds

Reviews provided by

Powered by vBadvanced CMPS v3.2.3
Disclaimer:

This website is not affiliated with or endorsed by Sportsmobile SIP or any of its affiliates. This is an independent, unofficial site.


All times are GMT -6. The time now is 10:48 AM.


Powered by vBulletin® Version 3.8.8 Beta 4
Copyright ©2000 - 2024, vBulletin Solutions, Inc.