Journey with Confidence RV GPS App RV Trip Planner RV LIFE Campground Reviews RV Maintenance Take a Speed Test Free 7 Day Trial ×


Reply
 
Thread Tools Display Modes
 
Old 09-13-2013, 08:35 PM   #21
Senior Member
 
Join Date: May 2013
Location: San Diego, CA
Posts: 295
Re: Popping my top

HAHAHA, it will fit, we will call it ours!!!!!!!

shadzima is offline   Reply With Quote
Old 09-14-2013, 08:00 PM   #22
Senior Member
 
boywonder's Avatar
 
Join Date: Jul 2013
Location: So Cal
Posts: 4,070
Re: Popping my top

Quote:
Originally Posted by shadzima
HAHAHA, it will fit, we will call it ours!!!!!!!

A timeshare!
__________________
2008 E350 RB passenger 4WD SMB penthouse
2013 KTM 350 EXC
2008 KTM 250 XCF-W
2003 Honda Element
boywonder is offline   Reply With Quote
Old 09-15-2013, 04:07 AM   #23
JWA
Senior Member
 
Join Date: Jan 2011
Location: Reynoldsburg, Ohio
Posts: 3,774
Send a message via Yahoo to JWA
Re: Popping my top

Budget-wise how much will you be saving going this route BoyWonder?
JWA is offline   Reply With Quote
Old 09-15-2013, 08:11 AM   #24
Senior Member
 
boywonder's Avatar
 
Join Date: Jul 2013
Location: So Cal
Posts: 4,070
Re: Popping my top

Quote:
Originally Posted by JWA
Budget-wise how much will you be saving going this route BoyWonder?

So far:

Used RB Penthouse-$2K

Headliner material and adhesive-$100

Yakima Tracks-$100

Cro-mo tubing for support mods-$100

LED lights-$100

New rubber trim, stop light and roof tape-$167

Shoulder screws and other stainless fasteners-$50

Butyl sealant tape-$35 (McMaster-Carr)-haven't purchased yet-don't know if it's the right stuff

paint and primer-haven't purchased yet

penthouse bed-still need a "make or buy" decision....

So around $2600 so far plus a day for the extraction and at least another day for installation

So.....the top is completely functional, no bent tubes, upholstery trim and springs chain are all there, fluorescent lights work, canvas is fine, stop light works....all of the above are upgrades...so without upgrades it's $2K for the top and $36 for a roll of butyl sealant.

I'm up at Bass Lake for the weekend; I drove by Sportsmobile Fresno on the way up......may have to stop by there on the way home.....
__________________
2008 E350 RB passenger 4WD SMB penthouse
2013 KTM 350 EXC
2008 KTM 250 XCF-W
2003 Honda Element
boywonder is offline   Reply With Quote
Old 09-20-2013, 08:05 PM   #25
Senior Member
 
boywonder's Avatar
 
Join Date: Jul 2013
Location: So Cal
Posts: 4,070
The project continues......

Got some time to fabricate a new headliner for the top.....

1/8" Baltic Birch was used for the new headliner base plywood. Since BB comes in 5'x5' sheets, this allowed elimination of one of the joints in the headliner since I would only need 2 pieces (SMB uses 4' x 8' sheets of plywood requiring 3 pieces). The total length of the headliner is 48+48+21.5=117.5" x 53" wide.

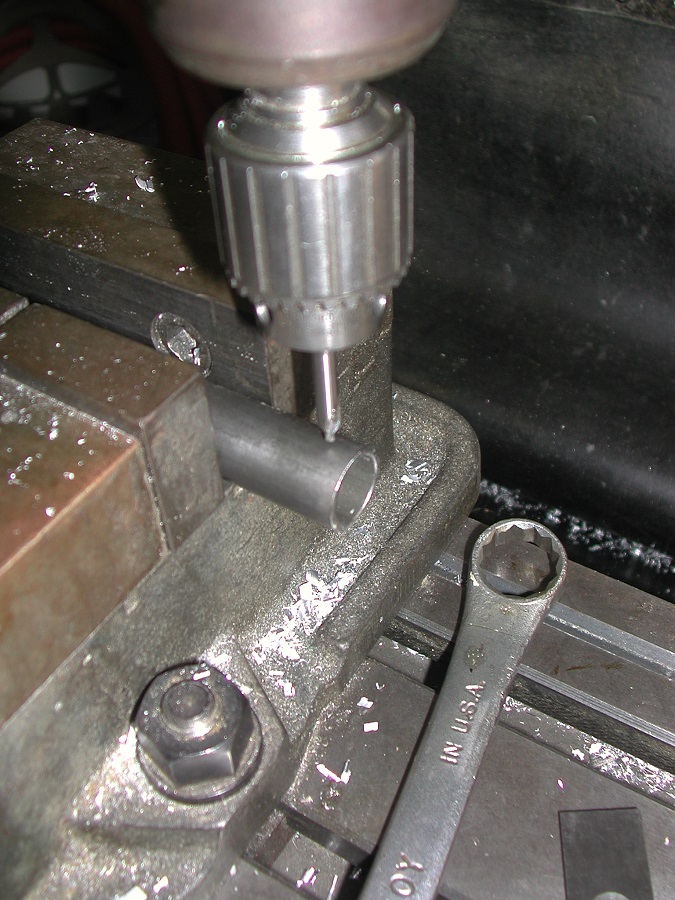
Using the old headliner pieces as a template, holes were drilled in the new ply for the J hooks, padded support thingies, lights, etc. and the end corners were radiused. The new pieces were cut about 1/16" undersized all the way around to allow room for the folded-over padded headliner.

Before gluing on the material, the wood was test-fit to the top to confirm that everything lined up and that I had space for the material wrapped around the edges.

The headliner material was purchased online at http://www.yourautotrim.com. These guys have lots of choices, from regular stuff to ultrasuede, perforated vinyl and even camo headliner material. I bought a headliner sample kit before ordering the material to evaluate the color match with the rest of the PH trim. The color is called PH1769 charcoal and it's a close match to the SMB grey velour fabric. I also bought 3 giant spray cans of DAP weldwood high strength contact adhesive from the same place.


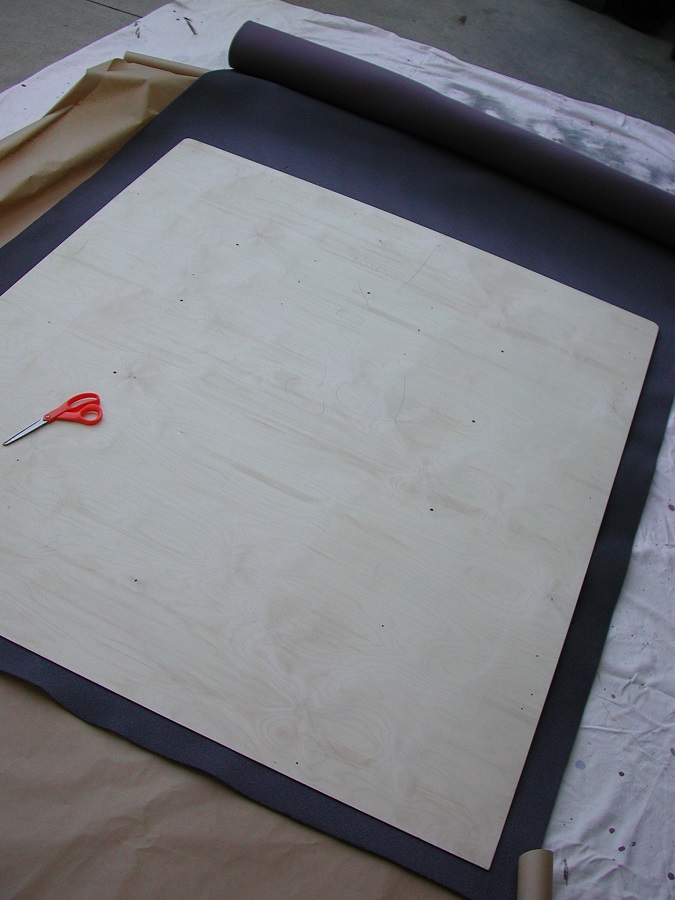
Here are a few action shots:

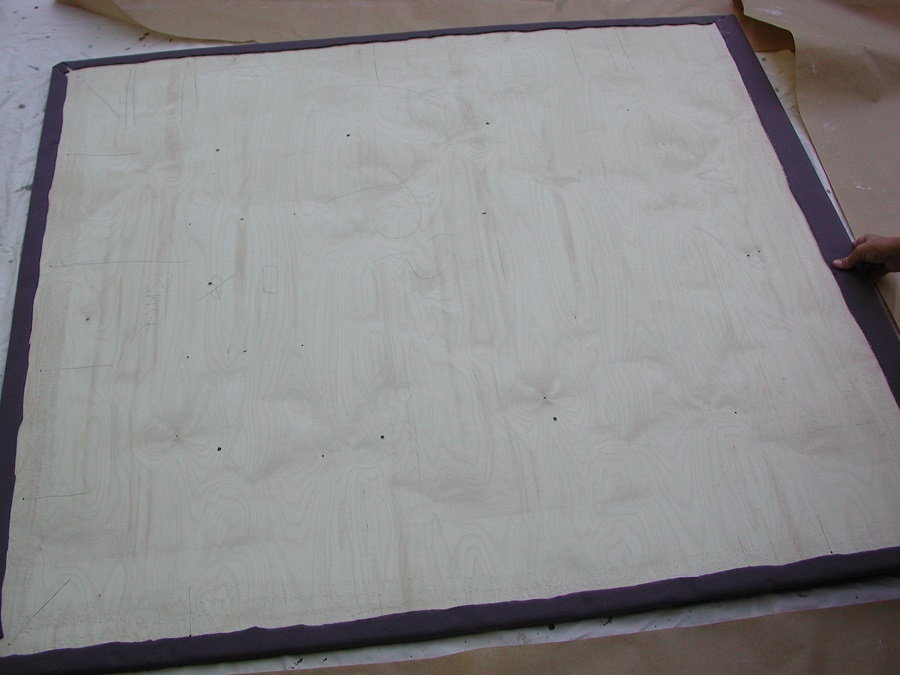
Laying out the prepped plywood on the back (foam side) of the headliner fabric


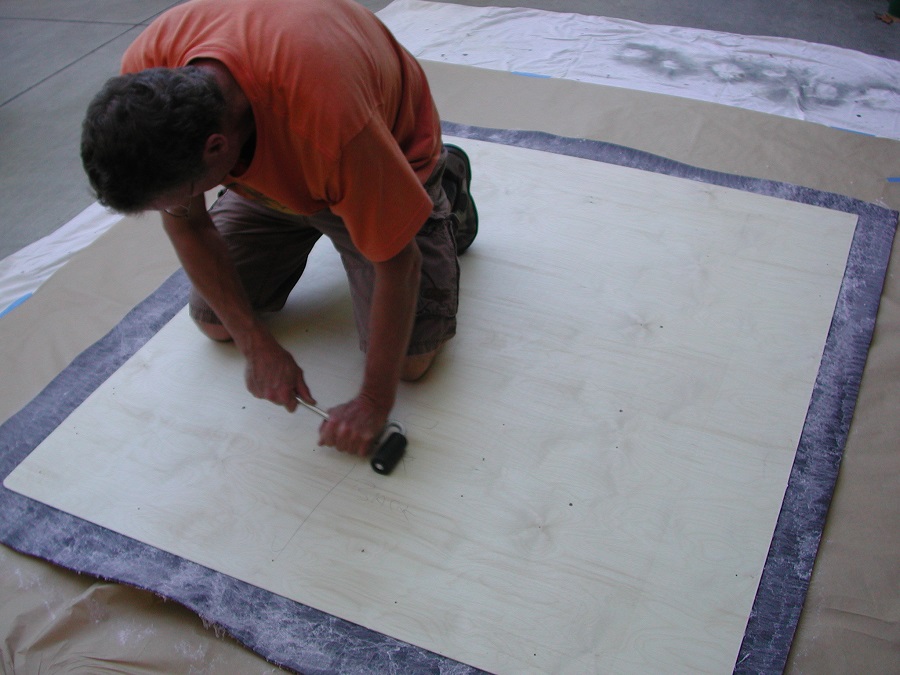
Spraying the contact adhesive (also applied contact adhesive to the plywood not shown...)


Carefully "rolling" the plywood on the headliner without making any bubbles.....the only real stressful part of the job.


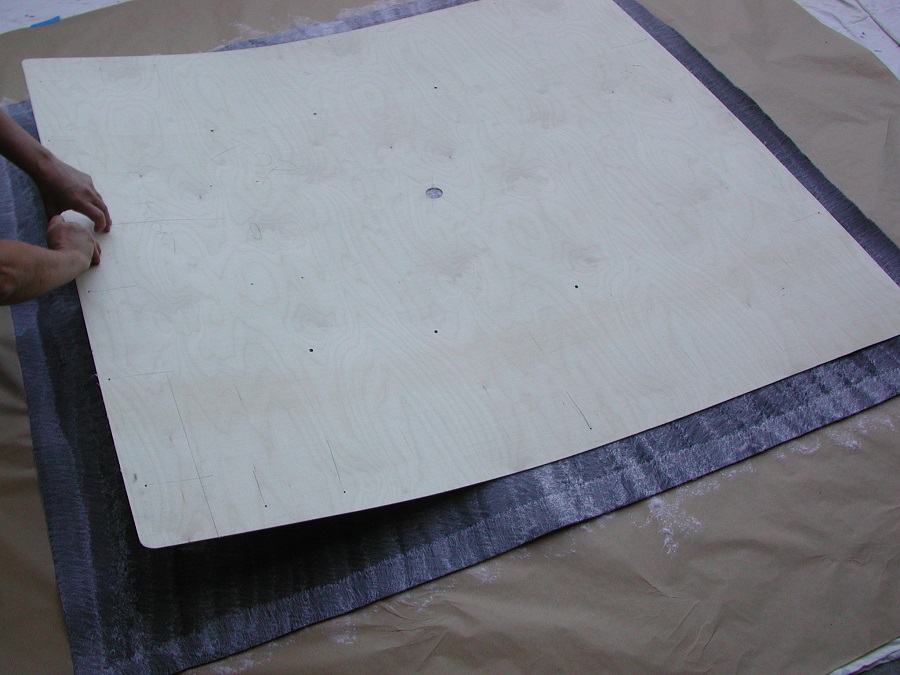
Using a veneer roller to get the pieces stuck together


Applying a 2" strip of contact adhesive to the perimeter of the wood and folding over the material. Note the mitered corners.


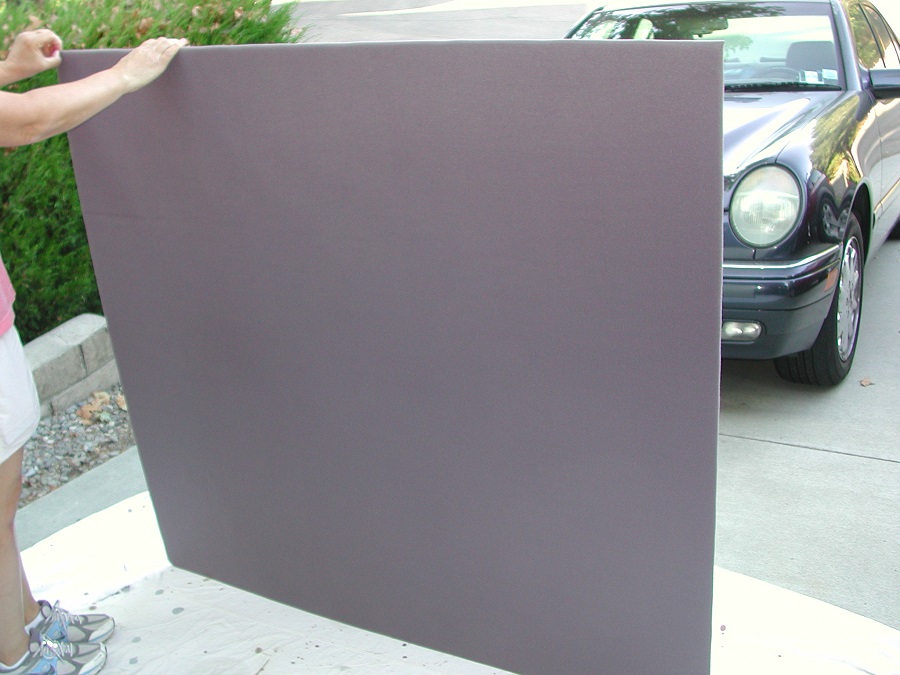
The finished product! (repeat steps above for second piece...)


I still need to poke holes in the fabric at various places and will attempt this with a leather punch.
__________________
2008 E350 RB passenger 4WD SMB penthouse
2013 KTM 350 EXC
2008 KTM 250 XCF-W
2003 Honda Element
boywonder is offline   Reply With Quote
Old 09-21-2013, 04:35 AM   #26
JWA
Senior Member
 
Join Date: Jan 2011
Location: Reynoldsburg, Ohio
Posts: 3,774
Send a message via Yahoo to JWA
Re: Popping my top

Very very nice job applying the headliner material!

I've seen that done differently but finished results don't always rely upon just one process.

Your PH is coming along nicely----that new van on your horizon yet?
JWA is offline   Reply With Quote
Old 09-21-2013, 07:58 AM   #27
Senior Member
 
boywonder's Avatar
 
Join Date: Jul 2013
Location: So Cal
Posts: 4,070
Re: Popping my top

Quote:
Originally Posted by JWA
Very very nice job applying the headliner material!

I've seen that done differently but finished results don't always rely upon just one process.

Your PH is coming along nicely----that new van on your horizon yet?

Thanks! What's the other process for making a headliner? Curious....

Still looking for a van......
__________________
2008 E350 RB passenger 4WD SMB penthouse
2013 KTM 350 EXC
2008 KTM 250 XCF-W
2003 Honda Element
boywonder is offline   Reply With Quote
Old 09-21-2013, 02:10 PM   #28
Site Team
 
BroncoHauler's Avatar
 
Join Date: May 2007
Location: Southern New Mexico
Posts: 10,179
Re: Popping my top

Quote:
Originally Posted by boywonder
Quote:
Originally Posted by JWA
Very very nice job applying the headliner material!

I've seen that done differently but finished results don't always rely upon just one process.

Your PH is coming along nicely----that new van on your horizon yet?

Thanks! What's the other process for making a headliner? Curious....

Still looking for a van......
You bought your pop-top before owning a van, please don't tell me you're going to make a headliner before buying a van?

We need to get you a van, and get you one soon. Can we help? What are you looking for?


Herb
__________________
SMB-less as of 02/04/2012. Our savings account is richer, but our adventures are poorer.
BroncoHauler is offline   Reply With Quote
Old 09-21-2013, 04:02 PM   #29
Senior Member
 
boywonder's Avatar
 
Join Date: Jul 2013
Location: So Cal
Posts: 4,070
Van-aholic

Quote:
Originally Posted by BroncoHauler
You bought your pop-top before owning a van, please don't tell me you're going to make a headliner before buying a van?

We need to get you a van, and get you one soon. Can we help? What are you looking for?

Herb
.....it's a slippery slope.......

"Hi everyone! My name is boywonder and I have a van problem......"

Headliner is mostly done....anybody know where I can get one of those joiner strips for the headliner that's a little thicker? The padded panels are a tight squeeze on the SMB one.

Just got the cro-mo tubes drilled for the crossbars....

Next up, mount the Yakima tracks and source some cool LEDs for the new headliner.

and (almost forgot) mount the solar panel

No real hurry on the van, I'll find one. I'm combing the countryside rather heavily for a 2WD 2009+ RB van in either red color, dark grey or possibly silver. Preferably a window van, although I'll entertain a cargo van if it has enough windows and power/cruise. I can't do white or black. If I was looking for a white van, I'd have a couple dozen in the driveway by now.

The only thing I can't do without having a van is paint the top.....soon enough.
__________________
2008 E350 RB passenger 4WD SMB penthouse
2013 KTM 350 EXC
2008 KTM 250 XCF-W
2003 Honda Element
boywonder is offline   Reply With Quote
Old 09-29-2013, 02:13 PM   #30
Senior Member
 
boywonder's Avatar
 
Join Date: Jul 2013
Location: So Cal
Posts: 4,070
Re: Popping my top

Continuing on.....

The crossbars were reinforced with 4130 cro-mo tubing. I picked up the tubing at my local metal supplier (Industrial Metal Supply (IMS) in Irvine.

The tubing is .750 OD x .065 wall by 54" long DOM (drawn over mandrel...ie seamless) chrome-moly.. 4 pieces with tax was right around $100 or so including cut charges. Full lengths are 20' (I needed 18' total) and are probably slightly cheaper but I paid the cut charges to make them easier to haul. Also, as a side note, mild steel DOM tubing the same size is about $30 for a 20' length.

The yield strengths for mild steel and cro-mo are roughly 40,000 psi and 70,000 psi respectively, so you get almost double the yield strength for 3X the cash.

Two (perhaps) interesting tidbits for this project:

I used a center drill to drill the pilot hole for the end hole, it keeps the bits from wandering in the drill press.

Once the new tubing was inserted in the crossbars I used a shoulder screw in the lower hole to fixture the inner tube to drill the pivot hole. A shoulder screw provides a tighter fit (more accuracy) than a vanilla 1/4-20 screw.

Instead of using a drill press and center drill, the other way would be to slide the new tubes into the crossbars and use the existing holes as your fixture.

Since a few of my existing crossbar holes were rather egged-out, I'm going to use 5/16" shoulder screws for the pivots and the fixed end of the crossbar. I'm also planning on improving the sliding bolt setup where the chain connects and will post pics when I get the new fasteners and spacers.

Center drill


Using a shoulder screw as a fixture to drill the pivot hole

__________________
2008 E350 RB passenger 4WD SMB penthouse
2013 KTM 350 EXC
2008 KTM 250 XCF-W
2003 Honda Element
boywonder is offline   Reply With Quote
Reply


Posting Rules
You may not post new threads
You may not post replies
You may not post attachments
You may not edit your posts

BB code is On
Smilies are On
[IMG] code is On
HTML code is Off
Trackbacks are Off
Pingbacks are Off
Refbacks are Off

» Featured Campgrounds

Reviews provided by

Powered by vBadvanced CMPS v3.2.3
Disclaimer:

This website is not affiliated with or endorsed by Sportsmobile SIP or any of its affiliates. This is an independent, unofficial site.


All times are GMT -6. The time now is 09:10 AM.


Powered by vBulletin® Version 3.8.8 Beta 4
Copyright ©2000 - 2024, vBulletin Solutions, Inc.