|
|
 03-18-2014, 09:24 AM
|
#51
|
|
Senior Member
Join Date: May 2007
Location: Washington - Ridgefield
Posts: 4,728
|
Re: Popping my top
Lookin' good Scott.
Hopefully I'll get to see the finished van (are they ever really finished?) someday.
Mike
__________________
Alaska to Key West, Labrador and more
Prostate cancer survivor. See Thread Prostate cancer and Sportsmobiles
2015 VW GTI 2020 Fiat 124 Spider
2012 E250 Hitop camper
|

|

|
|
03-18-2014, 09:35 AM
|
#52
|
|
Senior Member
Join Date: Nov 2012
Location: boise idaho
Posts: 2,625
|
Re: Popping my top
^^^ lol, nope. projects of this caliber are never really finished. just done enough to function 
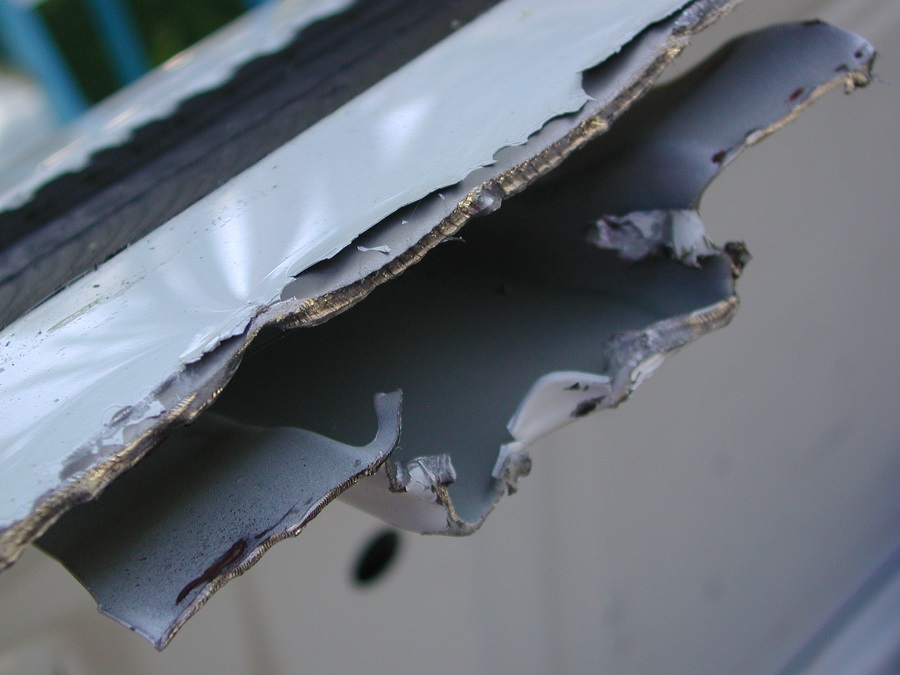
^^^ that photo still floors me to no end. it does look like they chewed through the metal, but not with anything as sharp as a chainsaw. how they can justify a cut like that on an install for what they charge for a top amazes me...hopefully that was a cut from a disgruntled employee on his last day.
the L brackets are a good idea. i try not to make square edge cuts unless i have to. i like to do a holesaw then cut from hole to hole so the cut has nice radiused edges when possible. i was told that a square edge cut is an easy place for a structual crack to start, so i try to avoid it when possible.
install looks nice man, well done!  when is the first trip planned??
i got my top seam sealed and everything on the roof (not the topper) painted with bedliner last weekend. hoping to get the canvas installed tomorrow and the bedframe fabbed up thursday or friday, then testing it out sat night for the first time with the poptop!
__________________
"understeer is when you hit the wall with the front of your car, oversteer is when you hit the wall with the rear of your car, horsepower is how hard your car hits the wall, and torque is how far your car moves the wall."
|
|
|
|
|
03-18-2014, 02:37 PM
|
#53
|
|
Senior Member
Join Date: Feb 2012
Posts: 879
|
Re: Popping my top
Just found this thread for the first time and read through. Great thread! I like all the improvements you made to the top/installation, and they are well illustrated. Very cool.
One note that came to mind as I read the part back when you were painting it, re: mold release wax. I think you were right on with your guess. Fiberglass boats use mold release wax during construction, and even after spending 30 years in the water, if it's not carefully removed it can cause a paint job to fail (always seems incredible that it can still be there, when if you wax your car wanting it to stay on, it does not last 6 months). Not usually to fish-eye (for that I always suspect the evil silicone), but to not stick.
On boats a product called "Interlux 202" is often used for prep. It's sort of a special/glorified acetone type product, and you use it by saturating a square of toweling, wiping over a small area, and then wiping it off with another fresh dry towel. Then you repeat for the whole thing but never re-using any piece of toweling (or you spread the contamination back on). Paper products are fine (you go through a lot of toweling!) What is special about the 202 (I'm no chemist so not describing it technically) is that it stays "wet" for a period of time, holding the wax in suspension, which is when you go back and swipe it off with the second/dry towel. Something like pure acetone just re-dries super quickly.
Anyway, just figured this might be useful to someone else in future (because with how useful this thread is, I'm sure many people are getting ideas from it for future use).
|
|
|
|
|
03-18-2014, 06:21 PM
|
#54
|
|
Senior Member
Join Date: Jul 2013
Location: So Cal
Posts: 4,071
|
Re: Popping my top
OK, a few more pics.......
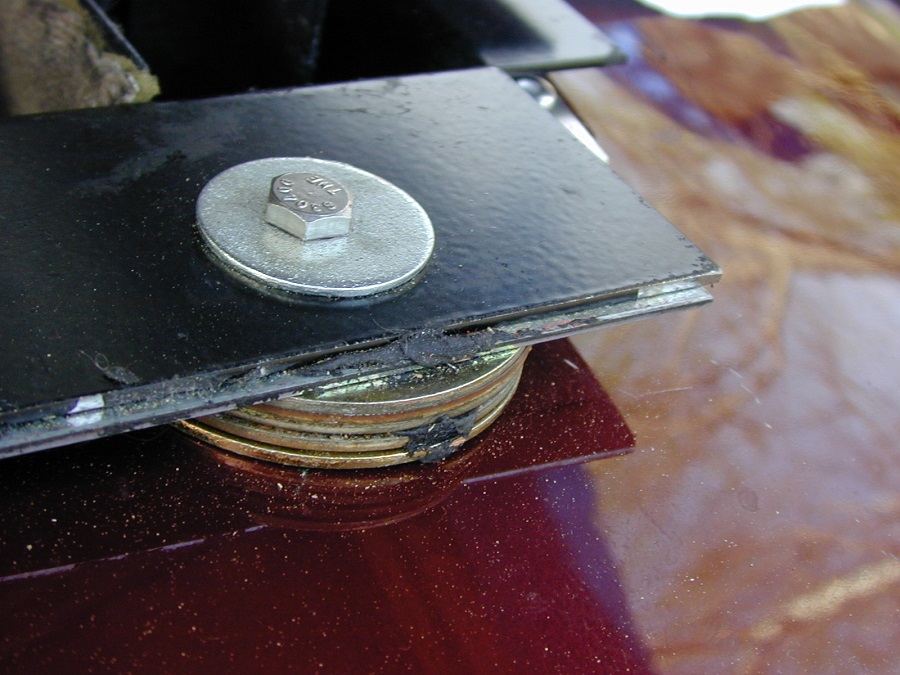
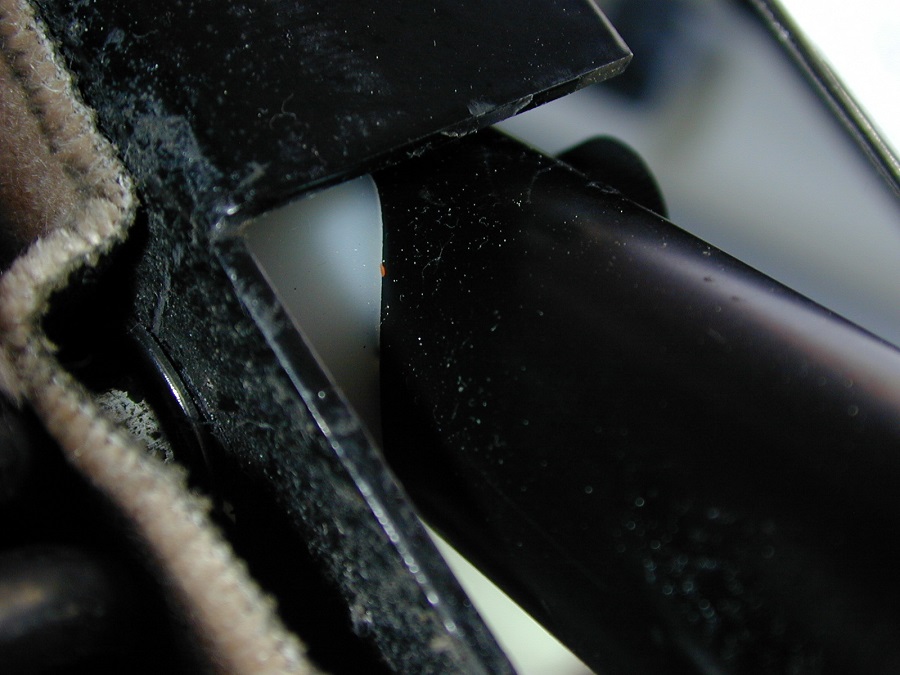
Here is the rear SMB PH cross member under the side rails at the rear corners. Since the cross member does not have any curvature (to follow the roof curvature) I put stacks of washers under each end. I don't think the donor van had this (can't remember) but without the spacers the van roof distorts quite a bit. Can anyone take a look at their setup and let me know if this cross member is bolted down without spacers on the ends?
The next pic shows the SMB nylon spacers and the ones that I replaced them with (again from McMaster-Carr)
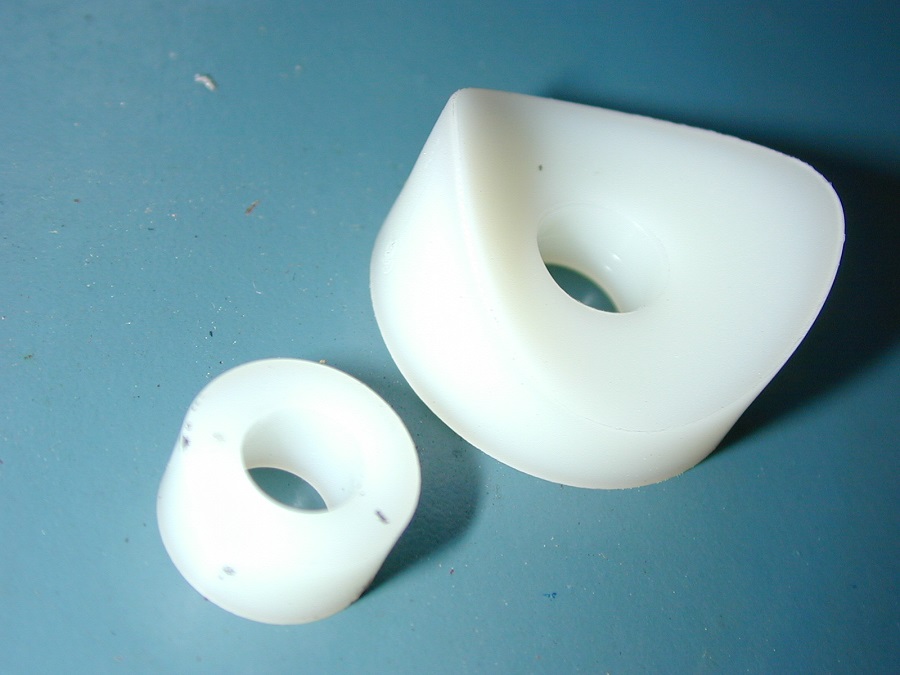
For the crossbar pivot, I drilled out the crossbar holes to 5/16" dia and used a 5/16" x 2 1/2" long shoulder screw and larger nylon tube spacer. The crossbars also have cro-mo tubing inserts for added strength.
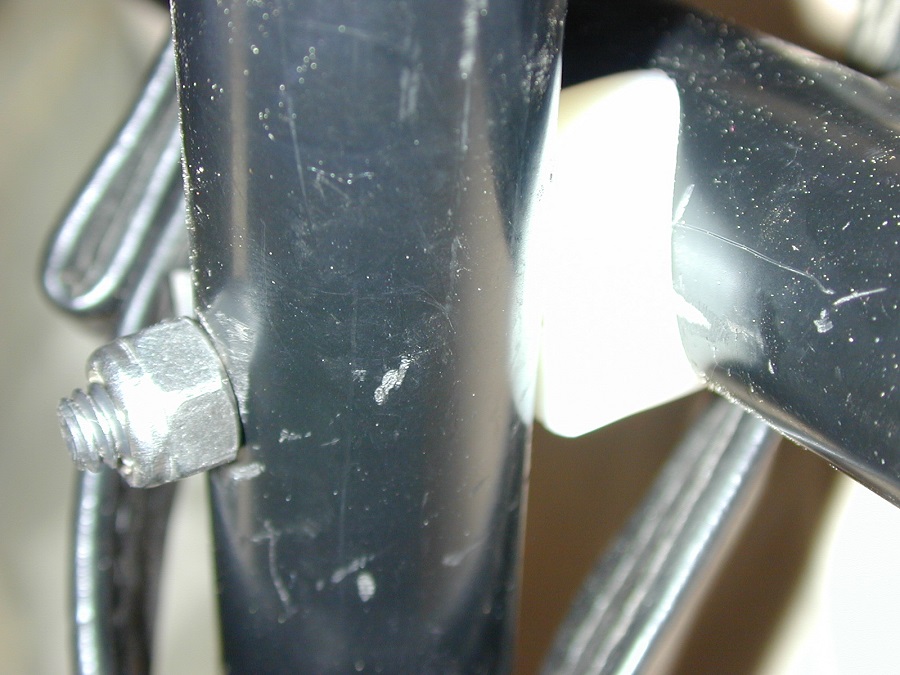
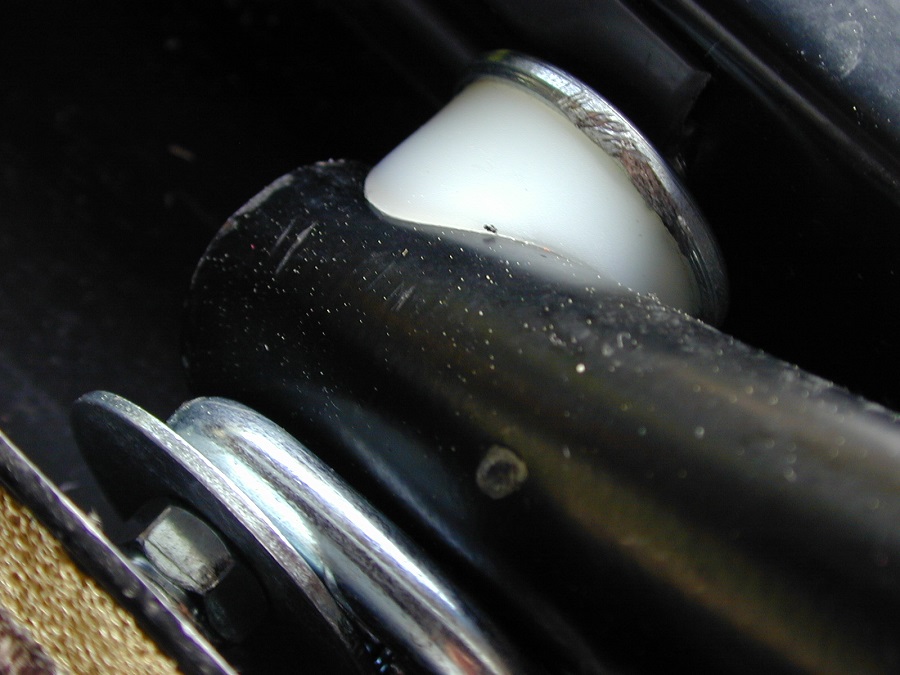
The next two pictures show the stock sliding end of the cross members and the modified version.
Here I used the stock screws and little roller thingies, just added a nylon tubing spacer to tighten/stiffen up the joint and ease the squeeze on the tubing. If I were designing this sliding joint from scratch, it would be a lot different.

The fixed pivot end of the crossbars were drilled out to 5/16" dia and 5/16" x 1 1/4" shoulder screws and new tubing spacers were fitted. The shoulder screw has tight-fitting washers on either side of the rail where it is clamped. This allows the shoulder screw to act as a true cantilevered pivot shaft without clamping the cross member tube.
__________________
2008 E350 RB passenger 4WD SMB penthouse
2013 KTM 350 EXC
2008 KTM 250 XCF-W
2003 Honda Element
|
|
|
|
|
03-19-2014, 07:54 AM
|
#55
|
|
Senior Member
Join Date: Jul 2013
Location: So Cal
Posts: 4,071
|
Re: Popping my top
Quote:
|
Originally Posted by Ford_6L_E350
Lookin' good Scott.
Hopefully I'll get to see the finished van (are they ever really finished?) someday.
Mike
|
Thanks Mike! This project is keeping me entertained.
__________________
2008 E350 RB passenger 4WD SMB penthouse
2013 KTM 350 EXC
2008 KTM 250 XCF-W
2003 Honda Element
|
|
|
|
|
03-19-2014, 11:57 AM
|
#56
|
|
Member
Join Date: Feb 2013
Posts: 40
|
Re: Popping my top
Quote:
|
Originally Posted by shenrie
^^^ that photo still floors me to no end. it does look like they chewed through the metal, but not with anything as sharp as a chainsaw. how they can justify a cut like that on an install for what they charge for a top amazes me...hopefully that was a cut from a disgruntled employee on his last day.
|
Do we know for sure SMB installed that top? I have a hard time believing a company with that much experience installing their own products could do just a poor job. Sure they don't expect the customer to see that, but I would think it would be difficult to do that bad of a job honestly, looks like a lot of effort and work to chew it up like that.
|
|
|
|
|
03-19-2014, 07:12 PM
|
#57
|
|
Senior Member
Join Date: Jul 2013
Location: So Cal
Posts: 4,071
|
Re: Popping my top
Quote:
|
Originally Posted by TheYeti
Do we know for sure SMB installed that top? I have a hard time believing a company with that much experience installing their own products could do just a poor job. Sure they don't expect the customer to see that, but I would think it would be difficult to do that bad of a job honestly, looks like a lot of effort and work to chew it up like that.
|
No, we don't. The donor van's owner said that he bought it from an elderly couple (with the PH already installed). It was a 2003 E150. I'm assuming that the PH is a 2003 but that's purely a guess.
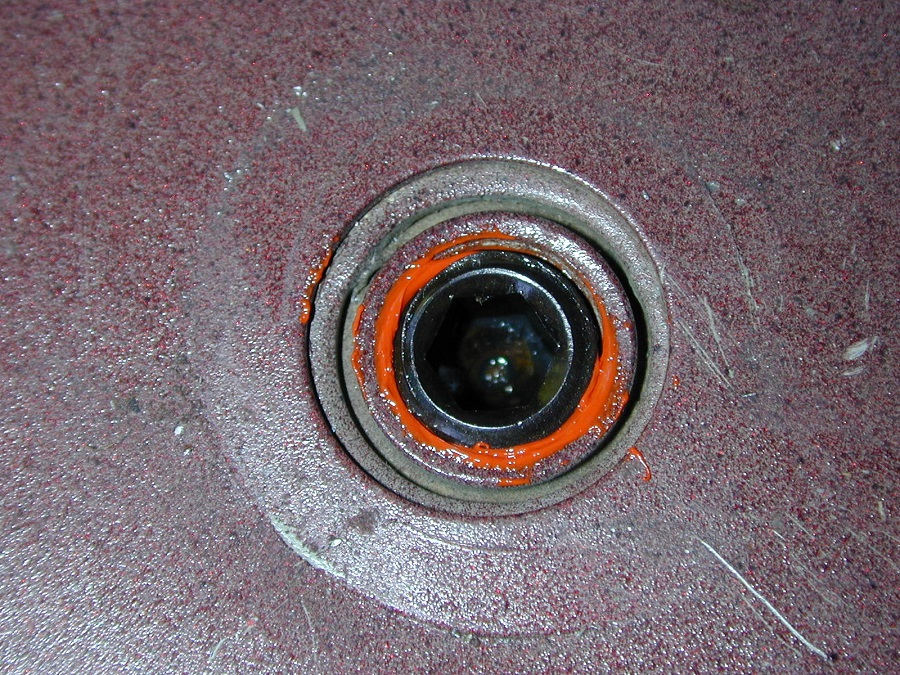
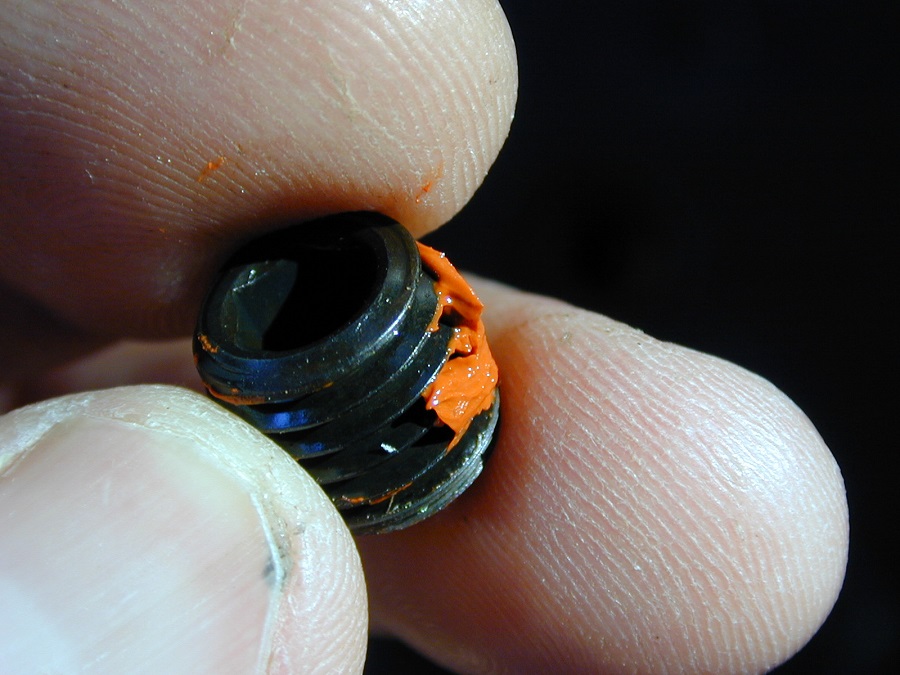
A few more things accomplished today.......I installed M12x1.75 x 12mm long set screws in the threaded floor holes where the seat brackets used to live (passenger van). The set screws were 14 cents each in qty 25 at my local fastener supply house. I applied RTV to the threads to seal them and hold them in place. I left a few threaded holes unplugged so that I can fasten down the new floor. The ones that got plugged are not accessible from under the van.
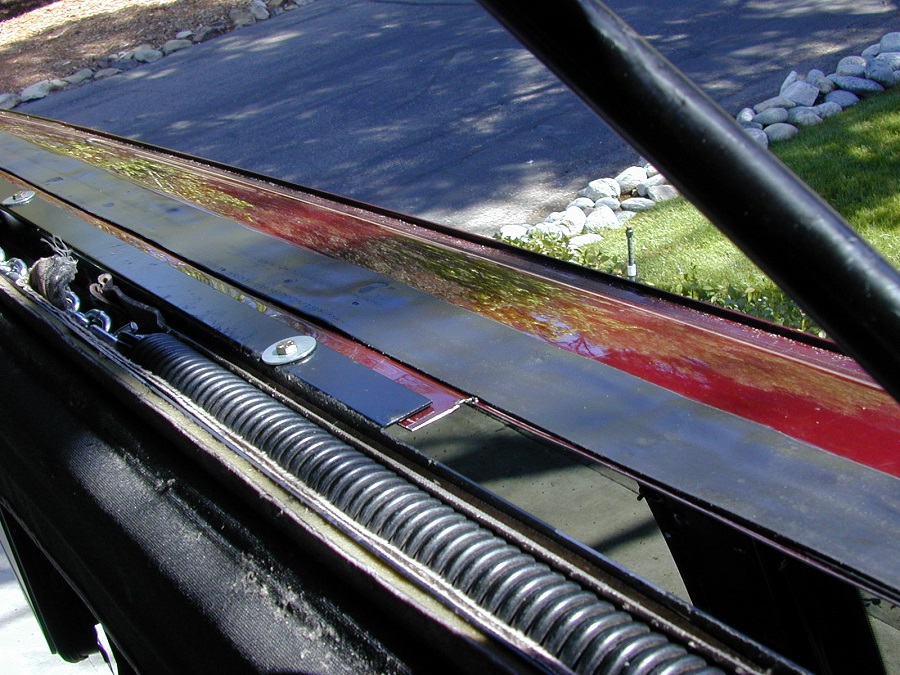
The canvas is now attached to the roof; we used 4 layers of 1/8" thick butyl tape on the sides since it lays in the roof channels and must be built up above the surface of the roof. Probably could have stopped at 3 layers now that we are done but it worked out fine. The toughest part was drilling holes in the very corners of the ply strips holding the canvas. There is about a 3/16" thick layer of butyl below the bulb seals on both sides. The layers were 2 1/2" wide strips top and bottom, with 2x 1 1/2" wide in the middle.
Here is all 4 layers of tape in the channel before the screwing began.
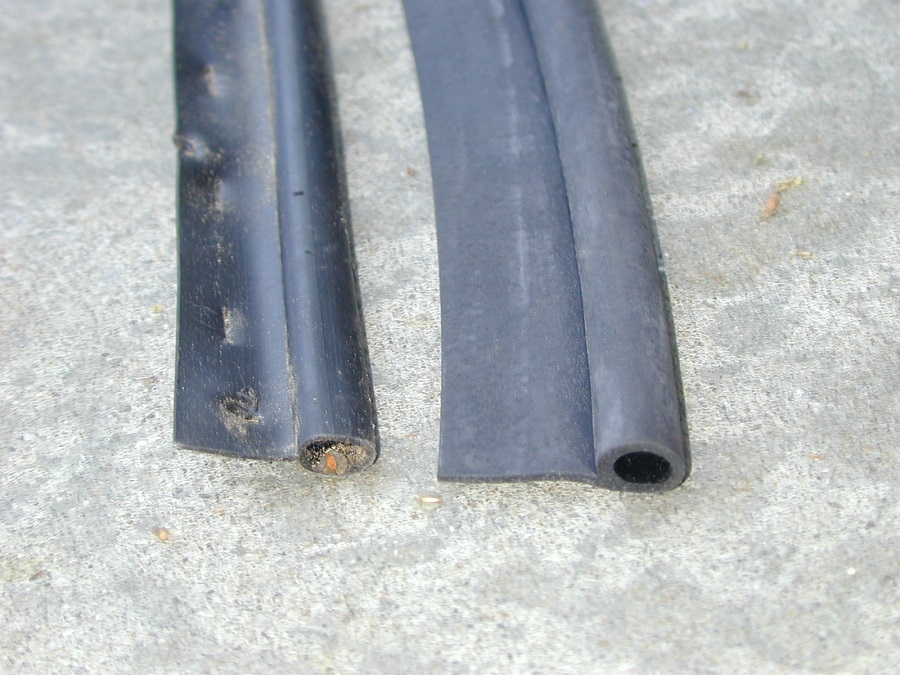
The SMB plastic bulb seals on the ends of the penthouse top were replaced with rubber (EPDM) bulb seals sourced from McMaster Carr.
And finally, we got the Avery UHA heavy plastic tape stuck to the roof to protect the paint when the PH is down.
__________________
2008 E350 RB passenger 4WD SMB penthouse
2013 KTM 350 EXC
2008 KTM 250 XCF-W
2003 Honda Element
|
|
|
|
|
03-19-2014, 08:24 PM
|
#58
|
|
Senior Member
Join Date: Jan 2009
Location: Boulder, CO.
Posts: 2,554
|
Re: Popping my top
Believe it....I wish I was there when my SMB installed top came off to take some pics, but the cuts and framing for the new CCV top were already in place by the time I went up. Derek said the cuts that were there were pretty rough with several large gouges going past the opening point at the corners. The other thing was that the metal channels that house the springs were attached to the roof's sheet metal only, not to the structural metal, it is pretty amazing what we are finding out through various top swaps right now, the workmanship, or lack thereof, of some of the work that SMB does that goes into our rigs....
__________________
'03 Ford E350 7.3L Diesel
(de)SMB'd Custom RB-50
Quigley 4X4 w/Deavers & Agile Offroad's R.I.P. package
CCV High Profile Pop Top
|
|
|
|
|
03-20-2014, 06:36 AM
|
#59
|
|
Senior Member
Join Date: Nov 2012
Location: boise idaho
Posts: 2,625
|
Re: Popping my top
Quote:
|
Originally Posted by TheYeti
Do we know for sure SMB installed that top?
|
as op stated, no. but i just happen to call derek at ccv when he was removing ref's top. we got to chatting about the pic that the op posted of the really bad cuts and he told me he has done a few retrofits from smb to his tops and saw similar bad cuts. i cant imagine they are all like that, but quality control appears to be lacking from some of the smb locations.
im sure others on here agree, especially the gents building thier own rigs, when i say that i would not allow a cut like that to go out of a shop i was running regardless of whether or not you could see it when the project was finished.
__________________
"understeer is when you hit the wall with the front of your car, oversteer is when you hit the wall with the rear of your car, horsepower is how hard your car hits the wall, and torque is how far your car moves the wall."
|
|
|
|
|
03-20-2014, 08:36 AM
|
#60
|
|
Senior Member
Join Date: Aug 2010
Location: Taylor, Mississippi
Posts: 1,648
|
Re: Popping my top
When we rebuilt the interior of my '95, ALL of the SMBWest cuts were like that or worse! I am not fully emotionally recovered from some of what they did 
I don't know what they look like in modern builds, but I would homebuild if at all possible.
__________________
'95 SMB E350 Quigley 7.3
https://www.taylorarts.com
... If you have to ask, you'll never understand...
"... torpedo'd, because we don't generally cotton to bullshit around here." -jage
"... do they ooch apart in the night?" -Dia
|
|
|
|
|
|
 Posting Rules
|
You may not post new threads
You may not post replies
You may not post attachments
You may not edit your posts
HTML code is Off
|
|
|
|
 » Recent Threads
 |
|
|
|
|
|
|
|
|
|
|
|
|
|
|
|
|
|
|
|
|
|
|
|
|
|
|
|
|
|
|
|
|
|


 watchtower, white whale, land yacht, big pig...


 Linear Mode