Journey with Confidence RV GPS App RV Trip Planner RV LIFE Campground Reviews RV Maintenance Take a Speed Test Free 7 Day Trial ×


Reply
 
Thread Tools Display Modes
 
Old 03-08-2017, 11:50 AM   #1
Senior Member
 
Join Date: Sep 2008
Posts: 147
V.A.N. (aka Decepticon) Rebuild Project

Hey all,

im just starting this tread to keep track of the mods and progress of the re-do of my van. Im still undecided if im going to keep it or get a new one, but these mods need to happen regardless if for me or the next owner, plus its only money and time, right?

Ill start with the photos I took years ago, with an empty shell, through the first few initial builds and tests, to what I have now. Then the teardown and rebuild. I hope this thread inspires someone or at least sparks discussions.

Rockman is offline   Reply With Quote
Old 03-08-2017, 11:57 AM   #2
Senior Member
 
Join Date: Sep 2008
Posts: 147
<2000 miles


Filling in the window cutouts with double layer reflectix type insulation and fill doors.


Roof insulation, before "pink" fiberglass


some insulation on the gaps of the floor. I suspect that it really only prevents some cold air flow.


Glued and screwed marine ply subfloor


Second build of the galley.. water tank near the door.


More finished galley with water tank level hose and instrument panel
Rockman is offline   Reply With Quote
Old 03-08-2017, 12:12 PM   #3
Senior Member
 
larrie's Avatar
 
Join Date: Apr 2011
Location: Oregon Ciry Oregon
Posts: 2,854
Always liked that color. Looking forward to reading about the changes you are making.
__________________
Larrie
Read detailed trip reports, see photos and videos on my travel blog, luinil.com.
Current van: 2002 Ford E350 extended body camper with Colorado Camper Van pop top and Agile Offroad 4WD conversion.
larrie is offline   Reply With Quote
Old 03-10-2017, 09:12 AM   #4
Senior Member
 
Join Date: Sep 2008
Posts: 147
That build lasted a few seasons, although I didnt really have a solid idea of the layout I wanted, I just started building.

After a couple iterations of that "layout" I went for a different approach, having a single wide bed on the passenger side and cabinets on the driver. I converted the hinges from a westy for the couch/bed.


[IMG]http://www.sportsmobileforum.com/forums/members/501-albums978-
picture34302.jpg[/IMG]

[IMG]http://www.sportsmobileforum.com/forums/members/501-albums978-
picture34300.jpg[/IMG]


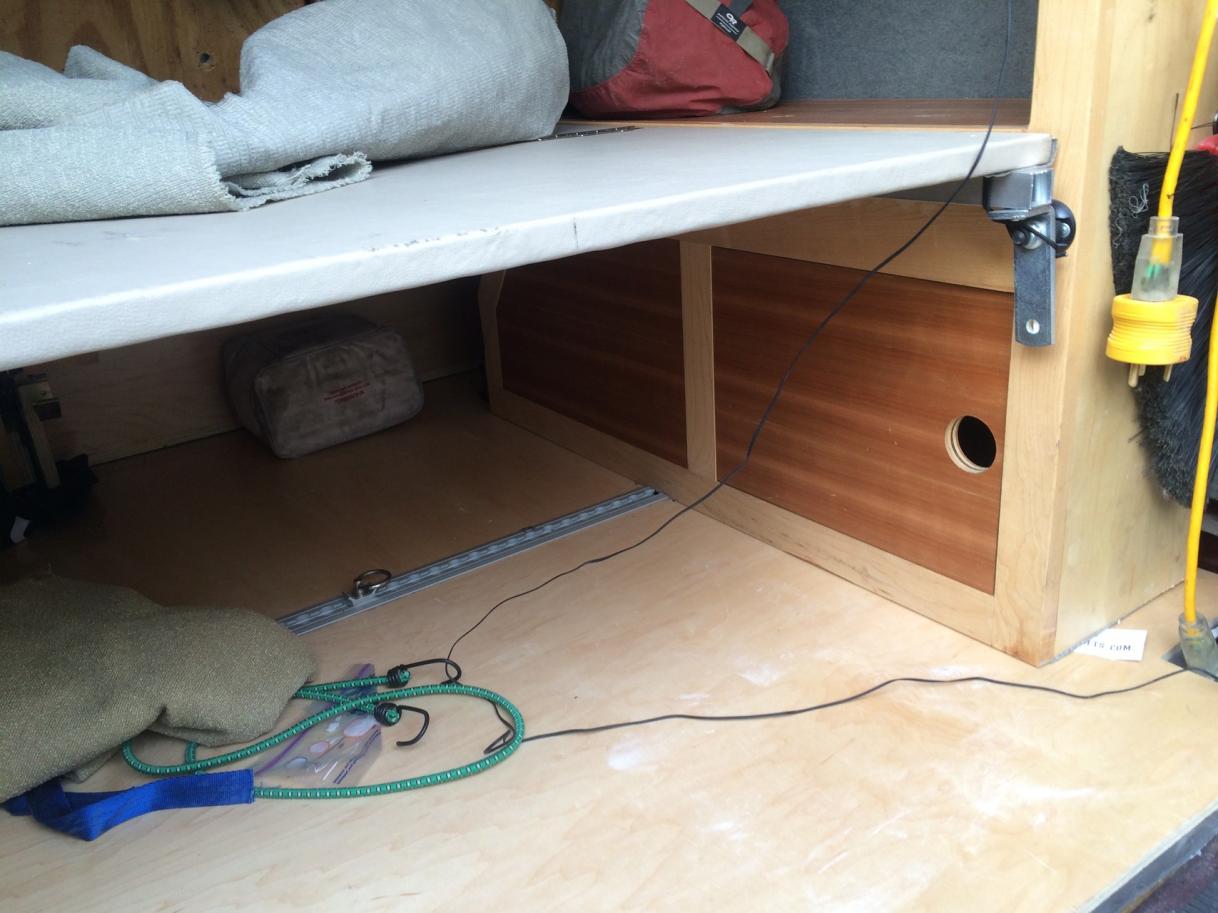
This layout allowed me to have a "singles" bed, and isle to get to the back area as well as ample room to get to the cabinets. As a note, they are sized to fit milk crates so I could just load up food etc in the house, and easily move them to and from the van.

I upholstered the couch with really nice foams ( I broke my back, yet it sleeps great )


I started the galley to hold a electric fridge, microwave, and Portable A/C. ( I vented it through the driver window for a season) It was very nice, and worked perfectly for that year.


After a divorce, and camping alone for years, I decided that I would need a "double" bed from now on. So I started playing with modifying the setup I had, by moving the couch toward the middle and filling the passenger gap for storage.


I ran square alum tube along the sides to support.


That setup worked, but I didnt want gaps in the foam, due to my back, so started looking for a more modular way to do the bed. I should not that I have a fairly firm idea that I should be able to remove the bed very fast and easily as I have always used the van to carry farm items (until recently) like Pumpkins, cut beetle kill ash wood, etc.


For the last few years, this has been the setup, which works really quite well. I spend at least 4 months a year in this setup, and have been finding the shortcomings of it. Namly, I need it easier to get to a few of the storage cabinets, since the foam bed is kinda in the way. I need easier way to get under the bed. As that stands now, the platform is really cool, and hinged in a way to pull up out of the way , have an exteded part for the bed length, and allow access to the underneath. It just needs to be tidied up a bit. And the main thing I need is a top, so I can stand up, did I mention I broke my back?


Rockman is offline   Reply With Quote
Old 03-12-2017, 11:58 AM   #5
Senior Member
 
arctictraveller's Avatar
 
Join Date: Mar 2013
Posts: 4,244
Wow, nice wood work. Where to from here?
__________________
Arctic Traveller
KC6TNI
2001 GTRV
Advanced 4wd
Agile Ride improvement package
arctictraveller is offline   Reply With Quote
Old 03-12-2017, 06:59 PM   #6
Senior Member
 
Join Date: Sep 2008
Posts: 147
Thanks,
thats a good question. First, im pulling everything out, floor and walls included. I want to redo the insulation using polyisocyanurate instead of the fiberglass pink that I have currently. And, build up the floor an inch or so for insulation there too.

New Bamboo flooring maybe, probably.
Fixed top.
Rewire the spaghetti wire mess that I have made over the years to do fixes and upgrades.
Build a galley that works.. my tester galley is ok, but design changes regarding the fridge has made a mess.
Better table situation for eating and socializing.
Better way to gain access to under the bed.
Maybe another battery installed on the rail
Maybe add another 100w solar panel.
Better curtains/reflectix for the front windsheild and side windows.
I just found a manual couch at a salvage yard that is perfect condition, and looking to install that maybe somehow.
Rockman is offline   Reply With Quote
Old 04-15-2017, 09:48 AM   #7
Senior Member
 
Join Date: Sep 2008
Posts: 147
Some more photos of the deconstruction . I had reflectix against the skin for about 10 years and it def showed some signs of moisture , mainly be delaminating. Luckily no rust at all.


Sent from my iPhone using Tapatalk
Rockman is offline   Reply With Quote
Old 05-10-2017, 06:25 PM   #8
Senior Member
 
Join Date: Sep 2008
Posts: 147
Got it down to the metal, then started with new insulation. Polyiso and great stuff pro.


Sent from my iPhone using Tapatalk
Rockman is offline   Reply With Quote
Old 05-10-2017, 06:28 PM   #9
Senior Member
 
Join Date: Sep 2008
Posts: 147

Last layer reflective side in.

With the walls I have, made of 5mm birch and auto carpet, this will have an inch or so most of the wall for an air barrier. The Polyiso is either 2 or 3 inches


Sent from my iPhone using Tapatalk
Rockman is offline   Reply With Quote
Old 05-16-2017, 06:19 PM   #10
Senior Member
 
Join Date: Sep 2008
Posts: 147


New bench set and fit testing cabinets.


Sent from my iPhone using Tapatalk
Rockman is offline   Reply With Quote
Reply


Posting Rules
You may not post new threads
You may not post replies
You may not post attachments
You may not edit your posts

BB code is On
Smilies are On
[IMG] code is On
HTML code is Off
Trackbacks are Off
Pingbacks are Off
Refbacks are Off

» Featured Campgrounds

Reviews provided by

Powered by vBadvanced CMPS v3.2.3
Disclaimer:

This website is not affiliated with or endorsed by Sportsmobile SIP or any of its affiliates. This is an independent, unofficial site.


All times are GMT -6. The time now is 11:15 PM.


Powered by vBulletin® Version 3.8.8 Beta 4
Copyright ©2000 - 2024, vBulletin Solutions, Inc.