Journey with Confidence RV GPS App RV Trip Planner RV LIFE Campground Reviews RV Maintenance Take a Speed Test Free 7 Day Trial ×


Reply
 
Thread Tools Display Modes
 
Old 09-25-2013, 01:53 PM   #1
Senior Member
 
Join Date: Jun 2013
Location: Seattle, WA
Posts: 286
6.0 PSD Coolant Filter Installation

To protect my new engine oil and EGR coolers, I installed a coolant filter on my van.

I bought a Dieselsite coolant filter kit in the "frame mount / van" configuration because it came with the ball valves and all the hose I could need.

Their instructions said to mount the filter adapter on the passenger side, but I put it on the driver's side because of a couple factors:
- The engine exhaust, van batteries, and my air compressor tank are occupying all the room on the pass. side.
- the source and destination of the filter feed lines are on the driver's side. I already don't like have SMB's added coolant lines running over the top of the fan, so I don't want more of that.

I picked a spot on the outboard side of the frame rail about a foot aft of the fuel conditioning thing. I assembled all the plumbing fittings on the filter adapter to make sure it would fit.
Using one factory hole that was the right size, I measured and drilled another hole to mount the filter adapter. A short drillbit really helps here.


Then, with the left CAC tube and Turbo Intake tube removed, I cut the hose that feeds the heater core right after it comes out of the water pump housing and installed the aluminum filter feed Tee. This is the same hose that the Dieselsite instructions want you to cut, just on the other side of the engine. I happen to have the fan removed in this picture, but you don't need to do that. In hindsight, I should have cut an inch off that hose to relax the bend a little.


I ran hose from that fitting to the input of my filter adapter. At the same time, I pulled the return hose but left it long. The hoses follow the fuel and brake lines down and under the driver's floorboard and along the inside of the frame. There's a nice opening right in front of the fuel conditioner where the hoses can go over the frame to the outboard side. I installed the hose ends on the filter adapter.

Then, with the CAC and Intake tubes back in, I installed the filter return Tee in the upper radiator-degas bottle line in a spot where the clamps won't chafe anything.


It's that easy. This took 2 hours max. Looking back, I could have done it in about an hour if I knew where to put it first. Add some time if you have to drain your coolant.
Attached Thumbnails
IMG_1894.JPG   IMG_1917.JPG   IMG_1921.JPG  

__________________
2006 E350 Diesel, SMB 4x4, RB50- "Hopper"- SOLD
BogusBlake is offline   Reply With Quote
Old 09-21-2015, 02:06 PM   #2
Member
 
AKSeeker's Avatar
 
Join Date: Sep 2015
Location: Soldotna, Alaska
Posts: 61
Re: 6.0 PSD Coolant Filter Installation

I was just getting ready to do this when I found your post with the great pictures, Thanks!
I like your location solution,.. My passenger side is pretty crowded already also.
__________________
'06 Ford 6.0 PSD E350 4x4 RB50 Customized SMB w/penthouse, Aluminess Bumpers & roof playpen. All Diesel & Electric: Espar Hydronic Heat, Wallas Catalytic Hot Plate Stove, VitriFrigo 12v Fridge, Dieselsite & Amsoil Filtration,.. and my other RV is a BMW R1200GS.
AKSeeker is offline   Reply With Quote
Old 11-01-2015, 07:15 PM   #3
Member
 
Join Date: May 2015
Posts: 34
Re: 6.0 PSD Coolant Filter Installation

Quote:
Originally Posted by AKSeeker
I was just getting ready to do this when I found your post with the great pictures, Thanks!
I like your location solution,.. My passenger side is pretty crowded already also.
I am looking at coolant filters now.

I am a little confused about this quote "Then, with the left CAC tube and Turbo Intake tube removed, I cut the hose that feeds the heater core right after it comes out of the water pump housing and installed the aluminum filter feed Tee. This is the same hose that the Dieselsite instructions want you to cut, just on the other side of the engine. I happen to have the fan removed in this picture, but you don't need to do that. In hindsight, I should have cut an inch off that hose to relax the bend a little." Did you install the T where the hose clamps are? What brand did you choose and why?

Thanks!
coolfeet is offline   Reply With Quote
Old 11-02-2015, 08:33 AM   #4
Senior Member
 
Join Date: Jul 2011
Location: Flagstaff, AZ
Posts: 2,001
Re: 6.0 PSD Coolant Filter Installation

I have the Dieselsite filter and am pretty happy with it. IPR also makes a nice one. http://www.iprresearch.com/IPR-High-Flo ... d-6.0.html
__________________
2005 E350 RB 6.0 PSD for extended fun
1989 Landcruiser FJ62 for local fun
2011 VW TDI Golf for hwy fun
JoeH is offline   Reply With Quote
Old 11-03-2015, 12:37 PM   #5
Senior Member
 
ShuttlePilot's Avatar
 
Join Date: Aug 2012
Posts: 633
Re: 6.0 PSD Coolant Filter Installation

I'm with you BogusBlake on the decision to add a coolant filter after all the labor in a new oil cooler and Bulletproof EGR Cooler. I did mine a few years ago similar to yours and a little different. I also went with a Dieselsite kit but I thought a lot on how to install because at the time I didn't know anyone who did one on a van.
My list of wants in the project were: 1) Not cut my new and expensive heater hoses after just getting rid of the SMB mess of a water heat exchanger. 2) Though the coolant system is a closed system it has a high and low pressure zone. I wanted without doubt to feed the filter from high pressure and return to low pressure in all conditions i.e. thermostat open/closed, heater flowing or not. 3) Remove and return flow to the system without disturbing the normal flow in the engine i.e. not cause a back pressure in the EGR or oil cooler. 4) Be able to visualize the flow or loss of flow returning from the filter in the degas bottle. 5) Provide a tap for a coolant pressure sender. The system I have so far has worked well and satisfied all these requirements.

I figured the block would be the safest high pressure zone to extract coolant. The block drain valve on the drivers side is a metric fitting so the challenge was how to make a hose barb. Found a fumoto F-108N oil valve would fit, it has a shoulder for the O ring to seal against the block and a barb for the hose. The shutoff is nice just encase I tear off the filter. I could close the valve and limp out.
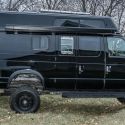
Shown driver side


Fomoto F108N I purchased from quickoildrainvalve.com


Filter mounted under driver door. Extra plug on filter block is handy to drain the system or add an air chuck to test pressurize system. I wish I could leave a shutoff on there but I would tear it off on the first trail.


Brass tee block for coolant pressure sending unit under the brake booster. I chose to return the filtered coolant to the radiator to degas bottle hose (rather than the other hose up there)because I didn't want to interfere with the EGR cooler to degas bottle flow. I can easily visualize the coolant flowing into the degas bottle even though the flow is divided between the bottle and the radiator. How much coolant flows through the filter? Gallons per hour or time until a full exchange of all coolant? Dunno. With a new filter the stream in the degas bottle is the size of the i.d. of the barb and gently washes the inside of the bottle at idle, more on high idle. Over time that has to add up.


The large clamp is just strapping it down for vibration.


The coolant pressure shown on the gauge display. A year or so later I was able to detect my coolant cap was failing with this set up. Make sure you always have a spare cap and buy one you trust. Perhaps another topic entirely.

Perhaps I greatly over engineered this coolant filter thing. If I can be of assistance please ask.
Thank you BogusBlake for the topic.

-Eric
2005 E350, 6.0PSD, 4x4, SMB
__________________
2005 SMB RB 4x4 6.0 PSD
A rocket on the pad is safe,
but it's not what rockets are built for.
ShuttlePilot is offline   Reply With Quote
Reply

Thread Tools
Display Modes

Posting Rules
You may not post new threads
You may not post replies
You may not post attachments
You may not edit your posts

BB code is On
Smilies are On
[IMG] code is On
HTML code is Off
Trackbacks are Off
Pingbacks are Off
Refbacks are Off

» Featured Campgrounds

Reviews provided by

Powered by vBadvanced CMPS v3.2.3
Disclaimer:

This website is not affiliated with or endorsed by Sportsmobile SIP or any of its affiliates. This is an independent, unofficial site.


All times are GMT -6. The time now is 12:04 AM.


Powered by vBulletin® Version 3.8.8 Beta 4
Copyright ©2000 - 2024, vBulletin Solutions, Inc.