Having had early roof leak, my ceiling panels were showing some water damage, so I wanted to repair that anyway. Also, I had previously sprayed my roof with lizard skin. At the time, I wanted to go with white, but the material showed up and was black. I was already committed to the time slot to get it done, so I just used the black instead of returning for the white that I ordered. MY van is dark blue, so I was looking to use white for reflection. Since then I had purchased some T nuts from Kelly (Gooseberry) I while back and wanted to install them.
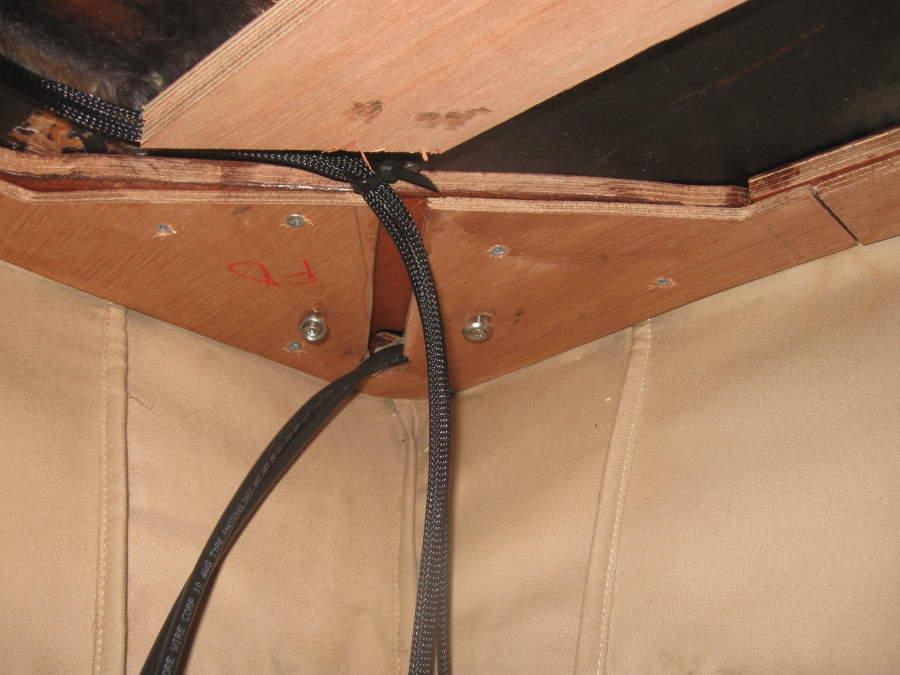
The first part of the job was to remove all the hardware. This was not a difficult job, but the wife gave me one of those looks when she came out and the penthouse walls were all down. Not a lot to see, a very thin layer of bubble wrap, and of course you can see how the roof bars are held or not held in place. All in all it was a good start to the project.
Next up, I wanted to re-coat the roof, I was looking at the various options and chose Monstaliner because I could roll it on (My compressor had recently gone out) and they had color options, I went with gray. The installation was normal except that I used more material going over the Lizard skin then I anticipated, and it was hell on the roller. Needless to say I did not have enough for a full second coat, so I had to send for more and taking another day to finish the top. All in all I liked the results.
Now I was moving to the next stage, first I had the T nuts from Kelly.
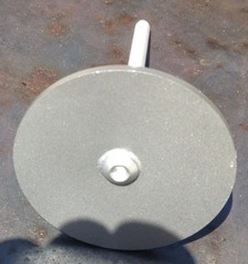
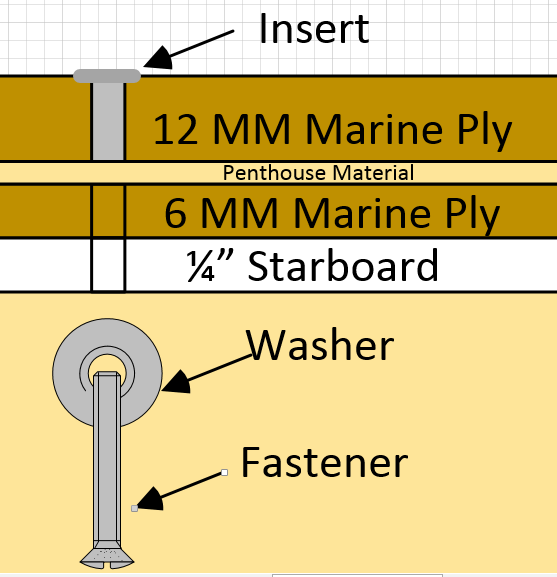
This is a one piece bolt and washer welded together. , the second part of my plan was to use a washer on the underside of the penthouse, this would give me the penthouse sandwiched between two washers and butyl rubber.
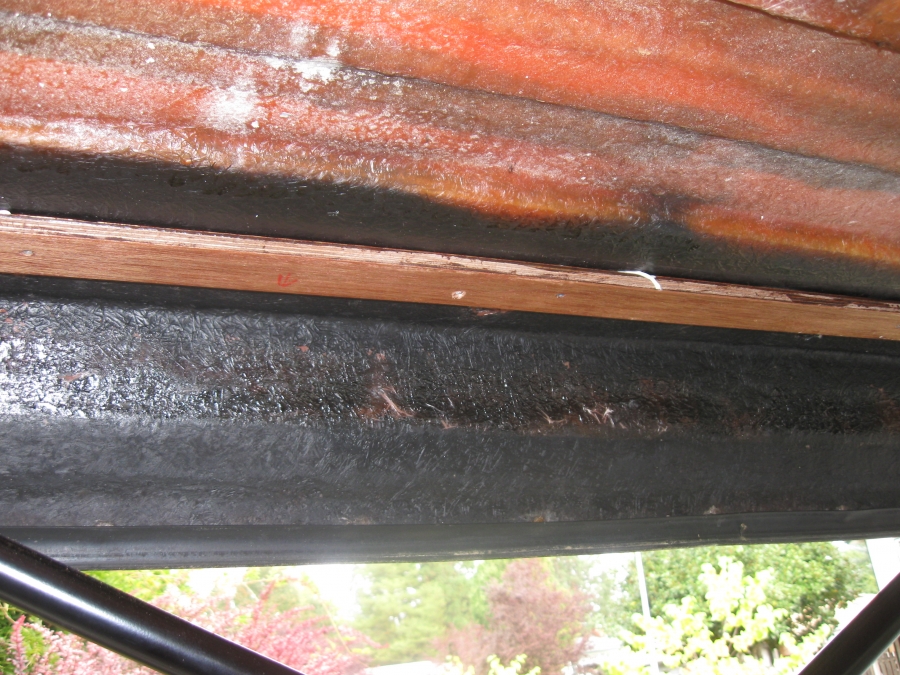
The next part of the redesign was to purchase some Marine plywood, I got a sheet ½ 4x8 and ¼ 4x8 at a local plywood shop. I was going basically use the ½ plywood as firing strips for the new roof panels.
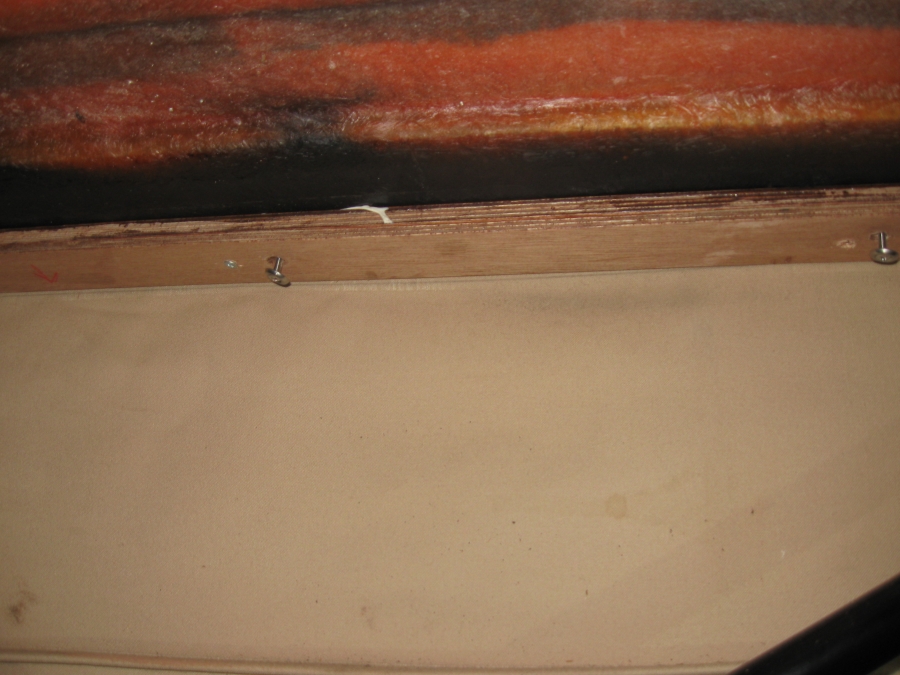
I would screw and glue the plywood to the penthouse and then attach the roof panels to it. A couple of key areas were the corners that always wanted to pull out on the original design. I decide to use inserts instead wood screws for installing the panels. This was a little more difficult as far as getting everything aligned, but I think worth it in the end. At the time that a cut the ½ inch plywood, I also cut matching (almost) pieces of the ¼ in plywood, these would be used later to hold up the penthouse material. I had laid out the holes for the inserts using the old material as templates, this also enabled me to align them to the roof as the previous roof panels were. One they were glued and screwed to the penthouse, I was able to look at putting up the penthouse material. I always thought that it would be a pain putting in a big panel, and trying to hold the material up at the same time. I used my ¼ inch strips instead, they had hold drilled out for inserts, I just took my time making sure that the material was secure to the firing strip, and a hole was made for the panel inserts.
½ Marine Plywood Strip
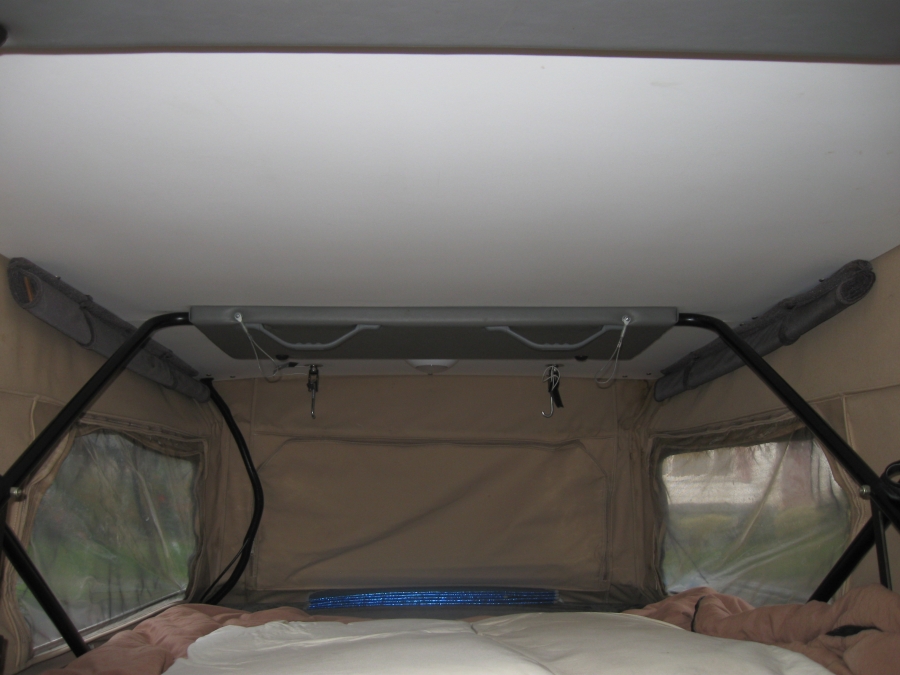
Penthouse walls attached
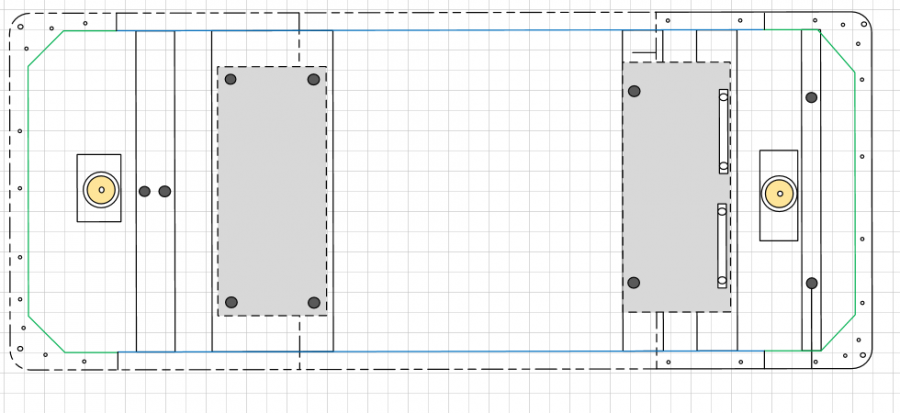
For the replacement panels I used ¼ in King Starboard material, I purchased these at my local Tap Plastic store, they had it in stock, and cut it pretty much to size. One of the advantages of using the king starboard was that it comes in width of 54 inches, with the existing panels being 53 inches wide, this would give me some flexibility in making sure that the seam could end up under the penthouse bow bracket. My starboard panels were cut about a quarter inch less than the fir strips installed earlier.
Wide Corner Area Securely Attached to the Penthouse Roof
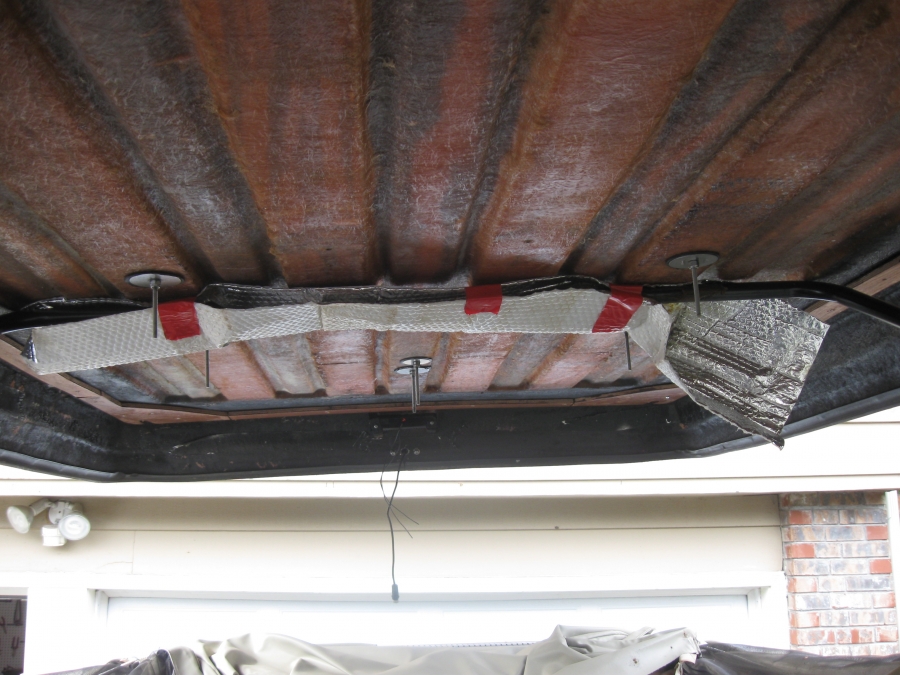
I had lined everything up previously when I was drilling for the inserts on the ½ material, before installing I went up one drill bit size to give myself a little wiggle room on the panel install. Now was time to install some additional firing strips, everywhere a bolt came through I wanted to make sure that I had a panel built up. These were installed opposite of the outside firing strips, I first put up the ¼ material with a whole large enough for the washer, this would allow ½ in material to sit flush over the washer, The hole for the bolt was be enough to get a socket on the bolt, again these were glued and screwed into the penthouse roof.
Looking towards the back
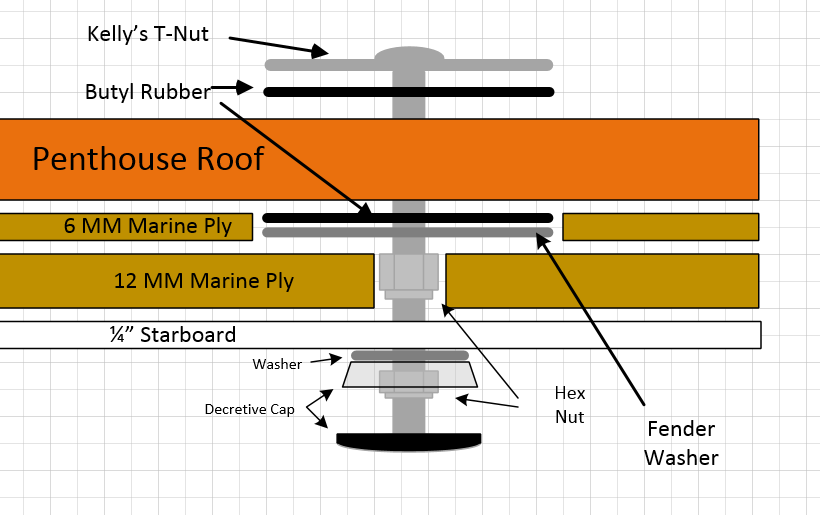
Room for the washer and butyl
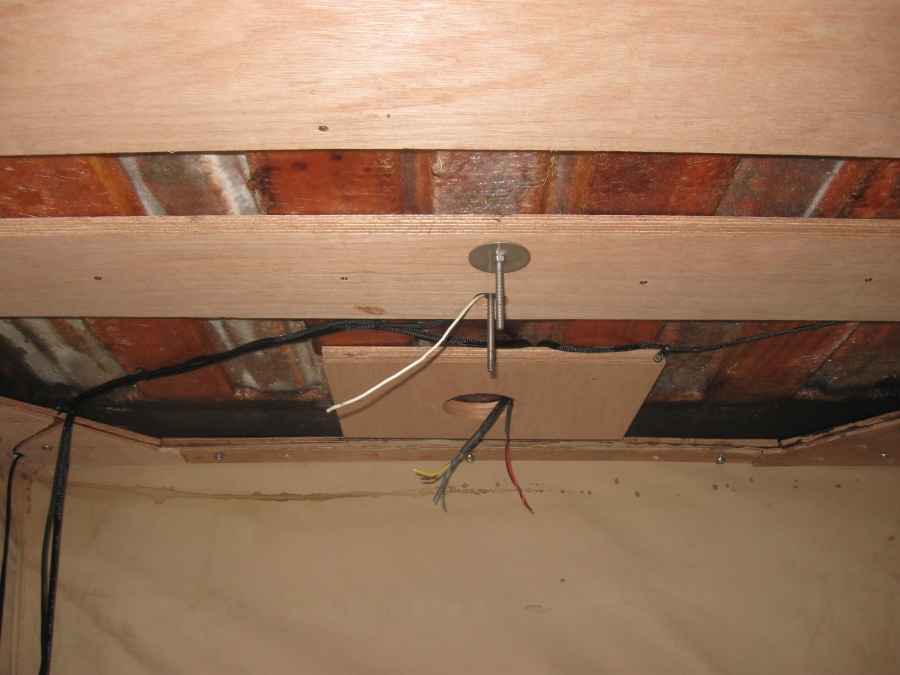
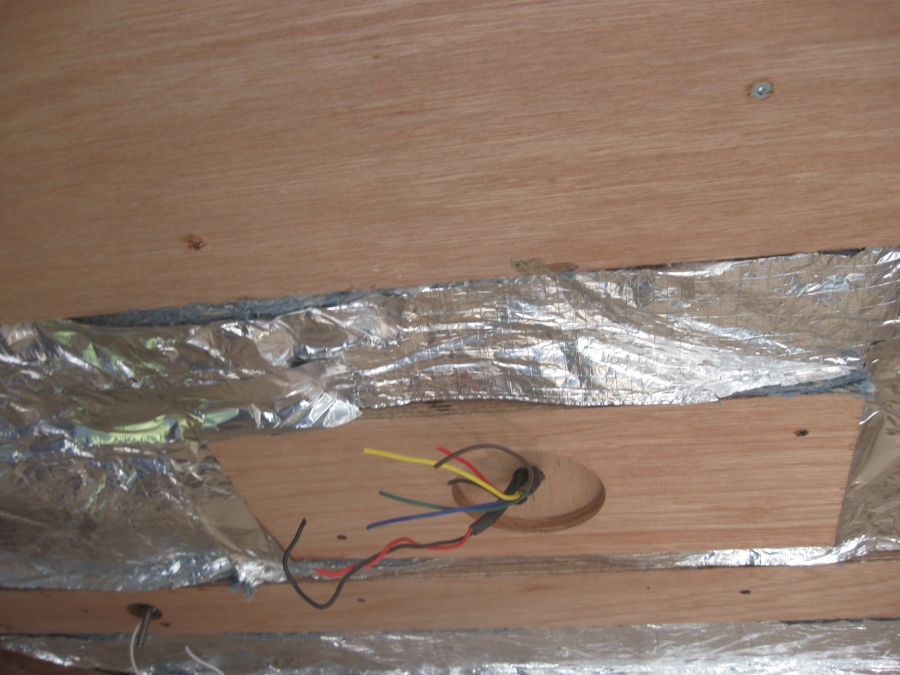
It is much easier screwing into the top, when you can see where it is going. Since I was wide open I now installed some wires for the ceiling lights, and my penthouse latch detection circuit. Since I was installing new LED lights and I tossed the lamp cord that SMB uses when going up to the penthouse roof. I can only imagine it has to do with flexibility and most likely some RIVA standard. Iran new wires, I also ran some extra wires for a future mod that I might do.
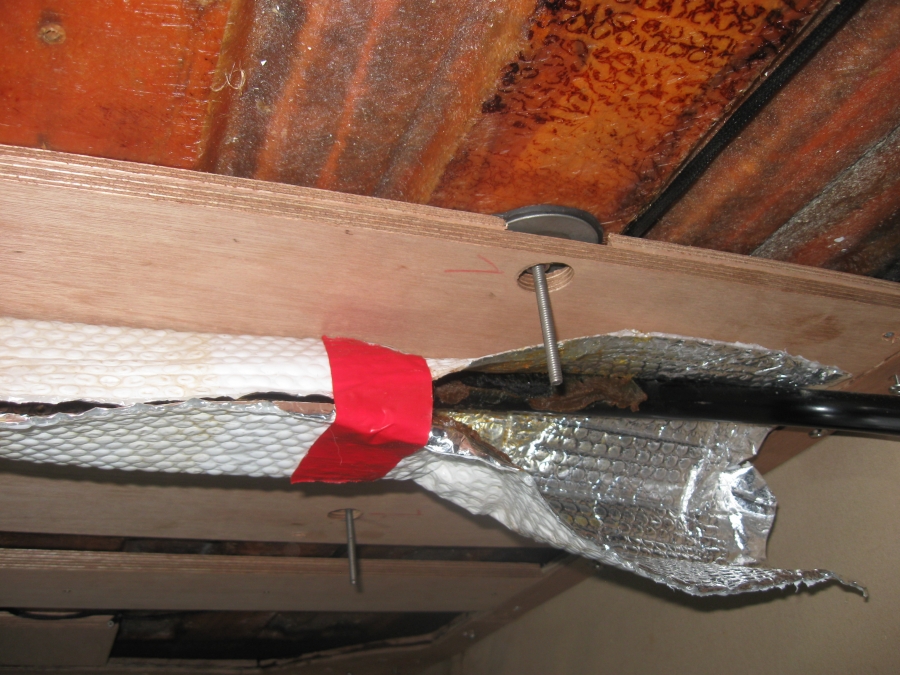
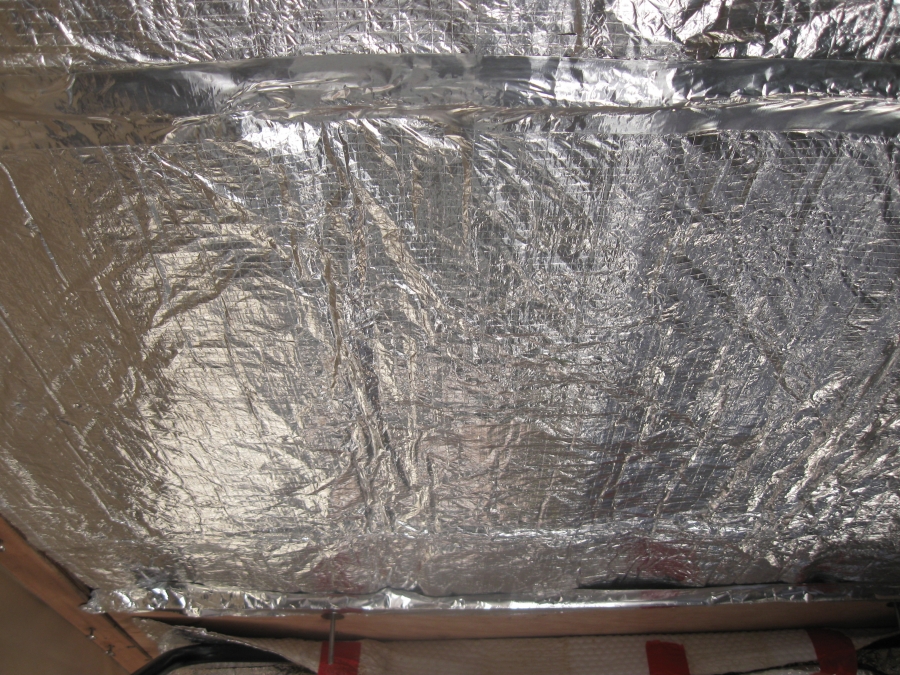
I had a lot of gaps between the strips, here I purchased an E350 roof insulation kit from Quiteride solutions .The insulation was pretty simple, the material cut pretty easy with scissors, and I had some left over.
Now it was time to install the panels. Using lengths of 4x4s I was able to block up the roof and give myself enough room to wrangle each panel in. The toughest panel for me was the middle, as it was the longest. Once I had all three panels up I used finishing washers to help attach to the plywood firing strips.
Starboard attached
Looking towards the back
Looking towards the front
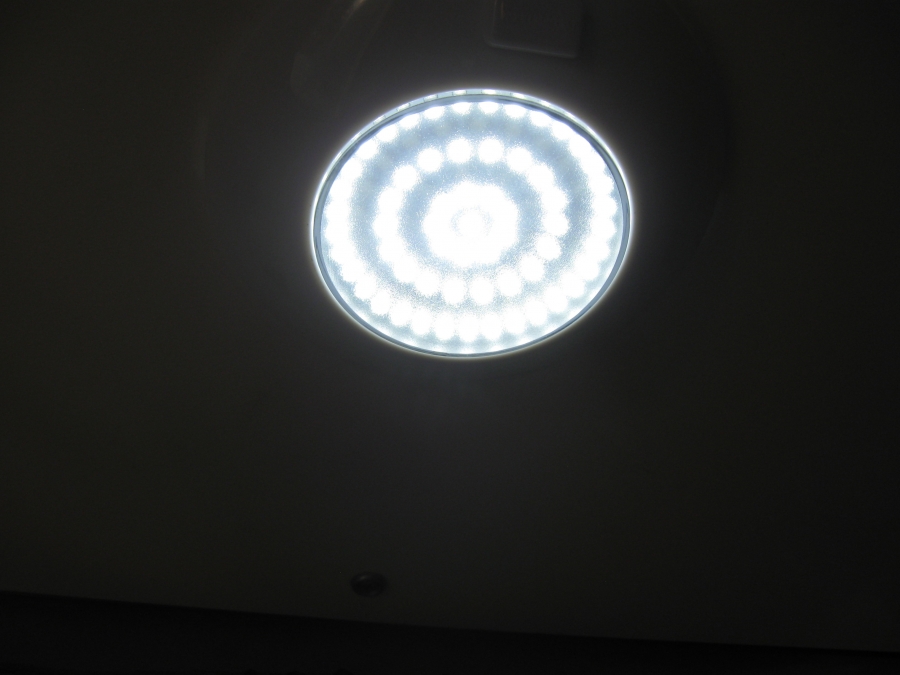
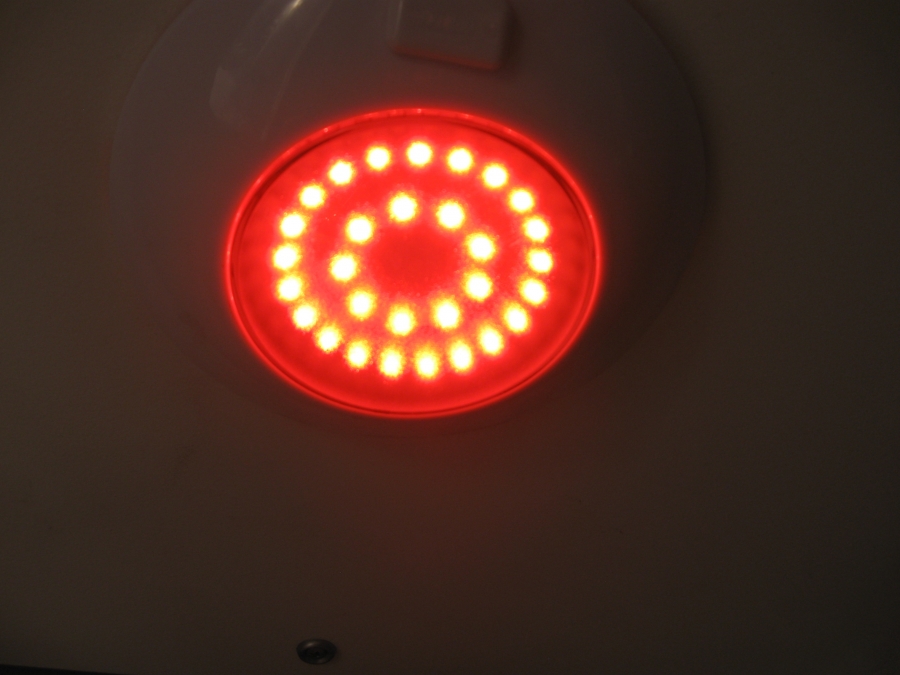
I also replaced the florescent lights with some LED lights from
https://www.superbrightleds.com/
5.6" Round Dome Light LED Fixture with 3 Position Switch Product Code: TDLS-RW91
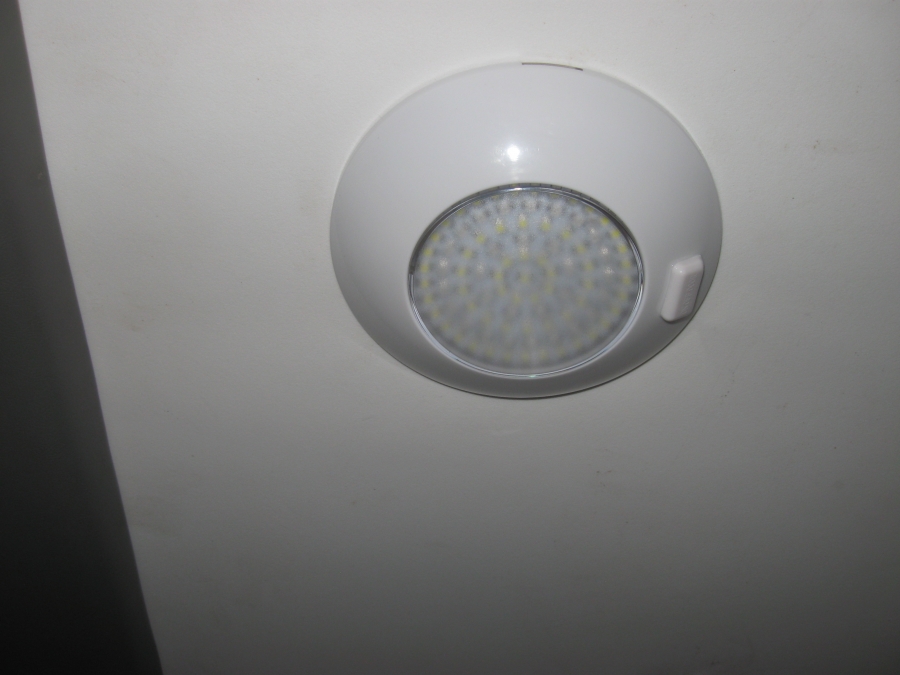
While one of these is not a bright as the florescent it replaced, I always found those a little two bright, and think this is just about right. One of the extras of this light, is that it has both normal and red light mode.
And finally a picture of the outside top.
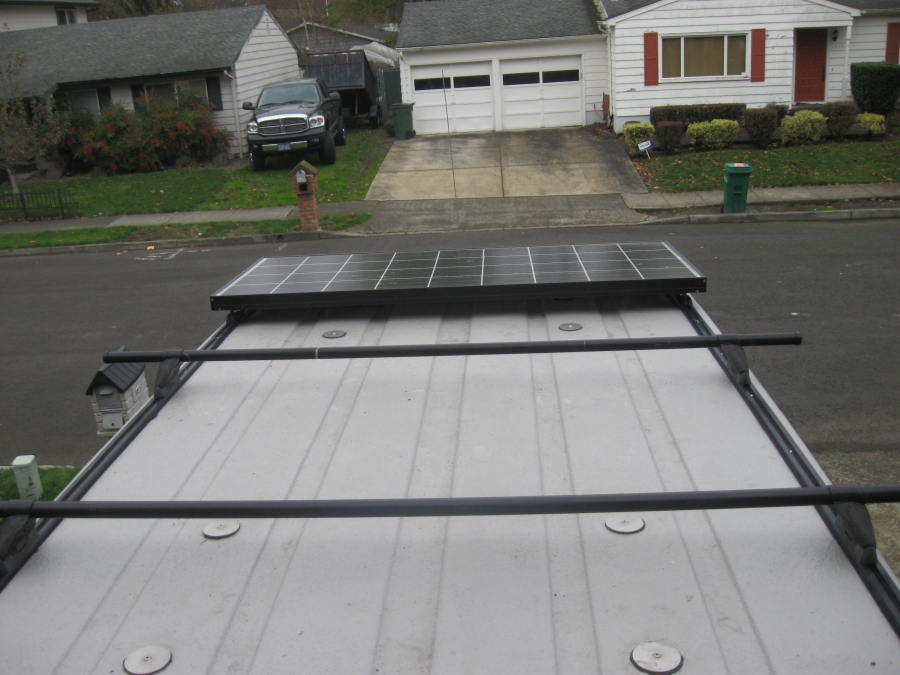
All in all I am happy with the way this turned out, I was worried about losing my storage of the RV supper bag & pillows between the roof and bed. But everything fits as it did before.


 Jiminy
 Sportsmobile (AKA Money Pit)
 Linear Mode