The YURT is fixed!
Took the SMB into the shop this morning and our shop supervisor and I made the repair to the busted weld and replaced both cross bar pins. In full disclosure, I helped with the pins and gave Dave, our shop supervisor, moral support while he did the critical work of welding the tube to the brackets.
Here are a couple of pictures of the passenger side lift bar where the weld broke.


A picture of the drivers side. Not broken, but we reinforced the welds between the tube and brackets and the backside between the tube and the brackets.

The drives and connections were all good so we were able to raise the top electrically, with a little manual help on the passenger side, until the cross bars were doing all the work. We then supported the top with 2 x 4s on both sides of the SMB. We removed the pins from the cross bars which released the brackets and lift tube. Of course, the passenger side lift tube was already free from the pins due to the busted weld.
We were able to pull the drivers side pin fairly easily by using a little muscle to make sure the cross bars had the tension taken off. The passenger side pin was bent so it took a little more work, but not bad.
Here are both lift tubes removed. The weld doesnt look too bad on the good one, but we added additional weld all the way around the tube/bracket interface and reinforced it. The lift tube on the left, from the passenger side, was slightly bent so it needed to be straightened. You want to make sure the lift tubes do not bind in the larger tube. They should fit loose enough that they slide easily within the larger, outer tube. The passenger side inner tube was sticking, due to it being bent, and Im sure that contributed to the weld fatigue over time.


Dave welding one of the tubes to the brackets.

Here are the two pins that came out of the cross bars and one of the new pins. The one on the right with the dog leg came out of the passenger side cross bar. Not sure if the pin was that badly bent prior to the lift tube weld breaking or the result of it breaking. I only had the top up once since it broke, so Im assuming the pin was previously bent, at least some. The drivers side pin doesnt look too bad. The pins are 5/16 x 3 with a cotter pin hole on one end and a flat head on the other.

When putting the new pins through the cross bars and brackets, you had to pull the bars a little to get the proper alignment. Small taps on the hammer helped get the pins all the way in.
This is the passenger side finished.

The drivers side finished.

The repair took about 2 hours from the time I pulled into the shop to the time I backed the SMB out. No real issues. It was pretty straight forward. The hardest part was getting the bent pin out of the passenger side cross bars. The welding was outside of my expertise so the repair couldnt have happened without a welder who knew what he was doing.
Here are some pictures of the connections down in the rails of the lift mechanism. This first one is the connection from the drive shaft to the rail assembly and the rear cross bar attachment. The drive is attached to the rail by a pin and cotter pin. The cross bar is attached to the rail with a bolt. You can see the arrangement of the nut and washers.

This is the attachment point of the lift tube to the rail. The pin is welded to the sides of the rail.
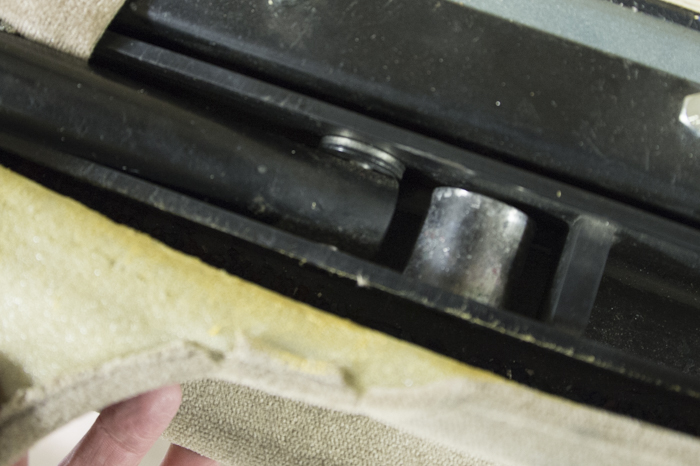
This is the attachment point of the spring to the rail. Also a bolt with nut and washers.

All the connections appeared to be good so I didnt replace any of the hardware.
Thank you Floyd (moorefc) for the initial help and phone call.
I was worried I had a major repair on my hands, but it turned out not so bad after all.
Mike


 The YURT


 Sportsmobile (AKA Money Pit)

 Linear Mode