Well if you're looking for the first installment you'll be sadly disappointed. This is just the middle of rectifying my separate "twin" 4Ds. To review, I purchased an ATV jack and removed the single Lifeline from under the van, bought some angle iron, cut and welded it up. That brings us to today, where I marked for attachment holes and removed the second 4D from inside the van.
Ohh, I wonder what these are.
The new rack being fit. The yellow was to mark the holes for drilling.


Art shot. Hey, I think I'll enter the
PHOTO CONTEST since it ends tomorrow.

The rack pre-paint.


Oh- THAT was in the package. The cardboard tubes are shipping material, just left on to keep me from doing something stupid.

The other chore was to remove the second battery from where SMB Texas added it.
Sealed inside in a battery box.

Wiring. Obviously, let's just go a** wild and use the WHOLE storage space.


Top removed from the battery box. That looks an awful lot like a DEKA and not like the matching Lifeline that I thought I was buying. Also, the Xantrex panel keeps telling me I don't have a temperature sensor installed. That yellow thing under the Aluminum tape is the wrong model for my inverter and my guess is installed incorrectly (it's supposed to be on the battery post).

Of note, the battery box was "sealed" all around with bits of wood and silicone- the silicone came away from the box plastic like nothing- it was the perfect mold, not sticky or attached in any way... problem being, if it wasn't sticky, it wasn't sealed. All the bits came off like this- they were just resting in the slots.

I have a new project to deal with those wires now as part of reclaiming my storage, however, apart from dealing with the terminal battery wires nothing here affects the battery project. I'd intended to just leave the battery wires, but I might salvage them for the underneath connection, even though the terminals don't match.

Can't complain about the panel being removable. While I need it for the bed, it's nice to know that if I ever need to work here in the future there is already a cut piece that gives pretty good access.
Lastly, the battery that was removed in the non-existant Part I. This POS has been disconnected for nearly 6 months as triage for the ongoing battery problems. I've got nothing against Lifeline, but I'm convinced that SMB Texas never tested it and it was bad when they installed the other one. C'est la vie.


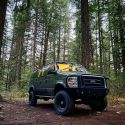
 Sportsmobile (AKA Money Pit)
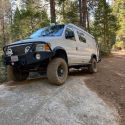
 good question. Open the pod bay doors HAL....I'm sorry Dave....
 Linear Mode