Last summer my Solara solar panels stop working. After only 3 years of use. I know many of you out there have had similar results. These panel cost over $800 each back in 2008 and now they are about $100 more if you can find them.


Not wanting to take a chance on the same panels again, I found a different flat and walkable panel called Solibian Flex. This is an Italian made product and just started to be sold here in the States last year. These panels are no less expensive then the Solara panels but you get more out-put for the same money. I chose the CP 125 Flex w/peel and stick backs and with the electrical terminals coming out of the bottom of the panel so there are no wires on the roof. These panels are slightly thicker then a credit card and they are very flexible.
Here is a link to a west coast distributor;
http://www.armorsol.com/
I got mine from;
http://www.bruceschwab.com/solar-power-solutions.htm
The challenge (after coming up with the money) was how to install them. They take up about a third of the roof and cover 6 of the Penthouse mounting points. Some of you know that I made some low profile T-nuts for my top but those are still to tall for such a flexible panel. I was going to have to put down a flat sub panel to overcome those high spots. These panels are designed to be mounted directly to flat or slightly curved surface, not the ridges and bumps of a SMB PH top. I saw this as an opportunity to create some passive cooling under the panels. Ironically solar panels are very sensitive to heat. So the cooler you can keep them the more efficient they are and the longer they will last. Even if they are designed not to need it. I used a product called twin wall polycarbonate used mostly as clear panels on greenhouses. I used a 8mm thick sheet and was able to find a 6'X8' sheet for around $90 and after shipping and tax $117.
http://www.gemplers.com/product/171481- ... -8mm-Clear This size sheet gave me the ability to make the 51 3/4"X52" sub panel out of one piece. This panel will allow some air to flow under the solar panels and take some heat with it and it is flat and rigid enough for me to mount the solar panels on and I can walk on them.

I used the old sub panel as a template to rout out the pockets for the PH mounting hardware. With this panel I did not go all the way through, I only cut in to it about 1/8".


The next challenge was how to mount it to the roof. I used a 3M VHB 5952 tape, 1" wide. A 36 yard roll was $125 and I used the entire roll. This is considered to be a permanent bond. The good thing with that is that I did not have to put any screws into my top. (I filled all the holes that I made from the first solar panels) The bad thing about that is that when these panels fail (and I know they won't outlast my SMB) it's not going to be fun getting them off. This is where I got it;
http://www.rshughes.com/products/021200_56229.html?
The stressful thing here was the actual setting of the twinwall sheet and the panels. Once there is contact with the tape, there is no turning back. I had only a 1/16" tolerance so I really took my time. I was doing this all alone and didn't have access to three sides of the pieces, because all of this was being put on the front third of my roof.


Once the sub panel was set in place I had to make the holes for the under-panel terminals to make their way to the inside of the pop-top. I had already cut the holes in the twinwall sheet while it was on my work bench. This made it easy to be very accurate with there placement. At this point I just had to drill through the roof. These holes were drilled to 5/8" and a rubber hose was inserted along with a generous amount of sealant.

Each terminal had a 24" wires soldered to it and heat shrink covered all exposed metal.

Again there was very little tolerance here. The wires were fed into the rubber hoses and a portion of the protective sheet was pulled back to expose the sticky back of the panel. Before I made contact with the sub panel, I applied some more sealant to the base of each terminal. Then I did some final alignment and pushed down. From here it was a matter of slowly pulling out the protective sheet and pushing down as I went along. It was very important not to get air bubbles under the panels. The first panel went down perfectly. Repeat this on the second one and let out a big sigh of relief.
Now it was just a matter of connecting the new wires to the old controller. And power on!
BTW the whole setup (solar panels, sub panel and tape) weights 19 lbs. The old Solara panels and sub panel was 55 lbs.


I finished everything around 8pm on Friday and by 9pm I had already strapped our surfboards to the roof. 5am the next morning we were on our way to Orange County for a day at the beach. It was overcast for most of the day. I still have my original house battery (installed Dec. 2006). By 10:30am my Blue Sky controller was indicating 14.12V and by 1pm it was up at 14.21V with the full charge indicator blinking. This has never happened with the Solara panels. It's only been four days but everything is still in place and my battery reaches a full charge everyday (even with the June Glum).
Cheers,
John


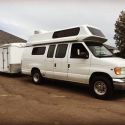
 Sportsmobile (AKA Money Pit)
 Linear Mode