Journey with Confidence RV GPS App RV Trip Planner RV LIFE Campground Reviews RV Maintenance Take a Speed Test Free 7 Day Trial ×


Reply
 
Thread Tools Display Modes
 
Old 11-30-2014, 05:24 PM   #1
Junior Member
 
Join Date: Sep 2011
Posts: 9
Smurf Build

Hey All,

I've lurked here quite a bit, and even started some threads similar to this once upon a time. Rather than resurrecting those long dead threads, I figured I'd start a new one.

I thought I was going to finally make some progress on building out the floor and insulation today, but instead have spent the entire day reading on websites like this one. I imagine these questions have been answered, but I haven't been able to find them.

Basically I found some rust on the bed of the van after pulling up the OEM rubber mat and padding. It sounds like this is a common issue, but I haven't found the post where people actually talk about how they fixed it. I assume there are a few steps to get the current rust cleaned up, and prevent future rust.

Anyone feel like chiming in with their preferred methods?

Not sure if the picture is even going to show up, or if it will show the scope of the rust. I think it is fairly minor, but widespread, if that makes sense.


Anyhow, thanks in advance for any suggestions on how to deal with this. It will be nice to finally make some progress on a long overdue build.
Attached Thumbnails
IMG_20141130_145620.jpg  

VANquisher is offline   Reply With Quote
Old 12-01-2014, 05:57 AM   #2
JWA
Senior Member
 
Join Date: Jan 2011
Location: Reynoldsburg, Ohio
Posts: 3,773
Send a message via Yahoo to JWA
Re: Smurf Build

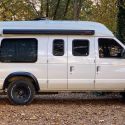
Congrats on starting your build---hope to see the progress along the way!

The good news with your van as shown is the rust present is absolutely of no concern at this point.

As you mention rust forming under the OEM mat is a problem especially for those of us in a 4 season climate. Long story short the padding under the rubber portion absorbs moisture over time and it never seems to evaporate out. It quickly becomes saturated and over time the constant exposure to so much moisture the floor will begin to rust. It can go unseen for years, only showing itself when damage is so extensive major body work is required.

As will be seen later my damage was quite a bit more serious.

Having already been through this (and living in Columbus, Ohio too) I used a knotted wire wheel on a robust 4.5" grinder to remove accumulated surface rust. From there I applied POR-15 in the silver color following the instructions to the letter.

Two plus years later there is no sign of any rust re-forming anywhere on the treated areas.

Having learned my lesson with the current E250 EB and seeing the damage done on other vans from those soaked OEM rubber mats I elected to do nothing more than add a 3/4" plywood floor over the POR-15 treated floor. This is by far the most effective method even though some will add layers of various materials in hopes of maximizing sound deadening and heat/cold insulation. IMHO adding layers of this and that do nothing to attenuate road noise and does almost nothing in terms of insulating for temp changes.

As a way to prove this drive the fully empty van on both city streets and the freeway---pay close attention to the sound level coming from the rear. Next place a few sheets of the 3/4" plywood on the rear floor, maybe cut to an approximate shape but only in a single layer---repeat this drive test---the difference should be pretty impressive.

I have a somewhat more detailed write-up on my project for this posted on the FTE boards. For now here is my PhotoBucket album showing parts of my project: http://s184.photobucket.com/user/JWA...Ford/03%20E250 (Pertinent info starts on Page 2 there.)

HTH
JWA is offline   Reply With Quote
Old 12-01-2014, 07:51 AM   #3
Senior Member
 
86Scotty's Avatar
 
Join Date: Jul 2011
Location: TN
Posts: 10,239
Re: Smurf Build

Agreed. POR15 is your friend.

86Scotty is offline   Reply With Quote
Old 12-01-2014, 08:13 AM   #4
Senior Member
 
JohnandMandi's Avatar
 
Join Date: Apr 2014
Location: Pan-American Highway
Posts: 320
Re: Smurf Build

x3

-John
__________________
2001 7.3 E350 Ujoint 4" w/ SMB Penthouse
johnandmandi.com
JohnandMandi is offline   Reply With Quote
Old 12-01-2014, 09:43 AM   #5
JWA
Senior Member
 
Join Date: Jan 2011
Location: Reynoldsburg, Ohio
Posts: 3,773
Send a message via Yahoo to JWA
Re: Smurf Build

Here's a more complete thread on my floor refinish: http://www.ford-trucks.com/forums/11...-por-15-a.html
JWA is offline   Reply With Quote
Old 12-01-2014, 05:13 PM   #6
Junior Member
 
Join Date: Sep 2011
Posts: 9
Re: Smurf Build

Thanks so much for the replies. It's a huge help to talk to people about this that have been through it before.

So it looks like I need to

Grind
Clean
Etch
POR15

It sounds like it needs to be applied to bare metal. I guess that means I need to grind the paint off the entire floor? It almost seems like overkill given the severity of the current rust.
VANquisher is offline   Reply With Quote
Old 12-01-2014, 05:16 PM   #7
Senior Member
 
86Scotty's Avatar
 
Join Date: Jul 2011
Location: TN
Posts: 10,239
Re: Smurf Build

I don't think so. At least I wouldn't. I would just grind the 'active' rust spots.
86Scotty is offline   Reply With Quote
Old 12-01-2014, 07:03 PM   #8
JWA
Senior Member
 
Join Date: Jan 2011
Location: Reynoldsburg, Ohio
Posts: 3,773
Send a message via Yahoo to JWA
Re: Smurf Build

Scotty is correct----that's one reason I mention I followed POR-15's instructions to the letter. http://por15bc.com/por-15.htm The link I posted about my process show despite my severe case there was no need to grind 72 sq/ft of painted metal bare, simply loosen/remove the rust scale. (I can't emphasize enough following POR's instructions is paramount!)

POR stands for "paint over rust" and that tells a lot.

It was recommended 2 qts of finish in order to twice coat my floor but in real use one quart did the entire floor which included an after thought of doing the front section too. Its best to have the second quart just in case though.
JWA is offline   Reply With Quote
Old 12-01-2014, 10:57 PM   #9
Junior Member
 
Join Date: Sep 2011
Posts: 9
Re: Smurf Build

Interesting. It looked like you did almost the entire floor in your other post. Did you just apply it over the factory paint where the rust wasn't severe?

I found their FAQ here http://www.por15.com/POR-15-FAQS_ep_61.html

I'm not sure what they mean by "Seasoned Metal" but it does say:

Quote:
CAN I APPLY POR-15 OVER OTHER PAINTS?

Yes, but you will lose the important benefits of POR-15. You must remember that ordinary paints are weakened by exposure to moisture. POR-15 can't stop rust if it isn't in direct contact with the base metal.
So is it just a waste of product to apply it over the paint that hasn't started to rust yet?

Thanks again for all the responses!
VANquisher is offline   Reply With Quote
Old 12-02-2014, 04:42 AM   #10
JWA
Senior Member
 
Join Date: Jan 2011
Location: Reynoldsburg, Ohio
Posts: 3,773
Send a message via Yahoo to JWA
Re: Smurf Build

I did indeed coat my entire floor because I scuffed the entire area which greatly reduced the already-thin factory coating or paint. Adding another layer of high-solid content silver POR-15 gave me an additional layer of something over the metal.

I did realize POR-15 over solid factory finish wasn't necessary but an additional over coating didn't hurt anything either. It also didn't make much sense to let any remaining POR-15 simply sit in the can for who knows how long?

Honestly though if you used a Scotch-Brite red pad to scuff through any existing surface rust to remove the loose bits before spot applying POR-15 only to those "rusty" spots you'd be fine.

Where does your van live? What climate?
JWA is offline   Reply With Quote
Reply

Thread Tools
Display Modes

Posting Rules
You may not post new threads
You may not post replies
You may not post attachments
You may not edit your posts

BB code is On
Smilies are On
[IMG] code is On
HTML code is Off
Trackbacks are Off
Pingbacks are Off
Refbacks are Off

» Featured Campgrounds

Reviews provided by

Powered by vBadvanced CMPS v3.2.3
Disclaimer:

This website is not affiliated with or endorsed by Sportsmobile SIP or any of its affiliates. This is an independent, unofficial site.


All times are GMT -6. The time now is 03:33 AM.


Powered by vBulletin® Version 3.8.8 Beta 4
Copyright ©2000 - 2024, vBulletin Solutions, Inc.