|
|
 05-11-2015, 12:05 PM
|
#1
|
|
Senior Member
Join Date: Sep 2010
Location: Bend, OR
Posts: 800
|
Name TBD: AWD Express / CCV Poptop
Some of you may recall our last van, Dookie. Dookie was an '84 E350 diesel 4x4 on 33's or 35's with a homebuilt '50' style layout that our family loved. The grand plan was to have it not only as an adventure rig, but as a second vehicle for my wife to drive when it got a bit too nasty for her 2wd wagon. This was all good in theory, but the combination of diesel/glowplugs/transfer case/hubs/auxiliary overdrive, etc made it a little inconvenient to jump in for a short daily drive.
After our long summer excursion last year, we decided to make a wish list of our perfect (within reality for my skills and our budget!) rig. Here is what we came up with:
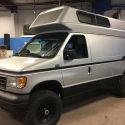
Base vehicle/drivetrain: AWD Chevy Express w/ 5.3L V8. We used the high clearance capabilities of our old van only a few times, but having all wheels driving for snow/ice/slimy roads was important to us. The Express van made sense - my work truck has nearly the same drivetrain and has held up incredibly well and it is the contractor van of choice in our area so my confidence was pretty good about this option.
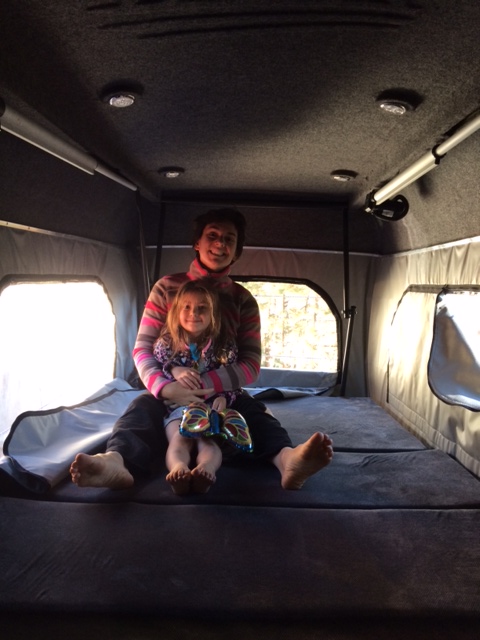
Top: This for us was a no-brainer. We need to have a poptop so that we can fit in an 8' garage door. After doing a lot of reading and chatting with the folks here on the forum we were really excited to try out the CCV poptop. The increased space that we gain compared to a SMB top will be much appreciated in our RB layout. Our previous SMB top only offered enough room to leave a couple of summer weight down bags in the loft with the top down. The ability to stow all our bedding and pillows on the bed platform will be a huge plus for us.
Layout: We have two kids, so forward facing seats was a must. We really liked the '50' layout and decided to stick with a good thing. We wanted to have adequate windows for the people in the rear seat to be able to look out and enjoy the scenery and not just look at a cabinet, so this was also figured.
Amenities:
Heat - we loved our Espar in the old van. Having heat makes all the difference. With no diesel available we decided to opt for the propane fired Propex.
Cooking - We are outside cookers typically, but I would always find myself firing up water for coffee first thing in the morning or cooking pancakes inside if it was nasty out. Our single burner butane stove worked fine, but was never the most stable thing. Plus it was one more thing to pack, store, put away, etc. A flushmount single or double burner would be really convenient and since we will have propane for the furnace we decided it would be worth losing a little bit of drawer space.
Fridge - We had the Isotherm 130 in the last van, and my wife indicated that nothing smaller would do. We love having the big fridge!
Water - Our old sink was too little to really do anything practical with. Our main drinking water will just be in smaller containers (pint - 2 gallon size). Though we won't have a sink inside, it would be nice to carry 10g +/- for purposes of dishes and rinsing off kids via a sprayer out the back door.
Electrical / Power - simple inverter charger (MSW) to power small odds and ends and allow charging the house batteries by plugging in. Solar to supplement battery capacity to make it through a long weekend.
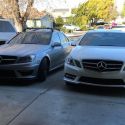
The overall goal with this rig is to not only make it our weekend adventure rig, but also my wife's daily driver (when not bike commuting). Since she typically puts on less than 5000 miles a year, it makes sense to us to consolidate vehicles. Time will tell if the convenience of the van's amenities and simplicity of not having an extra vehicle will outweigh driving the slightly larger rig around town.
__________________
Josh
2009 Express AWD, CCV Top & 50-ish home build. Daily driver/camper/kid hauler
|

|

|
|
05-11-2015, 12:06 PM
|
#2
|
|
Senior Member
Join Date: Sep 2010
Location: Bend, OR
Posts: 800
|
Getting started
The search was on for an AWD Express. Finding a decent used AWD express proved to be more challenging than we imagined. Not only were we a little particular about what we were looking for, but Chevy is also discontinuing the AWD express as of 2014 which may have had an influence on the supply.
Our want list included: cargo, slider, PW, PL (remote), cruise, G80 limited slip rear, under 100k miles.
Alas, we finally found our van! It is a 2009 AWD Express with just under 100k miles on it. I would have loved the 3.73 ratio (it has the 3.42) and heated mirrors but it had all our major requirements. I nearly walked away after scrutinizing some minor drivetrain weeps but we were ready to be done with our van search.
The inside was pretty clean:

After finding the right base van, the next step was the easiest, albeit the biggest hit to the wallet - get the CCV top installed:

Getting the van to / from CCV is a story in itself. I'll save that one for beers around the campfire.
As you can see here, there are some major benefits to the added height of the CCV top. Not only can you sit up straight in the penthouse, but my wife can stand up in the portion of the van without a bed when the top is DOWN.
Thus far I am impressed with the CCV top. I ordered the top with the triple wall canvas, but opted out of the additional insulation in the ceiling. We will see if that is a mistake or not down the road. I had Derek prewire for a Fantastic Fan in the event that it would be able to clear the garage header (I know now it won't). I also asked for extra wiring to the switches in case I wanted to change their location, which they did with no issues.
__________________
Josh
2009 Express AWD, CCV Top & 50-ish home build. Daily driver/camper/kid hauler
|
|
|
|
|
05-11-2015, 12:07 PM
|
#3
|
|
Senior Member
Join Date: Sep 2010
Location: Bend, OR
Posts: 800
|
Exterior
Since we wanted heat and a cooktop, finding a spot for a propane tank was needed. If it all possible, I wanted to keep from having to cut a hole in the side of the body for an access panel, but at the same time did not want the tank to hang way below the body both from a functionality and aesthetic standpoint.
I haven't tried filling it yet, but the 4.6 gallon tank from GoWesty tucks up between the body and frame nicely:

If I need to, I can lower it a little bit on the threaded rods to facilitate filling.
Here is how it looks from the outside:

Next up was windows. As previously discussed, I wanted to have a window on each side of the rear bench so the passengers could enjoy the scenery.
Measure twice, cut once:

Awning window above galley with fixed windows either side of bench seat:


The van came with the tinted pop-out windows on the slider and rear doors - that was a bonus.
__________________
Josh
2009 Express AWD, CCV Top & 50-ish home build. Daily driver/camper/kid hauler
|
|
|
|
|
05-11-2015, 12:08 PM
|
#4
|
|
Senior Member
Join Date: Sep 2010
Location: Bend, OR
Posts: 800
|
insulation
There are a myriad of options for insulation. We decided to do a layer of reflectix against the sheet metal and then a layer of 1" EPS over that. This brings my insulation section to the inside of the body ribs. We wanted to maximize the interior volume, so creating thick wall panels was not going to be ideal.
Reflectix layer first:

Complete with 1" EPS layer:

Next, take advantage of child labor to paint subfloor plywood:

__________________
Josh
2009 Express AWD, CCV Top & 50-ish home build. Daily driver/camper/kid hauler
|
|
|
|
|
05-11-2015, 01:27 PM
|
#5
|
|
Senior Member
Join Date: Sep 2010
Location: Bend, OR
Posts: 800
|
Seat
The interior build ultimately revolves around the folding bench/bed. While looking on line for the right options, I found this gem on Craigslist:

The fabric was faded, had a tear, and the seat itself is clearly too wide. But since free is a good price, I figured I could make it a good starting point.
Let's strip the thing down and see how it looks:

Not too bad, but still a little wide. Fortunately we have tools to fix this:

Welded back together after removing about 8-10" of width. This shows some additional webbing support put in by the upholstery shop before recovering as well:

The seat is now a nice width to work with and has new foam and covering for much less than I could have bought a new one.
__________________
Josh
2009 Express AWD, CCV Top & 50-ish home build. Daily driver/camper/kid hauler
|
|
|
|
|
05-11-2015, 02:17 PM
|
#6
|
|
Senior Member
Join Date: Sep 2010
Location: Bend, OR
Posts: 800
|
Cabinet Planning
Next is that point where we just start putting pieces together to see how they fit. My process is to start adding boards/cardboard, trim, review, then have another beer:
Newly recovered seat and fridge:

How should this cabinet lay out? Note the cardboard section along the seat as well:

Change the countertop a little to fit the stove better:

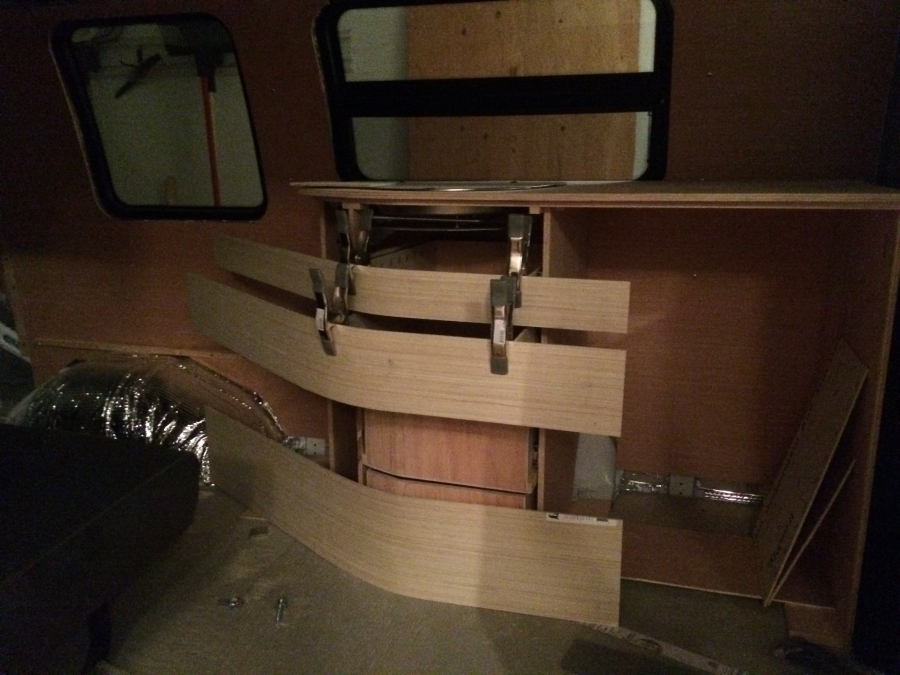
Figure out how the back cabinet should be configured to maximize storage and view while minimizing the chance of whacking your head on the cabinet:

Build the back cabinet section to fit, and put it on the scale before it goes in for curiosity sake (30.9#):

Install rear cabinet section and work on Propex furnace box:

uh oh - glass is empty!
__________________
Josh
2009 Express AWD, CCV Top & 50-ish home build. Daily driver/camper/kid hauler
|
|
|
|
|
05-11-2015, 02:27 PM
|
#7
|
|
Senior Member
Join Date: Sep 2010
Location: Bend, OR
Posts: 800
|
drawers
We have found that we REALLY like having drawers next to the fridge. Not shelves, not cubbies, but real drawers. It keeps everything very accessible and organized.
Do you what wouldn't be too hard? Square faced drawers. Nothing better than four 90 degree corners. But that would be far too quick and eas(ier). Let's put just the slightest radius on the front - just enough to increase the production time tenfold.
Build boxes with rough profile:

Sand the face to get the desired radius:

Put those drawers in and see how they look:

Bend some face wood. I'd never done anything like this before, so it was complete trial and error:

See if the bent radius on the face pieces matches the drawers:
Cut and glue the faces on:

Add laminate to finish counter surface and work on upper false section that covers stove:

I still need to go back and trim up the drawer edges - they are not all in a nice line like I would like. I am hoping I don't screw them up in that process. I am also hoping that these will last long term too - time will tell!
__________________
Josh
2009 Express AWD, CCV Top & 50-ish home build. Daily driver/camper/kid hauler
|
|
|
|
|
05-11-2015, 03:20 PM
|
#8
|
|
Senior Member
Join Date: May 2013
Location: Cascadia
Posts: 319
|
Re: Name TBD: AWD Express / CCV Poptop
Nice work Rockbender. Things are coming along nicely.
__________________
2023 Transit AWD w/ Van Haus build.
73 BMW 2002 O=00=O
|
|
|
|
|
05-11-2015, 05:28 PM
|
#9
|
|
Senior Member
Join Date: Jul 2011
Location: TN
Posts: 10,238
|
Re: Name TBD: AWD Express / CCV Poptop
Awesome job man, looking great!

|
|
|
|
|
05-11-2015, 05:43 PM
|
#10
|
|
Senior Member
Join Date: Sep 2013
Location: San Luis Obispo, CA
Posts: 2,552
|
Re: Name TBD: AWD Express / CCV Poptop
This van is coming out awesome!
__________________
2005 E350 Chateau - V10 - Agile Offroad 4x4
2012 CTS-V Wagon - For the baby...
|
|
|
|
|
|
| Thread Tools |
|
|
| Display Modes |
 Linear Mode Linear Mode
|
 Posting Rules
|
You may not post new threads
You may not post replies
You may not post attachments
You may not edit your posts
HTML code is Off
|
|
|
|
 » Recent Threads
 |
|
|
|
|
|
|
|
|
|
|
|
|
|
|
|
|
|
|
|
|
|
|
|
|
|
|
|
|
|
|
|
|
|