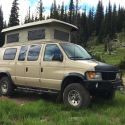
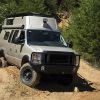
Windshield Cover
This is the last of the set of projects that began when the penthouse trim and headliner were taken down. This project is a inside cover for the front windshield. The goal is to have something that will both block sight into the van, for privacy, and also block light coming out of the van if in stealth mode. Up till now I used a off-the-shelf windshield foil reflector but it never complete blocked the light and wouldn't stay in place. I use Reflectix for the side windows but I think it's too bulky for the front windshield.
To make a cover I bought three yards of of "Quilted Iron Quick Fabric" from
nancysnotions.com. The material is listed as "100% aluminum on a 100% cotton back, polyester batting and polyester/cotton backing. Heat resistant up to 399 degrees". One of it's suggested uses is as potholders so it should hold up OK. I'm thinking that the aluminum side will help reflect the sun's rays and the polyester batting will act as insulation. Here's what the back side looks like.

I experimented with different ways of holding the fabric in place. Maybe add a metal clip to the edge of the headliner then use magnets on the fabric.

Or sew wooden dowels into the fabric.

Here's what I decided on. Use epoxy to glue 10 small rare earth magnets to the front edge of the headliner.


Hand sew 10 fender washers to the back side of the fabric.

The washers line up with the magnets.

The washers and magnets hold the top edge of the fabric in place.

I tried different combinations of rare earth magnets and washers and their placement before settling on this configuration. Sewing smaller washer to the front of the fabric would also hold the cover in place but if the washer comes in contact with the magnet it's harder to separate them. By keeping the fabric between the washer and the magnet there's less chance of the magnet pulling free of the epoxy. This results in a weaker magnetic attraction so the larger washer is needed to compensate.
Now to do something about the fabric edge.

Say hello to my new tool.

OK it's not really new. This was my Mom's. She used to sew. A lot. After both my parents passed away and my surviving brother and I had to sell their house I'd already begun work on the van and thought that the sewing machine might come in handy some day. That day would be today.
And let's just get one thing out of the way. The thought that somehow using a sewing machine is sissified. I'll point out that the operative word in "sewing machine" is
MACHINE! (manly grunt grunt grunt)
As a kid I'd seen Mom sew enough to have a basic idea how this works but luckily it came with a manual.

First up. Threading.

OK, that's done.

Turn the hand wheel, top towards you, till it brings up the thread from the bobbin.

Pull both threads towards the back of the machine. Put the fabric in place and drop the foot.

To operate the motor there is a paddle that swings down underneath the cabinet. You push it to the right with leg. The farther it's pushed the faster the machine goes.

OK. Start sewing. I'm folding the edge of the fabric so the white backing is on top. This is so when the cover is magnetically attached to the headliner the leading edge will curl upwards against the headliner and block more light.

I worked at a slow pace, folding over the fabric as I went. Had to keep shifting the whole mass of fabric to keep the stitching (somewhat) straight. When I got to the washers went real slow. Didn't want to see what would happen if the needle hit a washer.

When I got to the end of the fabric be sure the needle is in the up position. Pull it way from the machine then cut the two threads.

There it is. My first hem.

Give it a test in the van. Looks good.

Back to the machine. Now do the bottom edge. This time I'm folding the fabric so that the aluminum side is up.

Sewing along when I realize that something is wrong. Just making tiny holes in the fabric. No thread is joining the material. Found that the thread coming from the bobbin had broken. The bobbin is under the machine.

That's the bobbin on the right. It has thread wound around it that loops through the thread pushed through the fabric by the needle. I re-threaded the bobbin but it kept breaking. Ended up unspooling all the thread on the bobbin and winding it with new thread.

After that didn't have any more problems. Here's the two different hems.

How it looks in the van.

The fabric is thick enough that it can be tucked in at the gap between the windshield and the dash where they meet and stay in place. This way the slack in the cover can be taken in so there is less of a downward bow in the middle.

How it looks from outside.

I'm not done yet. The cover's sides will have to be taken care of next.
In working on the van so far I've used several of my Dad's old tools so it was nice to get my Mom's sewing machine involved in the project but also the realization that the last time this machine ran my Mom was using it did leave me feeling more than a little bit melancholy.
continued -


 VivaLaVida
 Hopefully it will change soon...


 Linear Mode