|
|
 10-21-2007, 01:33 PM
|
#1
|
|
Senior Member
Join Date: Apr 2007
Location: Parker, CO
Posts: 7,644
|
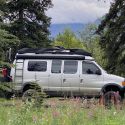
Dynamatting the Fridge and Rebuilding the Wall
Project Overview:
Well the fridge has always been loud and rattled the counter tops, drawers and the whole van. Based on input from the group and Badgertrek.com I pulled the fridge to determine the problem and found that not only was it rubbing on a bolt, but the wall construction behind the fridge was pretty shoddy and did little to cover the gap to the outside.
I also took a crack at addressing the efficiency of the fridge simply through disabling the 110 outlet when not attached to shore power.
This project has 4 parts, each in a separate reply, use the links if you want to quickly get to one part of the project (opens a new window).
Pulling the Fridge --> http://www.sportsmobileforum.com/vie...hp?p=2838#2838
Addressing the Vibration --> http://www.sportsmobileforum.com/vie...hp?p=2839#2839
Rebuilding the Wall and Rewiring the Socket --> http://www.sportsmobileforum.com/vie...hp?p=2840#2840
Reinstalling --> http://www.sportsmobileforum.com/vie...hp?p=2841#2841
__________________
it was good to be back
|

|

|
|
10-21-2007, 01:34 PM
|
#2
|
|
Senior Member
Join Date: Apr 2007
Location: Parker, CO
Posts: 7,644
|
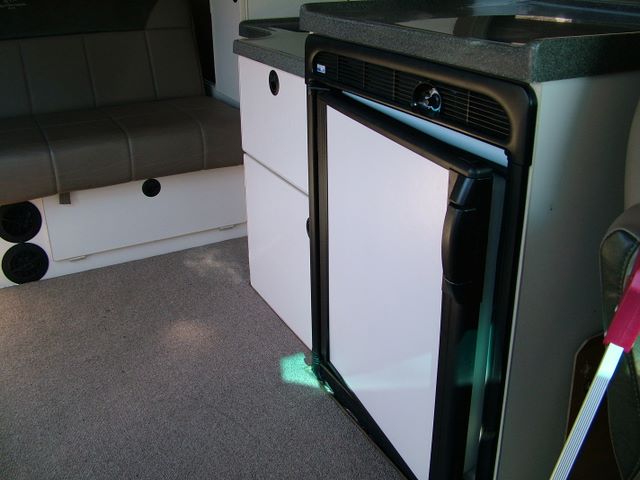
Pulling the Fridge
Basically there are two screws on either side holding the fridge in. To get to them you have to remove the door, then some hardware, the lower panel, slide and twist off the molding and then after the screws pull the fridge out. Unplug the 110 connection (be careful not to rip out the wall) and disconnect the 12v wires at the clips.
Ready to rock and roll

Pull back the carpet

Hmmm, I know this comes out…

Gently Pull Bottom

Remove door screws

Remove door screws

Remove plastic Ls


Start at the bottom and pull out the outside

Slide down (to get out of the top molding)

The outside is easier to roll off despite being a solid tab.

Remove 4 screws

Gently pull out


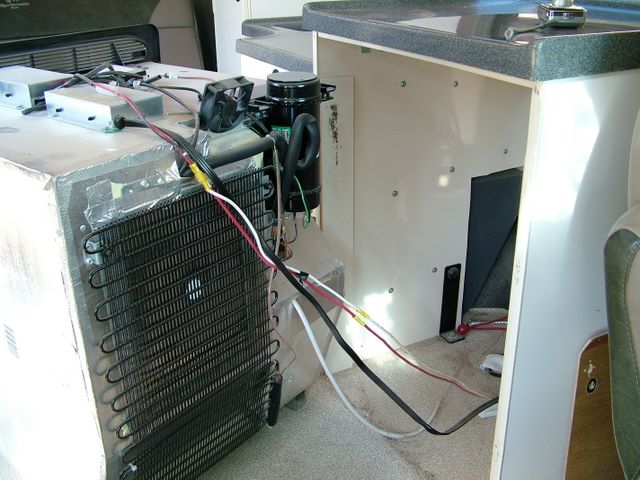
There are DC and 110 connections

The DC is a plug, the 110 has male-female clips. Be careful not to rip the wall when pulling out the 110 plug- that part of my wall was just loose over the gap.
__________________
it was good to be back
|
|
|
|
|
10-21-2007, 01:35 PM
|
#3
|
|
Senior Member
Join Date: Apr 2007
Location: Parker, CO
Posts: 7,644
|
Addressing the Vibration
The vibration came from the L bracket on the panel behind the driver's seat being installed too close. The solution was to cut a channel in the L bracket and reposition that part of the wall further out.
The bolt is just held on by a nut and cut washer. Removing and reinstalling is easier with two people, but if you drop a box wrench on the bolt you can work the nut alone (depending on your space with your configuration).
I was a little disappointed that the installer just forced the fridge in, as is clear from the dents, instead of addressing the problem. But with the state of the wall, and the "out of site out of mind" mentality they both reflect, I'm not surprised.

A tooth rattling vibration you say? Ah, there's your problem mister.

Note the dent where the space was obviously too tight and the unit was forced.
 Well, don't look at me

The culprit has a flattened cap from years of vibration.

The nut on the lower bolt of the L is in there (better pic later).

Nut and washer removed

Bolt and hole without the L

Since I don't have the equipment to wallow out the hole I decided the best way to reposition was to make a slot.


Parts for reinstall

Location of nut

Washer and nut- would it have killed them to use a tabbed nut?

Relocated and tightened down
__________________
it was good to be back
|
|
|
|
|
10-21-2007, 01:35 PM
|
#4
|
|
Senior Member
Join Date: Apr 2007
Location: Parker, CO
Posts: 7,644
|
Rebuilding the Wall and Rewiring the Socket
Based on discussions here, RV.net and the Norcold manufacturer's website, I found the fridge runs on 110 whenever it is supplied. There are two reasons this is bad. The first is that according to some posts 110 has a more frequent duty cycle using more energy to achieve the same results.
The other is that the fridge will run on 110 whenever it is supplied, and 12v only when 110 is not available. What this means is that whenever I was turning on my invertor, the fridge was switching to 110, and not only using more power from the worse duty cycle, but taking 12v through the invertor and converting it to 110 to use. Simply leaving the invertor on overnight can put a huge hit on your batteries this way.
So, while rebuilding the wall and addressing the gaps I also installed a Wirecon switch to control only the refrigerator outlet. This switch will be off at all times unless I'm plugged into shore power, in which case I want the fridge running on 110.
By rights I should have pulled the gray water tank and done the full gap with Great Stuff but I decided to do my best without taking more of the counter apart and tried to just get it everywhere. If the extreme amount of road dirt inside the cab wasn't enough proof, putting a small fan near the hole was. Between the Great Stuff inside and outside and the new wall I hope this has been addressed enough to reduce the problems.

The sockets are Wirecon WDR style. Two screws with tabs.

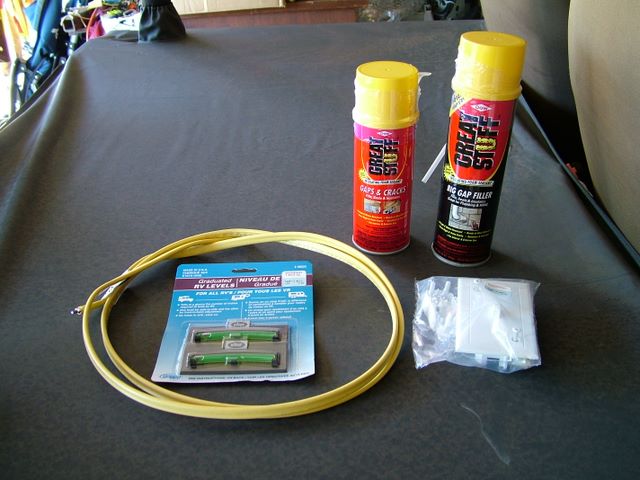
Some "Great Stuff" for the gaps, wire and a switch for the project.

The switch is by Wirecon also and has a similar install.

A dry erase piece of wainscoting courtesy of Lowes.
 Excuse me there seems to be a board in my spot
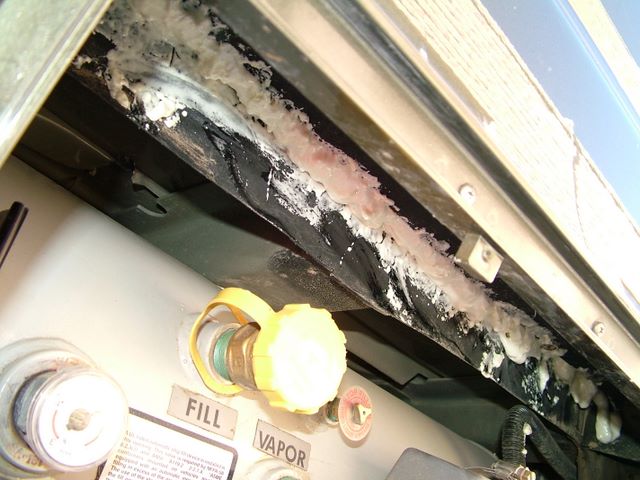
Great Stuff applied outside

5 minutes later
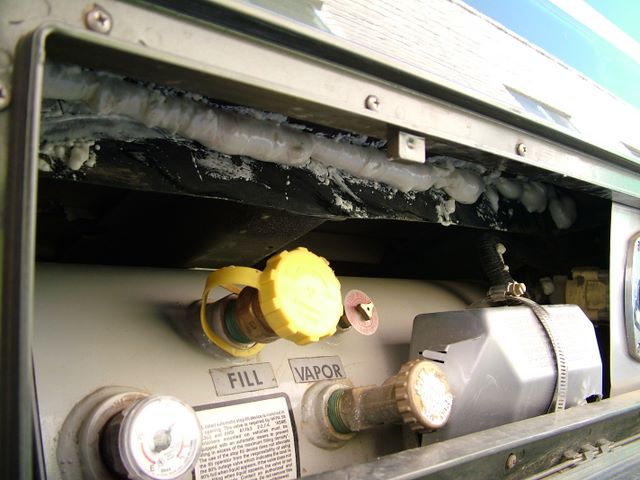
about 15 minutes

about 1/2 hour

Great Stuff on the inside too

Expanded and Cured

Cardboard template

Easy to change

Measure never, cut lots

My ultra hi-tech working area

No wonder the cuts aren't straight

I left some space at the top to recut when I have a table saw again. I'll probably add some silicone when it's cleaned up too.

Moving up to the socket behind the driver's seat

Cut hole below for switch
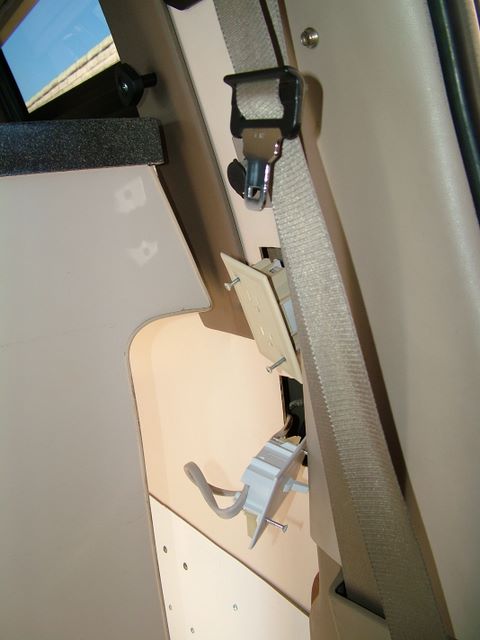
Switch wired behind driver's seat for testing

And fully installed
__________________
it was good to be back
|
|
|
|
|
10-21-2007, 02:06 PM
|
#5
|
|
Senior Member
Join Date: Apr 2007
Location: Parker, CO
Posts: 7,644
|
Reinstalling
I can't begin to tell you how easy the Dynamat was to work with. I doubled up on nitrile gloves and used the mini wooden roller I purchased with the kit. I cut the pieces over cardboard with a box cutter and they applied easily. Admittedly I was working with relatively square flat surfaces, but the mess and the fuss was totally minimum.
The result of the whole project isn't really the silent fridge I hoped for, but the tone is much bassier and easier to live with. You can still feel the vibration in the counter, but it's not the "rattle everything to death" vibration it was.

Dynamatted fridge ready to go

Everything realigned but there was a gap under this foot, so a piece of the wallboard went to use.

Molding back on

The previous owner's insulation

Scribbles and I agree it's better but not perfect.
__________________
it was good to be back
|
|
|
|
|
10-21-2007, 07:37 PM
|
#6
|
|
Senior Member
Join Date: Jun 2007
Location: Helena, Montana
Posts: 613
|
Refrig and Dynamat
Great documentary jage! I was out soloing for several nights on Vancouver Island two weeks ago and began to notice a lot more noise on start up of my 2.7 cubic foot frig cycle. i moved stuff around in the frig but the start up noise was coming from the fan and compressor. I will have to pull it sometime this winter and try to quiet it down.
Could you repeat the process with a labradog instead of the cat? 
__________________
2006 Baja Tan SMB 4X4 EB50 PH 6LPSD
Mohawk Royalex Solo 14 foot canoe (light white-water)
Mad River Kevlar Explorer 17 foot canoe (flat water)
Dagger Royalex Legend 16 foot canoe (white-water)
Maravia New Wave 13.5 foot raft (fishing and white-water)
|
|
|
|
|
10-22-2007, 12:29 PM
|
#7
|
|
Senior Member
Join Date: Apr 2007
Location: Mather, CA
Posts: 378
|
Excellent Job, Jage.
|
|
|
|
|
10-22-2007, 04:32 PM
|
#8
|
|
Senior Member
Join Date: Apr 2007
Location: Santa Barbara, CA
Posts: 1,841
|
Superb piece of documentation.
Why couldn't you just pull out the 110 v. fridge plug?
|
|
|
|
|
10-22-2007, 04:39 PM
|
#9
|
|
Senior Member
Join Date: Apr 2007
Location: Santa Barbara, CA
Posts: 1,841
|
More pictures of the cute cat, please.
|
|
|
|
|
10-23-2007, 09:47 AM
|
#10
|
|
Senior Member
Join Date: Apr 2007
Location: New "Yawk" City
Posts: 245
|
Dynamatting the Fridge and Rebuilding the Wall
That's the best SMB project write up I've seen.
Over the last couple of years, I've noticed my fridge is starting to make more noise and rattles sometimes. It was ultra quiet when new (4 CF.) Maybe it's time to do the fridge mod.
Does the fridge really run off the inverter when the inverter is turned on? I simply assumed the fridge 110V line didn't go through the inverter. I have my inverter on most of the time for the computer!
I'm going to have to check out my 110V circuit breakers now.
-Joey
__________________
2005 Ford E-350 Diesel Sportsmobile
EB 102 Voyager top, 3.55 rear, Mobil 1 all around
270 amp alternator, billet water pump, coolant filter kit,
aluminum radiator, X-Monitor with pyro, trans temp, boost
+ Scan Gauge & SCT Live Wire (Economy)
|
|
|
|
|
|
 Posting Rules
|
You may not post new threads
You may not post replies
You may not post attachments
You may not edit your posts
HTML code is Off
|
|
|
|
 » Recent Threads
 |
|
|
|
|
|
|
|
|
|
|
|
|
|
|
|
|
|
|
|
|
|
|
|
|
|
|
|
|
|
|
|
|
|


 The Delta Flyer
 Linear Mode