Journey with Confidence RV GPS App RV Trip Planner RV LIFE Campground Reviews RV Maintenance Take a Speed Test Free 7 Day Trial ×


Reply
 
Thread Tools Display Modes
 
Old 05-02-2010, 12:38 AM   #1
Senior Member
 
jage's Avatar
 
Join Date: Apr 2007
Location: Parker, CO
Posts: 7,644
Roof Leak Repairs Round II - The Front Section

Ah the roof leak, again. I rebuilt the back half in Arizona with panion's help and for the next two years had the SMB pretty consistently garaged. Since standing water, which pools over the back hardware, seems to be the cause the fact that the front was also leaking was somewhat obscured.

Of course since it was built the same way as the rear, it's no surprise that it was also leaking as you'll soon see. This is the exact same repair as doing the back, with the exception of trimming a washer to fit in the channel being necessary in the back.

Mmmm, tools. I pretty much had everything boxed from the last round waiting for the next problem.


This is the proper hardware, in my opinion. You'll see why later.


My ever persistent helper in a rare bout of actually helping, rather than running around trying to get eaten by a coyote or eat a bunny. The F250 bed served as ladder and work platform.


The project: front six hardware stacks in the Sportsmobile PH.


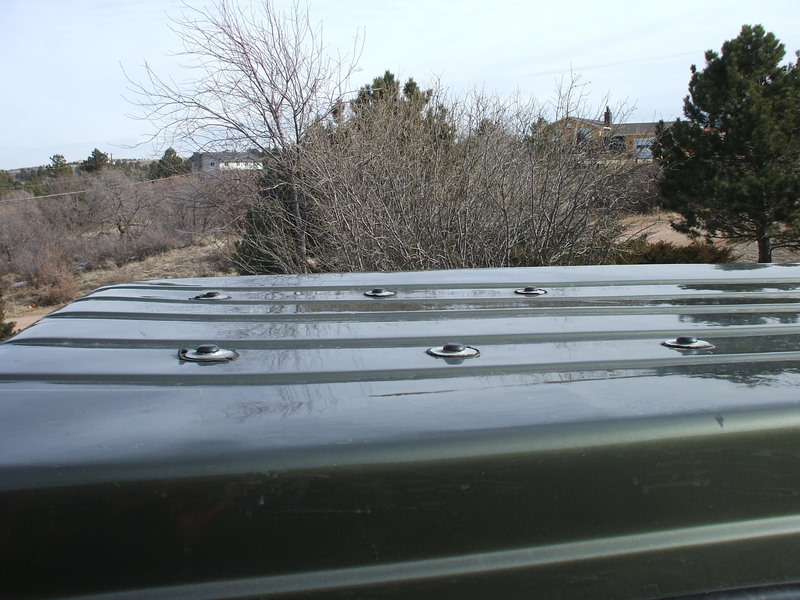
This is the cap as it was.


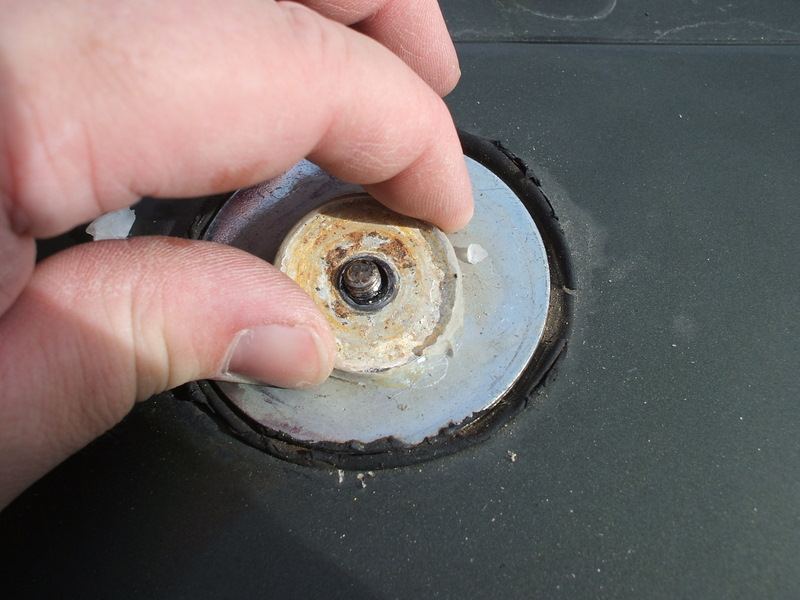
The clear silicone was SMB West's "solution" for which I drove 1400 miles and waited 5 hours. The never even loosened a nut.


As you can see with the silicone out, it really didn't do anything. There wasn't anything UNDER this piece, so unless the water was coming through the black cap itself, the application was useless.


Clear water damage between the cap retainer and the first washer. Note the ring of silicone- applied around not between the hardware.


Pulling the first washer off.


There is some old butyl, but not enough to fill the 1/2" hole in the second washer. This oversized hole in the washer and the first washer are what I think cause all the problems.


Only the second washer. Note the green roof through the hole- the first washer was needed as the second is so ill-fit to the bolt.


Pulled away.


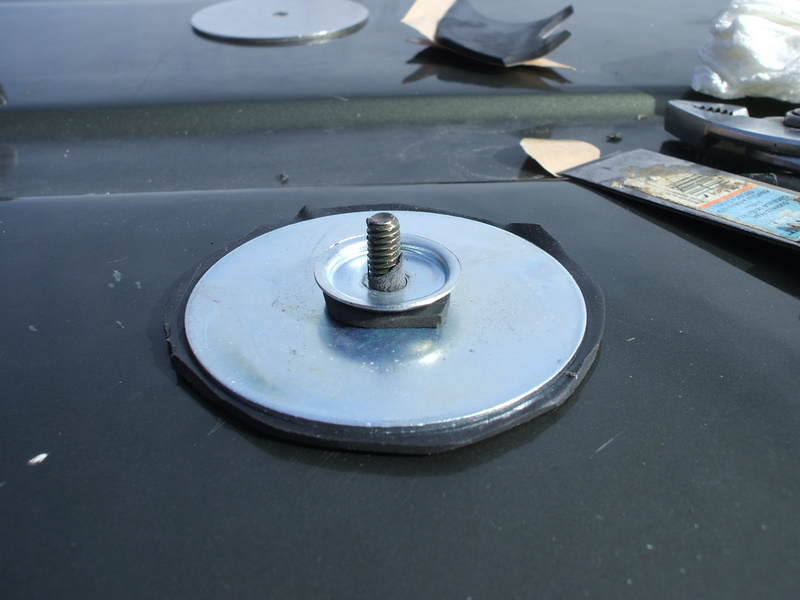
Comparing the new "correct" hardware to the old. The new is 4 1/2" in diameter with a 1/4" hole, which matches the bolt.


Note the cracks radiating from the area where the washer did not fit.


This is the other problem with the mis-sized washer- the fiberglass mushrooms around the bolt.


Which leads to this. This is years of rust. Between that and the washers in photos above and below it's clear, again, that SMB never addressed the problems with the roof.


Inside the hardware removed.


The new hardware, a cap retainer and a washer.


New hardware in place.


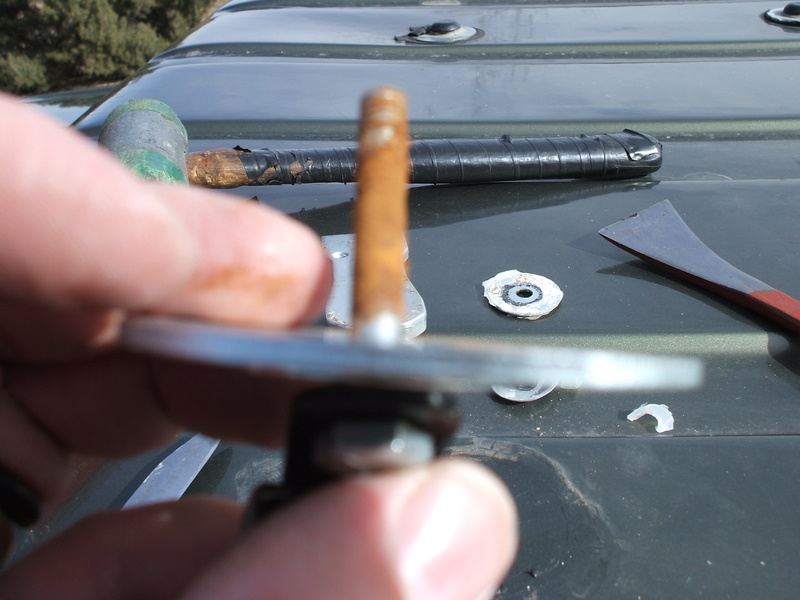
The new top hardware.


Cutting butyl disks to go under each washer.


Another butyl layer between the washer and the cap.


And another between the cap and nut.


Another new and old comparison, this time the internal washers on the J-hooks.


The J-hook base itself was bent. The previous owner over tightened to try to seal out the leak, but it only caused more problems. There was also no washer under the J-hook base, allowing it to bend.


A little vise work to straighten...


A test fitting with a small washer and the new inside washer.


I decided that wasn't enough so I shaped some larger washers for inside the nut.


And with the shaped washer. No butyl on this side as the leak goes between the top layers. Also the intention is not to be able to subject this to greater force, but to distribute everything as evenly as possible.


Going back all the threads got some butyl. I don't doubt more could be done, like silicone or RTVing the whole shaft and hole, but I don't know how those products play with butyl.


The help pointing out my CB antenna is missing. On project at a time Scribbles, on project at a time!


Another butyl butyl sandwich coming together.


And another poorly siliconed mess coming apart.


I did each bolt completely on each side, so that only one bolt was out at a time. With the top down nothing seemed to shift and there didn't seem to be any tension on any of the hardware.


The bolts are all too long, and I was left with three sets of threads sticking up.


A quick dremmel and they were flush with the nut.


What comes next? Well how about some butyl...


Wrap that in butyl before putting the cap on...


And the finished product with both sides done.
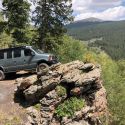
__________________
it was good to be back
jage is offline   Reply With Quote
Old 05-02-2010, 11:18 AM   #2
Site Team
 
daveb's Avatar
 
Join Date: May 2007
Location: Turlock Ca
Posts: 10,409
Garage
Re: Roof Leak Repairs Round II - The Front Section

Looks good. Were you having leaks or just decide to head it off? What should I look for as you said obscure?

I should have done this before the rack and solar was put on. I plan to show Peter at SMB this link. One of the things I've noticed is SMB is reluctant to use stainless steel hardware. If I were to order new, I would insist on everything exposed to water, especially the roof hardware to be SS rather than galvanized when possible. It would be worth the expense to take a little more time to do a better job and I would even pay extra for it. Nice job.
__________________
2006 Ford 6.0PSD EB-50/E-PH SMB 4X4 Rock Crawler Trailer

Sportsmobile 4X4 Adventures..........On and off road adventures
daveb is offline   Reply With Quote
Old 05-02-2010, 12:07 PM   #3
Site Team
 
WVvan's Avatar
 
Join Date: Jul 2009
Posts: 1,293
Re: Roof Leak Repairs Round II - The Front Section

Another excellent write up Jage. I hope I never need to use it.
And I see I'm not the only one who has furry supervision.
One question. Where did you get the butyl sheet? I have only found it in tape form.
__________________
Open the pod bay doors Hal.

Once I exit Hal, this is what I do.
https://larry.wvnet.edu/~van/pics/lic...late-small.jpg
WWW.WVBIKE.ORG
WVvan is offline   Reply With Quote
Old 05-02-2010, 04:08 PM   #4
Senior Member
 
jage's Avatar
 
Join Date: Apr 2007
Location: Parker, CO
Posts: 7,644
Re: Roof Leak Repairs Round II - The Front Section

Scalf77 was kind enough to supply it twice. What a guy! I've never seen it anywhere else.

The symptoms are water inside, namely coming through the rear light. Said water is black and usually appears when the top is going up (e.g. it pools inside) and as a stain both in the light fixture and on the canvas.

It would almost be easier if it just came in when it rained. As it is, when the water comes out inside it's almost never raining, or the top has been down and the bunk is wet. The only way I was sure I wasn't crazy is when I pull a wholly rusty bolt out... then it's like, AH HA! Here is the problem after all!

Search "Leaky Top" and my name and you'll find several other posts about this.
__________________
it was good to be back
jage is offline   Reply With Quote
Old 05-02-2010, 07:59 PM   #5
Senior Member
 
Join Date: Apr 2008
Location: Carmel Valley, CA
Posts: 634
Send a message via AIM to Skywagon
Re: Roof Leak Repairs Round II - The Front Section

Jage-
You need to feed that poor starving cat!
B.
__________________
2008 RB 50 Pueblo gold, Diesel, 4X4, Aluminess
NO2B
Skywagon is offline   Reply With Quote
Old 05-03-2010, 09:52 AM   #6
Senior Member
 
Scalf77's Avatar
 
Join Date: May 2007
Location: Beaverton, OR
Posts: 2,504
Re: Roof Leak Repairs Round II - The Front Section

Quote:
Originally Posted by jage
Scalf77 was kind enough to supply it twice. What a guy! I've never seen it anywhere else.
I found it at McMaster-Carr http://www.mcmaster.com/#butyl-rubber-tape/=6xgta9. They originally had it listed as 8" by 8ft role. When it showed up it was not an 8ft role but really an 8 yard role. Anyway I had (have) yards left over. McMaster also appears to sell it in a sheet

http://www.mcmaster.com/#butyl-rubber-sheets/=6xgzxs


Nice job Jage


greg
__________________
-greg
__________________________________________________ ______________
"Goldilocks" 2020 Ford Transit High Roof Extended 3.5 EcoBoost AWD Homebuilt
Scalf77 is offline   Reply With Quote
Old 05-03-2010, 09:18 PM   #7
Senior Member
 
jage's Avatar
 
Join Date: Apr 2007
Location: Parker, CO
Posts: 7,644
Re: Roof Leak Repairs Round II - The Front Section

Quote:
Originally Posted by Skywagon
Jage-
You need to feed that poor starving cat!
B.
That's what she says!
__________________
it was good to be back
jage is offline   Reply With Quote
Old 05-04-2010, 05:47 AM   #8
Senior Member
 
Join Date: Jun 2007
Location: Helena, Montana
Posts: 613
Re: Roof Leak Repairs Round II - The Front Section

Are you sure the roof damage isn't caused by the giant cat walking on it?

Great write up jage, and good luck with your long-suffering roof!
__________________
2006 Baja Tan SMB 4X4 EB50 PH 6LPSD
Mohawk Royalex Solo 14 foot canoe (light white-water)
Mad River Kevlar Explorer 17 foot canoe (flat water)
Dagger Royalex Legend 16 foot canoe (white-water)
Maravia New Wave 13.5 foot raft (fishing and white-water)
Ed in Montana is offline   Reply With Quote
Old 10-26-2010, 08:17 PM   #9
Senior Member
 
LenS's Avatar
 
Join Date: Jan 2009
Posts: 1,220
Re: Roof Leak Repairs Round II - The Front Section

Jage,

Just came across this post. We must have been on our Newfoundland trip when you were doing all this.

Did SMB over say: "Oh, you have the old design. We fixed that."? Or in reality we all have potential for the same water leaks AND top cracks. The top cracks worry me. I do snug my penthouse down for going down the road. How old is your top? Looks like I need to pull a bolt every one or two years to check for cracking. Or just wait for them to propagate beyond the washers.

Great photo's. Never understood why you were having a leak problem.
__________________
Len & Joanne

The Green TARDIS
LenS is offline   Reply With Quote
Old 03-07-2012, 10:21 PM   #10
Junior Member
 
Shadowfax's Avatar
 
Join Date: Oct 2007
Location: New Hampshire
Posts: 12
Re: Roof Leak Repairs Round II - The Front Section

Jage,

I've been reviewing this topic because I have a leak problem that looks much like this. I've decided to replace all the hardware front and back. Your instructions are excellent and the photos great. I have only two questions:
1. How exactly did you specify the parts you needed from Sportsmobile? Or will they know what I'm talking about when I call them up? (They being the folks in Indiana where mine was built.)
2. What is the thickness of the butyl rubber material? In seems to come in several thicknesses.
__________________
Harry Purkhiser
2k2, 4x2, E350 EB, Custom, Solar
Shadowfax is offline   Reply With Quote
Reply

Thread Tools
Display Modes

Posting Rules
You may not post new threads
You may not post replies
You may not post attachments
You may not edit your posts

BB code is On
Smilies are On
[IMG] code is On
HTML code is Off
Trackbacks are Off
Pingbacks are Off
Refbacks are Off

» Featured Campgrounds

Reviews provided by

Powered by vBadvanced CMPS v3.2.3
Disclaimer:

This website is not affiliated with or endorsed by Sportsmobile SIP or any of its affiliates. This is an independent, unofficial site.


All times are GMT -6. The time now is 05:32 PM.


Powered by vBulletin® Version 3.8.8 Beta 4
Copyright ©2000 - 2024, vBulletin Solutions, Inc.