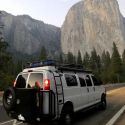
Journey with Confidence RV GPS App RV Trip Planner RV LIFE Campground Reviews RV Maintenance Take a Speed Test Free 7 Day Trial ×


Reply
 
Thread Tools Display Modes
 
Old 08-07-2010, 10:03 PM   #231
Member
 
Join Date: Oct 2009
Posts: 95
Re: Hal The Van

I really enjoy your write ups, pics & humor. Great job.

__________________
Current vehicle: 08' Power Wagon
Future vehicle,hopefully: SMB 4x4 RB 50, Purpose built for off-roading & camping, in style of course !!!
TwinStick is offline   Reply With Quote
Old 08-13-2010, 10:56 PM   #232
Site Team
 
BroncoHauler's Avatar
 
Join Date: May 2007
Location: Southern New Mexico
Posts: 10,179
Re: Hal The Van

Great story, great memories and great idea for your dad's ashes. Try to focus on the good memories, but I am sorry for you loss.


Herb
__________________
SMB-less as of 02/04/2012. Our savings account is richer, but our adventures are poorer.
BroncoHauler is online now   Reply With Quote
Old 08-13-2010, 11:23 PM   #233
Senior Member
 
Nomadcat's Avatar
 
Join Date: Nov 2009
Location: Greenwich Village, NYC
Posts: 568
Re: Hal The Van

So sorry to hear about your Dad.

Mine died two years ago at 86 and I think about him all the time. Kind of wish I had saved a scrap from his easy chair.

Anyway, it's a day at a time.

Take care.

Paul
__________________
2009 E350 5.4 Quadvan Homebrew
One day at a time
Nomadcat is offline   Reply With Quote
Old 08-14-2010, 02:26 AM   #234
Member
 
blkjak's Avatar
 
Join Date: Aug 2009
Location: s.w. florida
Posts: 43
Re: Hal The Van

my dad died 5 years ago @ 96. my mom and dad are gone now; what a void.
sorry about your dad; blkjak.
__________________
https://pic50.picturetrail.com/VOL165.../392572714.jpg
2005 ford e-250 extended crew cargo van "stealth sleeper".
blkjak is offline   Reply With Quote
Old 08-15-2010, 09:15 PM   #235
Site Team
 
WVvan's Avatar
 
Join Date: Jul 2009
Posts: 1,293
Re: Hal The Van

Back to work.
I'm going install a trailer hitch and then a bike rack on the van.

I'm using a Hidden Hitch Class III trailer hitch with a 2" receiver. I bought and mounted this hitch back in May. I used Model #87465. It's weight ratings: WC-TW: 600:6000 WD-TW: 1000:10000


I just checked the Hidden Hitch company site and it's no longer listed so I guess it's been discontinued.
I ordered it from etrailer.com for $184.95 (free shipping). They no longer list it either but I did a search and some other retailers still have it.

Here's the box after I opened it.


The box was damaged but the hitch was OK.


The hitch has a minimum of packing.


I was worried that the extra parts my have been lost with the big hole in the box but not to worry. The parts bag is securely taped to the hitch.


Once everything is unpacked this is what you get. The instruction sheet is one page.


Here's a closer look at the attachment hardware.


Notice there are three kinds of washers, three kinds of spacer blocks and two kinds of bolts. The nuts are all the same. The instructions read that drilling might be required but it wasn't.

Before starting the installation I suggest you crank down the spare tire. One reason is to get it out of the way.


Another reason being that you can use it to help support the hitch as you install it.


The hitch is about 36 pounds which makes it too heavy and cumbersome for me to hold in place with one hand while I bolt with the other. So some extra support is needed. I used a jackstand.


I could have used two jackstand but the tire and the one jackstand worked best. With two jacks the hitch would rotate. The tire is wide enough it stopped the hitch from rotating as I raised the other side.

There are holes in the frame that line up with the holes in the hitch so no drilling is needed.


When you start using the attachment hardware you have to closely follow the instructions. The different square spacers go between the frame and the hitch or the frame and the bolt head depending on the bolts location.


The washers are slightly concave so you need to place them with the bow facing upward.


When viewed from the rear I'm working on the right side first. Just get the nuts started. Don't tighten anything up yet.

After doing the right side I slide the spare tire out of the way and moved the jackstand to the left.


Attach the hardware on the left side.


I ran into a snag when I went to install the third bolt on the left side. The emissions canister (charcoal canister) is in the way.


At the time I was installing this back in May I didn't want to mess with the canister so I just skipped the third bolt. The trailer was only going to be used to support a bike rack so I wasn't worried. Since then I've removed the canister and found out it wasn't that big a deal to take off.

Look on the outside of the frame member and you'll see the two bolts that hold the canister in place. Just remove these two nuts and the canister can be moved out of the way.


I got around to putting on that final bolt today.

Tighten all the bolts in a alternating fashion. The hitch will bend slightly as it is tightened up against the frame.

That finishes up the trailer hitch. When you go to crank the spare tire back up you'll find it now rests against the inside of the hitch. You might have to give the tire a nudge or two as it raises so it clears the trailer hitch.


Next up is the bike rack.
__________________
Open the pod bay doors Hal.

Once I exit Hal, this is what I do.
https://larry.wvnet.edu/~van/pics/lic...late-small.jpg
WWW.WVBIKE.ORG
WVvan is offline   Reply With Quote
Old 08-16-2010, 06:53 PM   #236
Site Team
 
WVvan's Avatar
 
Join Date: Jul 2009
Posts: 1,293
Re: Hal The Van

Finished moving the charcoal canister today.


Moved it forward of the rear axle. More details to follow.
__________________
Open the pod bay doors Hal.

Once I exit Hal, this is what I do.
https://larry.wvnet.edu/~van/pics/lic...late-small.jpg
WWW.WVBIKE.ORG
WVvan is offline   Reply With Quote
Old 08-31-2010, 11:14 AM   #237
Site Team
 
WVvan's Avatar
 
Join Date: Jul 2009
Posts: 1,293
Re: Hal The Van

Two weekends ago.
Advantage of a "B" sized RV. Just keep moving it around till you hit a level spot.


Previously I'd installed a trailer hitch so I can haul my bike with me. Now for the bike rack.

I use a fold-down style bike rack with my other camping vehicle, Subaru Forester with the WVBIKE plates.


The fold-down rack wouldn't work so well on the van. I could open the doors with a bike on the folded down rack but couldn't safely climb in and out of the back of the van. Because of that I went with a swing-away style rack.
I bought the Surco DBR300 OSI Swing Away Hitch Mount Bike Rack, 2" Receiver, Up To 3 Bike Capacity.
It was $226.58 on Amazon ( free shipping).


There are a couple of design problems with this bike rack but nothing that can't be fixed.

The bike is secured in this top horizontal holder. There are spaces for three bikes. Put your bike into the "V" groove then just tighten down with the two threaded knobs. The round knob on the right has a lock. Once you have the bike tightened into place you can "unlock" the knob so that it spins free and doesn't loosen the bolt underneath.


Even secured by these two bolts the bike can still swing so I always add a strap wrapped around the bottom brace to keep it in place.


Here is how the swing-out part of the rack works.
There is a large bolt that holds the two halves of the rack together.


Loosen this bolt.


Then pull on the cable release.


That raises this spring pin which allows the front half of the rack to swing away.


The two halves pivot on this bolt.


As you swing the bike you'll quickly see that it can only go so far before the back tire meets the van.


Where the horizontal bike hold-down is attached to the bike rack is another pivot point. Pressing down on these two knobs allow the top to rotate.


You can rotate the top 90 degrees.


With the top hold-down in this new position you swing the rack until the bike is parallel to the side of the van.


That allows full access to the back of the van.


Now to the design problems with this particular bike rack. There are two. I don't like the locking knob as a security feature. It doesn't feel robust but compared to the second problem it's small potatoes.

Here's the main problem. The pivot bolt that secures the halves of the bike rack together.


All it would take is a thief and a wrench to remove this bolt then walk away with the front half of the bike rack with the bike still attached. Nothing to stop them.

Here's how I fixed it. Had a friend weld on two pieces of steel angle. One onto each half of the bike rack then drill a hole through both pieces.


Putting a lock through the holes secures both halves of the bike rack together so even if the bolt was removed the rack will stay together.


Adding a steel cable to the lock means I can run the cable through the bike which secures the bike to the rack without worrying about the quality of the locking knob.


There was one other modification that had made to this bike rack. I have a step bumper on the van which is wider than standard rear bumper. To compensate for this extra width the square tube part of the bike rack that slides into the trailer hitch had to be extended by 1-1/2". The local machine shop did it for $20. Good price.


To secure the bike rack to the trailer hitch I'm using Draw-Tite J-Pin Anti-Rattle Lockset for 2 inch Receivers. Currently around $26.


This J-pin is designed for 2" Receiver Style Hitches with 5/8" Pin Hole & 1/2" Pilot Hole.


The short leg of the "J" shape goes through the "Pin" hole and compresses the rack tube against the side of the receiver tube.


Once you tighten this nut enough (with included wrench) there will be no movement or rattle between the rack and the trailer hitch. It's like they are one unit.


When it's all tightened down, put the lock on.


I first read about this J-Pin lock on-line then went to a couple local RV/trailer dealers to buy it. Neither stocked it or claimed to know what I was talking about. That's odd. This thing really does the trick.

Some of these previous pictures are from this past weekend. After I took the bike off the van I headed for the West Fork Trail.


Work on the van or enjoy using the van? Tough call.
__________________
Open the pod bay doors Hal.

Once I exit Hal, this is what I do.
https://larry.wvnet.edu/~van/pics/lic...late-small.jpg
WWW.WVBIKE.ORG
WVvan is offline   Reply With Quote
Old 09-09-2010, 09:57 PM   #238
Site Team
 
WVvan's Avatar
 
Join Date: Jul 2009
Posts: 1,293
Re: Hal The Van

I'm way behind on my RV conversion but on the bright side the van is still available to fill to the ceiling with "stuff that needs hauled".


I'm going to start work on the heating system for the van. This will be done in steps. The first step is the design and placement of the fuel tank. It's also the only step I've completed so far.

For the heater I bought a used Webasto Airtop 2000 on ebay for $411 Canadian.


Here is the Webasto label.


The Webasto is made in Germany so the label will need a little translating. According to the Google translator "Brennstoff" means fuel. It's listed as "Diesel" which is the same in both languages. If this was a gasoline model heater it would read "Benzin" instead.

Notice the legend "Inbetriebnahmejahr" at the bottom of the label and to it's right you can see small spaces where parts of the label have been removed. The word translates as "commissioning year". Normally to the right there would three two digit sequential numbers which represent when this particular heater was manufactured. Obviously someone has scratched off the numbers so you won't know how old the heater really is.

No problem. Even an old heater is OK. The Webasto's have a reputation for reliability and longevity. A classic case of the phrase "German Engineering". Even if there is a problem, replacement parts are readily available.

I've been asked why I didn't just didn't get a gasoline model since this is a gas van. A good used gas model Webasto is very hard to find. A new one goes for around $2000. So the difference between $400 for a diesel and $2000 for a gasoline model is the reason I'm going this route. It also gives me a chance to do something new.

All the previous information also applies to cab heaters made by Eberspächer. This is the main competition to Webasto. These are both German companies and have most of the market split between them. In America Eberspächer products are marketed under the Espar brand name.

I'll need a separate fuel tank on the van to hold the fuel for the diesel Webasto. Full credit for the fuel tank design I'll be using goes to Diyvanner at the RV.Net site. I couldn't have done this without his help. All the good ideas are his. The bad one's are all mine.

Diyvanner shared all of his design secrets but his installation was on a GMC van. Since mine is a Ford van I'll have to come up with all my own measurements and adaptations. First I'll have to figure out where to install the tank under the van. That involved a lot of laying under the van and making measurements.

I decided that the best place is on the driver's side of the van between the rocker panel and one of the two main frame beams. One consideration is the emergency brake cable that runs along the side of the frame beam.


There are also two cross pieces under the floor. This picture was taken while looking straight up under the van.


Next take a bunch of measurements.


Here's the result of all the measurements. The front of the van is to the right. The "gas inlet hose" in the drawing refers to van's gas inlet not what I'll be adding for the heater.


The fuel tank will be placed within this space.

continued:
__________________
Open the pod bay doors Hal.

Once I exit Hal, this is what I do.
https://larry.wvnet.edu/~van/pics/lic...late-small.jpg
WWW.WVBIKE.ORG
WVvan is offline   Reply With Quote
Old 09-11-2010, 09:04 PM   #239
Site Team
 
WVvan's Avatar
 
Join Date: Jul 2009
Posts: 1,293
Re: Hal The Van

Heater fuel tank installation continued -

Lately I've been spending so much time below the van getting measurements, working, painting on rustproofing and other things that I no longer think of it simply as the space under the van. It is now "The Undervan".

With the undervan measurements on hand I now needed the side dimensions. The inlet for the fuel tank will go through the side of the van. I don't know where the rocker panel ends and the side of the van begins or even if this distinction holds with a van. I couldn't find any kind of a cut-away diagram.

So I need to know the width of the side of the van in relation to outer edge of the undervan on the drivers side. I'll be using a drywall T-square, clamp and tape measure.

No we haven't had a freak snowstorm in WV. These pictures are from when I first did this back in February.

Clamp on the T-square using the small lip at the bottom of the rocker pane as an anchor point.


The cross part of the T-square is against the inside edge of the rocker panel (aka the outer edge of the driver's side undervan).


With what I think of as the upright part of the T-square now extending outward from the van I have a graduated baseline for measurements.


Take the tape measure and and find the distance from the top edge of the T-square to the edge of the van. Write it down.


Using graduations on the T-square as a guide, move the tape measure a half inch farther left. Then get the distance from the edge to the van. (In the picture it's moved an inch but you get the idea.)


Keep this up until you run out of van.


As usual I was under direct supervision.


Take all the measurements and plot out a cross section of the rocker panel.


The line on the left that represents the outer skin of the rocker panel is far from exact but it is close enough for my purposes. You can see a measurement of 6.17" under the line. If you extend the line of the floor to the left into the rocker panel space this what the width should be at this point.

But that was still the big unknown. What's really inside the rocker panel? (Don't bother telling me. I now know.) Even without that information I can use this drawing and the one from the previous post for sketching up different fuel tank and inlet configurations.

continued:
__________________
Open the pod bay doors Hal.

Once I exit Hal, this is what I do.
https://larry.wvnet.edu/~van/pics/lic...late-small.jpg
WWW.WVBIKE.ORG
WVvan is offline   Reply With Quote
Old 09-13-2010, 09:32 AM   #240
Site Team
 
WVvan's Avatar
 
Join Date: Jul 2009
Posts: 1,293
Re: Hal The Van

Heater Fuel Tank continued:

Now that I have a near complete set of measurements it's time to decide on some equipment. Diyvanner had already done the research so I just followed his lead. For the fuel inlet that will go through the side of the van I'll use a Sea Dog Stainless Steel Angled Hose Deck Fill. Model# 351521. Made for 1-1/2" fuel hose with "Diesel" written on the face plate.

It's currently around $40.

I couldn't find all the dimensions I needed on-line so contacted the company to get these additional two.


I'm assuming that I can place the fuel inlet on the side of the van no higher than the level of the floor.

The fuel inlet outlet end has a 30 degree slope. I doubled checked the side of the van where the inlet would be mounted and and it has a slope from vertical of around 20 degrees. Mounting the inlet so it's face is flush with the side of the van will now give a slope of 10 degrees to the outlet end.

The fuel tank will be made by Coyote Gear. They make custom built spun aluminum tanks in 5 different diameters. I think a tank with a diameter of either 8" or 10" will be best. To help decide create scaled drawings with each size.

10" tank


8" tank


While the 10" tank would fit OK I didn't like that it would extend below the bottom edge of the van. Also there isn't much room for error around the sides of the tank in case I made a measuring mistake, and it's getting close to the emergency brake cable. So I decided on the 8" tank.

Next decision was on where to place the fuel inlet on the tank. If I put it on the top of the tank it looks like the rubber fuel hose that would connect the fuel inlet to the tank would end up with a negative slope away from the tank.

The tank could be lowered but for simplicity's sake I wanted to use one of the under floor supports as a mounting point.

If I move the fuel tank inlet to where it's 30 degrees from vertical a formed rubber fuel hose with a 45 degree angled bend should fit with just a little extra bending. I'd prefer that the fuel line had more of a slope towards the tank. The tank will probably have to be filled slowly.


So a 8" diameter fuel tank with a fuel inlet 30 degrees from vertical is the type of fuel tank I'm going to order.*

Before placing an order for the fuel tank I'll have to open up the rocker panel so there's absolutely no doubt about what's inside. Since it is custom made tank I won't get a second chance.

NOTE*: I have over simplified the design process for the fuel tank. I actually spent weeks considered other mounting options and worked out a bunch of different fuel inlet angles but I didn't want this post to drag on forever. While writing up the descriptions of the different things I do on this RV build I'm never quite sure where informative stops and plain old boring begins. At least I hope it's informative.

continued -
__________________
Open the pod bay doors Hal.

Once I exit Hal, this is what I do.
https://larry.wvnet.edu/~van/pics/lic...late-small.jpg
WWW.WVBIKE.ORG
WVvan is offline   Reply With Quote
Reply


Posting Rules
You may not post new threads
You may not post replies
You may not post attachments
You may not edit your posts

BB code is On
Smilies are On
[IMG] code is On
HTML code is Off
Trackbacks are Off
Pingbacks are Off
Refbacks are Off

» Featured Campgrounds

Reviews provided by

Powered by vBadvanced CMPS v3.2.3
Disclaimer:

This website is not affiliated with or endorsed by Sportsmobile SIP or any of its affiliates. This is an independent, unofficial site.


All times are GMT -6. The time now is 10:26 AM.


Powered by vBulletin® Version 3.8.8 Beta 4
Copyright ©2000 - 2024, vBulletin Solutions, Inc.