Journey with Confidence RV GPS App RV Trip Planner RV LIFE Campground Reviews RV Maintenance Take a Speed Test Free 7 Day Trial ×


Reply
 
Thread Tools Display Modes
 
Old 10-28-2007, 10:14 PM   #1
Senior Member
 
jage's Avatar
 
Join Date: Apr 2007
Location: Parker, CO
Posts: 7,644
Brake Controller Install

I wanted to find someplace good to put my brake controller. Unfortunately as anyone who has looked at the Ford dash realizes, there really is no good place.


Of course the first thing was to find the factory harness for the brake controller.


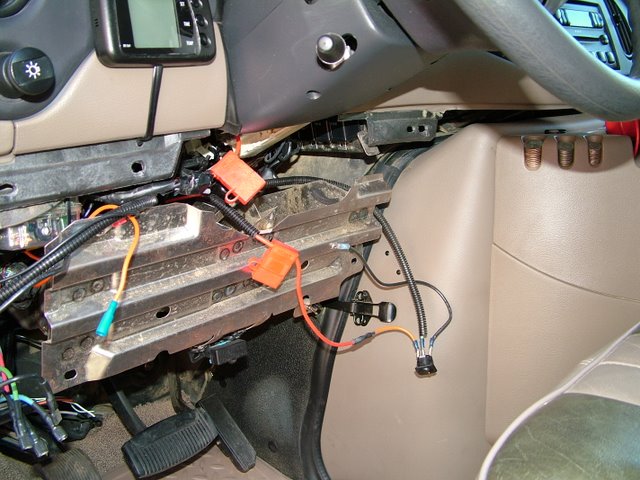
The panel pulls off with clips and yields a nice metal support, a favorite grounding location for all things added.


I cut the metal with a dremel for easy bending, flattened this part, and then drilled some holes in the expected mounting location- drilling before bending was easier. After drilling I cut more- the goal was to get the holes flat.


Cut down further and folded flat with the expected bracket location.


Cutting the dash cover to match- I really don't like the SMB switches or placement so I was glad to lose the "High Idle" control hole. The dash received more attention in a side project, restoring the high idle switch in a new location. In this pic it is pretty square, later I ovaled out the sides to accomidate more space for the side dials.


The brake controller in place. After fitting I moved it all the way to the right thinking the left knob was for adjustment.


It turns out the right know is adjustment, the left knob the leveler- so I'm going to be able to move it back left and the gap with even out.


As it is, I can adjust both sides easily. It wound up further out than I expected and since the left knob on the only needs to be adjusted once it should look better once I reposition it.


Sorry about the bad pic, but this is another shot of the location.

It winds up being a great spot, away from my knees and easy to reach in any situation. Even though I used only two screws out of four to mount to the bracket, it is stiff enough for daily use (I usually squeeze with my thumb on the opposite side when applying the brake lever). It's quite likely the mount will become mangled in an emergency stop or trailer breakaway, but at that point alignment won't matter, just me monkeyfisting the brake lever, so I think the mounting is going to work just fine.

__________________
it was good to be back
jage is offline   Reply With Quote
Old 11-03-2007, 10:33 PM   #2
Senior Member
 
cellularSTEVE's Avatar
 
Join Date: Oct 2007
Location: SoCal
Posts: 1,071
Good write-up Jage!

Good write up Jage!
I just installed my brake controller today and was starting out to follow your mounting location.

I instead put it in a more visible place for me. It is on the left side behind the turning signal lever. Where you have that screen. What is that anyway, something for diesel?

I will post some picutures when I have a moment.
__________________
'05 Ford V-10 4x4 SMB "50" White
'00 Jeep Cherokee 4x4 Highly Modified
'04 Jeep Grand Cherokee- wife won't let me modify it. :-(
Does anyone really read this stuff other than surfgeek?
cellularSTEVE is offline   Reply With Quote
Old 11-03-2007, 11:04 PM   #3
Senior Member
 
jage's Avatar
 
Join Date: Apr 2007
Location: Parker, CO
Posts: 7,644
It's the Chili Dog controler and temp sensor- the dash was a bad place so I move it to over the fridge opposite the side door.
__________________
it was good to be back
jage is offline   Reply With Quote
Old 10-03-2008, 09:32 PM   #4
Senior Member
 
John and Dana's Avatar
 
Join Date: Feb 2008
Location: Normandy Park, WA
Posts: 364
I just installed a Prodigy controller on my '08 and unfortunately under the knee panel on the 08s there is nothing to mount the controller to. After much pondering I decided to mount the controller to the bottom bracket for the knee panel.


I first cut a small piece of leftover strut from installing a garage door. Any angle would work but this had the added benefit of already having a hole for the spring clip on the knee panel. I had to bend the angle open to approximately a 50 degree angle so that the controller would be level to slightly tilted up in the front. I then attached the angle with pop rivets to the bracket for the controller.


I then used a c-clamp to hold the mount in place while I drilled holes through it and the support for the knee panel. I then pop riveted the mount in place. Screws would work fine to, but I like the pop rivets because they won't work loose over time and are easily removed with a drill, if you use aluminum rivets.


Final Installation.

John
__________________
'08 SMB 4X4 6.0PSD EB 50 (96K)
John and Dana is offline   Reply With Quote
Reply


Posting Rules
You may not post new threads
You may not post replies
You may not post attachments
You may not edit your posts

BB code is On
Smilies are On
[IMG] code is On
HTML code is Off
Trackbacks are Off
Pingbacks are Off
Refbacks are Off

» Featured Campgrounds

Reviews provided by

Powered by vBadvanced CMPS v3.2.3
Disclaimer:

This website is not affiliated with or endorsed by Sportsmobile SIP or any of its affiliates. This is an independent, unofficial site.


All times are GMT -6. The time now is 04:24 AM.


Powered by vBulletin® Version 3.8.8 Beta 4
Copyright ©2000 - 2024, vBulletin Solutions, Inc.