|
|
 10-14-2008, 10:36 AM
|
#21
|
|
Senior Member
Join Date: Jul 2008
Location: Forest Falls CA
Posts: 876
|
Right on. I would like to switch over to eye mount in the rear also. I don't know why stupid ford decided to run stud mount outback... ugghh.
|

|

|
|
10-14-2008, 10:57 AM
|
#22
|
|
Senior Member
Join Date: Jan 2008
Location: Baja Whenever Possible
Posts: 1,012
|
Thanks. The welds are not as ugly as they appear in the pic. Also, since you can't see them when mounted, more concerned about function over form.
Regarding the front, a similar mount would work for the lowers, but I want some cleaner lines as those are highly visable. With the SMB setup (front) my eyelets measure approx 16" from center to center. I have approx 2" of clearance between the diff housing and the cut out notch on the crossmember. If my front axle only traveled up and down in a level motion, then I'd only need to add about 1/2 on eyelet distance up front. Of course, the van and the front axle do not always travel in the level movement. With that, I'm going to max the distance I can get while leaving the current upper mount in place (in the top of the old coilbucket). That will produce a gain of 2" (approx 18" distance at rest). The Bilsteins are 14.06" compressed and 24" + fully extended. Lots of unused travel on extension with this setup. Will do the hoops later so that the usuable shock travel is in the middle of the travel range. Off to anothe rmeeting now.
__________________
It takes a village to raise an idiot.
|
|
|
|
|
10-15-2008, 03:20 PM
|
#23
|
|
Senior Member
Join Date: Jan 2008
Location: Baja Whenever Possible
Posts: 1,012
|
Home with the flu today, but can't keep out of the shop. Decided to start on the lower front mounts. Started with 3/16" shock tabs for a 3" axle, in this shape:

Drilled out the holes to 3/4". Cut the mounts so the bottom edge would run perpendicular to the spring plate sides and the upper edge would run well up on to the spring plate side. Using 1/4" x 1 1/2" flat bar to extend the spring plate sides. Will fully weld the mounts and flat bar to the spring plate once I pull the spring plates off the van. Welded a bushing into each unit and used various bushings to ge teh spacing correct while tacking the modified tabs into place. Here's what I've got right now.


This setup will increase the shock mount spacing by 1 3/4" At rest, the shock mount spacing will be approx 17.75".

__________________
It takes a village to raise an idiot.
|
|
|
|
|
10-16-2008, 08:36 PM
|
#24
|
|
Senior Member
Join Date: Jan 2008
Location: Baja Whenever Possible
Posts: 1,012
|
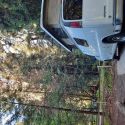
Found some time today to mount up the front shocks. Did one side at the time. Started with passenger side as it was a little more complicated due to the added stabalizer bar. Jacked up the pass side with a floor jack on the axle housing (keeps leaves up again the axle so its easier to remove the leaf plate. The front shocks were completely shot (no resistence, water in the boots, etc. -complete garbage as expected). Here is a pic of the driver's side leaf plate after I removed the old shock mount and welded on my new creation:


Passenger side with shock mounted.

Full shot of shock. By mounting the rezie on the side, and giving it the right amount of twist, was able to get the rezie hose up and well out of the way.

I added a bump stop perch on the pass side. Once installed, it looked like it might have been a mistake (not a ton of room). I'll run with it for a while, but will likely remove it. Bump cans would be an improvement.

With only the fronts installed, there is a noticable improvement in handling. Of course, the old shocks on the rear drag down much on the improvement of the fronts. Will tackle the rear shocks this weekend hopefully. Looks like those rezies will store neatly out of the way on the frame cross member where the rear upper shocks mount. Yes, I need to clean my shop.
Oh yes, want to give you folks a heads-up. Even if not switching/modding the shock setup, you need to change out the bolts SMB used for mounting the shocks. The bolts are too short (not enough smooth shaft). I had noticable wear on all the bolts because the SMB mounts mated with the threaded portion of the shock bolts. That's a no-no. You'll need Grade 8, 1/2" bolts. I think I went with 2 1/2" length to make sure the threads were beyond any place where the bolt and mounts could make contact (for me it was only relevant when it came to the upper front mount as I'm still using the SMB mount in the coil bucket). 1/2 washers on each side and a lock washer on the nut side guarantee you'll have plenty of thread available to tighten everything up.
__________________
It takes a village to raise an idiot.
|
|
|
|
|
10-19-2008, 09:41 AM
|
#25
|
|
Senior Member
Join Date: Jan 2008
Location: Baja Whenever Possible
Posts: 1,012
|
Today will finally mark the end of this conversion. Again, if planning on using a remote shock, I'd highly recommend you make sure it has a 90 degree hose fitting at the shock body and a short hose so you can mount the rezie to the shock body. With the straight hose fitting, the fitting/hose hits the crossmember at the upper rear shock mount. I am having to trim a fair amount of metal (lip) to get the shocks in place without having the hoses hit the crosmember. A real drag. A 90 fitting would have avoided this problem completely, and I'd be done now. Instead, I probably have a few more hours underneath the van cutting this and welding that (had a small piece of hot metal roll down my ear canal yesterday and it hurt). I'm burned and cut all to hell today. Grinding and welding above you really bites. Anyway, here is a pic of a mounted lower rear shock mount. From the pic you'll be able to tell I can't leave well enough alone. I drilled the mount holes from 1/2" to 3/4" and welded in a bushing on one side (again, allowing me to inseart the opposing bushing and bolt from the other side which is much stronger and easier than the alternative). Looks like the sun may have heated the lands enough for me to get back under the van, so I'm off. As you can see, the lower mount is slightly below the plane of the bottom of the axle housing. However, the shock itself will be well above. Set up the rears so at rest, the shock is at mid-travel. More than enough travel on compression and extension without fear of bottoming out or over extending the shock.


__________________
It takes a village to raise an idiot.
|
|
|
|
|
10-20-2008, 09:35 AM
|
#26
|
|
Senior Member
Join Date: Jan 2008
Location: Baja Whenever Possible
Posts: 1,012
|
The wind gods hate me. On Saturday, when welding shocks mounts on the rear axle housing (outside), the wind was howling. Had to drape the rear of my SMB with blankets so the shielding gas for the welder wouldn't blow away. Made for some not so pretty welds (strong still, but not so pretty). On Sunday, when I wasn't welding anything, you couldn't fly a kit it was so calm. Anyway, all shocks are in. Ride is improved, but haven't had a chance to see how it feels in some of these high Gorge winds. On the highway, the van doesn't feel as top heavy now (rocking side to side when passing, when in highway ruts, sharp turns, etc.). Definately worth the effort. Now I've got to clean out my shop. Its a disaster in there between the shock mount fab and the Bug resto (welded in new floor). With the very heavy valing I chose, compressing the shocks enough to install them can be challenging. For the rears, I mounted the shocks at the upper mounts and used a small floor jack to compress the shocks from the bottom. Once compressed, it was nothing to put the shock eyelets into the lower mount housings. Once resting in the housings, a screw driver could be used to pry the shock ends to line everything up for the bolts. Up front, I installed at the lower mounts first, and used pure god-like strength to compress the shocks. Once compressed, placed the upper eyelets into the mount housing and used a screw driver to adjust for alignment. There, I'm done with this thread finally.
__________________
It takes a village to raise an idiot.
|
|
|
|
|
11-09-2008, 09:20 PM
|
#27
|
|
Senior Member
Join Date: Jan 2008
Location: Baja Whenever Possible
Posts: 1,012
|
Ha ha! Just when you thought it was safe to go back into the forum....
I bought some used F series shock hoops. Will modify them to work on the van (at least that's the plan) and get rid of those damn coil buckets. I'll keep you updated.
__________________
It takes a village to raise an idiot.
|
|
|
|
|
11-18-2008, 11:43 AM
|
#28
|
|
Senior Member
Join Date: Jan 2008
Location: Baja Whenever Possible
Posts: 1,012
|
I should have taken a pic of these shock hoops. Held them up in place to get a general idea what I've got to work with. If I had a body lift, I think these might bolt right in after removing the left-over coil buckets (some drilling required). Not doing a body lift, so will cut these hoops down a couple of inches or more to fit the wheel wells.
__________________
It takes a village to raise an idiot.
|
|
|
|
|
03-03-2009, 12:11 PM
|
#29
|
|
Senior Member
Join Date: Jan 2008
Location: Baja Whenever Possible
Posts: 1,012
|
Re: Shocking Thread
This has abosolutely nothing to do with the SMB and its shocks, but thought I'd share anyway (becuase the SMB hauls the buggy). Started building mounts for my rear buggy shocks (Fox 2.0 coilovers and Fox 3.0 triple Bypasses). Now, these be some serious shocks.
 
__________________
It takes a village to raise an idiot.
|
|
|
|
|
03-03-2009, 02:27 PM
|
#30
|
|
Senior Member
Join Date: Apr 2007
Location: santa barbara
Posts: 229
|
Re: Shocking Thread
I just put some King shocks on my VW syncro Vanagon. I'd like to put some on the SMB but at 800.00 per set I think I'll go with Deavers first then upgrade the shocks.
.JPG)
__________________
Seth Hatfield
'05 EB350 6.0 4x4
Homebuilt Interior
Santa Barbara Ca
|
|
|
|
|
|
 Posting Rules
|
You may not post new threads
You may not post replies
You may not post attachments
You may not edit your posts
HTML code is Off
|
|
|
|
 » Recent Threads
 |
|
|
|
|
|
|
|
|
|
|
|
|
|
|
|
|
|
|
|
|
|
|
|
|
|
|
|
|
|
|
|
|
|


 Linear Mode