|
|
 08-20-2020, 10:18 PM
|
#721
|
|
Senior Member
Join Date: Nov 2015
Location: Vacaville, just east of the San Francisco Bay Area
Posts: 1,062
|
^^^^^ Good info!
We need others in different parts of the country to ask the same question and provide feedback. Effect of freeze/thaw cycle? I'm having a tough time with that, thus we need data!
__________________
Flint - 2016 SMB Sprinter 4x4 144" RB 150S w/ PH
KN6BJX
|

|

|
|
08-22-2020, 10:24 AM
|
#722
|
|
Senior Member
Join Date: Nov 2015
Location: Vacaville, just east of the San Francisco Bay Area
Posts: 1,062
|
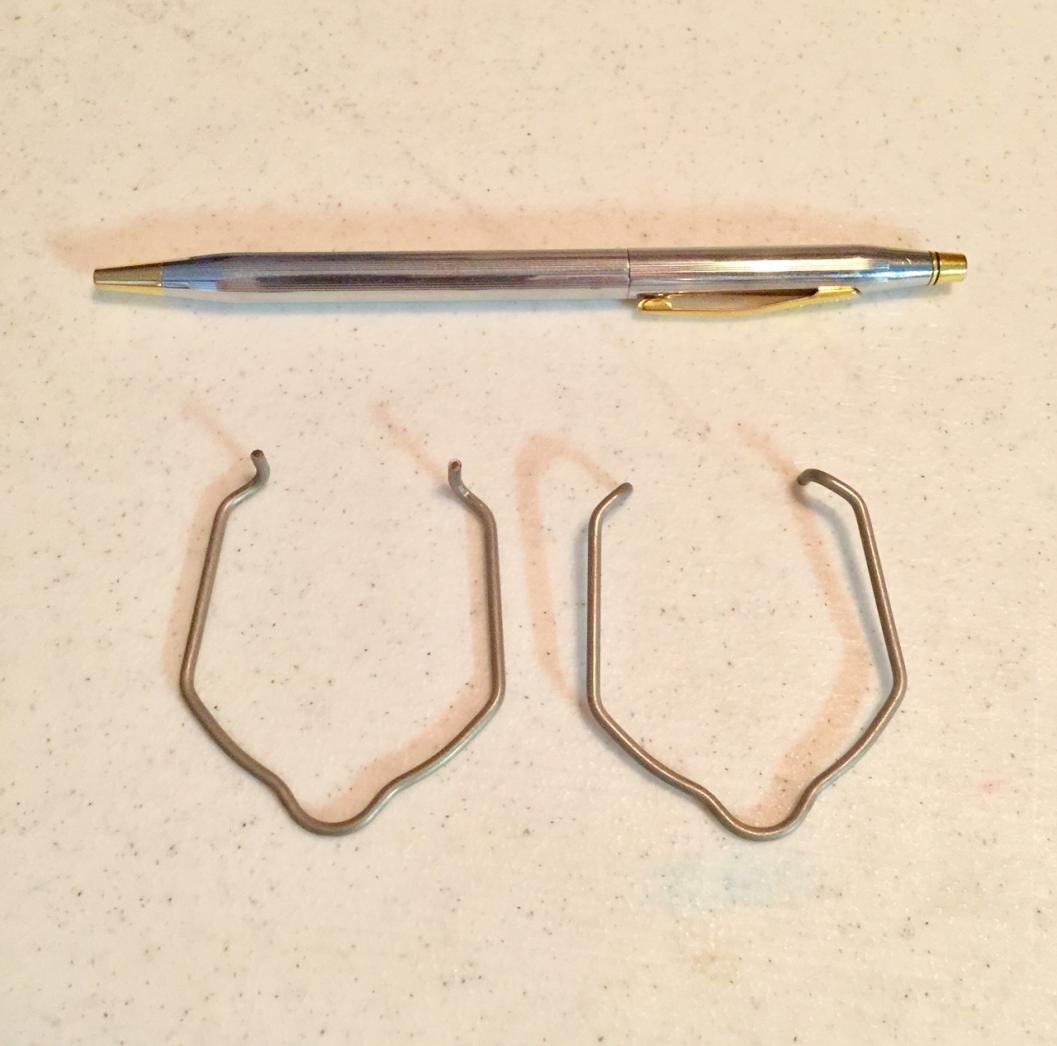
000-993-08-02 Spring Clip
Not much to look at, is it?
Skinny little Cross pen for scale.
FYI, I tried as hard as I could to re-assemble the fitting laying there on the side of the gravel road, all to no avail. Now that I'm more familiar with what's there, if it were to happen again I would disconnect the standard hose clamp connection on the engine side of the hose and then try to make up the snap lock fitting at the radiator (after replacing the clip with one of those shown in the picture below). The extra flexibility afforded by having the entire hose free is most likely the key to making up the snap lock joint. The receiver at the radiator was bad and needed to be replaced, but by doing this I might have been able to limp into town. I'll never know....
__________________
Flint - 2016 SMB Sprinter 4x4 144" RB 150S w/ PH
KN6BJX
|
|
|
|
|
08-22-2020, 02:56 PM
|
#723
|
|
Member
Join Date: Aug 2016
Posts: 84
|
Quote:
Originally Posted by Fitz

^^^^Hein,
I'm on it! You are right, it looks bad, thanks for pointing it out.
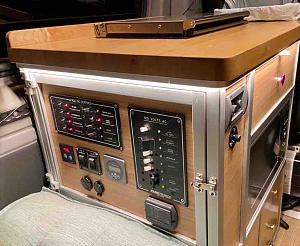
The black spots you see are me previously applying the coating you reference to the various electrical grounding screws SMB installed during the build. On my list is gathering up the grounds and running them all to the Blue Sea Systems 2300 bus bar that I have sitting on the workbench waiting for the appropriate time...
Once done I'll be sure to go back and coat everything that's visible from the outside.
Question: Any thoughts on what to use in the holes once I remove the various screws? I'm currently thinking of simply plugging them with SS threaded bolts.
For reference, here is what it looks like from the inside:
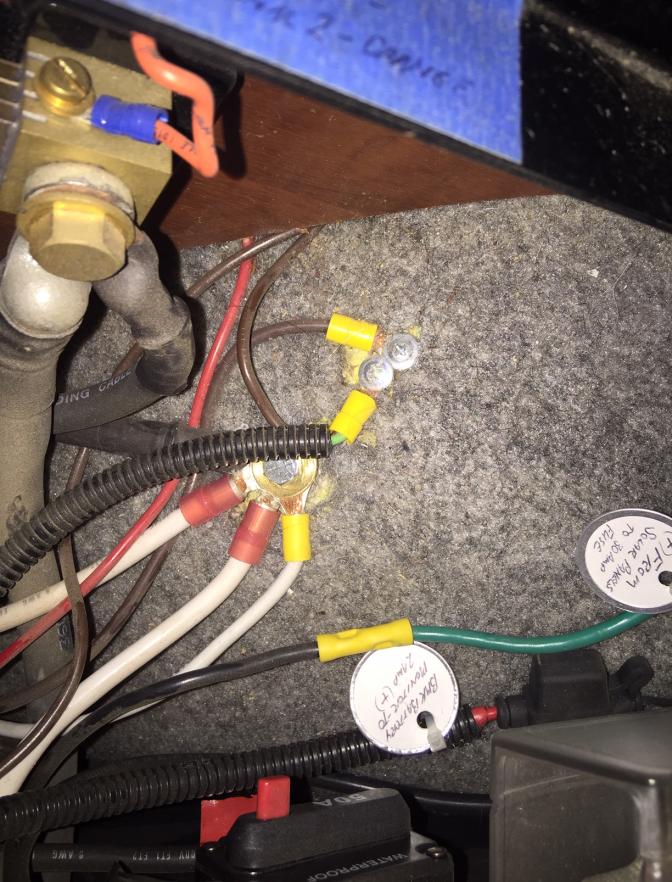 |
Hey Fitz...those SMB grounds are pretty bad. Not sure how I missed that when I had my head in there last time around. If you haven't already done this, let me know...I've got some tips for you....
Basically, don't rely on the bolts or washer as a conductor between a ring terminal and the body. Washers, unless copper or brass, are horrible conductors electricity and are generally unreliable. The same is true for bolts. Tooth washers is a great trick for attempting to get a lower power ground through paint... But for a high current connection like an inverter or anything over 10 or 20 amps, it needs to be clean metal and it needs to be a bolted connection. I always smear some dielectric or anti-corrosion electrical grease on chassis connections as well. The ring terminal needs to be tinned and ideally as marine rated... Bare copper is a big no-no as corrosion may develop between the copper and metal surfaces.
If I recall the 2300 requires a short jumper between the bar and chassis return. Let me know if you want me to make up a short jumper... I've got some extra ultra flexible 1/0 and 3/0 cable and appropriate terminals. For cable that large will need to make sure we've got the appropriate bend radius... Ideally we'd use a 5/16 bolt as that ring terminal has quite a bit of shoulder on it for good conduction. I can't remember if that's also the chassis return for the house battery bank as well (all the alternator current flows through that connection to charge the batteries?) I'm not active on here all that much anymore... so when you get ready to do the mod, text me.
Oh by the way, the windshield washer wiper clip? Mine's been loose or broken pretty much since I got the van. A UV stable zip tie works wonders.
Great post on the lower radiator hose. Thermally, I don't have near the number cycles at your van has (mileage), The calendar wise my van is older. I'll have to put that on the list for the next maintenance round.
And one more thing, as you know I have the van compass lift on my van. The back of my van is sometimes lighter and sometimes a great deal heavier than yours.
In one instance, I heard some pretty bad metal rasping/scraping sound... Thinking I dragged a shock mount or the pumpkin, I looked for damage. Didn't find any. A few days later, happened to noticed the driver side rear wheel well (front of well) pinch seam was bent/mushed down.
I bit noticed the axle moving forward in the wheel well on one of the videos my wife took of a creek crossing...In the latest trip, we went on some fairly aggressive tracks...(lots of good size boulders, lots of tripoding, and lots of fun). And lots of airing down. The amount of ground clearance the lift plus the 35 gives our vans is insane...
Since I'm running a true 35, my tires are quite a bit closer to the fenders than yours. It occurred to me that the movement required to catch the seeem did seem like a bit much. I thought the van compass additional leaves would resist enough axle wrap, but no longer believe that's the case. Combined with the typical slop of a center pin and a leaf spring, the center pin on a lift block and the usual movement in a OEM rubber leaf spring bushing, It makes sense that the axles are going to move around quite a bit. I think you and I use our vans quite a bit harder than most - and therefore doubt most folks would ever see this as an issue.
I'm thinking that a Deaver Spring pack and VC valved Falcon Shock upgrade is a likely mod that will happen in the not too distant future.
|
|
|
|
|
08-23-2020, 09:19 AM
|
#724
|
|
Senior Member
Join Date: Nov 2015
Location: Vacaville, just east of the San Francisco Bay Area
Posts: 1,062
|
Mike,
You didn’t miss the grounds, it was your comment at the time that put this on my to-do list. I’ll reach out when the time is right.
As you saw, I upgraded/changed to the full spring pack in the rear. It’s interesting that there is no discernible difference in the way the van rides or how the suspension feels, but I am confident that the axle movement has been reduced as a result. Running 33’s I still have plenty of room in the wheel wells, I can see where your 35’s combined with your use case combined with some axle movement would result in contact in some situations. Another reason why I like my 33’s....
I’m not surprised that you are eying the Falcon shocks, as am I! Laura carries the little adjuster wrench that VC sells for the Fox shocks on her keychain and she is fully trained and proficient in its use, I’d hate to give up watching her do her job by replacing the shocks! Decisions, decisions, decisions!
I need to see all the work you have done to the inside of your van, time to get together!
__________________
Flint - 2016 SMB Sprinter 4x4 144" RB 150S w/ PH
KN6BJX
|
|
|
|
|
08-23-2020, 06:14 PM
|
#725
|
|
Senior Member
Join Date: Nov 2015
Location: Vacaville, just east of the San Francisco Bay Area
Posts: 1,062
|
Towing a Sprinter
Quote:
Originally Posted by Twoxentrix
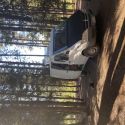
Unfortunate. Watching your own Van get loaded on a Tow-truck always heightens ones feeling of vulnerability.
|
^^^^Indeed!
I think a lot of people are under the misconception that Sprinters can't be towed the way way you see here, rather that they need to go on a flat bed transport. Not true, as evidenced in my recent experience.
From my 2016 manual: If the front of the axle is raised, the vehicle may be towed a maximum of 30 miles (50 km). For a towing distance over 30 miles (50 km), the propeller shafts to the drive axles must be removed.
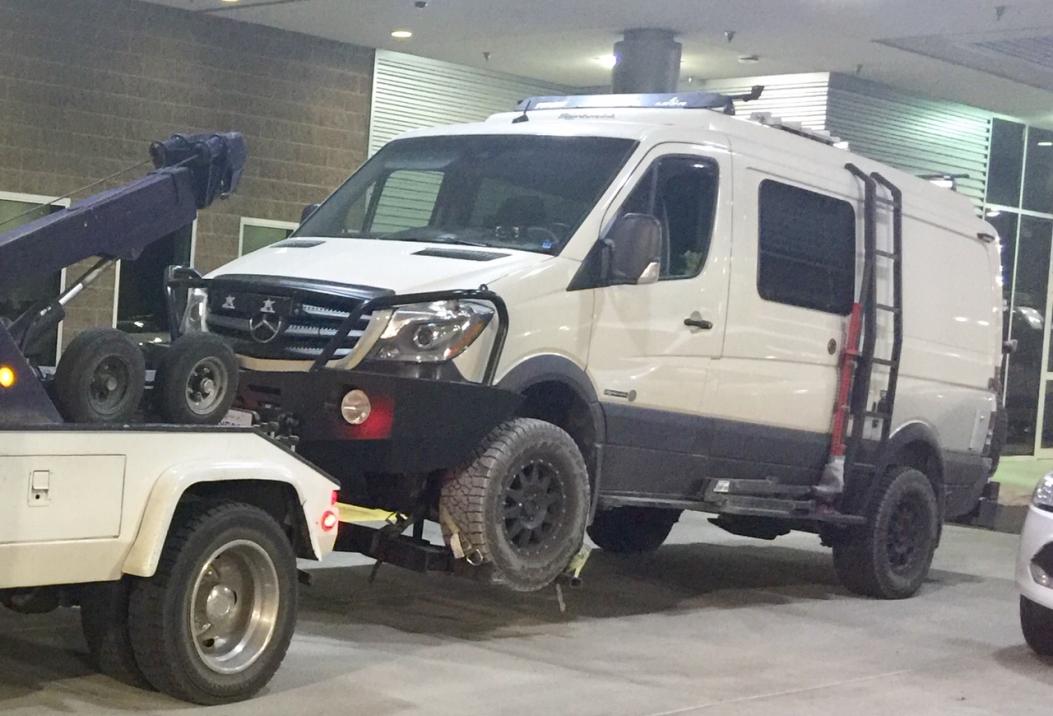
My recent tow was well over 30 miles, and as you can see, the front of the vehicle was raised. What you can't see is that the drive shaft was disconnected at the rear differential and strapped up for the ride.
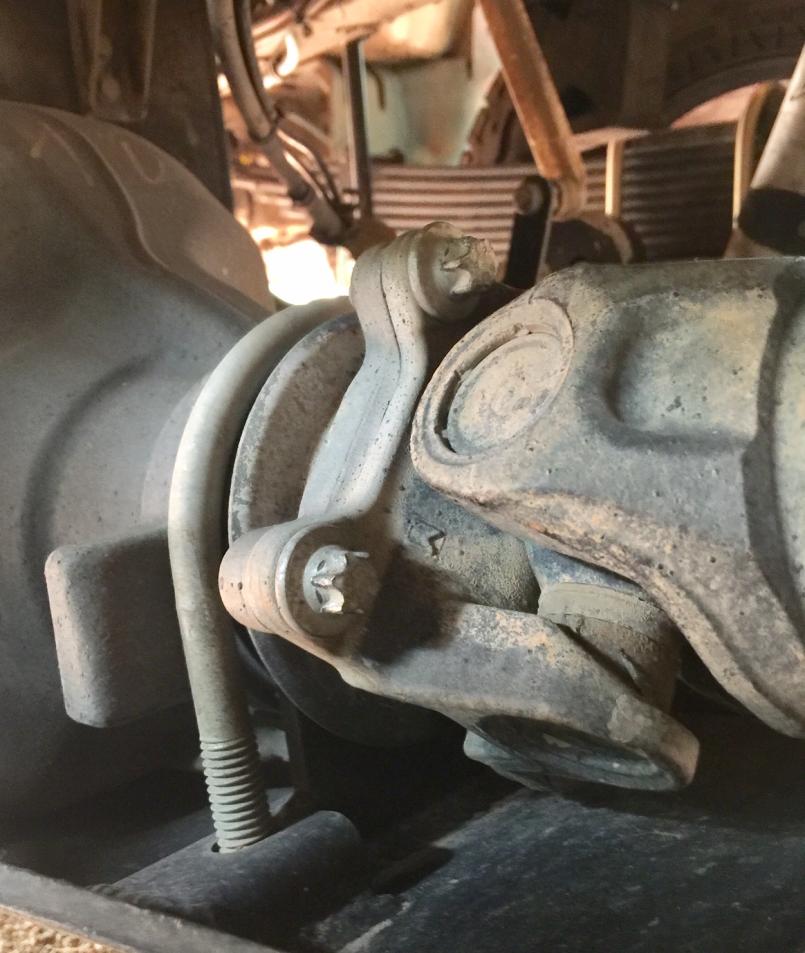
One thing worth noting is that the four attachment bolts require a 14 external Torx socket to break them loose. The tow truck driver who did the job came prepared, but what if that particular socket wasn't on board his truck?
Here is what the attachment looks like:
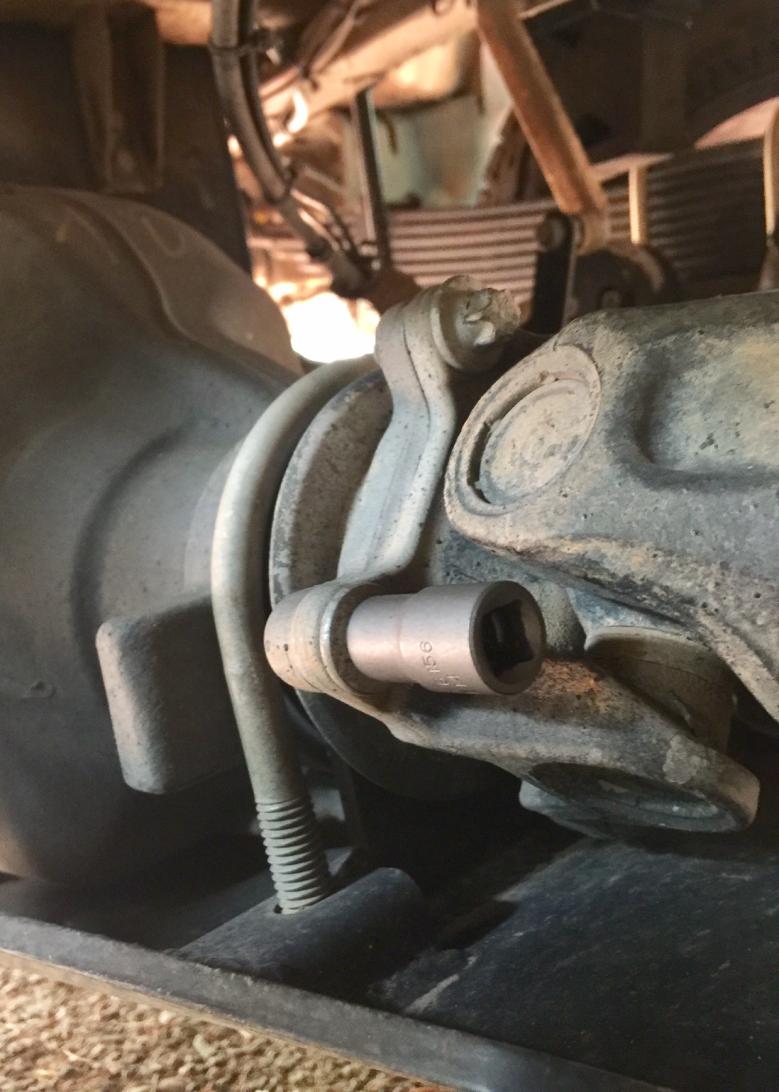
And here it is with the 3/8" socket in place. BTW, I don't think a 1/2" socket would fit.
And here is what the socket looks like:

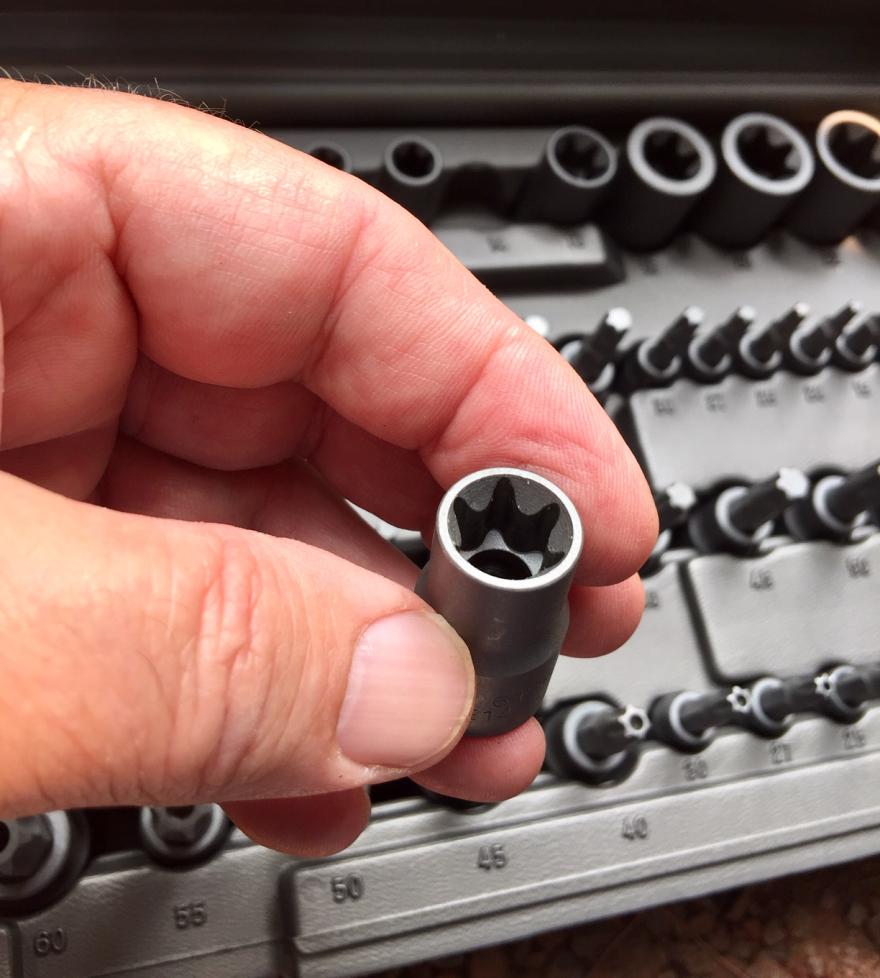
I don't carry my complete Torx set with me on a regular basis, but today I ordered an individual 14 external 3/8" drive Torx socket to carry on-board on a full-time basis.
And by the way, the torque setting for these four attachment bolts is 30 ft lbs, a good number to tuck away for that one time when you may really need it!
__________________
Flint - 2016 SMB Sprinter 4x4 144" RB 150S w/ PH
KN6BJX
|
|
|
|
|
08-25-2020, 08:02 AM
|
#726
|
|
Senior Member
Join Date: Jan 2011
Location: Reynoldsburg, Ohio
Posts: 3,771
|
Quote:
Originally Posted by Fitz
I don't carry my complete Torx set with me on a regular basis, but today I ordered an individual 14 external 3/8" drive Torx socket to carry on-board on a full-time basis.
And by the way, the torque setting for these four attachment bolts is 30 ft lbs, a good number to tuck away for that one time when you may really need it!
|
Wow---what timely information about something most might NOT never encounter---if I owned a Sprinter I'm sure it'd happen to me. 
That's a very wise idea carrying a specific socket for this sort of thing---they stow away easily enough.
I'd suggest a "light machine oil" (3-in-1 or similar) on those bolts before they're torqued, similar to wheel lug nuts.
|
|
|
|
|
08-25-2020, 09:23 AM
|
#727
|
|
Senior Member
Join Date: Apr 2012
Location: Philadelphia, PA
Posts: 4,206
|
I didnt even know there was such a thing as Torx sockets! [emoji15]
|
|
|
|
|
08-28-2020, 01:18 AM
|
#729
|
|
Member
Join Date: Dec 2015
Location: San Francisco Area
Posts: 40
|
Quote:
Originally Posted by VtSoundman
Hey Fitz...those SMB grounds are pretty bad. Not sure how I missed that when I had my head in there last time around. If you haven't already done this, let me know...I've got some tips for you....
|
It still surprises me that Sportsmobile would consider that type of grounding OK. I only got the pop top from them and electrical does not seem their strong point. Im coming from a boat background though so all my electrical has tinned marine negative wires running back to ground points and the battery; no opportunistic chassis grounding. Positives run to a breaker switch panel. Ive seen Sportsmobile just put unlabeled inline fuses where it was convenient during their install -which drives me nuts. I know Im not parking in seawater with stray current galvanic
corrosion issues anymore, but this is just good practice.
I havent tuned in in a while Fitz, but great to see this thread still going and get your spare parts and upgrade info (Must order spring clip). Weve been really enjoying our 16 van with 35k miles on it now. No Van mechanical issues yet, but Im confident that they are all just waiting for our 5yr 100k warranty to expire next year.
Cheers, David
|
|
|
|
|
11-22-2020, 11:51 PM
|
#730
|
|
Member
Join Date: Nov 2015
Posts: 47
|
All Caught Up
Hi Tim,
Today was a down day for me and spent the whole day ready your forum. I had read bits and pieces but today was start to finish. As always pickup something new every time. To all the members on this forum, great stuff and feedback.
I recently completed the Installation of the 3rd Lithium battery bringing my total to 315AHrs. The difference between having 2 Vs 3 batteries really shows an improvement. I will work on a write up on what and how I accomplished this change at minimum cost and upgrades. We had a chance to try things out along the coast north of Ventura.
You and Laura remain safe and enjoy Turkey Day. The same goes to everyone on this forum.
|
|
|
|
|
|
| Thread Tools |
|
|
| Display Modes |
 Linear Mode Linear Mode
|
 Posting Rules
|
You may not post new threads
You may not post replies
You may not post attachments
You may not edit your posts
HTML code is Off
|
|
|
|
 » Recent Threads
 |
|
|
|
|
|
|
|
|
|
|
|
|
|
|
|
|
|
|
|
|
|
|
|
|
|
|
|
|
|
|
|
|
|