Journey with Confidence RV GPS App RV Trip Planner RV LIFE Campground Reviews RV Maintenance Take a Speed Test Free 7 Day Trial ×


Reply
 
Thread Tools Display Modes
 
Old 09-11-2020, 11:52 AM   #1
Senior Member
 
Join Date: May 2020
Posts: 207
Electric Sienna seat swap

Im swapping out my old flexsteel seats for some Sienna seats i got on the cheap. Since no one makes adapter bases anymore i decided i would install them using six way electric bases....
Attached Thumbnails
seatbase.jpg   seats.jpg   slider.JPG   SWITCH.jpg   SWITCH2.jpg  

SEAT2 (1).jpg  

Chinook is offline   Reply With Quote
Old 09-11-2020, 11:53 AM   #2
Senior Member
 
Join Date: May 2020
Posts: 207
Sorry about the mess, i still have to do the passenger side. The dogs love the old torn up flexsteel seats. I think he knows im planning to rip his out next...
Attached Thumbnails
SEAT2 (2).jpg   seat2.jpg  
Chinook is offline   Reply With Quote
Old 09-11-2020, 02:36 PM   #3
Senior Member
 
nyyankees588's Avatar
 
Join Date: Nov 2018
Location: Santa Cruz, CA
Posts: 317
I think we'd all be super grateful if you posted links to buy the electric bases/any add-ons required... looks super good. Did you find the seats by just browsing craigslist/fb marketplace @ sienna vans being parted out?
nyyankees588 is offline   Reply With Quote
Old 09-11-2020, 02:44 PM   #4
Senior Member
 
Join Date: May 2020
Posts: 207
Actually i was planning on buying a pair of Knoedler extreme low rider truck air seats so i wasnt even really looking for seats. But i was browsing facebook marketplace and these popped up on the first page for $200. They had just been removed from a brand new Sienna so they could make it handi accessible.

I made all the brackets myself so there isnt much to buy except metal and bolts. I didnt take any assembly pictures when i did the driver side because i was to involved in figuring out all the measurements ect... But i will take some when i assemble the passenger side and post them here. It just involves cutting, grinding, drilling, and welding. Oh and lots of measuring and re-measuring.

The electric slider has to be located just right so as not to interfere with the recline mechanism ect...

I got the electric sliders here....https://www.discountvantruck.com/rvv...rseatbases.htm

Right Hand Control
Stock #
110995
Retail $462.3
Your Price: $335 each

Left Hand Control
Stock #
110996
Retail $462.3
Your Price: $335 each
Chinook is offline   Reply With Quote
Old 09-11-2020, 03:56 PM   #5
Senior Member
 
arctictraveller's Avatar
 
Join Date: Mar 2013
Posts: 4,244
Wow, what a lucky dog to get his own Sienna seat.
__________________
Arctic Traveller
KC6TNI
2001 GTRV
Advanced 4wd
Agile Ride improvement package
arctictraveller is offline   Reply With Quote
Old 09-11-2020, 04:41 PM   #6
Senior Member
 
Join Date: May 2020
Posts: 207
Quote:
Originally Posted by nyyankees588 View Post
I think we'd all be super grateful if you posted links to buy the electric bases/any add-ons required... looks super good. Did you find the seats by just browsing craigslist/fb marketplace @ sienna vans being parted out?
If your looking for a pair of chocolate brown seats theres a guy on Expedition Portal that has a pair he said he will part with due to change in his plans. His screen name on Expedition Portal is "Justgosurfin". He might be on here as well im not sure.

Yup, just confirmed that he is on this forum as well under the same name.
Chinook is offline   Reply With Quote
Old 09-11-2020, 04:54 PM   #7
Senior Member
 
Join Date: May 2020
Posts: 207
Quote:
Originally Posted by arctictraveller View Post
Wow, what a lucky dog to get his own Sienna seat.
Their little claws wore the cloth flexsteels out. They jump up on the seat and over time the cloth ripped where their back claws dig in to the seat. I imagine i will have to get some carhart covers for these seats to avoid the same thing happening to the leather. I just wasnt able to find any seat covers short of sheepskin for the flexsteels.
Chinook is offline   Reply With Quote
Old 09-11-2020, 06:58 PM   #8
Senior Member
 
Join Date: May 2020
Posts: 207
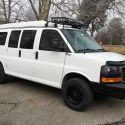
Initial seat prep is pretty much the same as how you would have done it using the MG risers or U-joints i assume. You have to cut off the metal lip on the one side of each seat. Then the rod that runs from side to side must be cut out and that area ground down smooth on each side so the new bracket can sit flush against the inside of the seat. The latches must be removed as well as their cables and the release lever at the back of the seat.

When its time to bolt the new bracket in the seat DO NOT try to reuse the original bolts that held the rear latches in place. They are a tapered bolt and they wont tighten down far enough to secure the bracket. If you tighten them up they will go in about 3/4 of the way and then they will wedge in place and you wont be able to get them back out without snapping them off. Dont ask me how i found this out. Just goto your local hardware store and buy some grade 8 replacement bolts.

All of the metal i used is 1/8th inch wall. The side pieces measure 2" wide, the larger peice of angle iron is the rear of the bracket and it measures 2"x2", the smaller piece of angle is the front and it measures 1.5"x1.5". The smaller piece of angle is positioned so as to not interfere with the recline mechanism as well as line up with and locate the electric slider so that it also does not interfere. Note that the side pieces all have a 45 degree cut on the front. This cut is required in order that the bracket will slide down into the seat far enough. By the way, these brackets are square, i have a wide angle lens on my camera when i took the pics so it gives a fisheye effect.

If i had access to a plasma cutter i would make some fancy smancy cuts on the brackets to lighten them up and make them pretty but i dont have that luxury and you cant see them once their bolted in place so no biggy.

Also note that i built the brackets this way because the seats have to be offset to one side. Doing it this way simplified making the brackets that bolt to the floor.

I will post more on sunday when i do the passnger seat.... if its not raining again.
Attached Thumbnails
s-l1600.jpg   DSC01331 - Copy.jpg   DSC01333 - Copy.jpg  
Chinook is offline   Reply With Quote
Old 09-13-2020, 07:31 PM   #9
Senior Member
 
Join Date: May 2020
Posts: 207
Finally got both seats installed. Drivers side is done, i still have to attach the seat belt latch on the passenger side, then its done. The floor brackets are 2"x1.5". I had to go with 2 inch because of the raised tranistion ledge behind the seats. You regular van guys can get away with 1.5"x1.5" or 1.75"x1.5" and still clear the module under the driver seat. You can see in the images that the slider drive motors sit directly over the module.
Attached Thumbnails
DSC01344.jpg   DSC01350.jpg   DSC01362.jpg  
Chinook is offline   Reply With Quote
Old 09-13-2020, 11:10 PM   #10
Senior Member
 
bigriver's Avatar
 
Join Date: Feb 2014
Location: Columbia River Gorge
Posts: 651
That's great info many will be interested in. Thanks!
__________________
Joe
2003 EB50 7.3L PSD Q4X4
2000 Chevy Express 3500 High Top EB37 - Sold
2003 EB30 - Sold
bigriver is offline   Reply With Quote
Reply


Posting Rules
You may not post new threads
You may not post replies
You may not post attachments
You may not edit your posts

BB code is On
Smilies are On
[IMG] code is On
HTML code is Off
Trackbacks are Off
Pingbacks are Off
Refbacks are Off

» Featured Campgrounds

Reviews provided by

Powered by vBadvanced CMPS v3.2.3
Disclaimer:

This website is not affiliated with or endorsed by Sportsmobile SIP or any of its affiliates. This is an independent, unofficial site.


All times are GMT -6. The time now is 05:36 PM.


Powered by vBulletin® Version 3.8.8 Beta 4
Copyright ©2000 - 2024, vBulletin Solutions, Inc.