Journey with Confidence RV GPS App RV Trip Planner RV LIFE Campground Reviews RV Maintenance Take a Speed Test Free 7 Day Trial ×


Reply
 
Thread Tools Display Modes
 
Old 08-07-2022, 06:15 PM   #1
Senior Member
 
jage's Avatar
 
Join Date: Apr 2007
Location: Parker, CO
Posts: 7,643
Has anyone modified the roof drip rail?

So back when my awning fell off, and I got new brackets and they're great- better than the old brackets for sure. The problem is when I put everything back together the awning brackets just ripped right off again, under it's own weight alone. Now while I'm happy it didn't happen while driving, it should have supported it's own weight- troubleshooting turned up the drip rail is slightly deflected in the area of the rear bracket. Now I'm not sure if this is why the old bracket failed or a result of it failing, however after beating everything back into shape in the front there doesn't seem to be anything to bend back in the rear drip rail.

The problem then as illustrated is that in section A where the drip rail is deflected, the radius of the bracket holding the awning is large enough there is no interlocking and it just slides over under weight. I'm not sure if I can crush the pinch seam at A in order to make a solid edge to fit against, or if I can have someone weld a lip there (built up TIG bead?) the problem being finding a skilled TIG welder who has 10 minutes to do it.


The only other thought I had was to drill vertically through the drip rail and add small bolts to prevent slippage- they'd be more like pins and under shear mostly keeping the bracket from slipping away.


Any thoughts? The awning is probably the best thing I've ever added and I'd like to get it back on but I just need something better to ensure it actually clamps on and I don't lose it again.
Attached Thumbnails
driprail.png  

__________________
it was good to be back
jage is offline   Reply With Quote
Old 08-07-2022, 07:08 PM   #2
Senior Member
 
boywonder's Avatar
 
Join Date: Jul 2013
Location: So Cal
Posts: 4,036
Are you using the Z bracket style brackets?


My awning also fell off pulling in to horse meadow campground in Kernville.....the rear two brackets went kaput but the front one held on....so I ended up dragging the awning for a short distance but luckily with minimal road rash.


I machined custom fitted solid aluminum Z bracket replacements that really grab the gutter, since they don't have a radii from bending sheet metal. The awning hasn't moved since then.


I can post a few pics if that helps.
__________________
2008 E350 RB passenger 4WD SMB penthouse
2013 KTM 350 EXC
2008 KTM 250 XCF-W
2003 Honda Element
boywonder is offline   Reply With Quote
Old 08-07-2022, 07:37 PM   #3
Senior Member
 
jage's Avatar
 
Join Date: Apr 2007
Location: Parker, CO
Posts: 7,643
Quote:
Originally Posted by boywonder View Post
Are you using the Z bracket style brackets?

Exactly. They held for years and then one day popped off like a dandelion head.
__________________
it was good to be back
jage is offline   Reply With Quote
Old 08-08-2022, 07:52 AM   #4
REF
Senior Member
 
REF's Avatar
 
Join Date: Jan 2009
Location: Boulder, CO.
Posts: 2,551
Send a message via MSN to REF
You could try using a dremmel or small chisel to remove some of the adhesive sealing material down in the gutter channel where you’re clamping the brackets to get more purchase.
__________________
'03 Ford E350 7.3L Diesel
(de)SMB'd Custom RB-50
Quigley 4X4 w/Deavers & Agile Offroad's R.I.P. package
CCV High Profile Pop Top
REF is offline   Reply With Quote
Old 08-08-2022, 11:01 AM   #5
Senior Member
 
1der's Avatar
 
Join Date: Apr 2013
Location: San Francisco, CA
Posts: 3,253
Jage - the flat face depth at A needs about 3/16" to 1/4" depth, almost no radius. If the gutter filler putty is too high it will reduce or eliminate the backside of the lip the clamp needs hold against.

Solution is usually to chisel out a bit of the putty to create the depth. An alternative would be to weld a bead onto the radius of the clamp and grind to a sharper radius/edge. boywonder effectively did this by machining new clamps with sharper hold edges.

Another approach would be to drill two holes in the clamp face that rests in the gutter (there may already be one which is used for hanging the parts for powder coating)
threading those holes and screwing in two screws similiar to what Aluminess does for the ladder gutter mount.

I would also like to see a side on picture to see how the bracket and clamp are positioning against the bottom and top of the gutter.

Lastly, if the gutter lip is damaged beyond repair then we are onto a different path.
__________________
Ray
Beastie 3: 2002 7.3 EB Cargo: Agile TTB, CCV High Top, Custom Walk Through, Lots of stuff added. www.BlingMyRig.com
1der is offline   Reply With Quote
Old 08-08-2022, 02:13 PM   #6
Senior Member
 
boywonder's Avatar
 
Join Date: Jul 2013
Location: So Cal
Posts: 4,036
Here are my machined awning Z bracket replacements.....


They grip the drip rail tighter than a........well...let's just say really really tight.


They are milled from aluminum and I drilled and tapped 5/16" threads in them (cuz that's the kinda guy I am...) but you could just drill a through-hole and use nylocks. They are primed and painted with rattle-can black and I used some thin silicone sheet material to protect the van finish.
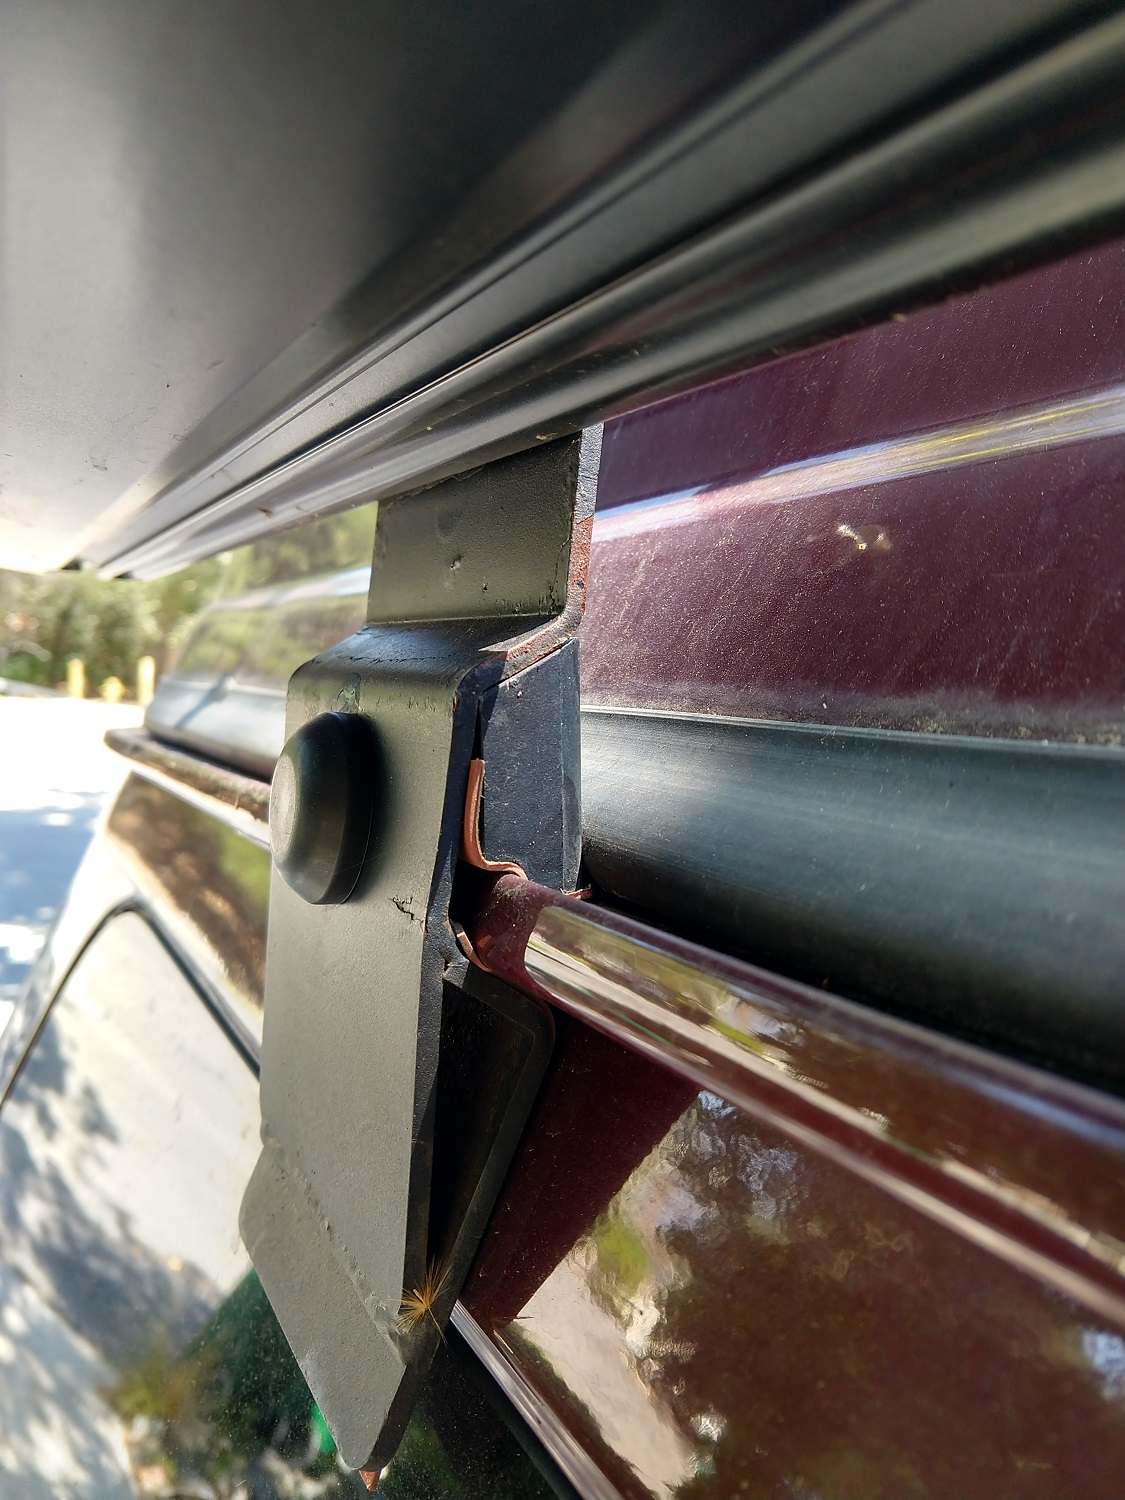

Rear bracket:


Middle bracket:


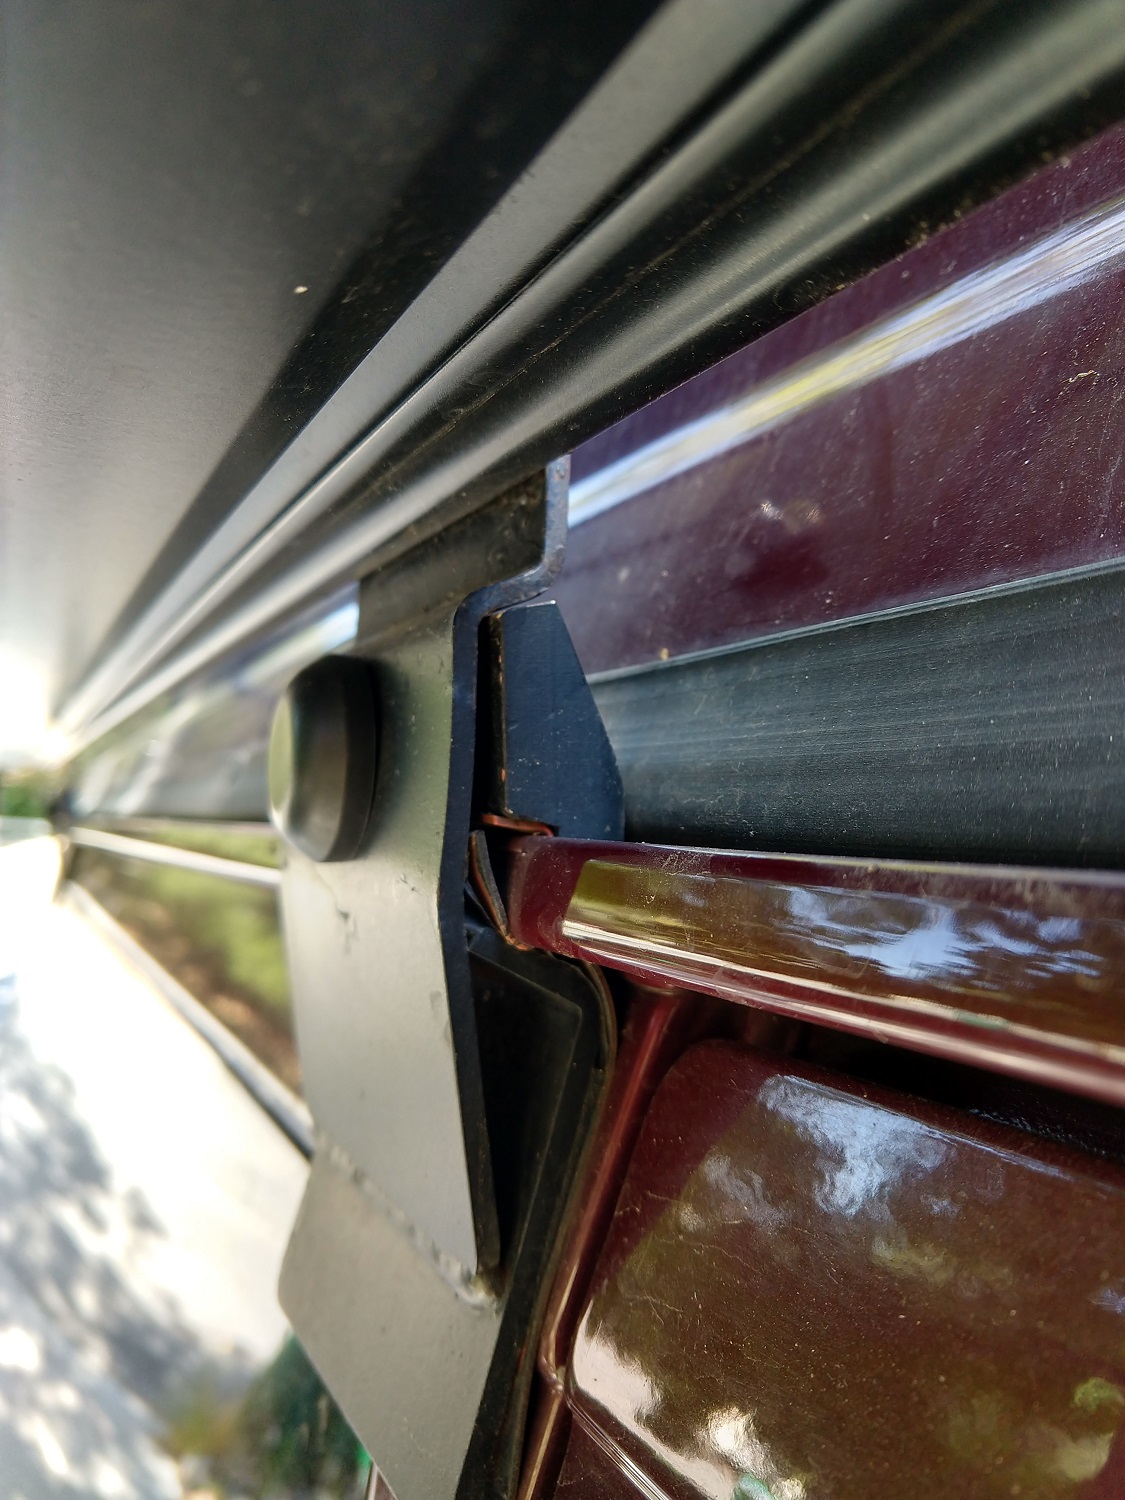
Each bracket required custom fitting so all three are a bit different. The objective is to get the beveled top surface to mate well with the large sheet metal bracket so that when you tighten the joint the machined inner bracket is wedged down into the gutter as it tightens on the lip.


The rear bracket was likely the last one I fabricated since it fits really well . I also bent the larger outer brackets here and there to get the awning to sit vertical.
__________________
2008 E350 RB passenger 4WD SMB penthouse
2013 KTM 350 EXC
2008 KTM 250 XCF-W
2003 Honda Element
boywonder is offline   Reply With Quote
Old 08-08-2022, 02:31 PM   #7
Senior Member
 
Join Date: Sep 2020
Posts: 355
Quote:
Originally Posted by boywonder View Post
I also bent the larger outer brackets here and there to get the awning to sit vertical.
It took me forever to adjust these so they were both snug and also perfectly vertical. Then, if using all 3 brackets, they will not be aligned because the middle of the van is a little wider than the ends. Fabricated spacers for the front and rear brackets to fix this.
N147JK is offline   Reply With Quote
Old 08-12-2022, 11:20 PM   #8
Senior Member
 
jage's Avatar
 
Join Date: Apr 2007
Location: Parker, CO
Posts: 7,643
I used some old chisels to dig out the putty in 3 places, slapped on some paint and reinstalled the brackets.
Attached Thumbnails
20220808_170846.jpg   20220808_170912.jpg   20220809_135844.jpg  
__________________
it was good to be back
jage is offline   Reply With Quote
Old 08-14-2022, 10:26 AM   #9
Member
 
Join Date: Sep 2019
Location: Columbus, Indiana
Posts: 72
Check this thread

https://www.sportsmobileforum.com/fo...ion-30607.html

I mounted my awning to the ends of my cross bars.

Works really well.
jso5000 is offline   Reply With Quote
Old 08-14-2022, 11:13 AM   #10
Senior Member
 
arctictraveller's Avatar
 
Join Date: Mar 2013
Posts: 4,232
I’ve been using 1der’s brackets for years and they are as solid as the day I installed them. That may likely be because I removed all the gutter sealant at each bracket to get a solid grip on the gutter. Last year I also fabricated my own brackets for my limb lifters. I used a straight piece of flat bar that grips the inside of the gutter. Again, I removed all the gutter sealant and they are solid enough that the gutter will rip off the body before it comes loose.
Attached Thumbnails
54E2BB0E-B43B-4503-A725-D7E4C6A5AB44.jpg  
__________________
Arctic Traveller
KC6TNI
2001 GTRV
Advanced 4wd
Agile Ride improvement package
arctictraveller is offline   Reply With Quote
Reply

Thread Tools
Display Modes

Posting Rules
You may not post new threads
You may not post replies
You may not post attachments
You may not edit your posts

BB code is On
Smilies are On
[IMG] code is On
HTML code is Off
Trackbacks are Off
Pingbacks are Off
Refbacks are Off

» Featured Campgrounds

Reviews provided by

Powered by vBadvanced CMPS v3.2.3
Disclaimer:

This website is not affiliated with or endorsed by Sportsmobile SIP or any of its affiliates. This is an independent, unofficial site.


All times are GMT -6. The time now is 05:40 AM.


Powered by vBulletin® Version 3.8.8 Beta 4
Copyright ©2000 - 2024, vBulletin Solutions, Inc.