|
|
 10-11-2018, 09:04 PM
|
#21
|
|
Senior Member
Join Date: Mar 2013
Posts: 4,244
|
Damn, seeing that makes me feel all warm and fuzzy. It almost makes me want to tear out my interior and start over.
__________________
Arctic Traveller
KC6TNI
2001 GTRV
Advanced 4wd
Agile Ride improvement package
|

|

|
|
10-11-2018, 10:11 PM
|
#22
|
|
Senior Member
Join Date: Jan 2009
Location: Boulder, CO.
Posts: 2,554
|
My big fat interior (re)build
I know, right! Super cozy....but hold that thought at least until after Baja, I can tell you from recent experience-tear down, prep and pre build stuff took a lot longer than I had anticipated! And lots of 8 hr days!
Might have to start putting in some weekend time to catch up, its kind of a pita, as I have a 45min+ daily drive each way to get to/from where the rig is up in Loveland. But Ive got myself my own huge heated garage space up there across from AVC I was able to rent for the month. Good thing, its been chilly and rain/snow all this week.
__________________
'03 Ford E350 7.3L Diesel
(de)SMB'd Custom RB-50
Quigley 4X4 w/Deavers & Agile Offroad's R.I.P. package
CCV High Profile Pop Top
|
|
|
|
|
10-13-2018, 09:45 AM
|
#23
|
|
Senior Member
Join Date: Jan 2009
Location: Boulder, CO.
Posts: 2,554
|
My big fat interior (re)build
Moving on to getting the columns wrapped...It seems that sometimes before I can get to items on my list of things to do requires 10 steps before I can even think about getting that item done, yesterday was one of those days!
I first had to sort some electrical stuff, the Ford wiring harness, moving speaker wires, and tucking as many things in to reduce bulk.
I then stuffed the rear column cavities with insulation and covered the holes with Noico to avoid having visible sunken holes when Im done.
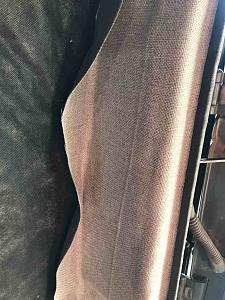
Next was wrapping the columns with foam for some cushioning behind the fabric. I doubled up the foam to build up around the Ford wire harness so it wasnt a big hump and covered the seam with foil tape to smooth it out a bit before fabric went on.
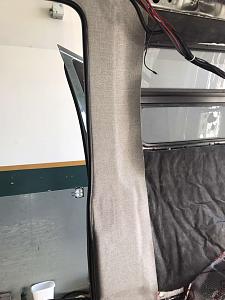
The extra fabric on the wall side will get tucked behind the fabric wrapped wall panels, the extra along the door seal gets trimmed along the pinch seam.
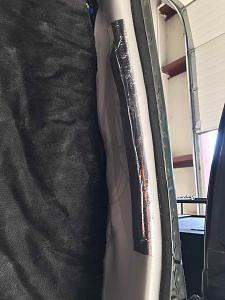
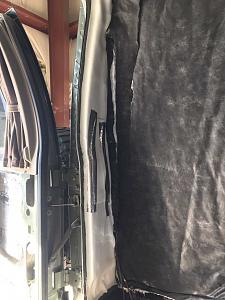


The last one I finished today...
__________________
'03 Ford E350 7.3L Diesel
(de)SMB'd Custom RB-50
Quigley 4X4 w/Deavers & Agile Offroad's R.I.P. package
CCV High Profile Pop Top
|
|
|
|
|
10-17-2018, 08:26 PM
|
#24
|
|
Senior Member
Join Date: Jan 2009
Location: Boulder, CO.
Posts: 2,554
|
My goal for this week is to get the floor and the wall panels in, then things will be able to move forward much quicker.
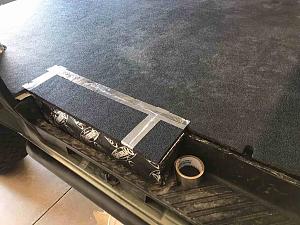
We are flipping the locations of the fridge and potty to be able to fit the larger TruckFridge in and still be able to recline the drivers seat. I realized I had to do something about the fuel filler hump that stuck out quite a bit right where the new fridge was supposed to go. You can see it here if you zoom in.....
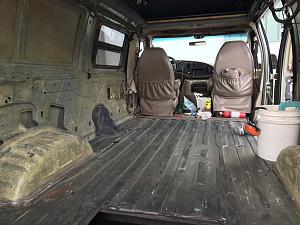
I used my multi-tool to make the cut, made a template before making the final, gave it a coat of paint, made some cuts along the top, screwed it in and sealed it with some roof sealant, gained about 2-1/2
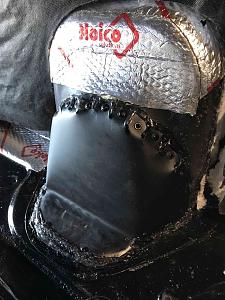
Covered it in Noico, and done.
__________________
'03 Ford E350 7.3L Diesel
(de)SMB'd Custom RB-50
Quigley 4X4 w/Deavers & Agile Offroad's R.I.P. package
CCV High Profile Pop Top
|
|
|
|
|
10-17-2018, 08:54 PM
|
#25
|
|
Senior Member
Join Date: Jan 2009
Location: Boulder, CO.
Posts: 2,554
|
My big fat interior (re)build
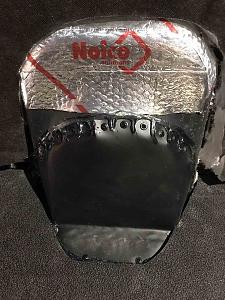
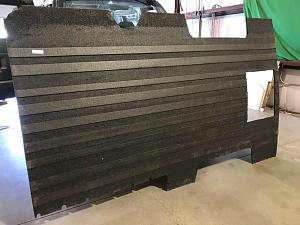
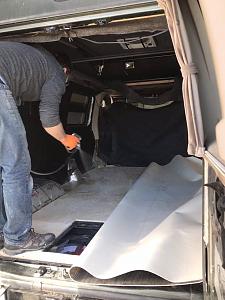
For the floor, I decided to go with Bedrug vantred version for a layer under the new ply. It comes pre-cut, it contours the floor ribs and is available for most vans. I knew I didnt want something that would hold moisture so this fit the bill. It also adds another layer of soundproofing and heat shielding. The added bonus was that I was able to use it as a template for the ply.
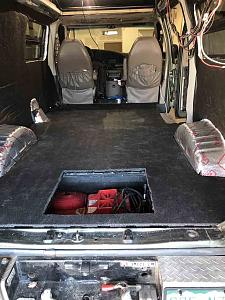
I first laid some strips of Noico in the valleys for added noise reduction. You can never have enough in a diesel! You can see the cut I made to the fuel filler here too

I had to cut out the in floor storage hatch hole

Bottom with the moulded ridges
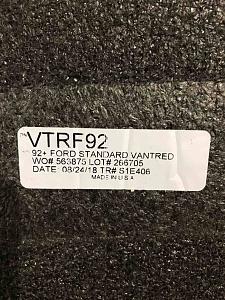
The info tag
Installed
I just had to add material to the step fill area, I used the piece I cut out from the hatch area.
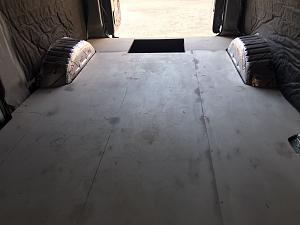
Heres the ply sitting on top of the sheet vinyl Im using for the floor. I used 1/2 birch ply for added strength. I was able to use just 2 sheets, 3 pieces. Nice!
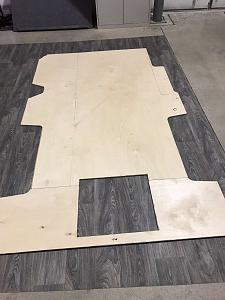
Trimmed the vinyl with 5 extra all around

Ply installed
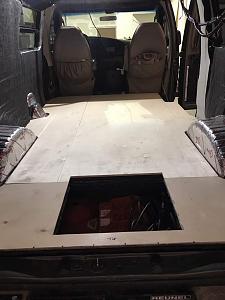
Screwed and Bondo filler
__________________
'03 Ford E350 7.3L Diesel
(de)SMB'd Custom RB-50
Quigley 4X4 w/Deavers & Agile Offroad's R.I.P. package
CCV High Profile Pop Top
|
|
|
|
|
10-17-2018, 09:30 PM
|
#26
|
|
Senior Member
Join Date: Jul 2011
Location: TN
Posts: 10,245
|
You're doing some nice work Rick!
|
|
|
|
|
10-18-2018, 11:17 AM
|
#27
|
|
Senior Member
Join Date: Mar 2013
Posts: 4,244
|
Looking good with some serious progress.
__________________
Arctic Traveller
KC6TNI
2001 GTRV
Advanced 4wd
Agile Ride improvement package
|
|
|
|
|
10-18-2018, 09:24 PM
|
#28
|
|
Senior Member
Join Date: Jan 2009
Location: Boulder, CO.
Posts: 2,554
|
Thanks guys!
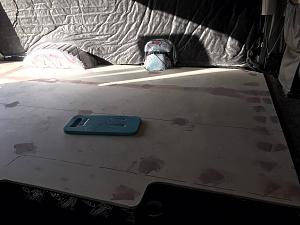
Another day, another project checked off.....the flooring is in! Yay
Bondo sanded down
Matt spraying in the contact adhesive
Here tis, will get a final trimming

__________________
'03 Ford E350 7.3L Diesel
(de)SMB'd Custom RB-50
Quigley 4X4 w/Deavers & Agile Offroad's R.I.P. package
CCV High Profile Pop Top
|
|
|
|
|
10-18-2018, 09:36 PM
|
#29
|
|
Senior Member
Join Date: Sep 2013
Location: Newberg, OR
Posts: 1,385
|
That is a thorough insulation job! Nice work!
|
|
|
|
|
10-19-2018, 12:17 PM
|
#30
|
|
Senior Member
Join Date: Mar 2014
Location: Flagstaff
Posts: 194
|
Ooooh... 
I love cool builds.
What flooring is that? Looks impenetrable.
__________________
1995 Econoline E-150 Custom Campmobile "Jupiter I" RB, 4wd Dana 60s, 93 Eurovan poptop.
1976 VW Type II Transporter Westfalia Campmobile.
1994 Toyota 4Runner,2001 Ford Escape,1970 Chevy El Camino,2 Cargo Trailers, 5 bikes, 4 Kayaks, 1 Canoe
|
|
|
|
|
|
 Posting Rules
|
You may not post new threads
You may not post replies
You may not post attachments
You may not edit your posts
HTML code is Off
|
|
|
|
 » Recent Threads
 |
|
|
|
|
|
|
|
|
|
|
|
|
|
|
|
|
|
|
|
|
|
|
|
|
|
|
|
|
|
|
|
|
|


 Linear Mode