|
|
 01-24-2022, 09:22 PM
|
#1
|
|
Member
Join Date: Oct 2021
Posts: 43
|
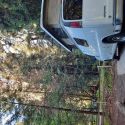
Paint prep for conversion? 2014 E-250 workvan.
Hey all, I got a 2014 E-250 work van that I need to get the paint fixed. it was a AZ located so no real rust issues that I noticed, ( I have yet to remove the bottom plastic floor on the rear so not sure of condition of floor of van. but from underneath it looks perfectly fine.)
How would you get this van rust safe? And what's up with this bug cave under my rain gutter after getting rid of the web and bugs should I seal it with something, what cased it you all think? It is right near where the extended part is attached to rear of van for long versions. other side looks normal with out a gap/cave.
Here are example pics of the missing paint and chipped areas on outside. The van is covered in small scratches and stuff like this on inside, the outside is much better but has a handful of dents from the inside pushing out and the paint popped off like in last pic.
First pic is bug cave.

top of wheel well

inside wall

inside wall

outside wall

|

|

|
|
01-26-2022, 05:46 AM
|
#2
|
|
Member
Join Date: Oct 2021
Posts: 43
|
Any thoughts? Like do I just clean the crud out of it and slap some rustolum on it? Should I hit it all with a wire wheel anywhere it is through to metal to clean up the edges of the existing paint? I have heard about something called por-15, but it seems like a kinda big deal with applications of prep treatment and rinsing between steps?
|
|
|
|
|
01-26-2022, 08:29 AM
|
#3
|
|
Senior Member
Join Date: Apr 2021
Posts: 407
|
I stumbled on this guy's channel the other day and he runs some interesting tests and seems fairly knowledgeable.
Rust converters:
Rust encapsulating paint:
|
|
|
|
|
01-28-2022, 08:31 AM
|
#4
|
|
Senior Member
Join Date: Nov 2018
Location: Santa Cruz, CA
Posts: 316
|
The interior should be pretty straightforward. Clean it up with a degreaser (assuming no rust), use rustoleum/whatever other metal paint you want. No need to be super careful, assuming you plan on covering it up. You are basically just trying to prevent future rust in the long long term due to moister in the van.
Bug thing - vacuum/clean it up. Are you saying that there's a hole or something in the body of the van there? If so, you'll need to fix it. If not, I don't see a reason to do anything. If my van sits for a week or two I'll have spider webs all over the outside of it... just the nature of the beast. It's a losing fight to keep them away.
For the outside paint, it gets a little trickier. You can see that the paint has started to crack around the damaged area. Technically you need to remove the cracked paint, from what I know. If you are trying to make it look nice, you might want to take it to a body shop. If you are fine DIY'ing it, put some blue painters tape around it, try to remove the cracked paint, paint the raw metal w/ as close to matching rustoleum paint as you can find. Afterwards you can use a clear coat spraypaint in that area to get it a bit more looking like your normal van paint. Just know that as you remove the cracked paint, there's a good chance the paint around it will want to start chipping away.
POR15 is really meant for serious rust and is most usually used on the underbody of a vehicle. It's great stuff, but I don't think your situation warrants it.
__________________
2003 E250 Full Self-Build
2009 Honda Element "lil' toaster"
2013 Suzuki DR650
Santa Cruz, CA
|
|
|
|
|
01-28-2022, 08:50 AM
|
#5
|
|
Senior Member
Join Date: Nov 2020
Posts: 436
|
When I bought my van the roof also looked fairly bad. Someone tried to just paint it over, but the rust came through again. As it's the roof, I didn't wasted too much time:
sanded all rust manually away, going from 200, 400, 600 grit until rust was gone and I didn't have too many steps between painted and non painted surface. Then sanded the whole roof with 400 grit, manually, quick and dirty. Degreased, some primer on, Rustoleum and clear coat. Keeping up for 2 years now and still no rust.
This was my roof some time during the sanding.

I also had some chips on my hood. Similar procedure:
- degrease
- tape around
- 200 grit sanding
- putty
- sand again down to 400
- then applied white coats
- tape off
- sanding 800
- clear coat
Came out really nice, BUT:
I have color code YZ and the "Oxford white" from OReilly combines two white color codes. So the new painted areas look slightly brighter. Nothing you see while driving by, but taking a closer look you see it.
I got to do another job, driver side between the rain gutter and the windows. Doing this I would really try to find the exact color match as the area is larger.
|
|
|
|
|
02-01-2022, 08:56 AM
|
#6
|
|
Senior Member
Join Date: Jan 2011
Location: Reynoldsburg, Ohio
Posts: 3,774
|
I might be a bit late here but as a suggestion.........
While you're dealing with rust or prevent it don't forget about the footwell areas in the front seating area. I would minimally peel the factory floor mats back to check what amount of rust is there. The mats absorb moisture over time, they become saturated as the accumulated moisture cannot evaporate back out.
I've treated my own front floors with this stuff and chose to re-use the factory floor covering but separated from the metal with radiant barrier insulation. That I use has a PVC sheet on one side, foil on the other and a relatively thing sandwich of "bubble wrap" in between.
Depending on your climate this may or may not become an issue over time, better safe than sorry though
If rust is present under the floor mats I'd suggest removing the seats, dog house and plastic footwell trim panels to better inspect the sheet metal up front. I personally recommend POR-15 from personal experience and use---its not cheap but it's highly effective. The silver rust preventative "paint" is best due its very high solids content.
(Front seat removal requires a T-55PLUS torx socket along with an 18mm socket or wrench for the rear nuts.)
It can be purchased direct from them or NAPA carries it as well.
If you do find rust up front please post photos so we can maybe offer advice.
|
|
|
|
|
02-05-2022, 09:30 AM
|
#7
|
|
Member
Join Date: Oct 2021
Posts: 43
|
Hey all, sorry about delay responding, I was in a bad place of sorts.
@motovan_mn , Thoes videos where perfect! thanks a ton!!!
@nyyankees588 , The bug thing I am not sure if it is actually a hole or not. but there is a gap there that is no where else making like a cave. I was gonna have someone spray water at it from outside to see it if penetrated to the inside at that spot to check, but a flashlight didnt show anything. I mentioned it cause it was right where the seam is for the extended part of the van. so I thought someone might be like "O ya xyz happens in that area a lot, do abc to prevent "
for the outside , ya I figured it may be a bit of a pita. but over all I dont care to much about the appearance of the van. so may just try like you said.
@E-350 , you got the OG name ! you and ny both mentioned the rustolum and a clear coat for the outside touch up. that sounds like a great starting point, Thanks!
@JWA , Thanks for the info on the front, I do have that tp55 bit since I was planning on installing a swivel seat for the passenger side soon™ But makes sense, I think I will check on it also. I did get the back removed and it is pretty ok, a couple places with bubbled paint but when I scratched the paint of that area it was clean metal under ( benefits of AZ summer drying everything quick ) but def some rust everywhere they pierced the floor.
Also on the POR 15, is the silver you mention the "top coat bare metal application rust preventive" one? I would guess that after I use a wirebrush to clean up the bad paint and the edges that I will need to paint over about 20% of the interior. how large a bucket you think I need, I hate to buy a gallon for 100+ and only use 1/4 of it. Do you think a quart is a good starting place or still might be more then I need?
Thanks all for the info!
|
|
|
|
|
02-05-2022, 10:43 AM
|
#8
|
|
Senior Member
Join Date: Jan 2011
Location: Reynoldsburg, Ohio
Posts: 3,774
|
Quote:
Originally Posted by kalabaddon

@JWA , Thanks for the info on the front, I do have that tp55 bit since I was planning on installing a swivel seat for the passenger side soon But makes sense, I think I will check on it also. I did get the back removed and it is pretty ok, a couple places with bubbled paint but when I scratched the paint of that area it was clean metal under ( benefits of AZ summer drying everything quick ) but def some rust everywhere they pierced the floor.
Also on the POR 15, is the silver you mention the "top coat bare metal application rust preventive" one? I would guess that after I use a wirebrush to clean up the bad paint and the edges that I will need to paint over about 20% of the interior. how large a bucket you think I need, I hate to buy a gallon for 100+ and only use 1/4 of it. Do you think a quart is a good starting place or still might be more then I need?
Thanks all for the info!
|
Make sure your Torx bit is the PLUS designation--it will be different from a normal T-55 bit.
Using a wire wheel on a drill or grinder remove any rust to bare metal, where the metal is just scratched rough up the area surrounding it to get the best finish acceptance.
Be sure to use the POR-15 products for cleaning the metal and preparing for painting, follow their instructions to the letter. The material you mention is the correct product for your application.
DO NOT shake POR-15 to mix rather use one of those "propeller" looking thingys to keep the silver constantly mixed--it tends to separate out rather quickly leaving the solids sinking to the bottom of the can.
You'll need no more than a single quart for your project. I used a single quart to do my entire rear cargo area completely covered twice.
Hope this helps, if not PM me in case I'm not here for a day or two. I'll get a notice of that PM.
|
|
|
|
|
02-05-2022, 12:26 PM
|
#9
|
|
Member
Join Date: Oct 2021
Posts: 43
|
Great info JWA, Thanks a ton! I am hoping to grab everything and get started within the week. really need to to get this out of the way so I can focus on the rest.
Umm had another thought, what is the best way to seal the holes in the floor ( metal screws and a holes drilled for mounting non standard seats before I bought it. I will deburr them and paint them first, but want to seal them somewhat.) Just some RTV? or maybe the stuff used for installing things to RV roofs is better for this?
|
|
|
|
|
02-05-2022, 06:53 PM
|
#10
|
|
Senior Member
Join Date: Jan 2011
Location: Reynoldsburg, Ohio
Posts: 3,774
|
Unused holes in the floor can be sealed with RTV etc but there will be no water intrusion through them---the under side of vans stay very dry regardless the weather.
Once whatever sealant you'd use is fully cured the POR-15 can be applied over top. Definitely coat the tops and bottom of those holes with the POR-15 if they've been drilled after the body was painted in the factory.
HTH
|
|
|
|
|
|
 Posting Rules
|
You may not post new threads
You may not post replies
You may not post attachments
You may not edit your posts
HTML code is Off
|
|
|
|
 » Recent Threads
 |
|
|
|
|
|
|
|
|
|
|
|
|
|
|
|
|
|
|
|
|
|
|
|
|
|
|
|
|
|
|
|
|
|


 Linear Mode