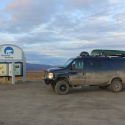
Planar 44D Install- Diesel- Thought it would be nice to have an in-depth Planar install.(likely covering some common sense things here but I'm a novice at best) so knowing some of the things below prior to getting into would have save someone time...hopefully...I don't have many pictures as my hands were typically covered in grime 95% of the time.
For the fuel tank drop we had...
Back of van was on jacks.
3 car jacks (you can get away with one)

Clean large shop2 people first two hours- 3 people last 3 hours (beer drinking and bs'ing subtract 30 mins or so)

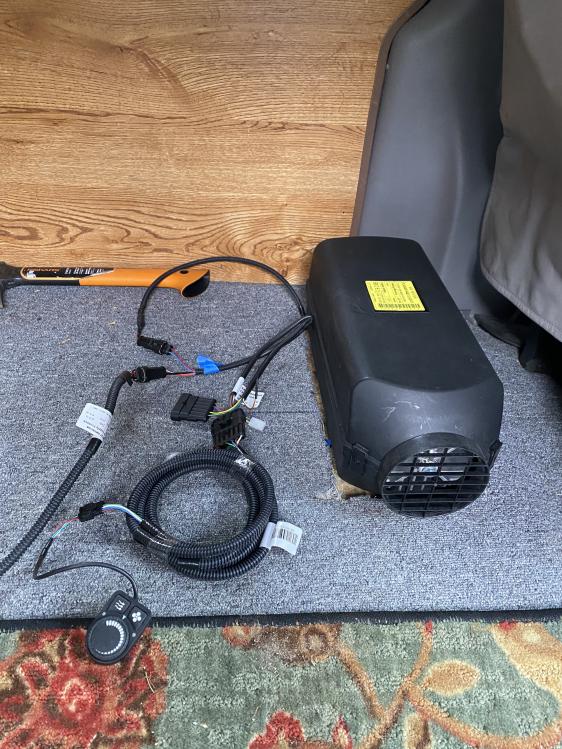
For the install of the heater I did over about 5 days (rain rain rain) in my driveway
This video was extremely helpful:
Decided to install behind the drivers seat- plenty of room for intake/outflow and it's close to the fuel tank so the fuel line is relatively short. Recommend the larger install plate for the convenience (there still is zero room to wrench when everything is connect) but this gives you less chance for bloody knuckles
 https://www.heatso.com/floor-mountin...r-air-heaters/
Should fit the Planar - didn't use it but wish I did. Planar specifically doesn't have this mounting plate- or at least I couldn't find it.
Bolts to mount the plate were a #10 inch and a half (just gave enough room to get a couple washers on + nylock nuts. Note- with the smaller mounting plate I had to put the bolts to mount the plate on and then connect the plate to the heater. When you mark your mounting holes- you don't have much room to get the 5/16 wrench on but it works.
Hole cut- roughed in the small plate- not much room to connect so I dry fit everything and then took it all apart- ran the exhaust and intake back up through the hole (make sure you file or grind down your hole and paint everything) connected everything.
Next came dropping the fuel tank. almost empty tank- key here- 2 man job and whoever helps you is a saint- its a messy project. Buy tank straps. We used two car/tranny jacks on each end of the tank. That was helpful if you have the resources. Fuel lines are nylon- disconnect the fuel pump electric first- this has no room to move if you cut the straps and drop the tank.
Large fill hose and small air hose- these have a pinch clamp to secure to frame- pinch and move that back. Clean the area around the connection with a rag. Once off- crap can easily fall into the large hose. Loosen both hose clamps until they slide free. You'll likely need to lower the tank a bit and move it back towards the driver side a bit to get enough space to pull the lines off. They will have a small (or at least should) small amount of fuel drip- not much. cover with something because when you move everything these hoses will still be attached to the tank and whatever you knock loose will get in there.
Once removed you can lower the tank to access the fuel lines below the frame (this small bit of info was left off a lot of the youtube videos) we didn't know how much play we had in the lines but ended up with more than we thought.
Fuel lines require tool- well worth it. Doesn't cost much
https://www.amazon.com/Lisle-37000-C...s%2C302&sr=8-6
Works to have one person on passenger side and one person on driver side pushing the tool in and then pulling. They can be a bear. I went on the passenger side and gently checked each spring/prong with a flathead to make sure they all were facing the right direction and would move. Took some effort but both came off Removed a black line (not sure what it was) from the front of the tank- slid it out (back black hose still connected) and thoroughly cleaned the sending unit area and slowly removed (i think 5/16) bolts and gently removed. Next came figuring out where to plumb the auxiliary fuel line- ended up mounting inside the gasket/seal (the seal sits about an inch or more inside of the rim- make note to clear this when drilling)
Made sure to cover the opening (sending unit doesn't not fully remove without remove some hoses inside of it- didn't want to get into this )
With the opening covered (plastic wrap and shop towels) we drilled a
Pilot hole (its tough material) and then drilled about a 1/4" hole (check your auxiliary line width- some vary I suppose) inserted the line- put it almost at the bottom of the tank (((lots of opinions and pros and cons of where you put this but decided on this as its fuel consumption rate is low and we typically have plenty of fuel + extra...running out of diesel on a 7.3L isn't fun)
When attaching the sending unit- make sure the gasket is lubed prior to re-installing- mine was dry when we went to put it back together. I used a very very small amount of bike grease. Attach bolts like you would a wheel, secure to hand tight. There is a rubber gasket in there so don't over-tighten) Didn't check if there was a spec for torq but tightened to what they were.

Attached the auxiliary hoses- ran the line out and taped it out of the way.
Next came getting the tank back up and into place to get the straps back on. connected front black hose. Inserted straps, pushed and lifted tank, jacks up to hold in place (make sure your fuel fill and air line don't get caught in the frame (good place here to pick up crap falling so guide those around frame ((insert 3rd helper here)) ha. Once up we were able to position and get the bolt ends back up into the frame and enough to get the 17mm wrench on. Made sure we were not pinching any lines or rubbing (including fuel pump electrical) reconnected that. fuel supply line + air.
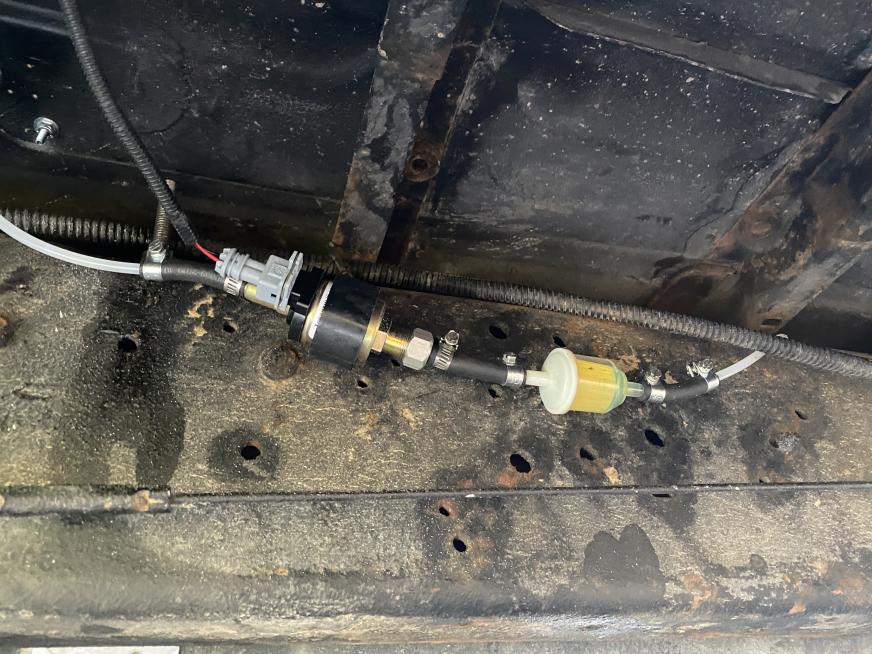
connecting fuel pump. Drivers side frame
Bought a fuel filter from local supplier store- basic. Installed that about 3 inches or so before fuel pump (set at proper angle). Installed fuel pump and hooked up all the lines (nothing tight). Then I tightened everything but the end of the fuel filter closest to the fuel tank. Figured this would need to be primed as it was a larger cavity to just suck air (after reading people having issues with the pump priming) . To get the fuel in there.. I had a water bottle with .14 cents worth of diesel in it (hah) and put a clean spray bottle top + hose into it. and stream sprayed into (direction of fuel line towards the fuel pump so what I was inserting was going through the filter first) until it was full. tightened all the hose clamps and fired it up. I used the manual- basic controller to do this because the electronic one was confusing to me (i don't have patience for the 12 pages of reading material that I didn't understand anyways) someday...clicked on the heat symbol and after 3 attempts (let it try and fire up and then shut off - really didn't even fire up- just tried to prime- click click) on the third I was underneath and could see the diesel coming out of the fuel pump and up into the heater and it kicked on. Puked some nice exhaust in my face, and then fired right up- takes a few minutes for it to get there but it was pumping out hot air and running like a champ. Let it run for about 10 mins and shut down. The electrical connections were pretty straight forward.
Not sure where the thermostat is- but if someone knows more about that let me know. Also there was one connection not attached but I believe this is for a modem hook up? .
I plan on enclosing it in a box (still maintaining proper airflow) and putting the cooler next to it. It's mounted on the wood floor (connected through the metal van body) I'll keep checking the heat around the carpet and if its too much I'll cut that out as well- vinyl eventually but for now its carpet)
Note- after fuel tank removal- we are planning on running 1 tank of fuel (I think its a 30 gallon tank) and then replacing the fuel filter...disrupting the tank its likely got crap in it)
After Pics

*Self Tap bolt to connect the fuel filter
Wires all need to be tucked away- All in all - its definitely a project- lots of research and google videos but the instructions are pretty straight forward and feel free to reach out if you have questions
Next- Action Van suspension (not doing myself) and new tires...let the winter adventures begin!
Rig: 2001, E350, 7.3L, 2WD, PH, EB, 147K and counting
Saeth


 2008 GMC 3500 SMB
 Linear Mode