Journey with Confidence RV GPS App RV Trip Planner RV LIFE Campground Reviews RV Maintenance Take a Speed Test Free 7 Day Trial ×


Reply
 
Thread Tools Display Modes
 
Old 03-08-2009, 11:08 AM   #11
Senior Member
 
charlie56's Avatar
 
Join Date: Sep 2007
Location: santa rosa ca
Posts: 994
Re: Small Projects Thread

Motivated by the LED light replacement project, I installed an LED step light.

I used a little 3-lamp accent light from superbright
http://www.superbrightleds.com/specs/alm.htm

The light is located on bottom of front barn door. It's that little black rectangle on the bottom rail of the door. It's only about 3/8" deep so it fits between the door and the body when the door is closed.


Light switch location.
Power for the light came from the overhead reading light just above the door. Routed it down the door piller, through the factory flex connector and into the door.

__________________
... Charlie
EV-2 build is now complete, (yeah right).
KZ6T
charlie56 is offline   Reply With Quote
Old 03-08-2009, 11:17 AM   #12
Senior Member
 
charlie56's Avatar
 
Join Date: Sep 2007
Location: santa rosa ca
Posts: 994
Re: Small Projects Thread

This one may need some refinement but ...

The factory bungie chord that holds the rear side barn door has too much play in it for me. To keep the door in its full open position, I made up a piece of 1/16" steel cable that just fits between the doors when they are closed. I mounted a small metal hook to the bushwacker fender flare. There is just enough play in the door hinge to act like a spring to keep the cable taught.


__________________
... Charlie
EV-2 build is now complete, (yeah right).
KZ6T
charlie56 is offline   Reply With Quote
Old 04-16-2009, 12:53 PM   #13
Senior Member
 
John and Dana's Avatar
 
Join Date: Feb 2008
Location: Normandy Park, WA
Posts: 364
Re: Small Projects Thread

Here is the first mod. I made to our new van. This probably should also be under the thread of the 10 best things we have added to our Sportsmobile.


John
__________________
'08 SMB 4X4 6.0PSD EB 50 (96K)
John and Dana is offline   Reply With Quote
Old 12-25-2009, 06:45 PM   #14
Senior Member
 
charlie56's Avatar
 
Join Date: Sep 2007
Location: santa rosa ca
Posts: 994
Re: Small Projects Thread

Mini projects of the day.
Installed an Iphone Holder.
$65 from Proclipusa.com but its a perfect fit.


Installed a different reading light on the ceiling of the rear penthouse.
Hella Halogen Reading Lamp. $37 + S&H from Amazon
Discussion: http://sportsmobileforum.com/viewtop...p=30618#p30618


Installed a broom holder.
(I left my last broom on the floor next to the Espar heater outlet. Melted it.)
Holder was $3.50 from Home Depot.
Broom was from Camping World
__________________
... Charlie
EV-2 build is now complete, (yeah right).
KZ6T
charlie56 is offline   Reply With Quote
Old 09-18-2010, 07:44 PM   #15
Senior Member
 
charlie56's Avatar
 
Join Date: Sep 2007
Location: santa rosa ca
Posts: 994
Re: Small Projects Thread

Another item off my list.

How many of you have been out on the trail when a great photo opportunity came along and had to fumble for your camera? I usually find mine find buried under the maps on the floor between the seats.
Hows this for a quick release camera mount?
The actual mount is the quick release part of a tripod system.
http://www.amazon.com/Manfrotto-323-Con ... =1-2-fkmr0

It is bolted to a angle bracket that is screwed to the underside of my laptop mount.
viewtopic.php?p=42807#p42807
(I think it would work just as well bolted to the plastic trim on the side of the seats.)
Attached Thumbnails
camera mount.jpg  
__________________
... Charlie
EV-2 build is now complete, (yeah right).
KZ6T
charlie56 is offline   Reply With Quote
Old 12-27-2010, 11:56 PM   #16
Senior Member
 
Join Date: Nov 2010
Location: Santa Monica, CA
Posts: 200
Re: Small Projects Thread

I saw Charlie's door stop farther up on this thread and thought it was a good idea. I started with the cables like Charlie did but ended up with a piece of 1" flat stock steel, a bronze bushing and 2 nylon washers. I shaped the metal to hook the fender, and dipped the end in some of that rubber coating. As it was pointed out in Charlie's post, the door hinges have enough spring to keep everything in place.


Attached Thumbnails
Sidedoor latch 1 .jpg   Sidedoor latch 4.jpg   Sidedoor latch 6.jpg  
jwintersteller is offline   Reply With Quote
Old 12-29-2010, 01:20 AM   #17
Senior Member
 
Join Date: Nov 2010
Location: Santa Monica, CA
Posts: 200
Small Projects Thread part

If you like that, check out my retractable drying rod.
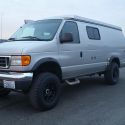
So this was not that small of a project, in fact it took two attempts to get it right. I ordered an extra rafter from Fiamma Inc., if you have one for their awnings, it is the extra extending thing that is suppose to help stabilize it. I made a plate that went over the old center brake light and then a mounting bracket that holds (what was once the "rafter" and is now) the drying rod. The cool thing about that is, I did not have to drill into my roof, it's all on that old brake light mount. When the top is down, it is all tucked away. When it is out, I can hang 2 wetsuits, 2 pair of booties, wet towels and maybe a bit more, with that much on it, it sags but that's it. You may be asking yourself "I wonder if he has ever forgotten to slide it back and closed the top down on it" well in fact I did just that a few weeks ago, not only that, I also latched the top down, as I was doing it I ask myself "why is this so hard". Well I'm happy to report, absolutely on damage.


Attached Thumbnails
Retractable dryng rod 1.jpg   Retractable dryng rod 2.jpg   Retractable dryng rod 5.jpg  
jwintersteller is offline   Reply With Quote
Old 07-10-2012, 11:44 PM   #18
Junior Member
 
Join Date: Jul 2012
Posts: 3
Re: Small Projects Thread

Ipad mount

pick a spot anywhere, mark two corners and drill holes, stick some bungee through the holes and tie a knot.
Presto
I didnt need the extra speaker but it is easier to hear with the ac on high.
Attached Thumbnails
smb ipad.jpg  
nasa13 is offline   Reply With Quote
Old 12-01-2012, 11:43 AM   #19
Member
 
4x4kayaker's Avatar
 
Join Date: Mar 2011
Location: Olympia WA
Posts: 98
Re: Insulate Penthouse with Reflectix

Getting ready for snow camping and snowboardng! I picked up a roll of Reflectix ST24025 Home Insulation 24"x 25' from Home Depot for around 20 bucks. Simply cut to length, the width of the roll fit perfectly in my GTRV Penthouse Top. See pics below took me ten minutes to cut to fit. Think Ill keep it rolled up in the van, its super lightweight material but you could fold it up and place in the mattress space when you fold down your top. I could tell it was reflecting back my body heat even without my furnace on, think it will be a great insulation barrier for my sons who sleep up top! Package states it metalized aluminium material that reflects back 96% and has a 5/16" insulating airspace.
Attached Thumbnails
insulation1.jpg   insulation2.jpg   insulation3.jpg  
4x4kayaker is offline   Reply With Quote
Old 12-27-2012, 03:12 PM   #20
Member
 
Join Date: Dec 2012
Posts: 35
Re: Small Projects Thread

Love that wetsuit drying rack. Am going to do the same thing on my van. I've got a kitesurfing school and we're forever drying gear.

I'd like something a little more sturdy though cuz it'll only be a matter of time till someone hangs a 40# bag of gear on one. Not to mention it's always blowing 20+ mph when I'm out.

I'm thinking of building something with ridges also to hold the hangers/carabiners.

That placement on the rear is superp though, love it.
smshield is offline   Reply With Quote
Reply


Posting Rules
You may not post new threads
You may not post replies
You may not post attachments
You may not edit your posts

BB code is On
Smilies are On
[IMG] code is On
HTML code is Off
Trackbacks are Off
Pingbacks are Off
Refbacks are Off

» Featured Campgrounds

Reviews provided by

Powered by vBadvanced CMPS v3.2.3
Disclaimer:

This website is not affiliated with or endorsed by Sportsmobile SIP or any of its affiliates. This is an independent, unofficial site.


All times are GMT -6. The time now is 02:45 AM.


Powered by vBulletin® Version 3.8.8 Beta 4
Copyright ©2000 - 2024, vBulletin Solutions, Inc.