I've posted a few threads in the short time I've had my van, asking questions, etc. and decided I've done enough thinking and it was time to start a thread to track my top to bottom to be done list. It's a long list and I don't bust out work like I used to so it's gonna take a while.
I've restored a few cars over the years and did research on custom build outs so I knew any interior, electrical, or plumbing issues I could deal with. So I did a lot of research at the mechanical level (year, engine type, etc.) and ended up with what I believe was a great deal for me.
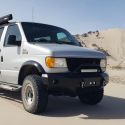
2006 E350 RB V10, has all passenger van glass, electric penthouse, rear AC. History is not very clear. PO said there were several TVs and SMB interior when he bought it. He pulled the TVs and replaced cabinets with Trail Kitchen cabinets. I believe the original layout was 30 or something? Has a side sitting gaucho couch behind the driver and I believe that is the only piece of the SMB interior that remains.
The one thing I didn't really research was the penthouse. I figured it went up and down and didn't leak so I'm good. Then my wife asked about adding a monitor to cast movies to, so I started searching and quickly learned about the common bolt and bar issues. I took a close look at my penthouse and realized my bars were bent and wires going up to the headliner had been cut which explained why the lights didn't work.
Having an electric top I wanted to make sure my bolts are solid so boy wonder, the pop top master, agreed to help me out with squaring that away. I made the trip down south and we got it done. I've got a lot of pictures below. I didn't do a great job of pics during the fix as we were both pretty busy through the six hour process but I am moving on to the headliner removal now so I included those pics to help tell the story.
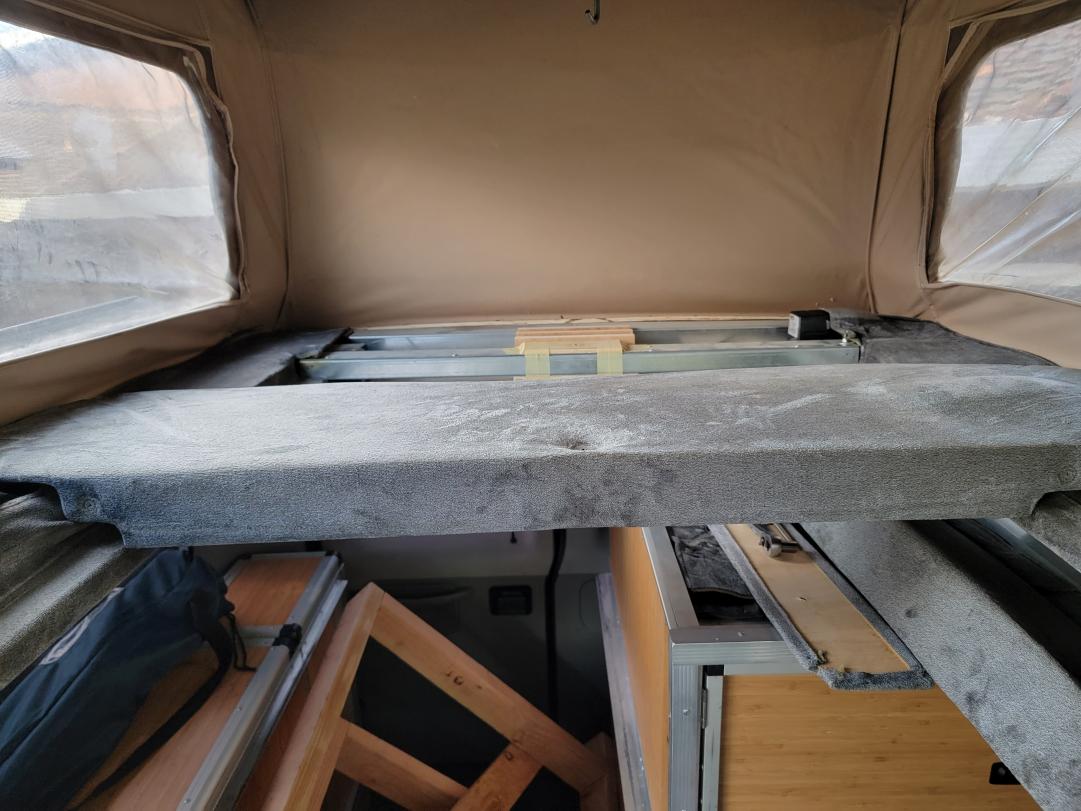
First we raised the roof as far as it would go and attempted to straighten the bars using the in place method with a big black pipe and u-bolts, but that didn't do much and I was OK with leaving them as is so we started removing all the screws from the upholstery that covers the tracks. There were two free pieces on each side and the rest just folded down into the van. In mine, the bed sits on upholstered long pieces of u shaped metal that slip over the rail of the top so the front and rear upholstery needed to be removed.
The two j hook latches needed be removed with two 7/16 wrenches. A thin upholstery tool is helpful in removing the black caps on the top and bottom of the hook latches. There was also a couple button screws in each corner covered by upholstered caps and several black screws in various locations in the corner and along the bottom. There is a top and bottom panel

Top and bottom removed

Next is the back panels. For this job you only need to remove the top panel but I'm showing all of them because of the other things I want to do with electrical, etc.

Picture isn't great but there is a trim piece tucked up near the top of the doors that is held in with four snap screws with upholstered covers.

Twp L brackets are covered by that trim piece and removing the four screws as well as any straggling black screws in the bottom panel, the four pieces all come apart.


Removed the two covered U rails (see them on the couch on the left). Front view.

Rear view

Then we built a couple braces. I had already cut several pieces and brought some extra 2x4s to finish up the final design. One in the front, between the pad and j hooks and one in the back as far back as we could get it.

Next was spring de-tensioning / removal


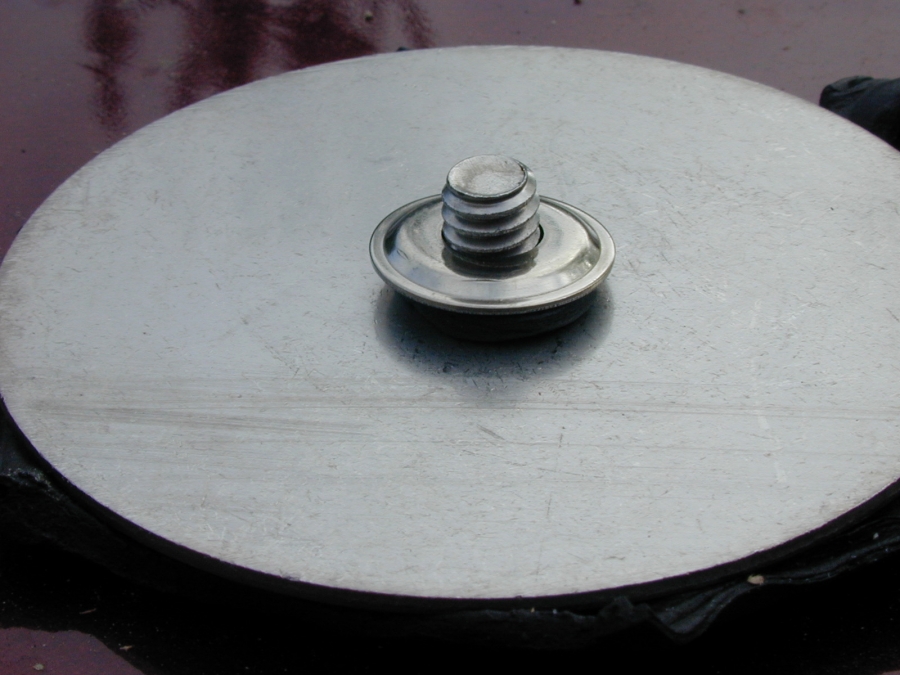
Here is what the front pivot bolt looked like.

Rear actuator detached. Just pull the pin in both sides and lower the roof until the actuator falls off the metal piece. A couple pics follow that show the bolt setup on this one, which is the rear one. We started pulling bolts and were able to get them loosened in pretty quick fashion so we decided we may as well try to pull the bars and straighten them in the vice. This required the removal of the bar pads which is held up by 8 bolts (4 in each) that go through the roof. Luckily boy wonder had a tall ladder and we were able to remove them with the top up. I won't have the luxury at my house. Can those be removed with the top down and then the top raised without issue? I plan to replace all those bolts as part of this as well.
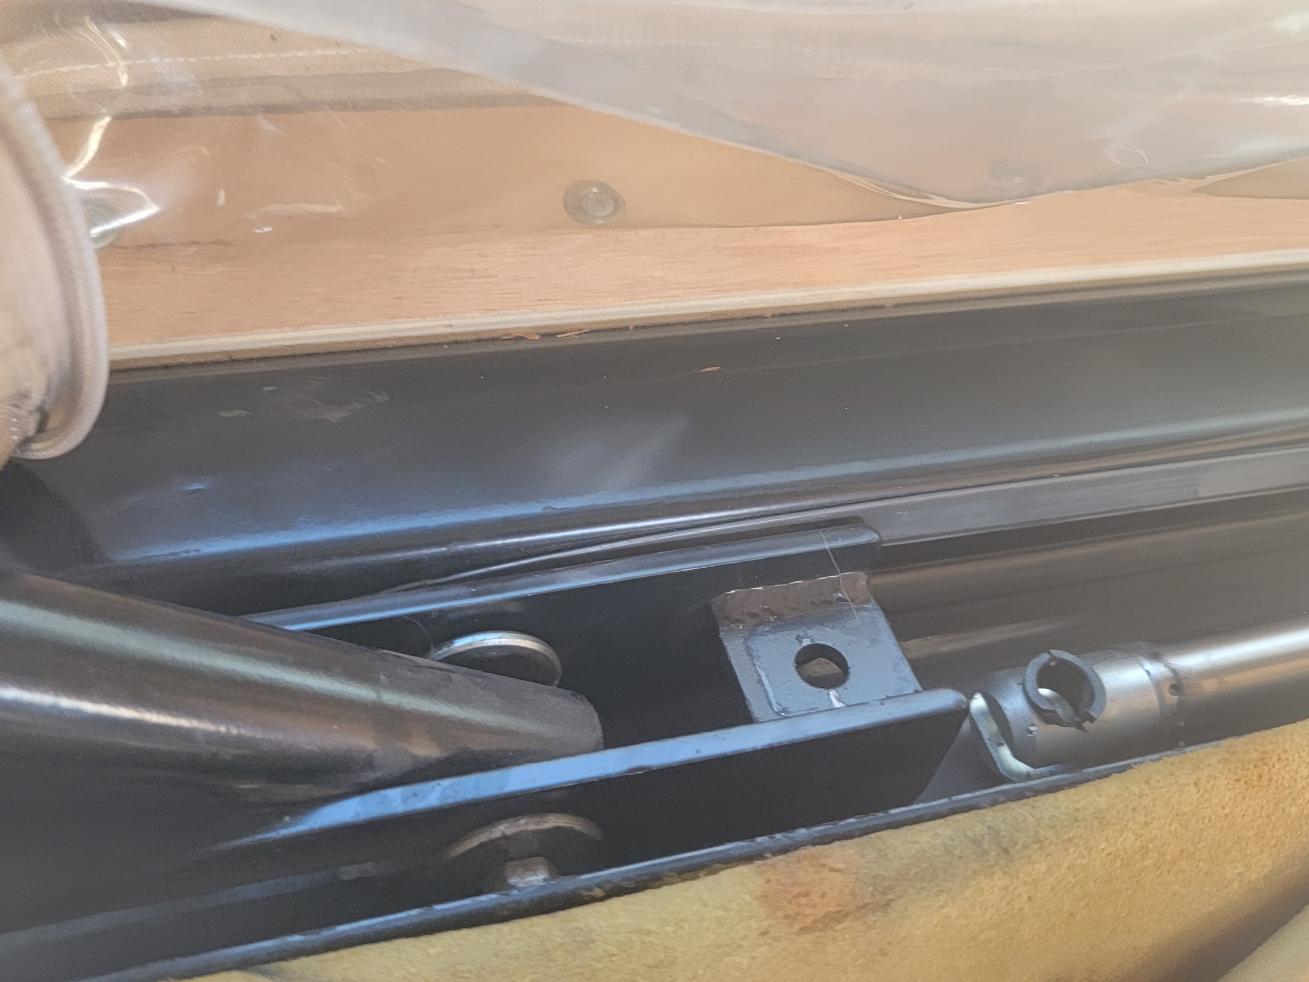

And here's what was there. The two bottom bolts where from the cross sections and were already 5/16. The middle pair were from the rear pivots and where 1/4. The top two were from the front pivots were 1/4 and were obviously bent.

Dddddoooouuuugggghhh. As we decided to do the bar pull boy wonder said "we need to disconnect these" and I said "Ok". We got busy with the the roof bolts and when the final bolt was pulled and the bars fell down...Oh well, another thing to add to the list. The other side ripped too but way smaller. I picked up several options already...stick on flexible tape, patches, vinyl repair, etc. I may end hand sewing the big one then covering with the Tear-Aid taped, but still have some research to do.

Don't know why these didn't upload straight. Here a pic of the refurbished front pivot. We used a 1/4 shoulder bolt, can't remember the length, a saddle spacer and some extra washers I believe

Scissor bolt. Two saddle spacers and a 5/16 x 2 3/4 shoulder bolt.
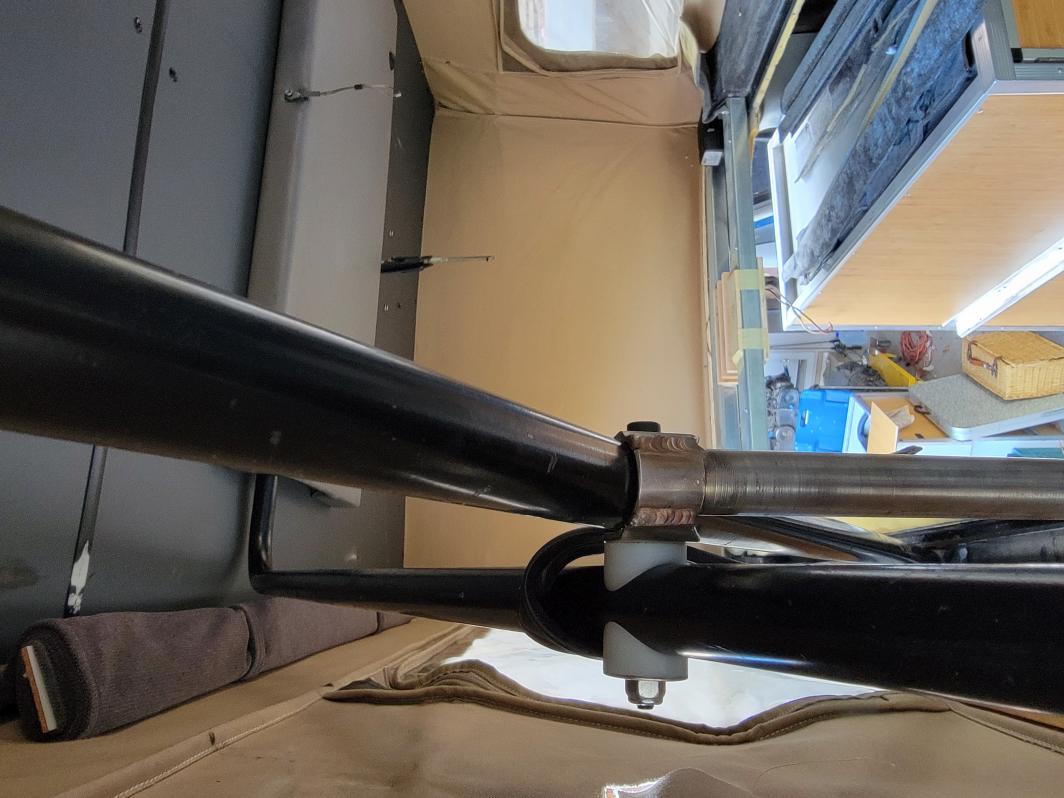
Rear bolt. We tried shoulder bolts here but because of the special roller washers the shoulder bolt was either to short or too long. I had sizes from 1 3/4 to 2 3/4 and nothing fit where we could get a nut on there so we stuck with the old bolts as they were in good shape and not bent.


In the end, all worth it. Here is the before and after. These pics are not of the same side but each side was basically in the same state. We pulled the bars out, clamped them in a big vice attached to a 3K LB mill, and used the black pipe we used for the in place attempt to use as leverage to bend them back. Took several quick pulls / pushes to get things somewhat straight. We also flipped the bars so any remaining bend was pointing to the roof instead of down. The little bar that looks like a hydrolic piece and is attached to the scissor bolt was also bent on each side. Boy wonder used a big mallet and the vise to get those straightened up too. Actuators used to top out and there was still two inches in the rear bar bad for the bar to move higher. Now it hits the end of the pad and could go even more. I'll have to pay attention when raising it now so I don't pull the canvas off the top of the van.


Plan to continue working from the top down, eventually ending with an under carriage clean and seal. Canvas repair, top bolt replacement, bar pad fixes, headliner electrical fixes, new headliner, other interior light fixes...etc.


 2008 GMC 3500 SMB
 Ford Zilla


 Linear Mode