|
|
 07-20-2020, 10:17 PM
|
#3051
|
|
Senior Member
Join Date: Jun 2016
Location: Chula Vista, CA
Posts: 158
|
A few years back, I unknowingly commuted to work with a stray kitten sitting under the hood of my Dodge pickup. I discovered it when I went to check the oil shortly after arriving to work.. alive  .
Also, finally painted and installed the rear door upper trim panels (pop-out window style) that I bought nearly 4 years ago! I didn’t even buy the pop out windows until a couple years after that. Used a shadetreevannin paint recommendation, which ended up matching the factory light grey nicely. It was Colorbond LVP Refinisher Ford Lt. Graphite #117.
__________________
Jean Claude Van Dad
|

|

|
|
07-21-2020, 08:50 AM
|
#3052
|
|
Member
Join Date: Dec 2017
Location: Santa Cruz ca
Posts: 63
|
New ladder!
I just slapped on my new stainless steel Surco ladder! Seems to be decent quality for an el cheapo. The back of my van had been looking a little boring lately... now I gotta put something cool on my roof I guess?
|
|
|
|
|
07-22-2020, 10:26 AM
|
#3053
|
|
Senior Member
Join Date: Jul 2011
Location: Flagstaff, AZ
Posts: 2,001
|
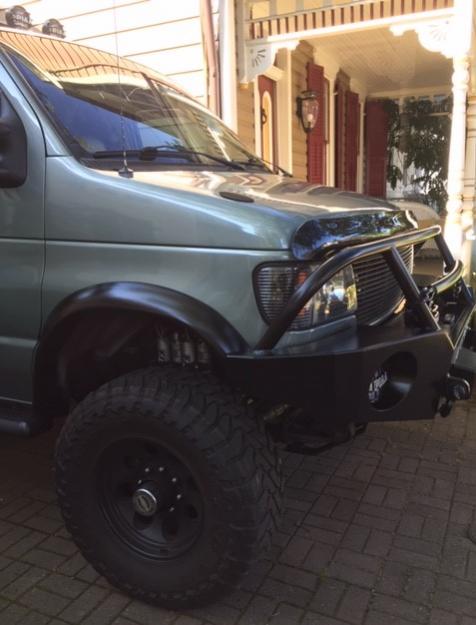
I finally finished a Dynatrac big brake upgrade to 14" rotors and front end rebuild with new drag links and tie-rod ends. Also upgraded to ProSteer ball joints and 35 spline axles. Calipers are Ford with Hawk LTS pads.
__________________
2005 E350 RB 6.0 PSD for extended fun
1989 Landcruiser FJ62 for local fun
2011 VW TDI Golf for hwy fun
|
|
|
|
|
07-22-2020, 10:47 AM
|
#3054
|
|
Senior Member
Join Date: Oct 2009
Location: Portland, OR
Posts: 1,257
|
Quote:
Originally Posted by JoeH

I finally finished a Dynatrac big brake upgrade to 14" rotors and front end rebuild with new drag links and tie-rod ends. Also upgraded to ProSteer ball joints and 35 spline axles. Calipers are Ford with Hawk LTS pads.
|
Joe, after all the posts lately on the big brakes I would love a clean build sheet of some kind if you are willing. I'm following behind you this fall. Even a simple bullet point list would be great. I've read all the posts but there is some gray between hydro/2wd big brakes/dynatrac. Nice work.
Brad
__________________
2001 Ford RB 7.3 Quadvan (sold)
2006 Sportsmobile EB Transformer 6.0
|
|
|
|
|
07-22-2020, 10:59 AM
|
#3055
|
|
Senior Member
Join Date: Jul 2011
Location: Flagstaff, AZ
Posts: 2,001
|
Quote:
Originally Posted by vandiesel
Joe, after all the posts lately on the big brakes I would love a clean build sheet of some kind if you are willing. I'm following behind you this fall. Even a simple bullet point list would be great. I've read all the posts but there is some gray between hydro/2wd big brakes/dynatrac. Nice work.
Brad
|
Thanks Brad! I'm just coming up for air on this project but was mulling over simply adding to the 3 or 4 valuable threads on this forum that I read repeatedly or simply doing a supplemental thread. But could definitely post a build sheet with all the part #'s as well as issues encountered along the way.
__________________
2005 E350 RB 6.0 PSD for extended fun
1989 Landcruiser FJ62 for local fun
2011 VW TDI Golf for hwy fun
|
|
|
|
|
07-22-2020, 06:51 PM
|
#3056
|
|
Senior Member
Join Date: Apr 2017
Location: Orange County, CA
Posts: 360
|
Quote:
Originally Posted by Twoxentrix
Thought this worthy of sharing: ***WOODY WAX***.
https://www.amazon.com/Woody-Wax-Tow...5109575&sr=8-5
Rejuvenates the Aluminess bling & Bushwackers that have lost their luster over the years (and not that cheep oily look). Applied some 5 months ago on the recommendation of a friend whom owns a Yacht detail business...lasted 4.5 months. Very quick, effortless, and easy to apply (a little goes a long way!).
Wish I had taken before & after pic's, but this is the result when applied (applied it again this morning):
 |
Did you have to do anything to remove the oxidization first? This is something I've been looking into but haven't gotten very far as I'm also in the middle of installing a HAM & GMRS radio, working on my roof rack set-up, figuring out where some lights are going to go, figuring out flooring & cabinets, and purchasing new Scheel-Mann seats... Damn these things are a lot of work 
__________________
Friends Don't Let Friends Do Stupid Things Alone
|
|
|
|
|
07-26-2020, 04:06 PM
|
#3057
|
|
Senior Member
Join Date: Sep 2017
Location: VIRGINIA
Posts: 633
|
Fixed the leak in the rear licence plate box
The gasket on the rear door license plate box had rotted and was leaking water into the door. I had to remove the door handle trim,disconnect the lock switch,remove the rear door cover,disconnect two latch linkages,pull the lamp cover, and remove the box. Did a serious cleaning of all the mating surfaces and bedded the box down with some tan butyl tape I had leftover from another project. The captive fasteners on the gold bracket needed some penetrating oil to get them to spin. I remembered not to button up until I had checked for lock functionality.  I did treat the rust on the lamp housing screw clips.About a 5 on the PIA scale.
__________________
'07 GMC 2500 6.0
|
|
|
|
|
08-06-2020, 05:56 PM
|
#3058
|
|
Senior Member
Join Date: Sep 2017
Location: VIRGINIA
Posts: 633
|
Plenty of rain lately and the repair held. woo hoo
__________________
'07 GMC 2500 6.0
|
|
|
|
|
08-21-2020, 06:13 PM
|
#3059
|
|
Senior Member
Join Date: Apr 2018
Location: Portland
Posts: 200
|
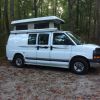
new kayak loader
I finally bit the bullet and installed a Thule Hullivator. Before, it was two person job to load my kayak. Now loading is manageable solo. I took it on it's maiden voyage today and it will definitely make getting out on the water easier! 
__________________
YoTerryH
2001 Ford Econoline E250
GTRV camper conversion
|
|
|
|
|
08-22-2020, 09:28 AM
|
#3060
|
|
Senior Member
Join Date: Jun 2016
Location: Chula Vista, CA
Posts: 158
|
Quote:
Originally Posted by YoTerryh
... it will definitely make getting out on the water easier! |
Great point! Similarly, I recently bought a halfway decent bike rack and it has encouraged me to ride the bike so much more than before. I hadnt realized what a hang-up it was to stuff the bike inside between the seats and random other family van crapola that lives in there.
__________________
Jean Claude Van Dad
|
|
|
|
|
|
 Posting Rules
|
You may not post new threads
You may not post replies
You may not post attachments
You may not edit your posts
HTML code is Off
|
|
|
|
 » Recent Threads
 |
|
|
|
|
|
|
|
|
|
|
|
|
|
|
|
|
|
|
|
|
|
|
|
|
|
|
|
|
|
|
|
|
|


 Vandiesel II
 Vanna
Vanna Linear Mode