|
|
 05-01-2018, 12:44 AM
|
#111
|
|
Senior Member
Join Date: Sep 2010
Location: Bend, OR
Posts: 800
|
Great work repurposing that old top! We'll be anxiously waiting to see the final product.
Congrats on the little one - nothing like cutting a hole in a perfectly good van with only a few hours sleep under your belt! (pretty sure I did the same once upon a time... you'll be just fine  )
__________________
Josh
2009 Express AWD, CCV Top & 50-ish home build. Daily driver/camper/kid hauler
|

|

|
|
05-07-2018, 10:08 AM
|
#112
|
|
Senior Member
Join Date: May 2017
Location: San Clemente, CA
Posts: 428
|
Well the day finally came and point of no return has been crossed. We had to start a little later in the afternoon Sunday so the plan was just to cut the hole and get the lift mechanism placed.
After mocking up the lift mechanism on the ground i measured the length and width (roughly 10 separate times). it was 42.5" x 106". We knew we had to start at the cross beam right behind the cab of the van so I marked the two front corners right along that 42.5" apart and centered on the van. We then cut an undersized "skylight" right behind that to work through.
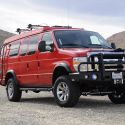
After measuring 106" back from the front cut, we realized that we were running out of space between the back edge of the cut and the brake light. Since I am repurposing the top from an old EB the shell has to sit right in front of the brake light. So we decided to cut 105" back and then notch 1" out of the front cross beam so that we had enough room to attach the canvas to the roof and still have the shell covering it.
|
|
|
|
|
05-07-2018, 10:14 AM
|
#113
|
|
Senior Member
Join Date: May 2017
Location: San Clemente, CA
Posts: 428
|
So we then measured 105" straight back from the front edge and cut. We used a combination of an air chisel, jigsaw, and saws all. The air chisel was awesome until it stopped working. It allowed me to sneak between the roof cross beams and sheet metal so we could do the entire cut with the cross beams still supporting the roof. This cut down on chattering and vibration big time, and someone didn't have to physically hold the rook up while we cut it.
After the sheet metal of the rook was cut we used the saws all to cut the cross beams and remove the whole thing! Next we had to dismantle the lift mechanism and get the side rails fitted to the edges of the cut. A few minor adjustments were made and then the notches for the outside bar were traced and cut. Cross bars were re-attached to the side rails and things were looking good!
|
|
|
|
|
05-07-2018, 10:38 AM
|
#114
|
|
Senior Member
Join Date: May 2017
Location: San Clemente, CA
Posts: 428
|
The last thing to do was to put the top on the rails and do a sanity check on the fit... Not too bad! The decision to notch the front cross beam was crucial in the end. We had limited time working around two newborn's schedules so thats as far as we got. I also didn't have the right hardware to attach the springs to the lift so I need to hit the hardware store and brainstorm a little bit about how I want to do that. Overall pretty excited about the progress we made, and can definitely see the light at the end of the tunnel.
|
|
|
|
|
05-07-2018, 10:46 AM
|
#115
|
|
Senior Member
Join Date: May 2017
Location: San Clemente, CA
Posts: 428
|
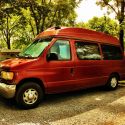
Also I don't think I have posted any interior pictures in a while. We got all the seats re-done. The bench turned out great and the captain chairs turned out just okay. I only paid $320 to get all of it done so I am not upset by any means but they didn't turn out exactly how I envisioned it.
Also got the drawer mostly finished. We are going to yosemite for memorial day so I am really excited to see how all the recent upgrades work out in a practical setting.
|
|
|
|
|
05-07-2018, 11:02 AM
|
#116
|
|
Senior Member
Join Date: Aug 2013
Location: Silverado, CA
Posts: 530
|
Quote:
Originally Posted by BenJJ

Also I don't think I have posted any interior pictures in a while. We got all the seats re-done. The bench turned out great and the captain chairs turned out just okay. I only paid $320 to get all of it done so I am not upset by any means but they didn't turn out exactly how I envisioned it.
Also got the drawer mostly finished. We are going to yosemite for memorial day so I am really excited to see how all the recent upgrades work out in a practical setting.
|
Looking good! Who did the seats/bench?
|
|
|
|
|
05-07-2018, 11:50 AM
|
#117
|
|
Senior Member
Join Date: May 2017
Location: San Clemente, CA
Posts: 428
|
Quote:
Originally Posted by BrianBlair
Looking good! Who did the seats/bench?
|
One of my mom's friends who mostly does slipcovers and things like that for furniture just out of her garage. The price was extremely reasonable ($70 per chair), but in hindsight I should have had her just sew it into the old fabric instead of a slip cover since she would have been able to pull it tighter.
They are definitely way better than before and much cleaner than the brown leather from the junkyard, but I might see if she can tighten them up with the sacrifice of having them not be removable.
|
|
|
|
|
05-08-2018, 03:14 PM
|
#118
|
|
Senior Member
Join Date: May 2015
Location: San Clemente, CA
Posts: 552
|
hurry up, we leave for yosemite in two weeks!
|
|
|
|
|
05-21-2018, 10:19 AM
|
#119
|
|
Senior Member
Join Date: May 2017
Location: San Clemente, CA
Posts: 428
|
I had all weekend to work on the van and get it ready for Yosemite, so it was pedal to the metal to finish the top... unless I wanted to drive a convertible van all the way there...
So the top came off the lift and I attached the canvas to the underside of the fiberglass. I did this using size 10 x 3/8" long sheet metal screws with washers. I started with 1/2" long screws and one of them poked all the way through so I had to downsize. I started attaching in the front left and then went all the way down the side. I waited to do any of the corners until I had the sides done. Positioning was a little tricky since I had the brand new canvas that Mark had added some extra length to on the top and bottom so I had some slop to work with. Also this wasn't like attaching a used top so I had no holes on the canvas to go off of, nor could I trust the holes in the fiberglass from the previous canvas After some measuring I ended up attaching the canvas with 4" of excess length. This was based off trying to center the windows between the roof of the van and the overhanging edge of the fiberglass top. We will revisit that 4" decision later.
Once one side was done I went back to the opposite front corner and attached the canvas there, 4" of excess, and went all the way down the edge. With both sides done I thought I had done the hard part... I was wrong. Trying to get the corners in the front and back positioned was a nightmare. I started at the front since it had a window and just centered the window at the same height as the side windows. The back of the canvas has no window so that took quite a bit of figuring out. I don't remember exactly how I ended up doing it, but after like an hour of screwing around with a tape measure I just went for it and got it screwed down. I also can't find my pictures from this portion of the work which is a bummer.
So I had the canvas attached to the underside of the top! Next, I cut a 115" x 48" piece of reflectix and slipped it underneath my 4" overhang of canvas to insulate the entire top. I then cut two 48" x 57" plywood pieces and covered them with foam and fabric (same as the interior stuff I have already done).Those got screwed into the underside of the fiberglass with some screw covers. The top was then transferred back onto the van.
My two brothers and dad then lifted the top up and i used ratchet straps to tighten the lift mechanism to hold the bars in the upright position. Once the bars were all the way up I cut some 2x4s and wedged them in the the rails to keep the lift popped up and removed the ratchet straps. The top was up and the canvas was hanging!
|
|
|
|
|
05-21-2018, 10:29 AM
|
#120
|
|
Senior Member
Join Date: May 2017
Location: San Clemente, CA
Posts: 428
|
It looked great, but I could tell that the 4" decision probably wasn't enough. needed to be probably more like 6". Not a huge deal since I am 5' 10" and my wife is 5' 3", so it will be easier to see out the windows with them hanging lower!
The next steps were to get the springs attached and tensions and then bolt the front, stationary crossbar to the fiberglass shell. The sportsmobile way on a manual top to hook up the springs is to just use S hooks and chain, and you tighten or loosen the springs but just hooking the S hook onto a different link in the chain. After a trip to Lowe's bemerritt and I found some big-ass turnbuckles that would allow us to hook the springs up to the chain and then tighten/loosen the tension just by spinning the turnbuckle! It worked like a charm. What is really nice about these is as I add weight to the top (solar panels, racks, etc.) I can just tighten the buckles to add more tension.
With the lift mechanism hooked up to the springs, the 2x4s got removed. The top was lowered and we positioned the shell right where we wanted it and then bolted the front bar in place using the U-bolts shown in the pictures. Looked pretty clean in the end. Also i covered the bottom of the biggest washer in butyl for a water tight seal on the top.
|
|
|
|
|
|
| Thread Tools |
|
|
| Display Modes |
 Linear Mode Linear Mode
|
 Posting Rules
|
You may not post new threads
You may not post replies
You may not post attachments
You may not edit your posts
HTML code is Off
|
|
|
|
 » Recent Threads
 |
|
|
|
|
|
|
|
|
|
|
|
|
|
|
|
|
|
|
|
|
|
|
|
|
|
|
|
|
|
|
|
|
|