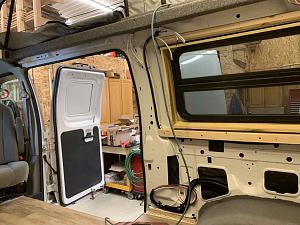
Journey with Confidence RV GPS App RV Trip Planner RV LIFE Campground Reviews RV Maintenance Take a Speed Test Free 7 Day Trial ×


Reply
 
Thread Tools Display Modes
 
Old 05-19-2019, 11:50 AM   #101
Senior Member
 
Join Date: May 2017
Posts: 199
2012 E-350 EB V10, 4x4, CCV Top

Electrical Wiring


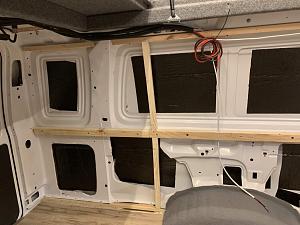
With the cabinets in I was able to finalize the electrical layout. It seems like I have way too much wire in a little campervan, so maybe I went a little overboard, but I figured it was easier to add wires now, than to have to do it later.


The wiring is mostly marine grade duplex wires, mostly 12 and 14 ga.

Click image for larger version

Name:	IMG_0728.jpg
Views:	49
Size:	102.1 KB
ID:	27253

Click image for larger version

Name:	IMG_0729.jpg
Views:	42
Size:	96.4 KB
ID:	27254

Click image for larger version

Name:	IMG_0734.jpg
Views:	42
Size:	110.7 KB
ID:	27255

Click image for larger version

Name:	IMG_0732.jpg
Views:	38
Size:	105.6 KB
ID:	27256


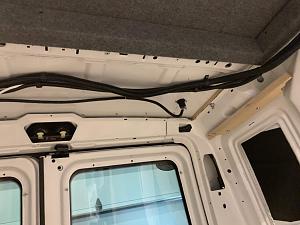
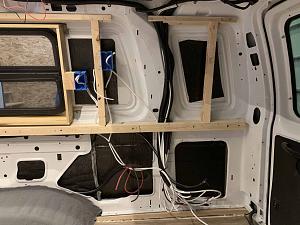
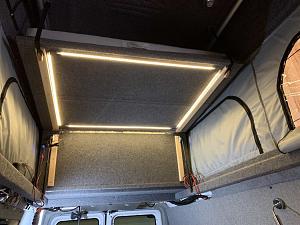
I also added LED strip lights to the underside of the bed. This give us plenty of light when the bed is raised up. I used a dimmer switch that allows us to adjust the brightness.


Click image for larger version

Name:	IMG_0791.jpg
Views:	36
Size:	105.5 KB
ID:	27257


Wall Covering


I previously cut some 3/16 plywood walls, and now it was time to cover the walls with foam and fabric.

Click image for larger version

Name:	IMG_3973.jpg
Views:	46
Size:	64.9 KB
ID:	27258


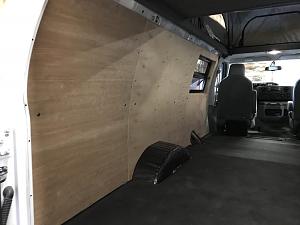
I set up a table outside, but was a little worried due the forecasted rain, but we finished just as the rain started. I used a siphon gun to spray the contact adhesive to the plywood and foam. Once the foam was glued to the plywood, I used a razor blade to trim the foam flush to the edge of the plywood.


I then sprayed the foam and back of the fabric and glued them together. The fabric was trimmed with about 2-3 inches of overlap.

I cut the corners and used more adhesive on the edge of the fabric and wrapped the fabric around to the backside of the plywood.

It was pretty easy and the corners all look good
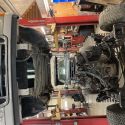
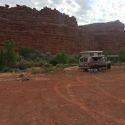
Attached Thumbnails
IMG_0742.jpg   IMG_0659.jpg   IMG_0662.jpg   IMG_0663.jpg  

cthayn is offline   Reply With Quote
Old 05-19-2019, 12:10 PM   #102
Senior Member
 
Join Date: May 2017
Posts: 199
Final insulation and wall panel installation

I used staples and spray adhesive to hold the Thinsulate in place until the wall panels were installed

Click image for larger version

Name:	IMG_0785.jpg
Views:	33
Size:	103.8 KB
ID:	27276

Click image for larger version

Name:	IMG_0786.jpg
Views:	32
Size:	107.0 KB
ID:	27277

Click image for larger version

Name:	IMG_0788.jpg
Views:	44
Size:	102.2 KB
ID:	27278

Click image for larger version

Name:	IMG_0695.jpg
Views:	41
Size:	105.7 KB
ID:	27279

Click image for larger version

Name:	IMG_0697.jpg
Views:	46
Size:	108.8 KB
ID:	27280
cthayn is offline   Reply With Quote
Old 05-19-2019, 12:20 PM   #103
Senior Member
 
marret's Avatar
 
Join Date: Nov 2016
Location: FL and VA
Posts: 1,952
Garage
Really coming together nicely.
__________________
Chris
2008 GMC 3500 Quigley Weldtec 4x4 Savana SMB
marret is offline   Reply With Quote
Old 05-19-2019, 01:34 PM   #104
Senior Member
 
Twoxentrix's Avatar
 
Join Date: Mar 2015
Location: Maryland
Posts: 3,378
Garage
Agree, Very well done.
__________________
TwoXentrix
"AWOL"
Twoxentrix is offline   Reply With Quote
Old 05-19-2019, 01:48 PM   #105
Senior Member
 
Join Date: Jul 2017
Location: San Clemente, CA
Posts: 1,379
Man people like you make anything I do look like utter crap. Great work!
Grampswrx is offline   Reply With Quote
Old 05-19-2019, 08:45 PM   #106
Senior Member
 
86Scotty's Avatar
 
Join Date: Jul 2011
Location: TN
Posts: 10,242
Quote:
Originally Posted by Grampswrx View Post
Man people like you make anything I do look like utter crap. Great work!
I couldn't have said it better. Seriously nice work there.
86Scotty is offline   Reply With Quote
Old 05-20-2019, 04:38 PM   #107
Member
 
Join Date: Apr 2018
Posts: 45
nice job on the wall panels...ill be doing them soon...im kind of dreading them
axcxnj is offline   Reply With Quote
Old 05-20-2019, 05:03 PM   #108
Senior Member
 
shadetreevanman's Avatar
 
Join Date: Jun 2017
Location: Riverside, CA
Posts: 385
Wow. I've read bits and pieces of your thread before, but somehow have missed a bunch of it. Today I read it through from the beginning and you have an incredible project going. Nice work all around. Makes me want to start over on mine and make a few different choices. I may be stealing that formed ABS idea.

__________________
Tim Potts

2012 Chevrolet Express 3500 6.0
shadetreevanman is offline   Reply With Quote
Old 05-20-2019, 06:45 PM   #109
Senior Member
 
Join Date: May 2017
Posts: 199
Thanks for the compliments. I’m not too consistent in updating this thread, but I will try to do better.
cthayn is offline   Reply With Quote
Old 05-21-2019, 10:41 AM   #110
Senior Member
 
boywonder's Avatar
 
Join Date: Jul 2013
Location: So Cal
Posts: 4,071
Nice router work to make the cabinet dados.....keep it coming!
__________________
2008 E350 RB passenger 4WD SMB penthouse
2013 KTM 350 EXC
2008 KTM 250 XCF-W
2003 Honda Element
boywonder is offline   Reply With Quote
Reply


Posting Rules
You may not post new threads
You may not post replies
You may not post attachments
You may not edit your posts

BB code is On
Smilies are On
[IMG] code is On
HTML code is Off
Trackbacks are Off
Pingbacks are Off
Refbacks are Off

» Featured Campgrounds

Reviews provided by

Powered by vBadvanced CMPS v3.2.3
Disclaimer:

This website is not affiliated with or endorsed by Sportsmobile SIP or any of its affiliates. This is an independent, unofficial site.


All times are GMT -6. The time now is 04:51 PM.


Powered by vBulletin® Version 3.8.8 Beta 4
Copyright ©2000 - 2024, vBulletin Solutions, Inc.