So I have been meaning to do this for awhile and just can't seem to get started, so I'm just going to start and do it in little bits.
After I got the fiberglass top made I had to design and build the lift mechanism. I basically copied Westfalia's "scissor hinge" design, made them out of 1/4" x 1" steel bar. Made a bunch of dummy models out of plywood strips to check the opening angles and function.
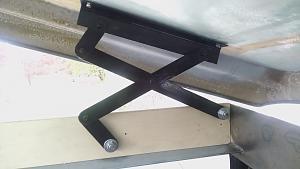
Getting the gas springs sized right turned out to be one of the most difficult tasks of the whole project. I'm NOT an engineer. Online resources were pretty limited in range, most tools only dealing with small lids and doors. I got some tech help from Bansbach in Germany and one of their engineers helped me out immensely. Between his calculations and my seat of the pants guesstimate, I got it pretty close to what I wanted. it takes about 60# of downward pull to close it which is a bit much, but it floats just where I wanted to get the tent tucked in. opening it is a breeze, unlatch the lid, loosen the straps and give a little push.
I had a local canvas shop make the tent out of Aqualon material with 3 zippered windows. I was not super happy with it at first, thought it a little rough for my taste, but it has turned out to be waterproof and durable.

I attached it at the lid with 1/8" x 3/4" aluminum strips and truss head screws. at the curb I used the same metal but sandwiched it in a fold of the cloth and put stainless machine screws through pre-tapped holes in the curb.
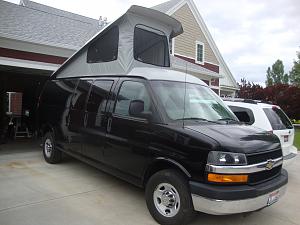


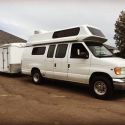
 2008 GMC 3500 SMB


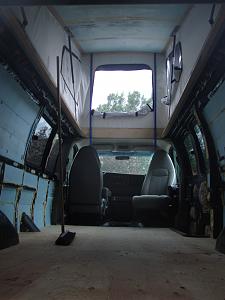
 Linear Mode