Journey with Confidence RV GPS App RV Trip Planner RV LIFE Campground Reviews RV Maintenance Take a Speed Test Free 7 Day Trial ×


Reply
 
Thread Tools Display Modes
 
Old 06-12-2017, 09:52 AM   #171
Senior Member
 
bemerritt's Avatar
 
Join Date: May 2015
Location: San Clemente, CA
Posts: 552
Turns out, the rarity of the black canvas may hurt my hunt for some material to fix it. Although I really like the black.

Here is sportsmobile very quick response fyi when asking for some additional black canvas for me to repair it:

"Thank you for your inquiry with Sportsmobile. We have only done 2 or three back canvas tops, mostly out of our Texas office. Can you tell us which of our three Sportsmobile plants your conversion was built? We will need to see if the one that built your conversion has any black materials."

bemerritt is offline   Reply With Quote
Old 06-12-2017, 11:12 AM   #172
Senior Member
 
mikracer's Avatar
 
Join Date: Sep 2013
Location: San Luis Obispo, CA
Posts: 2,554
I'm pretty sure 86Scotty just replaced the canvas on a SMB with a black one. Might want to PM him to see where he got it.
__________________
2005 E350 Chateau - V10 - Agile Offroad 4x4
2012 CTS-V Wagon - For the baby...
mikracer is offline   Reply With Quote
Old 06-12-2017, 11:15 AM   #173
Senior Member
 
bemerritt's Avatar
 
Join Date: May 2015
Location: San Clemente, CA
Posts: 552
Luckily Sportsmobile has been great so far. Van was built in Texas. SMB west redirected my request to them and they have already contacted me asking how much of it I wanted. Plan is to cut off the damaged bottom area (2.5") and sew on an extension to the top of the canvas to compensate.

I figure the top of the canvas is greatly protected by the fiberglass top and poses very little risk to leaking.
bemerritt is offline   Reply With Quote
Old 06-19-2017, 10:04 AM   #174
Senior Member
 
bemerritt's Avatar
 
Join Date: May 2015
Location: San Clemente, CA
Posts: 552
Made some great progress over the weekend, and met up with Boywonder who had some great advice. Was great seeing the penthouse in all its glory and the awesome interior he has built.

Sanded the top and raptor lined it. At first i was going overboard with the sanding. Eventually got over taking it all down to the white.


Needless to say, even with putting up some plastic, my whole garage is coated in red dust. I ended up removing the yakima tracks.

Sprayed it with black raptor liner. Looks pretty good. I had one bottle that I must not have mixed enough as the texture was a little rough and I can see those spots when looking for it. But overall, pretty happy. I used all for liters for the top and I had set my little dewalt 3 gallon compressor to ~60 PSI.


I used a small punch, smaller htan a standard hole punch, to attach the rubber seal.
bemerritt is offline   Reply With Quote
Old 06-19-2017, 10:09 AM   #175
Senior Member
 
bemerritt's Avatar
 
Join Date: May 2015
Location: San Clemente, CA
Posts: 552
Now my attention is on the lifting mechanism. Need to wirebrush off as much rust as possible, clean up some SMB weds and por 15 any questionable spots. Then I'll rattle can it.

Stripping off the foam padding and some fabric they adhered to it isnt fun.


Lastly, I am deciding how much work I want to do on the canvas. Overall it is pretty good, except for where it attaches to the van in a couple spots. I do have some canvas coming from SMB north, but boy wonder might have sold me on not cutting the canvas and sewing an extension. Still pondering this one.

bemerritt is offline   Reply With Quote
Old 06-26-2017, 02:25 PM   #176
Senior Member
 
bemerritt's Avatar
 
Join Date: May 2015
Location: San Clemente, CA
Posts: 552
Woke up planning on mocking up the lift mechanism, finished the day by lowering the top onto the van. Decided, "why would I try and assemble this in my garage, when I'll have to lift or disassemble before putting on the van?"

Well, it all worked out.

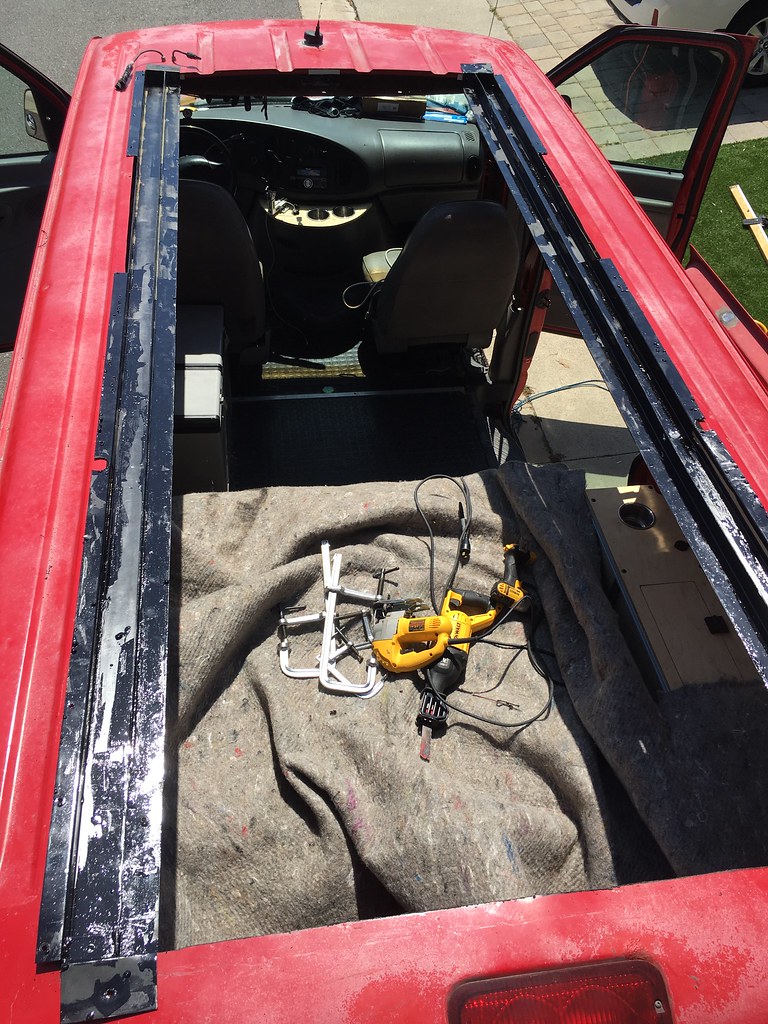
Started by cutting a sunroof and placing the side rails on the van to mock it up.


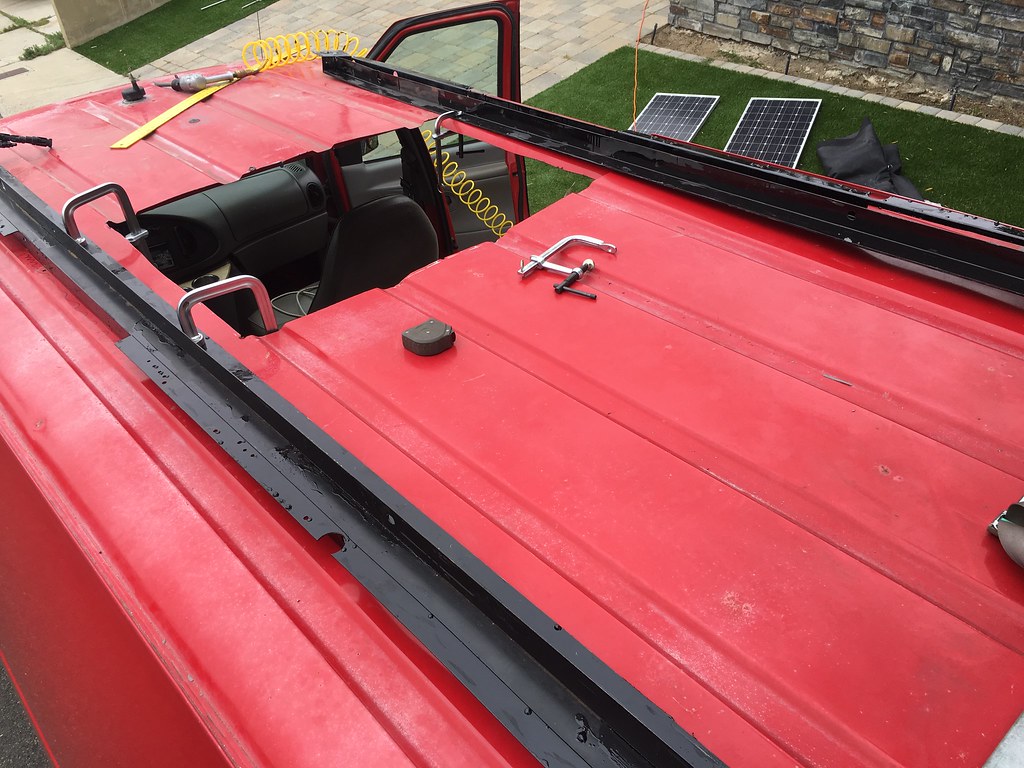
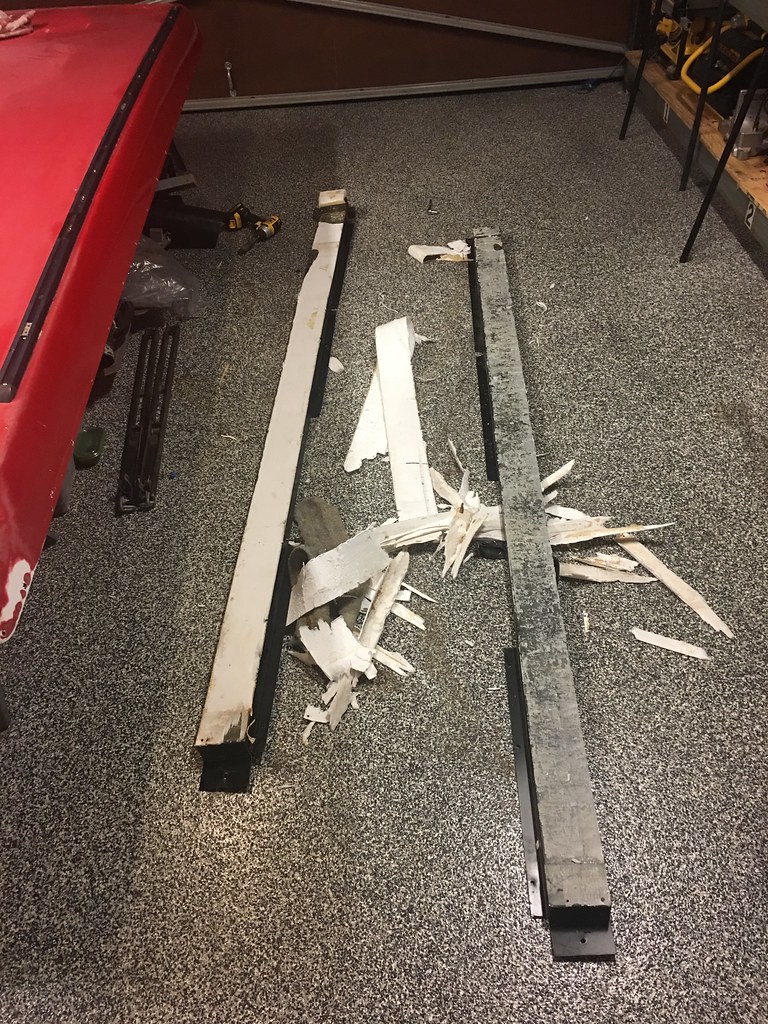
After measuring it out and looking at how it was mocking up, commited to it and cut the hole. Things of note, jigsaw with a fresh bi metal blade worked better tha the air chisel on my underpowered compressor. Unlike boywonder, and possibly all SMB west installs, I did my forward cut right along the B pillar support, without cutting it at all. This is how the donor van was.


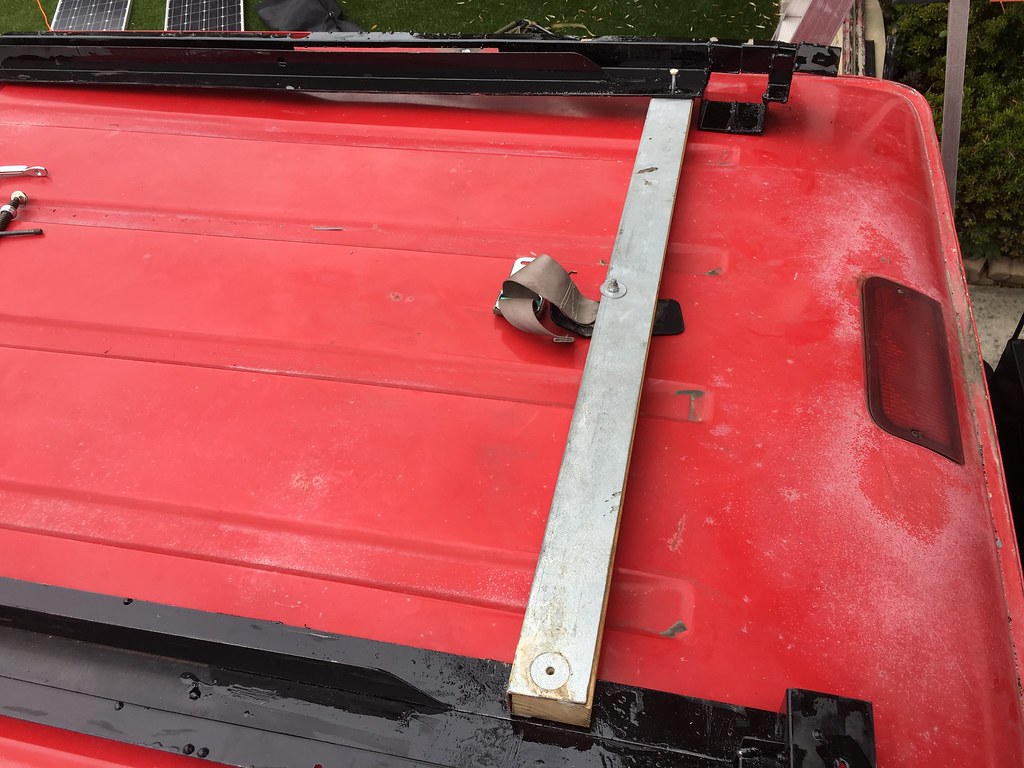
Assembled the lift mechanism with fresh stainless hardware. I still have everything just in place with clamps in case I didn't like the positioning when it lowered the top


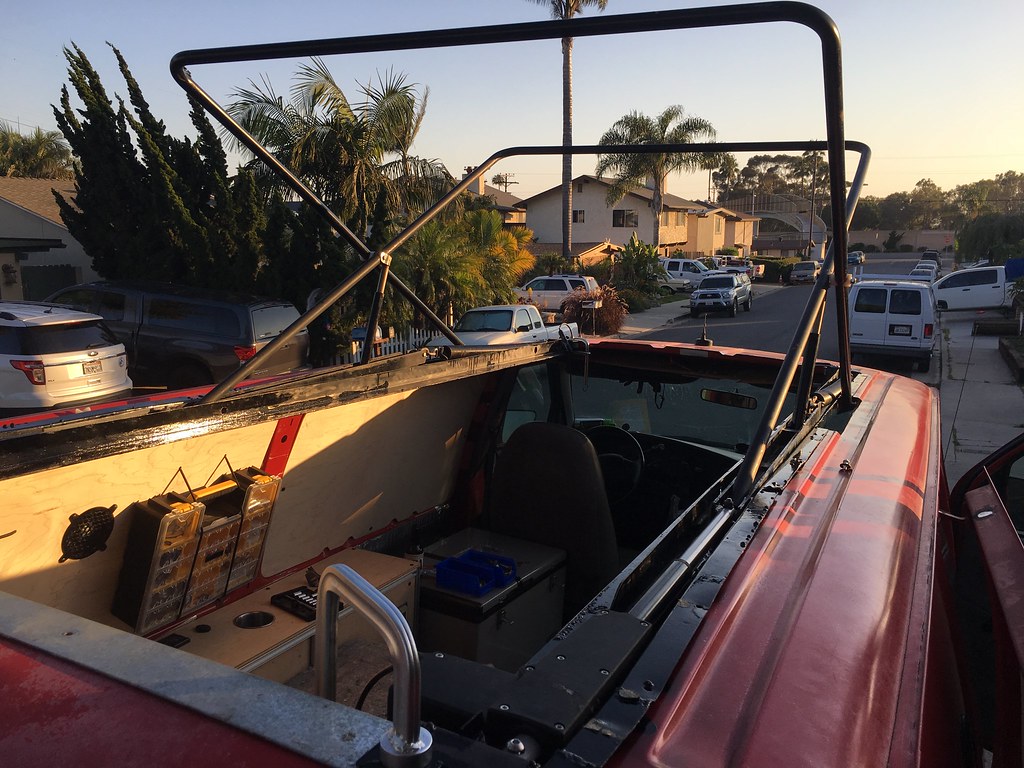
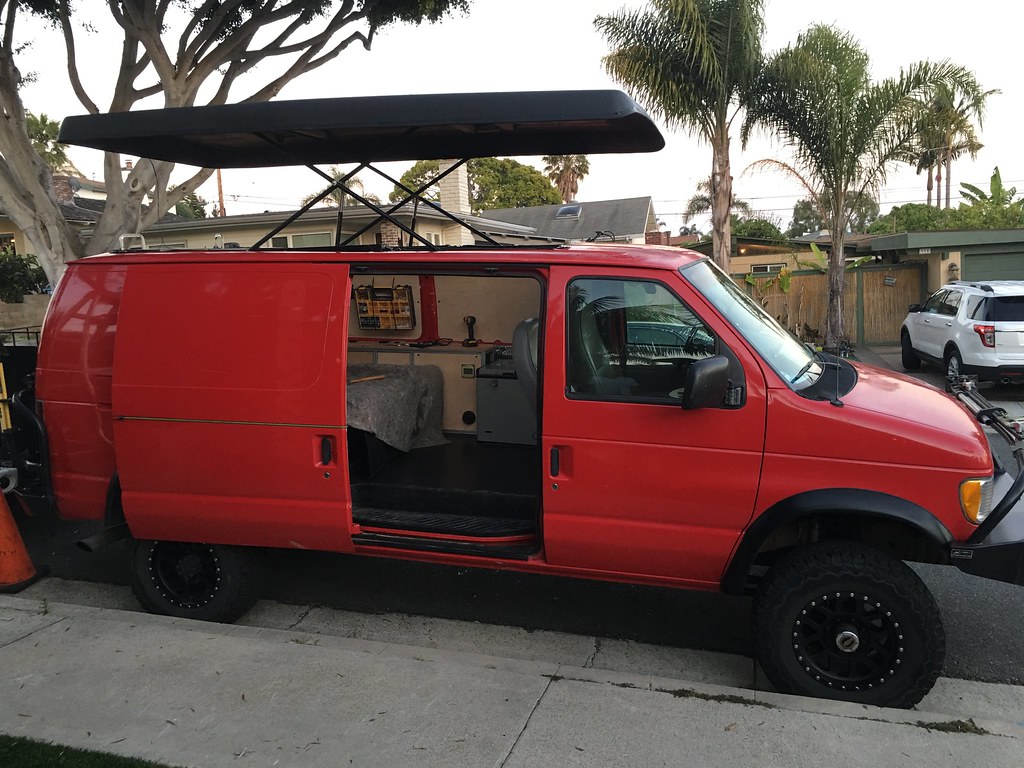
I then lowered the mechanism, ordered some nachos to entice helpers, and lifted the top up onto the van. This ended up being very easy for 5 grown men. Raised the roof to test.


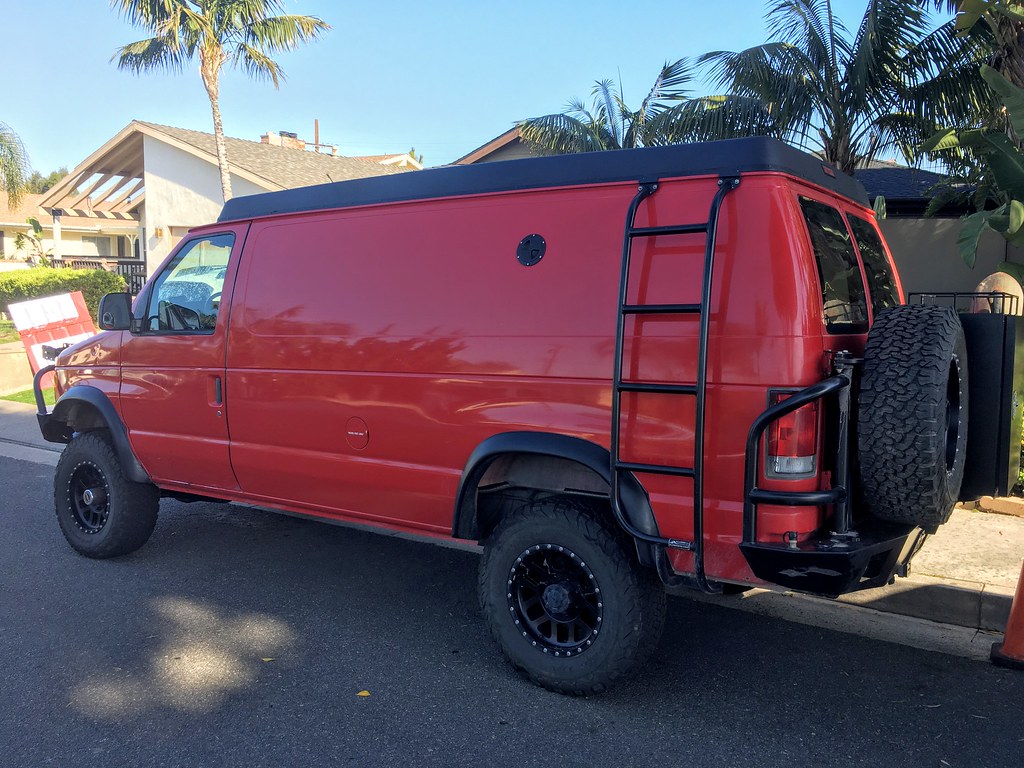
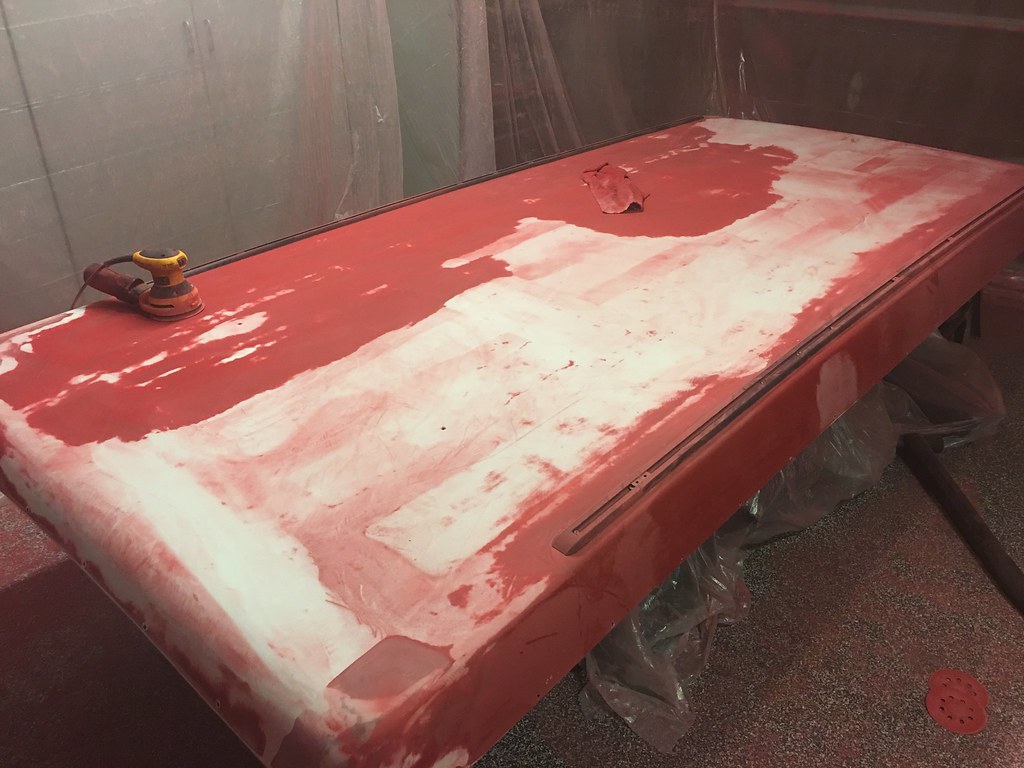
The look when lowered


Overall, really happy with it so far. Really surprised how much I could get done with an afternoon. Up next is raptor lining the roof of the van to match the penthouse, secure the rails to the van and attach the canvas.

Couple questions:

1. How do you ensure the top comes down perfectly everytime? Seems like there is a lot of slop and could use a bump in a direction to really sit properly.

2. The front doesnt completely sit down on the van. I believe this is probably from the top getting fixed before it got to me and the curve of it wasn't dead nuts. SHould I get over it and rely on the canvas waterproofing to do its job, or should I try something else to get a better seal. Obviously dont want a lot of water going under the top when closed, but everything should be waterproof and the raptor liner on the roof/gutters will do well to keep it from rusting.

bemerritt is offline   Reply With Quote
Old 06-26-2017, 02:42 PM   #177
Senior Member
 
rallypanam's Avatar
 
Join Date: Feb 2013
Location: San Francisco/Nevada City
Posts: 3,769
Great progress. It will go much easier on your brothers van!

Quote:
Originally Posted by bemerritt View Post
1. How do you ensure the top comes down perfectly everytime? Seems like there is a lot of slop and could use a bump in a direction to really sit properly.
You just have to align it.. sometimes it will come down to the side if it's windy, or on a hill or you do it wrong.. No worries, just lift it a bit and move it to one side or the other.. there's plenty of "wiggle" room.

Quote:
Originally Posted by bemerritt View Post
2. The front doesnt completely sit down on the van. I believe this is probably from the top getting fixed before it got to me and the curve of it wasn't dead nuts. SHould I get over it and rely on the canvas waterproofing to do its job, or should I try something else to get a better seal. Obviously dont want a lot of water going under the top when closed, but everything should be waterproof and the raptor liner on the roof/gutters will do well to keep it from rusting.
Interesting.. Is the rain gutter edge built up too much? Or is the gap because the front edge has been cut down? I'd try to trim the top to get it to align.. otherwise you'll have water and leaves and mice and all sorts of crap in there!

Also, did you sleeve the bars? Very recommended when you have it apart.
rallypanam is offline   Reply With Quote
Old 06-26-2017, 02:50 PM   #178
Senior Member
 
bemerritt's Avatar
 
Join Date: May 2015
Location: San Clemente, CA
Posts: 552
I think the gutter part is fine, I think it is the curve of it is slightly off due to a little too much material being removed. I am thinking of having a backing gasket attached to the van that it can come down on. It is a very small gap, but water would easily get under it.

Dont get a lot of rain down here in so cal, more worried about condensation on the roof when I start driving more than anything else.

I had purchased the tubing to sleeve the inside and I went off of boywonders build and got 3/4" OD. They didn't fit, I was frustrated and so I moved on with the assembly. Im sure I'll disassemble and do it at some point, but yesterday I was dertimined to get the top on the van.
bemerritt is offline   Reply With Quote
Old 06-26-2017, 03:02 PM   #179
Senior Member
 
rallypanam's Avatar
 
Join Date: Feb 2013
Location: San Francisco/Nevada City
Posts: 3,769
Maybe just install, then come back later and build it back up with fiberglass, touch up the raptor, and you're good to go.. but the repair could be made with the top on and functioning.
rallypanam is offline   Reply With Quote
Old 06-26-2017, 03:08 PM   #180
Senior Member
 
bemerritt's Avatar
 
Join Date: May 2015
Location: San Clemente, CA
Posts: 552
Ya, building up the material isn't a bad approach. Not well versed in fiberglass, but i guess no better time than the present! I'll have to get a better look at how big the gap really is.
bemerritt is offline   Reply With Quote
Reply


Posting Rules
You may not post new threads
You may not post replies
You may not post attachments
You may not edit your posts

BB code is On
Smilies are On
[IMG] code is On
HTML code is Off
Trackbacks are Off
Pingbacks are Off
Refbacks are Off

» Featured Campgrounds

Reviews provided by

Powered by vBadvanced CMPS v3.2.3
Disclaimer:

This website is not affiliated with or endorsed by Sportsmobile SIP or any of its affiliates. This is an independent, unofficial site.


All times are GMT -6. The time now is 03:44 AM.


Powered by vBulletin® Version 3.8.8 Beta 4
Copyright ©2000 - 2024, vBulletin Solutions, Inc.