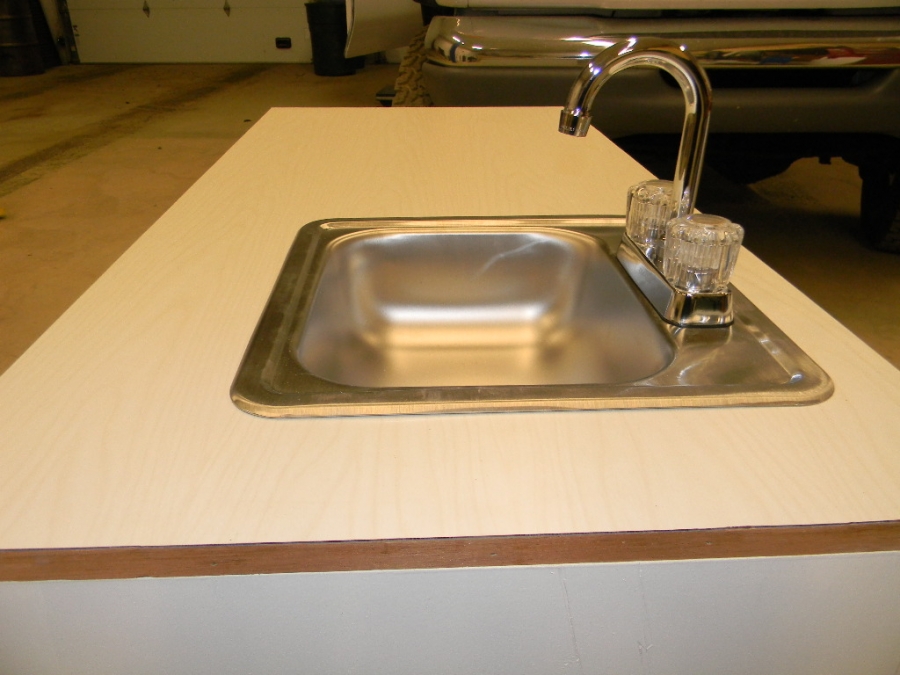
I worked on the van plumbing some more this weekend. I decided on 2 6 gallon tanks under the sofa bed, both for fresh water, piped together. I used reinforced tubing rated for potable water. This shot shows the whole works.
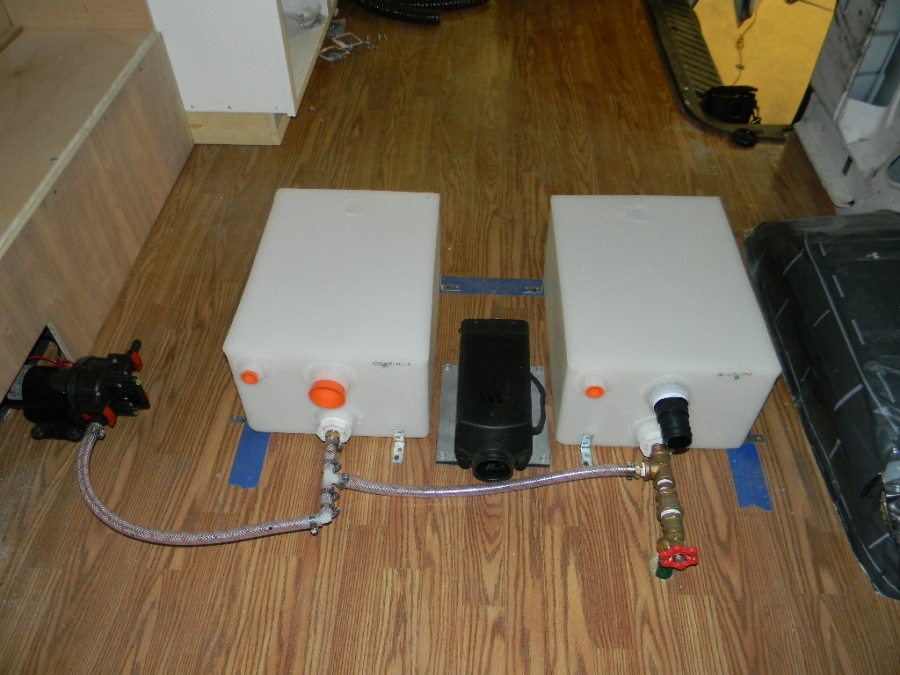
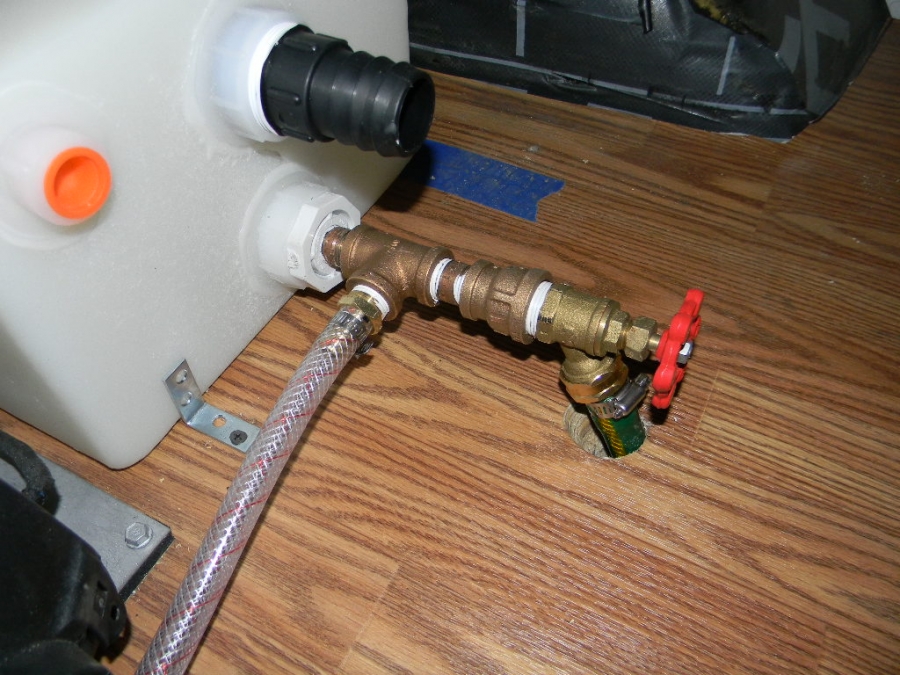
I set up a drain for the fresh water pretty much the same as the one I put on the grey water tank. I couldn't find all the fittings I needed in plastic variety on short order, so I used some brass to get it done.
On the pump end which comes out of this tank, I piped out and around the sofa bed leg system rather than pipe through it. This way, this sofa bed is easy to remove and replace without messing with plumbing.
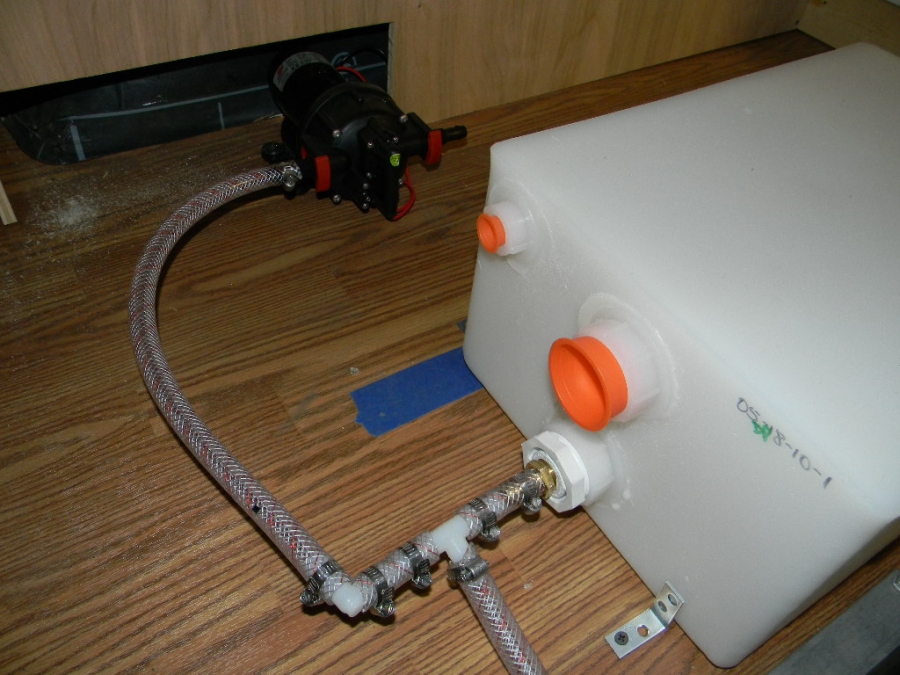
The small orange plugs in each tank are where the air vent will be piped. I plan to connect the two with a tee fitting and some small airline tubing, then out through the van wall (the lockable water fill has a screened fitting in place)
In the first tank, you can see the upper black fitting that will be the water inlet. I have picked out 2 exterior inlets or gravity water fillers, but I need to mess around some more with fittings to make it work.

the one with the locking cover has an angled (downward!) filler neck inside which takes 1 3/8" tubing. The other one , is designed for being deck mounted on a boat, is not lockable which means I would not put it on the exterior of the van (I don't want anyone peeing in my fresh water tanks), but it takes 1 1/2" tubing which I can find fittings for locally. I briefly considered an interior mounting for this one, but it seems like asking for problems with a rv garden hose in the van to fill the tanks. At this moment I plan to find the needed fittings to make the lockable exterior version work.
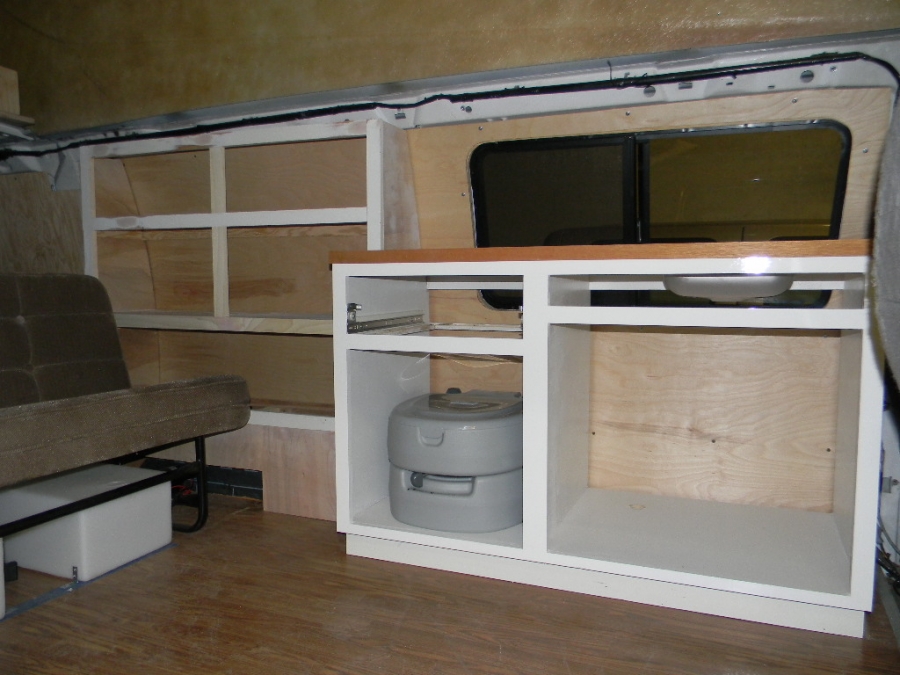
After running out of fittings, I decided to try my hand at cabinet making. I have never made a cabinet before, and was paralyzed by the thought of scribing the end panels of a cabinet to fit the vans curvature. The sink cabinet is large enough that It didn't need to be scribed, but the cabinet behind the sink cabinet has to be more shallow to fit between the sofa bed and wall, so scribing the back seemed necessary. Luckily, I found a scribe tool on the floor of the shop near the chop saw.
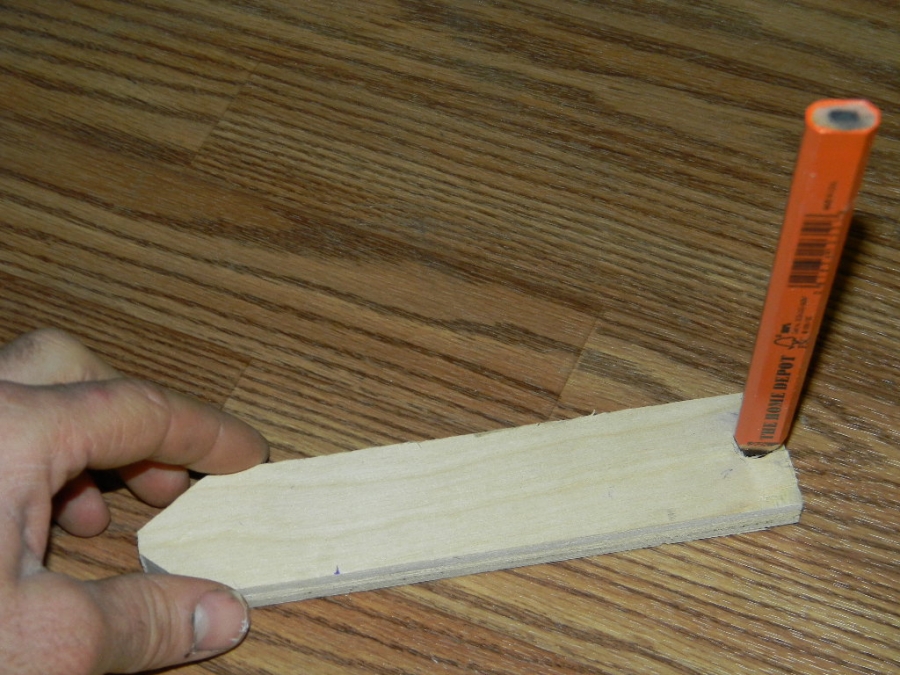
most carpenters use a compass. I used this block of wood held horizontally with the pointy end against the van wall, and the pencil end against the plywood panel which was precut for height. the length of the scribe tool was determined by the largest gap from the van wall to the plywood panel. I used a couple clamps to hold the plywood perpendicular to the floor, and then freehand followed the curve with the tool trying to keep the scribe tool horizontal It worked pretty well. I can think of much more elaborate ways, but this was just fine for a paint-grade cabinet. here are a couple of shots of the cabinet carcass unfinished, no face frame yet, and possibly one more shelf to be added.
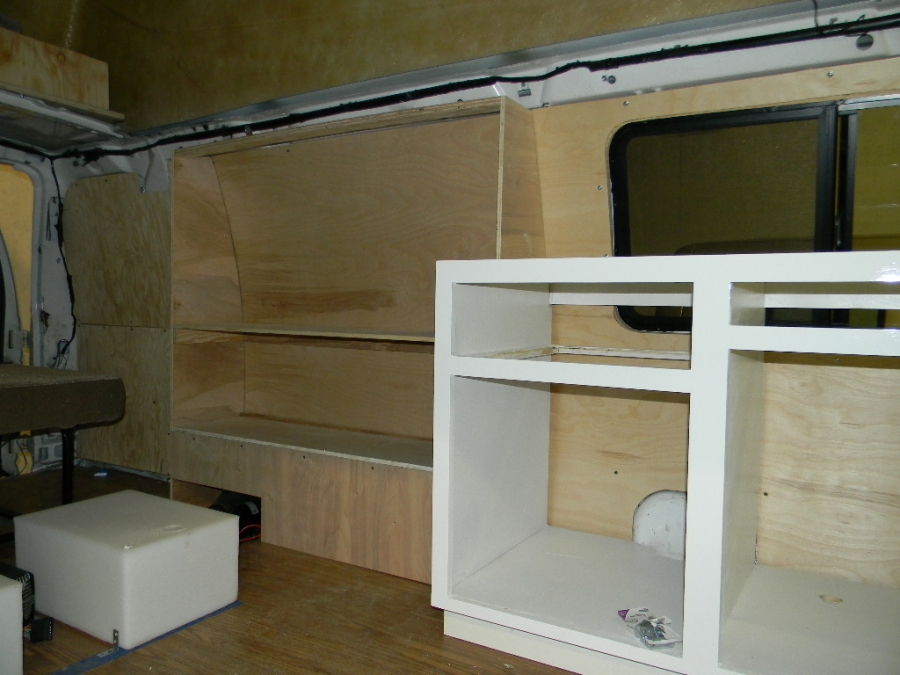
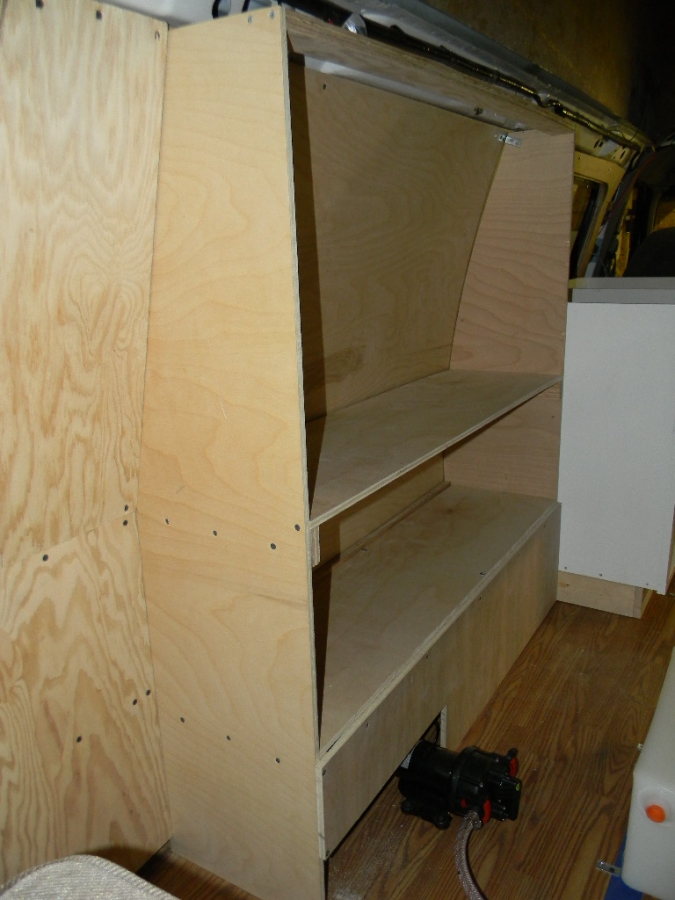
From the rear, notice the water pump partially hidden by the cabinet. The lowest shelf will be removeable to make easy access to the plumbing and electrical goodies that run through there. also a possible future location for an espar coolant heater and heat exchanger.
The plywood on the van wall behind the cabinet is 3/4" (not flexible) for mounting of electrical components which is why it is two pieces, not bent to fit the van wall. The inverter charger, fuse panel, lighting relays, battery monitor, future charge controller, etc will be back there in a separate cabinet.
This was a fun cabinet to build as each piece is custom cut to fit. Because the van tapers toward the rear, each end panel is different in depth in order to make the finished face of the cabinet run paralell to the sink cabinet. If I was just starting this build, I would certainly find the center of the van floor at the front and rear, then snap a line or tape a line down for reference. In this case, I ran a straight edge off of the sink cabinet and measured from it back to the van wall to figure out the depth of the end panels. Capish? This taper means the shelves get cut to the largest dimension which is the front part where the van is wider, then set in place flush with the front of the cabinet, and trace the overhang at the rear for trimming. the shelf heights in this cabinet coincide with the horizontal studs in the van wall, so the shelf support strip can be screwed into something solid.


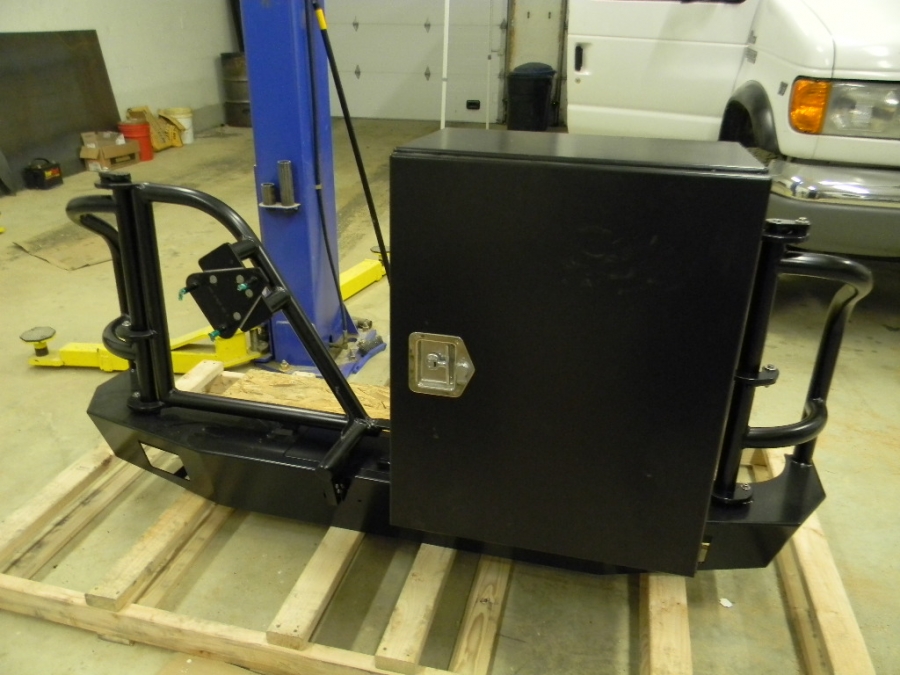
 . HMMM... I wonder if it would fit on the van if I had a flat and needed it. I am assuming that the 2000 quigley conversion came with 8 x 170 because thats what aluminess said I needed, but I am not sure- seems I have read all sorts of reports on what size bolt pattern for what years. The best test for me will be to take a wheel off the van and see if it fits the carrier. It could be that the spare I've been carrying is an oddball (it came with the van when I bought it- never thought to check it).
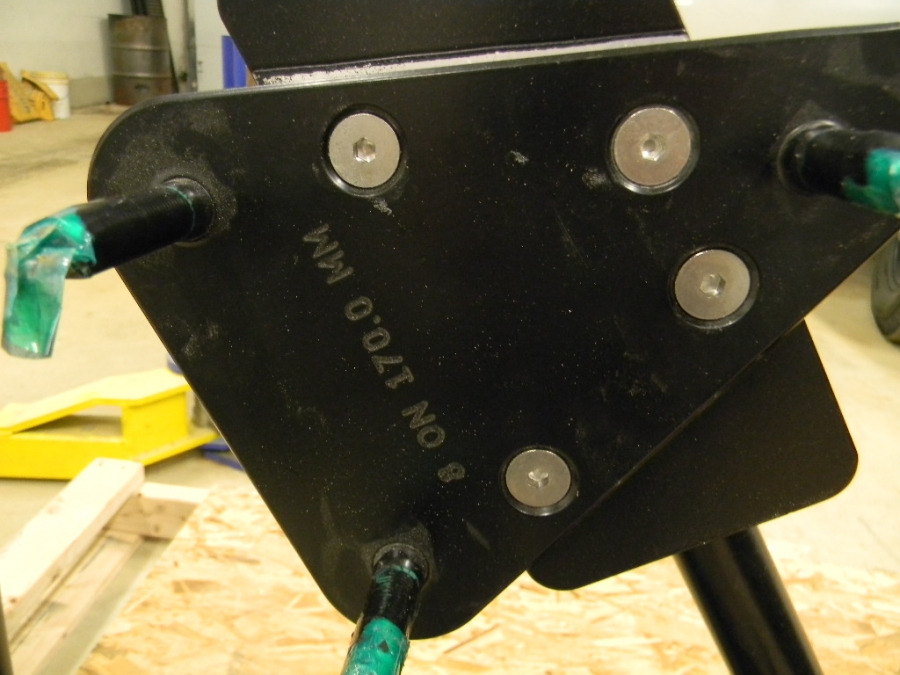


 Linear Mode