Journey with Confidence RV GPS App RV Trip Planner RV LIFE Campground Reviews RV Maintenance Take a Speed Test Free 7 Day Trial ×


Reply
 
Thread Tools Display Modes
 
Old 12-23-2021, 08:39 AM   #101
Senior Member
 
Scalf77's Avatar
 
Join Date: May 2007
Location: Beaverton, OR
Posts: 2,505
Forscan lite

So I jumped a little into Forscan when I was looking at my BCM - head light drain issue. I was using the full windows version for that, but now I started to load up a dashboard on my Iphone with Forscan lite.

One of the neat PID's available for my 2020 Transit is Battery SOC and Current. A built in battery monitor, the only issue is the vehicle must be on to connect.


-greg

Scalf77 is online now   Reply With Quote
Old 01-20-2022, 12:27 PM   #102
Senior Member
 
Scalf77's Avatar
 
Join Date: May 2007
Location: Beaverton, OR
Posts: 2,505
MobileMule Camera Selection Switches

It's been a while, but I got back working on some van projects. So I installed a manual on/of DVR switch , with some camera selection switches for the MobileMule DVR installed in post #80. Luckily I had already ran some wires from the overhead console to the back when doing the van electrical.

The main purpose was to add additional control to turn on the DVR system when the engine is off, and control over what camera is being viewed. Luckily the MobileMule DVR has 8 sensor inputs which let me identify a camera channel to display among other things. The default scenario is for the DVR to come on when the engine is running. To do that I use the engine run signal from the High Specification Vehicle Interface Connector (Pin 29 Engine Run). While that works when the van is running, part of the reason for installing the system is as security system, that I might want on while camping.


I added another relay that is controlled via the installed manually controlled switch. When the switch is off, the engine run signal goes through the normally connected path of the Relay. If the switch is turned on, the relay is energized to provide an alternative ground input for the DVR/Control power relay.

The next part of the DVR control switch is to choose the camera that is to be displayed. This is done using two SPDT (On/Off/On) switches, these switches use independently controlled LEDs that I use to indicate what camera is selected. The input to this switch is controlled power and it is then fed to the input trigger of the DVR. The DVR trigger settings allow you to choose the camera to display.


I had some thought of tying the camera triggers to the turn signals and back lines that are available on High Specification Interface Connector. The fact that my side cameras are not exactly trying to emulate a side view mirror (rear facing) I figured that it would be more confusing and chose not to go that route.


The switches and covers were purchased at OTR Switch Guys

-greg
Scalf77 is online now   Reply With Quote
Old 02-01-2022, 07:05 PM   #103
Senior Member
 
Scalf77's Avatar
 
Join Date: May 2007
Location: Beaverton, OR
Posts: 2,505
Grey Water Tank Installation

To fit the available profile I purchased a 11 Gallon RV Holding Tank | R-76H from Tank-Mart-Storage solutions. It is 41 inches long and 12 ˝ inches wide, this will fit nicely between the gas tank and driver side. The max height of 7 inches keeps it tucked under the van nicely.


I purchased 4 tank straps 1”x36” x 1/15” part# 05-20400 made from 304 stainless steel from Aircraft Spruce & Specialty Co. I also added about 8 foot of ANTI-CHAFE MOLDING part# 05-01800.


I took a day to bend the straps, install the rivnuts for mounting the straps and test fit for the location. Now I just need to route the drainpipes under the van. I have a shower and a sink on the same side of the van. They are located above the tank, so this shouldn’t be to difficult. The other goal here is to not have to drill a bunch of holes in the van. I used 1-1/2" Natural Uniseal (R) Pipe-to-Tank Seal adapters to provide entry into the water tank. The other thing was the p-traps, I used a Hepvo Waterless Waste Valves. The main reason was the shower didn’t have a lot of room; the sink would have probably been doable with a P-trap design.


The problem of course is mounting the tank and getting the drainpipe connected at the same time. The sink will be relatively simple, I can finish the plumbing after the tank is installed. The shower will be just a bit harder. Getting the downpipe through the Uniseal will be a challenge, as it will be a blind installation. Luckily after a few hours, a few choice words, I was able to align it and finish the lift with the floor jack.


The overflow and tank vent is part of the sink drain.


Ok, at least the under the van work is done. The shower drain is complete, I just need to finish the sink cabinet and then hook up that drain.

-greg
Scalf77 is online now   Reply With Quote
Old 02-01-2022, 07:45 PM   #104
Senior Member
 
1der's Avatar
 
Join Date: Apr 2013
Location: San Francisco, CA
Posts: 3,284
Amazing as always!

One experience we had was a frozen holding tank and drain pipes. On my list is heated pipe wraps and tank heater. That would be far more comfortable than the backed up sink and holding a hair dryer under the rig in 15 deg temps!
__________________
Ray
Beastie 3: 2002 7.3 EB Cargo: Agile TTB, CCV High Top, Custom Walk Through, Lots of stuff added. www.BlingMyRig.com
1der is offline   Reply With Quote
Old 02-02-2022, 03:53 AM   #105
Senior Member
 
marret's Avatar
 
Join Date: Nov 2016
Location: FL and VA
Posts: 1,953
Garage
Excellent, agree with Ray, amazing as always. Thanks for posting.
__________________
Chris
2008 GMC 3500 Quigley Weldtec 4x4 Savana SMB
marret is offline   Reply With Quote
Old 02-02-2022, 08:14 AM   #106
Senior Member
 
Scalf77's Avatar
 
Join Date: May 2007
Location: Beaverton, OR
Posts: 2,505
Ray, at a minimum I plan on running wires for the heated pads, and possibly a gate valve heater. The gate valve is only supposed to be for when the valve is frozen, and only on for a short period of time. Hopefully the tank pad and pipe wraps would render it unnecessary.

I did not show it, but I did wrap the shower drain with some insulating foam, before installing the tank, there are also no standard p-traps to fill with water and freeze. But I do expect that this will be in the future

-greg
Scalf77 is online now   Reply With Quote
Old 03-09-2022, 06:28 AM   #107
Senior Member
 
Scalf77's Avatar
 
Join Date: May 2007
Location: Beaverton, OR
Posts: 2,505
Truma Combi 4 eco plus install and more.

It has taken a while to get here, I purchased the Trauma Combi when my van was on order, that was right before Covid hit in 2020. Some issues with the Van and family health issues got in the way of things, but I am back on track. I purchased the unit from trumaheaters.com. This was not an official Truma dealer, instead he had purchased the units at asset auction. They were very upfront about this, the caveat to purchasing the unit through them, is you had no warranty from Truma. The site is now undermountac.com and they no longer have an Truma units in stock.

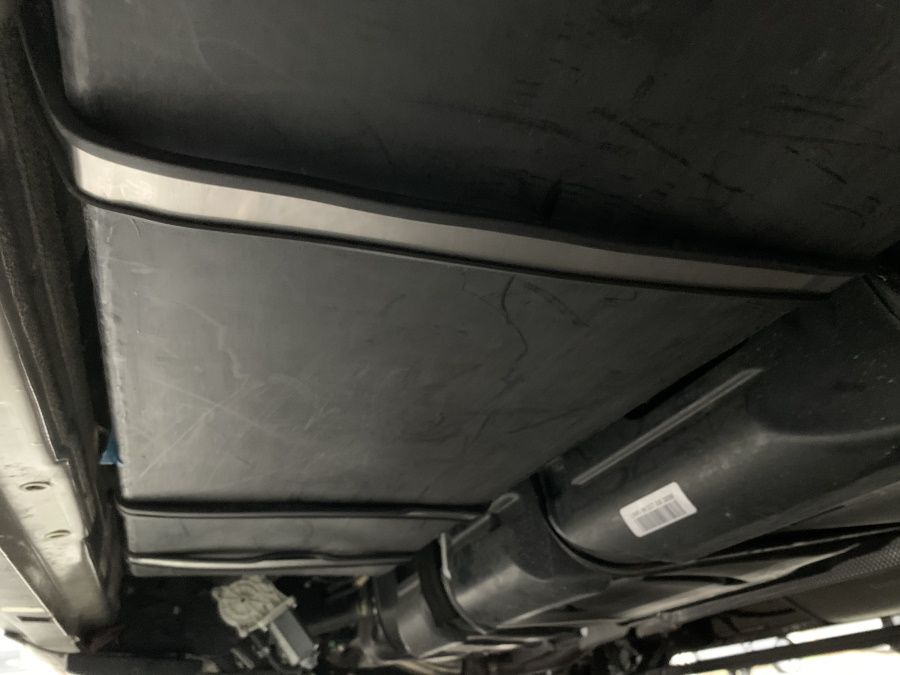
Seeing that the Trauma Combi is a combination heater/water heater I needed to get the water system installed also. I purchased a 21-gallon tank from RecPro. The unit is 39” x 16” x8” and is being installed behind the rear wheels.


The tank has four fittings: drain, inlet, output to pump, and vent. I put a check valve right after the water gets into the van interior. This allows this section exposed to the outside of the van to be drained when using in cold conditions. For the water intake, I stole the idea for this from the Vandit: Build thread. This is a nice clean water inlet for the van by Aquor Water Systems .


Being the unit is propane/electric I also needed an intake/exhaust vent. The only problem with this vent, is that gas station attendants try to unscrew it thinking it is a gas cap. I guess only a problem in states where you don’t pump your own gas.


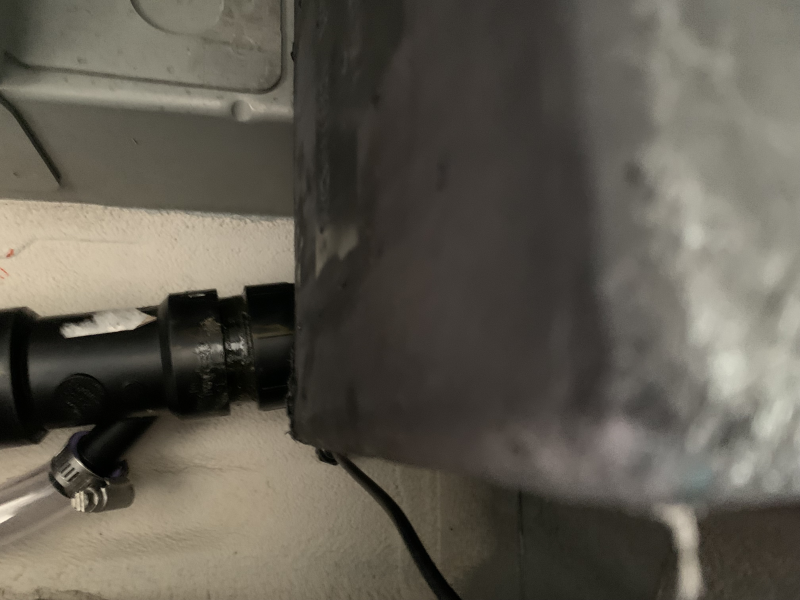
The combi system requires a pressure regulator, quick drain valve and check valve for install. It ends up being a PEX plumbing puzzle. I conveniently (actually, it is not so convenient) a fuse panel on this side of the van. The kit came with all the pieces and adapters needed. I have the water lines plumbed for the connection kitchen faucet and shower valve. The drain connection will connect to the 
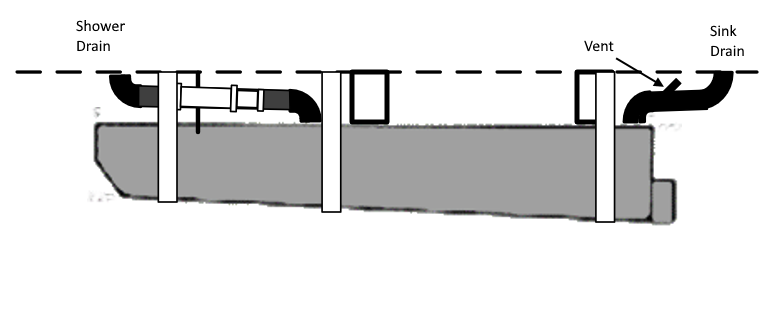
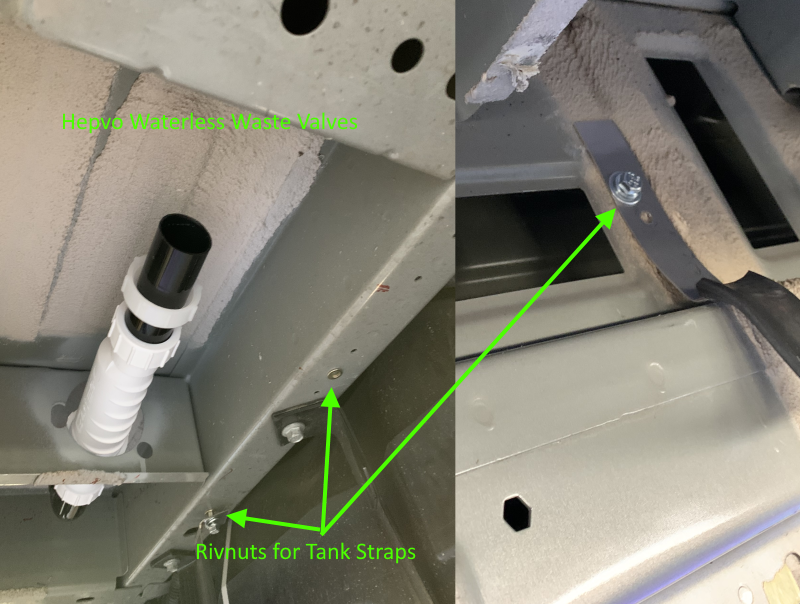
HepvO waterless waste trap.

The next move was to cover the mess up. For my interior I chose to go with painted marine ply, and I put a maple face frame, the draws are inset in the frame. Of course, the undermount drawer slides I wanted are all on back order, but I didn’t have time to wait.


After the that was installed, I wired up the water pump, and Truma Combi. It has the 120-volt, 12-volt, temperature probe and control panel connections. I used a Smart Switch from Safiery.com, I will go into more detail of them in a later post.


Now for the test run I just need to hook up the control panel. I threw together a quick bracket to hold it until I come up with a final location.


Being that you can’t find a RV undermount propane tank for sale at this time, I am testing with just electric. The unit has 5 energy modes:

LP gas LP gas
MIX 1 Electricity 850 W+ Gas
MIX 2 Electricity 1700 W+ Gas
EL 1 Electricity 850 W
EL 2 Electricity 1700 W

Anyhow currently all systems are a go, with testing the heater. The thing is crazy quite, admittedly I don’t have the propane burner firing up. The other great thing is that I will have four individual ducks, front of the van, underneath shower, sink cabinet, and back by the bed. No more hot spots in the van.


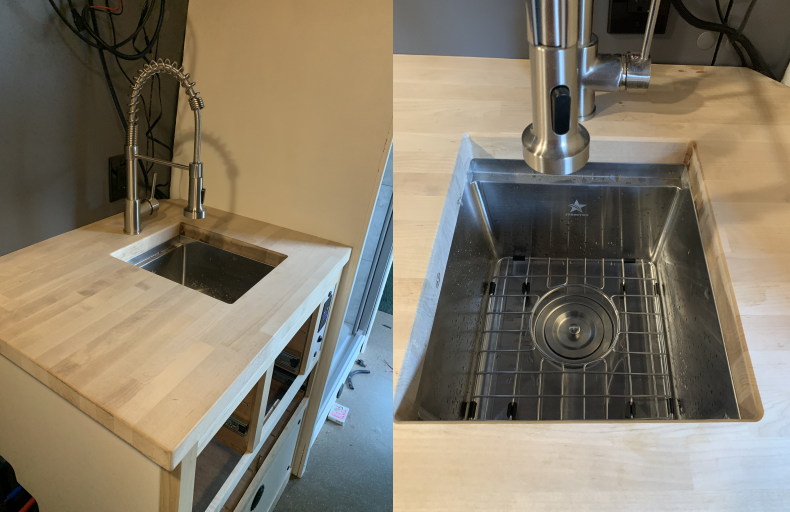
I throw the sink top on for a quick test fit and hook up the connections. The sink and faucet were found on amazon, OWOFAN Kitchen Faucets and STARSTAR Workstation Ledge Undermount Single Bowl. I still need to hook up the shower, and some other finish stuff (move electrical outlet over) , but now I can tell the wife we have indoor plumbing

-greg
Scalf77 is online now   Reply With Quote
Old 03-09-2022, 02:42 PM   #108
Senior Member
 
Twoxentrix's Avatar
 
Join Date: Mar 2015
Location: Maryland
Posts: 3,381
Garage
I for one enjoy monitoring your progress; The choice's you make, your attention to detail & organization... all of it just so well done!
__________________
TwoXentrix
"AWOL"
Twoxentrix is offline   Reply With Quote
Old 03-09-2022, 08:25 PM   #109
Junior Member
 
Join Date: Mar 2017
Posts: 17
Quote:
Originally Posted by Twoxentrix View Post
I for one enjoy monitoring your progress; The choice's you make, your attention to detail & organization... all of it just so well done!
As my 11 year old daughter would say, "same".
coloradoup is offline   Reply With Quote
Old 03-09-2022, 10:09 PM   #110
Member
 
Join Date: Dec 2018
Posts: 65
Absolutely incredible--amazing job!

How in the hell am I supposed to enjoy a P.O.S SMB after reading thru this thread??

I have SERIOUS van envy at the moment....
Doug-D is offline   Reply With Quote
Reply


Posting Rules
You may not post new threads
You may not post replies
You may not post attachments
You may not edit your posts

BB code is On
Smilies are On
[IMG] code is On
HTML code is Off
Trackbacks are Off
Pingbacks are Off
Refbacks are Off

» Featured Campgrounds

Reviews provided by

Powered by vBadvanced CMPS v3.2.3
Disclaimer:

This website is not affiliated with or endorsed by Sportsmobile SIP or any of its affiliates. This is an independent, unofficial site.


All times are GMT -6. The time now is 07:54 AM.


Powered by vBulletin® Version 3.8.8 Beta 4
Copyright ©2000 - 2024, vBulletin Solutions, Inc.