Journey with Confidence RV GPS App RV Trip Planner RV LIFE Campground Reviews RV Maintenance Take a Speed Test Free 7 Day Trial ×


Reply
 
Thread Tools Display Modes
 
Old 07-12-2011, 01:45 AM   #361
Junior Member
 
Join Date: Dec 2010
Posts: 20
Re: Hal The Van

can't wait to see the undercarriage storage box build. This is a very good thread. I'm enjoying it a lot and it is very informative. Keep up the good posts

SovereignCitizen is offline   Reply With Quote
Old 07-13-2011, 10:40 PM   #362
Site Team
 
WVvan's Avatar
 
Join Date: Jul 2009
Posts: 1,293
Re: Hal The Van

Undervan Storage Box:

Correction: In my previous posting I wrote about replacing the rear brake line. I made a mistake that needs to be corrected. When I flared the end of the brake line I used a single flare kit. This is wrong. I should have used a Double flare kit.
My thanks goes out to "Boomer2" at the Ford-trucks.com forum for bringing this to my attention.

Here is a picture of my single flare kit next to a double flare kit. The double flare kit was kindly lent to me by the owner of my local repair garage. (Thanks Gary!)

The main difference between the two kits is the double flare kit has a several round "adapters".

Here's how I used it. Cut the brake line like before.


Use the reamer on the inside of the brake line.


Rub the end against some fine sandpaper to smooth it out.


Do the same to the edge. Be sure it's clean when you're done.


Find the adapter that matches the 3/16" brake line that I'm using.


The divot on the end of the adapter will be placed against the tip of the flaring cone.


This is the other side of the adapter. Notice the small curve next to where the stem joins the adapter. This is what will form the first flare.


Place the brake line into the corresponding hole in the flaring bar.


Slide the brake line through the flaring bar till it extends a distance equal to the thickness of the adapter at it's first "step".


Use the cross-bar on the flaring tool to tighten down on the thumb screws on the flaring bar. If you try to just finger tighten it the brake line will slip out when the flaring tool is used.


Place the stem end of the adapter into the brake line.


Put the flaring tool on the flaring bar centered over the adapter. It's real important to keep the adapter and the flaring cone centered as they are being used.


Tighten down on the flaring tool until the adapter is flush against the flaring bar.


Remove the flaring tool and adapter. This is how the end of the brake line appears after using the adapter. This is the first flare.


Next center the flaring cone over the brake line.


Tighten down the flaring tool until it stops.


Here is how it appears after the tool has been removed. This is the double flare.


From what I've read the purpose of the double flare is to strengthen the brake line at it's seam. In the picture below look at the 12 o'clock position on the inside of the brake line. The visible line is the seam where the metal was joined to create the brake line. A single flared brake line is more likely to split along this seam. The double flare is actually folding over the end of the brake line which should reinforce the seam.


I practiced with the double flare kit on a new section of brake line before fixing the van.


While practicing I found that unless the flaring tool is well centered the flared end can be lopsided.


To fix what I'd previously done on the van I'd have to remove the single flare on the end of the brake line where it connects to the rear passenger wheel. After cutting off the single flare the brake line would no longer reach so I'll use a 3/16" union to extend it.

Since the fitting that secures the brake line to the brake cylinder was so chewed up I decided to replace it. The local auto parts store said the fitting was a 1/4" npt. They didn't had a direct replacement, even though the counter jockey told me they used to carry them, so I'm using a 3/16" to 1/4" adapter. In the below picture you can see both the old fitting and a union.


Here is the new adapter installed on the wheel cylinder along with the brake line and fitting.


This is the union.


After messing with the brake lines I had to flush them again. To flush I use a piece of vacuum hose attached to the bleeder valve.


Use clear tubing from the vacuum line to the waste container. Need the clear tubing so I can see if there are any air bubbles in the expelled brake fluid.


Sunset from under the van.


Not pictured: My neighbor who's working the brake pedal. (Thanks John!).

continued -
__________________
Open the pod bay doors Hal.

Once I exit Hal, this is what I do.
https://larry.wvnet.edu/~van/pics/lic...late-small.jpg
WWW.WVBIKE.ORG
WVvan is offline   Reply With Quote
Old 07-14-2011, 08:29 AM   #363
Member
 
Join Date: Jul 2011
Location: Maryland
Posts: 34
Re: Hal The Van

WVvan,

I have purchased a Van to convert myself, 2003 E350 Ext 85,000 miles. I just found your thread here and I am psyched. You are doing many of the same things I want to do to mine. The issue I am having is finding a pop-top. I am close by in Maryland, and none of the auto junk yards up here have even heard of them. How hard was it to find yours?
__________________
What have I got myself into now?
wmkbailey is offline   Reply With Quote
Old 07-14-2011, 09:36 AM   #364
Site Team
 
WVvan's Avatar
 
Join Date: Jul 2009
Posts: 1,293
Re: Hal The Van

Quote:
I am close by in Maryland, and none of the auto junk yards up here have even heard of them. How hard was it to find yours?
Hey Wmkbailey,
You won't find a used one around here. They are too rare. I bought mine new from Sportsmobile in Indiana.

It cost $5195 to have it installed back in Oct-2009.


If you pay in cash there is no sales tax.

For me it's been worth every penny.

Good luck and welcome aboard.
Dave
__________________
Open the pod bay doors Hal.

Once I exit Hal, this is what I do.
https://larry.wvnet.edu/~van/pics/lic...late-small.jpg
WWW.WVBIKE.ORG
WVvan is offline   Reply With Quote
Old 07-14-2011, 11:56 AM   #365
Member
 
Join Date: Jul 2011
Location: Maryland
Posts: 34
Re: Hal The Van

Thanks,

I found a web site that list most of the salvage yards in the US. I'm from Indiana, so maybe I will start there and take a trip home if I find one.

Wish me luck.

I can't wait to see you finish the basement, I would like to start mine as I work on body rust issues. Since I will be crawling around under it anyway.
__________________
What have I got myself into now?
wmkbailey is offline   Reply With Quote
Old 07-14-2011, 05:54 PM   #366
Junior Member
 
lopracer's Avatar
 
Join Date: Sep 2010
Location: Mountains, NC
Posts: 2
Re: Hal The Van

I am sincerely glad you caught the single flare v/s double flare slip. I must admit double flares are a bit of an art. It takes practice to get them right. Looks like you got the hang of it.
lopracer is offline   Reply With Quote
Old 07-14-2011, 08:14 PM   #367
Senior Member
 
jage's Avatar
 
Join Date: Apr 2007
Location: Parker, CO
Posts: 7,644
Re: Hal The Van

wmk, search bettyford as author, he's done two and probably in most of the used top posts. Also search fiberglass with no author (or better yet jage) there is a great thread by cowboy that will come up.

Also, everything Dave does is an art!
__________________
it was good to be back
jage is offline   Reply With Quote
Old 07-14-2011, 10:17 PM   #368
Site Team
 
WVvan's Avatar
 
Join Date: Jul 2009
Posts: 1,293
Re: Hal The Van

Thanks Jage but actually I'm the least artistic person around.

Undervan Storage Box
continued :

Using the measurements I took when I loaded down the van with half a ton of blocks and the dimensions from under the van I came up with a preliminary plan for the "box". These will change.


Rough calculation of the inside area excluding a few important things like the thickness of the box metal.
Figure total box as if square.
28" wide x 20" high x 32" deep = 17,920 cu in
Calculate angled part
15.41 x 5.5 x 32 x .5 =~ 1,356
Calculate beam
2 x 3.5 x 32 = 224
Subtract
17,920 - 1,356 - 224 = 16,340 cu in
1 cubic foot = 1,728 cu in
16,340 / 1,728 =~ 9.5 cubic feet

Since the box will be made of metal I have to be sure of the measurements before it's constructed. I'll make a full sized mock-up from wood to check it's fit.
Here's a picture of the highly detailed plans I'll be working off of.


I dug into my bone pile of scrap lumber to make the mock-up. It doesn't look like much but It's outside dimensions are accurate to 1/4".


Beside checking how the box will fit under the van I'm also worried about ground clearance. Here's what I came up with to test the clearance.
Take four large binder clips. You can get these at an office supply store. I keep them around the house since they are perfect for re-closing potato chip/snack food bags.


Take off the handles and screw the binder clips to the four places on the wooden mock-up where I want to measure clearance.


Make up four plywood sticks. One for each of the binder clips. Mark each stick in one inch increments. I've marked each stick so that when the black line is even with the bottom of that binder clip, the number below the line shows how many inches the end of the stick is projecting below the lower edge of where the box will be.


The strings are in case the sticks are knocked free. Was too conservative with the amount of markings I put on. Should have added several inches. When I started testing ended up using a tape measure to supplement the numbers.

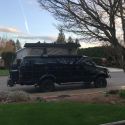
Mount the mock-up under the van. I could get it under the back of the van by using the little drop-off at the edge of my driveway and since it was really just a skeleton of box I could maneuver it around more. This won't work with the real thing.


Right off the bat I found I'd made a mistake in measuring the distance from the back of the van to the under floor beam. Some quick work with a saw will fix that.


Put it back under the van again. I'm using several claps to hold the mock-up into place.


if I make the box this size it will interfere with the charcoal canister. The stick on the right represents the most forward edge of the box.


Also the front passenger side corner is uncomfortably close to the exhaust pipe.


Here's the corner I just cut to clear the undervan beam. I took off an inch but I could get by with 1/2".


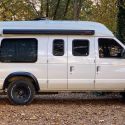
Enough of that. Let's do some road testing. Here's the basic plan. Find something that I might have a ground clearance issue with.


Climb under the van and set all the sticks so they project from under the mock-up the same amount.


Drive over the obstacle. Check the sticks. If they haven't moved or been knocked free, lower them each one inch and drive over the obstacle again.


Keep doing this until a stick finally makes contact.


Then I'll know my max ground clearance for that obstacle. Move on to some place different and reset the sticks. This time I'll try the most gouged up street intersection in town.


Perfect place for a test like this since the angle of the two streets is such that lots of vehicles bottom out. I drove this several time going both directions and different speeds.


Always changing the stick position until I got a result.


I'm doing these tests at first light on a Sunday so there is no one on the road but me. Otherwise it might have looked suspicious with me driving around the same neighborhood in a white van over and over again.

Since there was no one out (police) I started driving over curbs and other things just to see what kind of results I'd get.

When I as finally finished I found that there was never less then 5 inches of clearance at the point where the 20 degree angle starts and 7 inches at the rear most point on the box. Now these numbers are with the van not being loaded so if you take in consideration the cement block test that would reduce each of these numbers by one inch.

I'll still have to make some adjustments to the box size before I'm happy but ground clearance doesn't appear to be an issue with this design. Keep in mind that I don't plan to go off-road with the van. Off-pavement yes but not off-road.

continued -
__________________
Open the pod bay doors Hal.

Once I exit Hal, this is what I do.
https://larry.wvnet.edu/~van/pics/lic...late-small.jpg
WWW.WVBIKE.ORG
WVvan is offline   Reply With Quote
Old 07-14-2011, 10:26 PM   #369
Senior Member
 
jage's Avatar
 
Join Date: Apr 2007
Location: Parker, CO
Posts: 7,644
Re: Hal The Van

Quote:
Originally Posted by WVvan
Keep in mind that I don't plan to go off-road with this van. Off-pavement yes but not off-road.
Still I think axle or at least pumpkin clearance should be a limiter, you scrape with the pumpkin, you know your box is at risk. My definition for off-pavement might be a little more extreme, but I'm basically thinking ruts.

How are you finishing the box, or making the final box?
__________________
it was good to be back
jage is offline   Reply With Quote
Old 07-16-2011, 04:28 PM   #370
Senior Member
 
Nomadcat's Avatar
 
Join Date: Nov 2009
Location: Greenwich Village, NYC
Posts: 568
Re: Hal The Van

You also want to make sure that the thing won't become a snow scraper if there's deep snow around. Is the front of the box angled up at all?
__________________
2009 E350 5.4 Quadvan Homebrew
One day at a time
Nomadcat is offline   Reply With Quote
Reply


Posting Rules
You may not post new threads
You may not post replies
You may not post attachments
You may not edit your posts

BB code is On
Smilies are On
[IMG] code is On
HTML code is Off
Trackbacks are Off
Pingbacks are Off
Refbacks are Off

» Featured Campgrounds

Reviews provided by

Powered by vBadvanced CMPS v3.2.3
Disclaimer:

This website is not affiliated with or endorsed by Sportsmobile SIP or any of its affiliates. This is an independent, unofficial site.


All times are GMT -6. The time now is 12:20 PM.


Powered by vBulletin® Version 3.8.8 Beta 4
Copyright ©2000 - 2024, vBulletin Solutions, Inc.