Thanks guys.
continued
Next is the big drawer I use to hold the porta-potti.

With the water reservoir full this drawer will have some momentum to it so I'm using a 1/4" latching rod this time.

Going to make what I'm thinking is an improvement on the design. Instead of a extension spring I'll use a compression spring. Get to make one of those for the first time.
On the metal slide make a cut out. Will end up enlarging this slightly before final assembly

Spot weld like before but notice that now the rod is on the inside of the metal slide. I'm flipping the slide to better fit the handle placement.

Make another bracket for spring adjustment.

Now to make the compression spring. Like before I'm winging the design. I set the lathe to 6 threads per inch for the compression part of the spring. It took me three tries before I was happy. One end has had the wire trimmed before I took the photo.

To get the tight wind at each end of the spring I disengaged the drive mechanism (the half-nut). With the half-nut engaged the middle part of the spring is created. The spring is being wound on a 1/4" rod but it expands when finished.
Here's how the spring fits on the metal slide. I'll explain the LED light shortly.

With the spring on the rod, install the adjustment bracket then move it back and forth on the rod until I get what feels like the correct snap back force. Then screw the bracket in place.


Here's the handle slide all the way to the left, as seen from the front.

Since the hole through the side of the drawer has tighter clearance than the first one I've waxed that end of the rod.

As to the LED light. I was finishing this up yesterday and the power went out in the whole neighborhood. Well guess who happens to have a mobile power supply? Me that's who. I completed work on this using the van batteries.

Milled out the slots in the Formica.

Handle attached.

Drawer installed back in the van

How the fridge cabinet looks now.

Now I can build the bottom drawer.
View of the neighborhood after sunset. Wouldn't know it but there's a street light on the pole directly behind the van.

One other point about the advantage of this latching design. If the van is stationary for a while and there's no worry about the latching the drawers then just shut them with the rod extended. The drawer sticks out less than an inch if not latched. Not enough to be in the way but enough to tell you what needs latched before you get ready to roll.
I do have one employment announcement. This is my new trainee.


Her name is Fox. Displays extraordinary energy levels along with innate curiosity but has problems with remaining focused. She's got some big paws to fill.


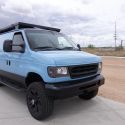
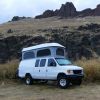 watchtower, white whale, land yacht, big pig...
 i lost 2 within a year or so of each other and i havent been able to bring myself to get another. sometimes the heartbreak is too much. it amazes me how attached you can get so quickly to those little furballs.
 Linear Mode