|
|
 02-12-2014, 04:54 AM
|
#111
|
|
Senior Member
Join Date: Jan 2011
Location: Reynoldsburg, Ohio
Posts: 3,774
|
Re: intro/build thread and our poorboy attempt at a camperva
This is something I wrote for FTE detailing replacement of the washer reservoir & pump assembly. Hope it doesn't include too much info not relative to your particular case Shrenie:
My '03 E250 had developed a leak evident only after filling it to a certain level, excess amount above the leak running out onto the ground. Even though mine still held some washer solution and pumped adequately stopping the leak was the goal--hate not having a full tank of washer solution!
This is what caused the leak, filler tube connection to the reservoir:

My speculation is rather severe rusting away of the right side inner fender structure allowed the washer fluid's weight and normal driving to pull it downward:

The washer reservoir is located under the battery. Once its out the battery tray is next. so that needs removed first then the battery tray. There are various type battery hold down clamps, mine was the lower type that fits into a recess at the bottom of the battery case. Battery tray removal should be pretty much the same from model year '92 to at least 2008, perhaps beyond too.
 [/img] [/img]
Reservoir as installed under the battery tray:

Remove the filler neck where it attaches to the upper cowl panel:

Easiest access to left side bolt:

At this point there would a right side nut to remove but the inner fender rust damage eliminated this step for me. 
The reservoir lifts up and follows the inner fender's slope which moves it backward too. Right side mounting tab cannot easily clear the harness wiring:

I removed and separated this connector as it seemed the best way to remove the reservoir:


Side-by-side view of new and old reservoirs, showing a few improvements I think. The new style hose is not only shorter overall but is secured and kept flush to the reservoir body; older style used longer hose, securing clips mounted along its length.

Re-connect the pump connector, a bit of dielectric grease can't hurt:

Re-install new reservoir, notice the highlighted area again. Since the wiring harnesses are moved aside it almost falls right into place

From here I wanted to better secure the reservoir so this didn't happen again. I cobbled a solution of sorts together using T-shaped mending plates typically used around the home, a few over-sized fender washers, U nut and 1/4-20 bolt:

It ain't pretty but it works----so far!
Original right-side mounting tab and stud, rusted away:


Just to be safe a cable tie was used:

After re-installing the battery tray and battery filled the leak-free reservoir all the way to the top --dry as a bone. I do notice the new pump and possibly its shorter hose run seems to squirt a better pattern, more completely covering the windshield. It wasn't horrible before, just better now.
Part numbers used or applicable, all Ford OEM:
Reservoir..............8C2Z-17618-A
Battery Tray..........3C2Z-10732-AA
^^ Bolts...............N606688-S2
Hold Down............6C2Z-10756-A
Feel free to ask any questions, add your own suggestions or comment---anything that helps the next guy!
|

|

|
|
02-12-2014, 05:44 AM
|
#112
|
|
Senior Member
Join Date: Jun 2012
Location: Unterfranken
Posts: 456
|
Re: intro/build thread and our poorboy attempt at a camperva
@ "JWA"]
You should work on the rust problem..... 
__________________
www.Dieda-unterwegs.net
2001 SMB E350 4x4 7.3 Powerstroke
1968 Pontiac Firebird 400 Convertible ,1978 Peugeot 504 Convertible,1988 Porsche 911 Carrera 3.2,KTM 300 EXC,BMW G/S Paris Dakar,BMW "Diabolo"
|
|
|
|
|
02-12-2014, 06:12 AM
|
#113
|
|
Senior Member
Join Date: Nov 2012
Location: boise idaho
Posts: 2,625
|
Re: intro/build thread and our poorboy attempt at a camperva
thanks and most excellent writeup jwa!!! and no there wasnt too much info at all 
i quoted and reposted in the thread i made specificially for the issue. it was pretty much word for word as i did it yesterday. didnt end up being my issue and i took it all apart for no reason  the issue ended up being inside the cowl. the bottom of the y splitter between the 2 nozzles had eroded away and all the fluids were just exiting into the cowl area.
__________________
"understeer is when you hit the wall with the front of your car, oversteer is when you hit the wall with the rear of your car, horsepower is how hard your car hits the wall, and torque is how far your car moves the wall."
|
|
|
|
|
02-12-2014, 06:50 AM
|
#114
|
|
Senior Member
Join Date: Jan 2011
Location: Reynoldsburg, Ohio
Posts: 3,774
|
Re: intro/build thread and our poorboy attempt at a camperva
Aww man---I HATE when I do that!  Needless to say such a blunder on my part has happened more than once. "Who needs troubleshootin'? I KNOW what's wrong!" 
Glad its sorted out now----nice to have a clean W/S again.
|
|
|
|
|
02-12-2014, 08:14 AM
|
#115
|
|
Senior Member
Join Date: Nov 2012
Location: boise idaho
Posts: 2,625
|
Re: intro/build thread and our poorboy attempt at a camperva
yep, i hate it too, but its good i did removal when i did. one of the bolts holding the battery tray on was so rusted that another few months and i wouldnt have been able to remove it. i had to put vice grips on it and use a crecent wrench to turn the grips, lol. ended up needing to replace both the battery tray bolts, and all i had for spare bolts was honda hardware. ill bet ford vans around the world heard my van scream in agony as it was forcefully penetrated with honda hardware.
__________________
"understeer is when you hit the wall with the front of your car, oversteer is when you hit the wall with the rear of your car, horsepower is how hard your car hits the wall, and torque is how far your car moves the wall."
|
|
|
|
|
02-12-2014, 09:15 AM
|
#116
|
|
Senior Member
Join Date: Jan 2011
Location: Reynoldsburg, Ohio
Posts: 3,774
|
Re: intro/build thread and our poorboy attempt at a camperva
Quote:
|
Originally Posted by schluchtenflitzer
@ "JWA"]
You should work on the rust problem..... |
Sadly the rusted inner fender structure is part of an overall bad condition of this van's body. Between it being collision damaged before my purchase and neglect by the PO its almost not worth it to fix or repair all the rusted areas. Were it not for the excellent condition drive train I'd have been very disappointed with my hasty purchase of this E250. I'm sure the extended body seduced me though.
Repairing the rust shown would require quite extensive work which I'm not prepared or enthusiastic to even begin.
Quote:
|
Originally Posted by shenrie
scream in agony as it was forcefully penetrated with honda hardware.
|
Just like anything with a bit of lube it'll fit---sooner or later!
|
|
|
|
|
02-22-2014, 06:42 PM
|
#117
|
|
Senior Member
Join Date: Nov 2012
Location: boise idaho
Posts: 2,625
|
Re: intro/build thread and our poorboy attempt at a camperva
^^^ i did have to greas'em up a bit
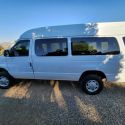
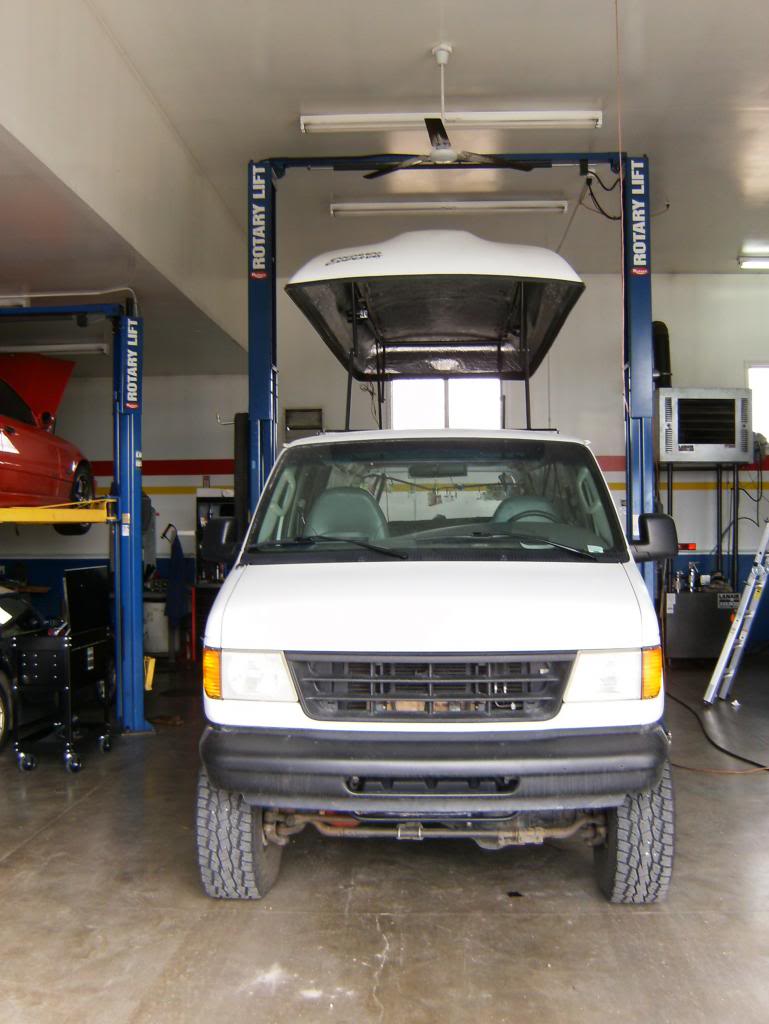
bought 3 of my buddies breakfast this am and talked them into installing the top today. took us just over 4 hours. canvas isnt on yet. theres some finish work i want to get done before that happens. but all went smooth, especially for not having any instructions, lol.
tony ready to make first cut.

saying goodbye to the soon to be old roof.

removing first chunk of roof.
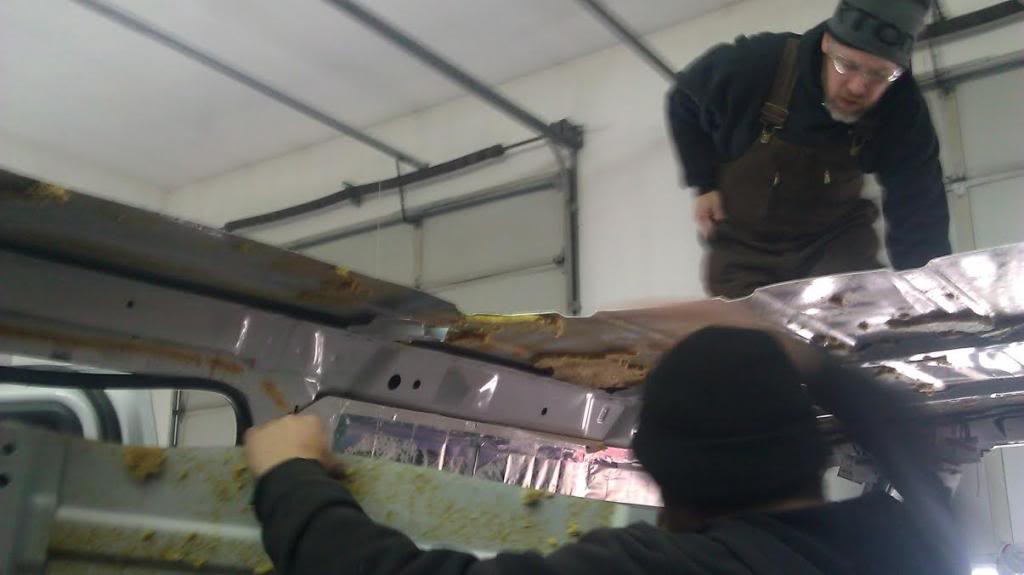
initial hole to get final cut ready.

top on ready to trace frame for final cut.

final hole ready for first stab.


top seated in place ready for final assembly.
making it permanent.

first time down.

obligitory in front of the shop sign pic...

super happy with everything so far. install was very straightforward and we wrapped up hours earlier than anticipated. ceiling in rear is 8'2". its amazing how much room is inside the van now. cant wait to start actually building out the inside!
__________________
"understeer is when you hit the wall with the front of your car, oversteer is when you hit the wall with the rear of your car, horsepower is how hard your car hits the wall, and torque is how far your car moves the wall."
|
|
|
|
|
02-22-2014, 06:48 PM
|
#118
|
|
Senior Member
Join Date: Aug 2010
Location: Taylor, Mississippi
Posts: 1,648
|
Re: intro/build thread and our poorboy attempt at a camperva
I just chewed all my fingernails off  Bold... really bold!
__________________
'95 SMB E350 Quigley 7.3
https://www.taylorarts.com
... If you have to ask, you'll never understand...
"... torpedo'd, because we don't generally cotton to bullshit around here." -jage
"... do they ooch apart in the night?" -Dia
|
|
|
|
|
02-22-2014, 07:27 PM
|
#119
|
|
Senior Member
Join Date: Jul 2013
Location: So Cal
Posts: 4,070
|
Re: intro/build thread and our poorboy attempt at a camperva
Sweet!.....
CCV didn't supply any kind of template or hole dims? How does the canvas attach to the top and to the roof?
looks like I'm next.....hopefully in the next 2 weeks or so.
That lift is pure luxury......my plan for the roof-ectomy is in the neighbor's driveway with at least 2 step ladders and long 2x4's all while flying below the radar of my homeowner's assoc.
__________________
2008 E350 RB passenger 4WD SMB penthouse
2013 KTM 350 EXC
2008 KTM 250 XCF-W
2003 Honda Element
|
|
|
|
|
02-22-2014, 08:09 PM
|
#120
|
|
Senior Member
Join Date: Nov 2012
Location: boise idaho
Posts: 2,625
|
Re: intro/build thread and our poorboy attempt at a camperva
^^^ nope, no instructions, but its very straightforward. you basically cut an access hole, set the top/armature/frame assembly on top of the van and lower it into place so its seated properly in the raingutter, then trace around the outside of the frame. cut the skin on the line, then the frame drops into place where it affixs to the main structure. theres nuts and bolts in each corner, then you weld from underneith to the main structure and from the outside to the roof skin. i can get some closeup pix next time i raise the roof up if youd like.
Quote:
|
Originally Posted by twogone
I just chewed all my fingernails off Bold... really bold! |
thanks, but the roof was littered with holes from being a service vehicle, so it really wasnt a big deal. cutting holes into vehicles that arent paid off is nothing new to these guys. weve been doing it for 20+ years. i wasnt even in the shop when they started hacking, lol. needless to say, i trust these guys without hesitation.
a good majority of the blm pumper and county firetrucks in this area were created from scratch from 2 of the guys that helped today. they know their shit, and if they dont, they figure it out. im lucky to have such creative and skilled friends like this 
__________________
"understeer is when you hit the wall with the front of your car, oversteer is when you hit the wall with the rear of your car, horsepower is how hard your car hits the wall, and torque is how far your car moves the wall."
|
|
|
|
|
|
| Thread Tools |
|
|
| Display Modes |
 Linear Mode Linear Mode
|
 Posting Rules
|
You may not post new threads
You may not post replies
You may not post attachments
You may not edit your posts
HTML code is Off
|
|
|
|
 » Recent Threads
 |
|
|
|
|
|
|
|
|
|
|
|
|
|
|
|
|
|
|
|
|
|
|
|
|
|
|
|
|
|
|
|
|
|


 watchtower, white whale, land yacht, big pig...