Journey with Confidence RV GPS App RV Trip Planner RV LIFE Campground Reviews RV Maintenance Take a Speed Test Free 7 Day Trial ×


Reply
 
Thread Tools Display Modes
 
Old 06-14-2021, 12:42 PM   #21
Senior Member
 
Join Date: May 2021
Posts: 400
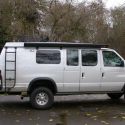
Primarily because my rig is a little heavier than the average full size E-350. In fact its heavy enough that the original factory leaf spring suspension felt like it was welded solid to the frame, it just wasnt acceptable to me.

The system rides nice and has been virtually maintenance free since i installed it 4 years ago, other than changing the air filter on the compressor. But its far from being reasonably priced once you add the air compressor system. I also spent another $600 on a Blue Ox Tracbar kit because i didnt like the idea of those white rubbing blocks attached to the frame. Obviously theres alot more to the system than whats shown in the picture. It has a compressor system, a main air reservoir, two ping tanks, two kneeler valves, an air gauge, compressor on/off switch, kneeler switch, low air alarm, air heater, auto drain valve, two height control valves, etc....

I had to buy all the airlines and fittings seperate, it came with straight fittings and i need mostly angled fittings. Then i had build my own wiring harness with relays to run everything. I think the kit they sell now may come with a harness, not 100% sure. The basic suspension kit is $2900 then you add the compressor kit which is over $3000, then you have to buy incidentals.

This system rides better than the leaf spring setup and it automatically adjusts the ride height back to its preset height regardless how much tongue weight i put on it. Well at least until i overload it so bad the air bags explode

Never been much for following manufacturers recommendations i guess.

ScrapIron is offline   Reply With Quote
Old 06-15-2021, 01:06 PM   #22
Member
 
Join Date: May 2021
Posts: 61
The motor work ended up getting moved way up in my timeline. The monitor I got was super nice to have during the process as it was really interesting to watch the gauges as the motor started to fail. I started to overheat on the last hour out to go camping and I was getting a EGR valve code. When I got to camp I noticed the coolant was empty. I topped her off before I started home. It drove fine for about 45 minutes before it started to overheat again. I topped her off and got another 30 minutes. Then it was 20 minutes. After that, the motor was surging and I could see a significant coolant leak coming from somewhere deep. I wasn’t sure if the surging was related to the EGR or the overheating, so I decided to get it towed to avoid damaging the motor. Luckily I had the monitor so I could read the codes and see the motor overheating before it was too late. It was actually really surprising to see how hot the motor got without the needle in the dash getting close to the max or getting a warning light. I wasn’t comfortable seeing how hot it would have to get before those triggered.

I got it home and started to rip in to it. My delta T between oil and coolant temp was way above spec so I knew I needed to replace the oil cooler. I was already planning to upgrade the EGR cooler so knew I had to strip it down pretty far.

The coolant leak ended up being the water pump o-ring. I decided to just replace the water pump since I was already in there. That was a relatively easy fix. I rented a pulley holder but had to make a fan clutch wrench. It worked well enough. I ordered a crows foot so I could torque it during reassembly.

As I was pulling things apart I could tell the EGR cooler had failed. There was a ton of gunk in the exhaust/intake and the headers were full of water. It wouldn’t have been long before I had to pull the motor apart for that if the water pump gasket didn’t fail.

I soaked the intake in engine cleaner then pressure washed it at a car wash. It removed most of the gunk. I took the turbo apart and it felt like it was on the border of seizing up. The surface corrosion was starting to make the vane plate stick. That was all cleaned with a wire wheel/scotch brite then I coated everything in high temp antiseeze before I put it back together

I replaced the oil cooler

Added coolant filter

I replaced the fuel filters since I was in there and both housings seem to have what looks like sand in them. I’m not sure what the deal with that is. Is that a diesel thing or did sand get into the fuel somehow?

The whole process wasn’t too bad for my first time working on this van/any diesel. I broke the clips off of 3 electrical connectors and had to replace them. I accidentally pushed the injector connector into the head and had to go back a few steps. I was scared I was going to have to pull the entire head to fix the connector but it just popped back in place. I didn’t fully seat the oil tubes going into the motor and it shot oil everywhere the first time I tried to start the motor. That required a partial tear down to fix but not too bad. Tool VIPs were the Milwaukee Electric ratchet (not sure why I haven’t gotten one until now) and a harbor fright borescope (allowed me to diagnose the oil tube leak and a few other things without fully disassembling the motor)

List of everything I did:
EGR cooler upgrade
Replaced EGR valve
Oil cooler replacement
Lubricated and cleaned turbo vanes
Coolant Filter
Swapped to ELC coolant (Delo Heavy Duty Coolant)
Swapped to synthetic oil (Rotella T6)
The HPOP fitting had already been upgraded
Blue Spring Fuel mod
Replaced both fuel filters
Replaced water pump
Replaced belt
Replaced thermostat
Attached Thumbnails
m1.jpg   m2.jpg   m3.jpg   m4.jpg   m5.jpg  

m6.jpg   m7.jpg   m8.jpg   m9.jpg  
kikisadventures is offline   Reply With Quote
Old 06-15-2021, 01:09 PM   #23
Member
 
Join Date: May 2021
Posts: 61
Coolant filter pics
Attached Thumbnails
2021-06-15_12h06_58.jpg   2021-06-15_12h07_06.jpg   2021-06-15_12h07_12.jpg  
kikisadventures is offline   Reply With Quote
Old 06-17-2021, 01:40 PM   #24
Member
 
Join Date: May 2021
Posts: 61
She doesn't look like a delivery van anymore!
Fuel Revolver Rims with 285/75R16 Discoverer S/T MAXX

I swapped in Moog 880S coils and put in Moog alignment bushings. I'm an dummy and forgot to take before height measurements so I'm not really sure how much it lifted the van.
Attached Thumbnails
2021-06-17_12h24_21.jpg   2021-06-17_12h24_33.jpg   2021-06-17_12h28_47.jpg   2021-06-17_12h42_31.jpg  
kikisadventures is offline   Reply With Quote
Old 06-17-2021, 01:51 PM   #25
Member
 
Join Date: May 2021
Posts: 61
The bigger tires definitely required some trimming. I think the fenders are good now but the pinch weld may require some more massaging with a large hammer. I'll drive it awhile and see if there is any rubbing.

I decided to fold the pinch weld over instead of cut it to keep the strength
Attached Thumbnails
2021-06-17_12h48_18.jpg   2021-06-17_12h48_48.jpg   2021-06-17_12h49_32.jpg   2021-06-17_12h49_41.jpg   2021-06-17_12h49_48.jpg  

kikisadventures is offline   Reply With Quote
Old 06-17-2021, 02:18 PM   #26
Member
 
Join Date: May 2021
Posts: 61
For trimming the fenders, I decided to take them off the van. it wasn't too hard and it made cutting and welding much easier

My goal was to have the fender 2" wide at the bottom. My pie cut ended up being 1.5" wide at the bottom and 12" tall. I made it that tall so the fender opening stayed tangent to the beginning of the cut and didnt have a weird bend in it

I used a combination of an angle grinder, pneumatic cutoff wheel, and body saw. There's a support on the inside of the fender that made the cut more challenging. I mocked it up on the van while i turned it to make sure i cut enough out. got lucky on the first try

I found that these paint stripping wheels work the best for getting to metal to a bare surface

I was able to salvage the inside gusset and keep the strength. Both sides welded up pretty nicely and I didn't even bother with bondo. The textured bedliner will hide the little imperfections anyway
Attached Thumbnails
2021-06-17_12h51_43.jpg   2021-06-17_12h52_54.jpg   2021-06-17_12h55_56.jpg   2021-06-17_12h57_59.jpg   2021-06-17_12h58_14.jpg  

2021-06-17_12h59_22.jpg   2021-06-17_13h15_59.jpg   2021-06-17_13h16_12.jpg   2021-06-17_13h16_18.jpg  
kikisadventures is offline   Reply With Quote
Old 02-06-2024, 02:12 PM   #27
Member
 
Join Date: May 2021
Posts: 61
I got real lazy on updating my thread. Here's to catching up

I did a bunch of trips bare bones. It really makes you appreciate each upgrade.

Added a maxx air fan. Forgot to take the installed pic haha
Attached Thumbnails
2024-02-06_13h04_20.jpg   2024-02-06_13h06_05.jpg   2024-02-06_13h08_45.jpg   2024-02-06_13h09_48.jpg   2024-02-06_13h09_57.jpg  

2024-02-06_13h10_05.jpg   2024-02-06_13h10_14.jpg  
kikisadventures is offline   Reply With Quote
Old 02-06-2024, 02:39 PM   #28
Member
 
Join Date: May 2021
Posts: 61
I got a hot tip from posplayr that a pick and pull yard had a high top. I drove out to Tuscan to pull it. A couple of hours later I had it off the van and in a u-haul. The yard was super helpful and the workers helped me lift it off the van and carry it to the u-haul.
Attached Thumbnails
2024-02-06_13h38_29.jpg   2024-02-06_13h38_12.jpg   2024-02-06_13h38_21.jpg  
kikisadventures is offline   Reply With Quote
Old 02-06-2024, 02:57 PM   #29
Senior Member
 
Join Date: Jul 2023
Location: Harrington, WA
Posts: 271
nice


more letters to meet minimuim
kbeefy is offline   Reply With Quote
Old 02-06-2024, 03:13 PM   #30
Member
 
Join Date: May 2021
Posts: 61
I had help lifting it onto the van but I had to take it off so I could prep the roof and set it back on by myself. it was sketchy haha

I used a metal skill saw for the straight cuts and a jigsaw for the corners

Once i got it back on, i started building an internal frame. I want a roof rack but I dont like the look of the exterior bars. I'll use the frame to support the AC, mount solar, and hang the inside cabinets.

The little nubs are through bolts for the roof rack.

Once I got the frame in I cut out the stock crossmembers
Attached Thumbnails
2024-02-06_13h59_34.jpg   2024-02-06_13h59_40.jpg   2024-02-06_13h59_50.jpg   2024-02-06_14h00_33.jpg   2024-02-06_14h00_45.jpg  

2024-02-06_14h03_08.jpg   2024-02-06_14h03_15.jpg   2024-02-06_14h03_21.jpg   2024-02-06_14h11_07.jpg   2024-02-06_14h11_17.jpg  

kikisadventures is offline   Reply With Quote
Reply


Posting Rules
You may not post new threads
You may not post replies
You may not post attachments
You may not edit your posts

BB code is On
Smilies are On
[IMG] code is On
HTML code is Off
Trackbacks are Off
Pingbacks are Off
Refbacks are Off

» Featured Campgrounds

Reviews provided by

Powered by vBadvanced CMPS v3.2.3
Disclaimer:

This website is not affiliated with or endorsed by Sportsmobile SIP or any of its affiliates. This is an independent, unofficial site.


All times are GMT -6. The time now is 12:37 PM.


Powered by vBulletin® Version 3.8.8 Beta 4
Copyright ©2000 - 2024, vBulletin Solutions, Inc.