Journey with Confidence RV GPS App RV Trip Planner RV LIFE Campground Reviews RV Maintenance Take a Speed Test Free 7 Day Trial ×


Reply
 
Thread Tools Display Modes
 
Old 03-19-2018, 01:25 PM   #11
Member
 
Join Date: Sep 2014
Posts: 55
Teardown and Lift

Time finally came that I knew the springs were getting close and I was worried about the weather turning so I started teardown.


I modified my 6 ton jackstands and welded steel plates on the bottom to keep the heavy van from sinking in the dirt. Ultimately I ended up having it up supported only on jack stands for like 4 weeks straight. I still have a normal job other than the van and I really only had weekends to get the project done. Waiting for parts was the hardest part as time went by that I couldn't get any progress till UPS showed up. During the 4 weeks on stands, I was worried because we get lots of wind where I live. The van stayed up without any issues for the entire time and didn't even budge. Even a couple heavy rains didn't effect the ground enough to bother the van.

You can see my home made axle stands in the background as I rebuilt everything and wrapped it up to keep it nice and clean as I waited for additional parts before being able to fully assemble the axles.


One of the more challenging parts is moving around heavy axles on dirt and gravel so I modified my 2 ton shop crane with big pneumatic tires. I pushed the limits of the Harbor freight tires but I was careful and made sure my toes were always out of the way just in case. Another challenge was simply the height. I stuck the front axle under the van with my jack stands maxed out safely and on wood blocks. I had about an inch to spare. The lift is big. Once the axle was under and bolted to the springs I could use the axle itself to lift up the van high enough for the tires. One day I will have a glorious shop with a lift. Built many projects in the dirt or funky parking situation.


Not having a shop is a huge pain. spent over an hour every time I worked just bringing out tools, and taking tools back inside. The van itself makes a decent storage shed for ongoing projects. My neighborhood is very safe but best not to temp the occasional passerby with my expensive toys... I mean tools hanging around. Also being gravel and dirt means that tools can disappear without even moving. In the Toyota world the joke is always that the 10mm socket is always missing. In the Ford world, you can have metric and standard bolts on the same part and may be different based on year or model of the van. Also I had to buy a new set of sockets and wrenches because everything on the van is bigger than anything I have ever worked on before.

DaYeti is offline   Reply With Quote
Old 03-19-2018, 01:35 PM   #12
Senior Member
 
86Scotty's Avatar
 
Join Date: Jul 2011
Location: TN
Posts: 10,245
All true. Kudos for getting it done the old fashioned way. I still have scars from working on my first vans in the gravel in my back yard.
86Scotty is offline   Reply With Quote
Old 03-19-2018, 07:33 PM   #13
Member
 
Join Date: Sep 2014
Posts: 55
Axles in.

Managed to get the front axle in.


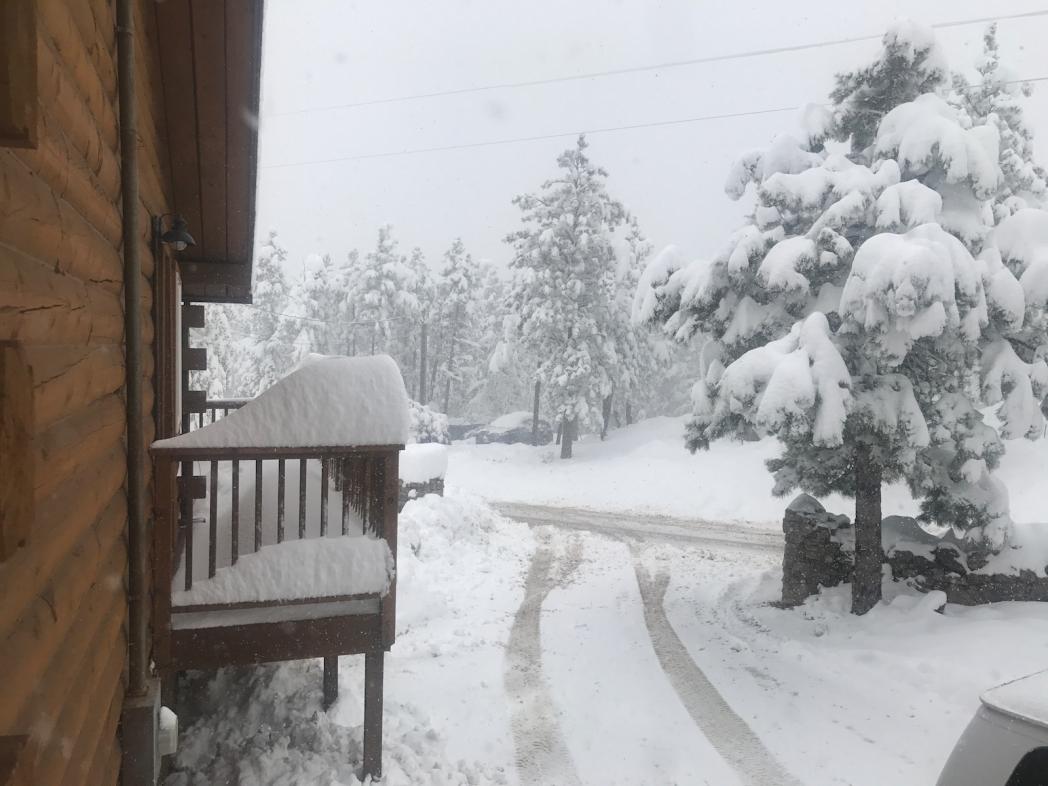
Had our first snow in the middle of October.


Not enough to do too much damage to my plans.

New Tires are going to be 4 inches taller in addition to the lift. I bought Good Year Duratracs based on them being severe weather rated and I mostly use my 4x4 for snow and ice. They are 315/70/17's. I wanted tall and skinny. Looks like 12 inches is about as skinny as they come. I put the tires on Black Rock Yuma wheels. It was fun using our Subaru XV Crosstrek to shuttle tires up the canyon to my house. We left the back open and strapped them in. 4 wheels fit barely. I will save the 5th for when the van is running. Wish I had a picture of the wheels and tires in the back of the Subi.


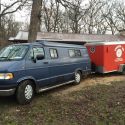
Once I got the front axle in and the back lifted I needed to drive the van 45ish miles to the nearest transmission shop. The back axle had an 8 on 165 wheel pattern, and the front had 8 on 170 at this point, so I had to drive it miss matched. The transmission had to be modified for 4x4, and since they had to tear it all the way down, I had it fully rebuilt at the time. I had the shop beef it up and added a second trans cooler as well. I drive lots of steep mountain roads and wanted to give the transmission its best chance at a long life. Once the transmission was modified, my stock rear drive shaft would no longer fit so I had to have her towed to my house. Not a cheap tow but it was my best option.


Front Axle


Rear Axle finally goes in. With the sterling 10.5 I had to change the axle spring perches. I had previously cut off the old and welded on the new after figuring out what my pinion angle should be. I also welding on new shock tabs and the brake line tabs. Nice thing about the Sterling 10.5 swap is getting rear disc brakes and the rear track width now matches my front axle. Additionally this swaps the hub pattern to the correct 8 on 170 so now I can use the new wheels on the rear. I had and still have fine threads on the front studs, and course on the rear. Means I have to keep my lug nuts straight but that isn't hard. I carry a spare of each just in case.


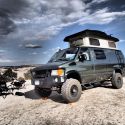
Here she is finally sitting on all 4 proper wheels with the new custom drive shafts from Boulder Driveline. This is the first trip around the block so to speak. We don't technically have city blocks where I live but this spot is less than a mile from my house.


All this happened just in the nick of time. This is a week after I got both front and rear drivelines made.

DaYeti is offline   Reply With Quote
Old 03-19-2018, 07:54 PM   #14
Member
 
Join Date: Sep 2014
Posts: 55
The nice thing about having a van is that I can now to take all these extra parts to the recycler without too much trouble. I sold the old Dana 60 rear end to a guy who was going to shorten it and put it in a race car. At least I recouped a little money from the sale.


Sad for me but the previous owner had just put new tires on the van. He took it 2000 miles across the country and wanted to be sure he had decent rubber. I sold them for 250 bucks. Again nice to get a little back. Tires are one of the most expensive parts of the build thus far. Especially adding a 5th for a full sized spare.


Here is a couple additional pictures that I forgot as part of the build.

Transfer Case and Ujoint crossmember. This shot also shows a decent view of the shortened fuel tank. It is a tight fit with about a half inch of clearance between the fuel tank and the transfer case.

Chris at Ujointoffroad does an excellent job with his fuel tank template. In fact the entire build was pretty smooth and the videos Chris produces really helped make sense of all the brackets and parts he sends. The van had so very little in the way of corrosion. Most of the bolts and nuts came out without too much fight. I did have a few that I got the torch out for. The only two parts of this build I didn't do was the transmission and the TIG welding to shorten the fuel tank. I weld MIG but didn't want it to leak so took it to a pro. As a half decent shade tree mechanic, I know where my limitations are.


Taking measurements for the driveshafts.


DaYeti is offline   Reply With Quote
Old 03-20-2018, 08:56 AM   #15
Member
 
Join Date: Sep 2014
Posts: 55
Engine tune up

This post is a little out of place. That is the downfall with writing up a build thread 2 years after you start building. So far I have been going by my pictures but in remembering before I did the lift I gave her a tune up. I don't have pictures but here is what I did.

The van was burning oil. Not a lot but just a bit. I had heard that replacing the PCV valve can help with that as the case is properly vented again. It was a $5 fix and super easy with a dog house to access the back of the motor. Ironically it did fix my oil burning issue. The oil has been nice and level since. Consequently I switched to fully synthetic oil not long after the first quick lube change I did to get the emissions passed. I am a fan of AMSOIL. Cost isn't really too much more and I feel better using it. I often refer to AMSOIL as Mary Kay for men. My daughter who is twelve and wants to be a mechanic reminded me that it also can be for women as well. Funny side story is that my daughter asked for tools for Christmas this year so I do feel like I am doing something right. She changed the oil in our Subaru the last time all by herself. I was there but she didn't need me to be.

When I changed the PCV valve I noticed that many of the vacuum lines were dry rotted and I assume leaking. I replaced every hose I had access to. Again cheap insurance and I had the some vacuum line left over from a previous project so why not use it?

Second thing I did was trouble shoot an occasional miss I have when sitting at a stop light after the car is warmed up. Pulled the plugs and the number 8 cylinder was way out of GAP. Also PO had used the cheapest parts to keep her going. I went about adding a new MSD coil, MSD plug wires, MSD cap and rotor. The distributor is an Autozone special and less than a year old. I will eventually rebuild the entire motor and will put in something better at that time. This fixed my miss issue. Ironically the PO did have receipts for all his oil changes. He was religious about changing fluids but went the budget route on any parts he replaced. Really the extent of his repairs all revolved around the engine electrical system, most of which I was replacing again about a year later.

Lastly as part of the tune up, I swapped in a new fuel filter and new air filter, then I greased all the fittings. Most of these fittings would later be replaced with the 4x4 conversion.
DaYeti is offline   Reply With Quote
Old 03-20-2018, 09:31 AM   #16
Member
 
Join Date: Sep 2014
Posts: 55
Bling

With the van now sitting on all 4 wheels and waaaaayyyyy taller than it was, I just had to button up a few small things. I trimmed the front bumper and removed all the plastic crap and put it back on. I will eventually build a new front bumper with a winch and good recovery points but that needs to wait for some fresh funds to come in. For now I have more pressing plans for the camper part of this build.


Consequently driving a full sized van that is 8 feet tall in the city isn't my favorite. Drives fine but parking is a pain. You can no longer use any of the garages. I managed to get her parallel parked in a fairly small spot. At least the spot was small for a lifted 4x4 full sized van. I realized at this moment that a backup camera would be needed as I can't even see the car behind me through the rear window.

I also realized that I needed to add some stops for the steering so I don't hit the springs with the tires at full tilt. It didn't need much. I drilled and tapped the stock steering stops so I could add a bolt and washers to build up a new stopping point. In the end it needed just the thickness of the bolt head on either side and that was enough to keep me from rubbing. A little thread locker and it was a cheap and easy modification.
DaYeti is offline   Reply With Quote
Old 03-20-2018, 09:40 AM   #17
Member
 
Join Date: Sep 2014
Posts: 55
Ditch Lights

I wanted to add some ditch lights to the van. I made up a couple of very simple brackets out of flat stock scrap I had. Bent it up and used two pieces for the more complex shape. I used the rear hood bolt to attach them and made a little notch that would keep them sitting straight.


They are cheap lights from Amazon. Nilight is the brand. I took them apart and sealed them better with some black RTV. I had some of the same light on a previous vehicle and they got moisture in them after a few months. This was just me jumping ahead of expected problems. They are decently bright. I know they are not Rigid branded but for my money they are enough at 14 bucks. So far I have had them about a year and a half and no moisture and they are still just as bright. The housing paint has oxidized a little. I am a function over form guy most of the time so don't mind the oxidation at this point. The van looks like I use it. I'm ok with that.

DaYeti is offline   Reply With Quote
Old 03-20-2018, 09:48 AM   #18
Member
 
Join Date: Sep 2014
Posts: 55
Switches

When I did the ditch lights in the front I added a switch panel to the dash. Not everything is hooked up and I have since swapped a couple switch labels but it worked well and fit well in this spot.


If I had to do it again I would get a 6 position switch. I didn't think it would fit but I could have easily put in the 6 position. Some of these are just waiting for accessories to be added still but I thought I would plan ahead. They light up with green and match the rest of the lights pretty well.
DaYeti is offline   Reply With Quote
Old 03-20-2018, 10:15 AM   #19
Member
 
Join Date: Sep 2014
Posts: 55
New Bumper

My buddy came up to our house with his kids to go do some sledding. We had just gotten a fresh mini-dump of powder and the local sledding hills were ripe for us to play on. We had enough people to take two cars. I got part way down the road and the kids realized we forgot the sleds. My friend had been putting his kiddos in their car seats and wasn't immediately behind me. I pulled over to wait for him to tell him we need a couple minutes to go back and as I looked in the side mirror I watch as he sailed into me at about 25 mph. Nobody got hurt really. His kiddos did have marks from their seat belts but were OK and the marks faded by the next morning. It was the first accident he had ever been in after driving for almost two decades. It happened on my little sleepy snow covered road. He was distracted for a moment and it all happened so quickly. I wish I had pictures. I took a bunch for the insurance claim but neglected to keep a copy for myself and it was through their app that the pictures were uploaded. My van had the bumper bent up so I couldn't open one side rear door but it didn't actually touch the door. Ironically it only just barely scratched the paint other than damaging the bumper. His minivan on the other hand had over 20k dollars worth of damage totaling it completely. I ended up with a new bumper, and because I did my own labor I had enough left to purchase a tire carrier for the rear so I guess I came out ahead. I felt bad. Accidents are accidents and it didn't effect us other than now I follow him when we go places together.

DaYeti is offline   Reply With Quote
Old 03-20-2018, 10:55 AM   #20
Member
 
Join Date: Sep 2014
Posts: 55
Snow

The main reason I need a 4x4 van is really the snow we get in the area I live. I live in Colorado in the mountains. Our town is called Nederland and is about 20 miles west of Boulder CO. I built the van for the desert back roads of Utah and the Colorado Plateau, but really where the 4x4 gets its use is in the snow around town here. I probably use my 4x4 more than most because of where I live. Elevation in town is officially 8236' above sea level. My house is probably close to 8500' but I have never actually measured. Just a close guess based on living above town. The biggest storms come in the spring as they come from the East. The continental Divide is visible from my house and storms coming from the West hit the divide and dump most of their snow on the other side. We don't suffer from lack of snow however (this year is different and historically low so far). Here are a few pics of the local snow if your interested. Not much stops the van however if I ever get stuck self recovery is probably my only option. Its a heavy beast. I weighed once on a truck scale full of camping gear at 7700 lbs.


We also have lots of wildlife around us. From big cats to bears to moose. Here is a few shots from the last year or so.


Winter travel in the mountains can be very dangerous and even kill. Often people come up from the flatlands, unprepared, and don't realize until it is too late that their cell phones don't work and that it was a bad idea to wear their Chuck Taylors. I regularly help pull people out from the side of the road when just driving around.


Wish I could post videos here. My pooch loves playing in the snow.

DaYeti is offline   Reply With Quote
Reply

Tags
4x4 van, campervan, get out explore, high top van, ujoint off road


Posting Rules
You may not post new threads
You may not post replies
You may not post attachments
You may not edit your posts

BB code is On
Smilies are On
[IMG] code is On
HTML code is Off
Trackbacks are Off
Pingbacks are Off
Refbacks are Off

» Featured Campgrounds

Reviews provided by

Powered by vBadvanced CMPS v3.2.3
Disclaimer:

This website is not affiliated with or endorsed by Sportsmobile SIP or any of its affiliates. This is an independent, unofficial site.


All times are GMT -6. The time now is 03:29 AM.


Powered by vBulletin® Version 3.8.8 Beta 4
Copyright ©2000 - 2024, vBulletin Solutions, Inc.