|
|
 02-04-2019, 09:57 PM
|
#21
|
|
Junior Member
Join Date: Jan 2019
Location: los angeles
Posts: 29
|
Great work! I'm a fan of your technique and I'm doing my cab area at the moment. I've used sound deadening throughout and I have enough of the 3/8 neoprene foam to put a layer down in the cab (same that you used in the ribs of the van) Do you think I could use that instead of the closed cell foam and get some similar results? I'm worried the sheet vinyl wont adhere very well to this neoprene without another layer on top, but maybe I'm wrong. Their site is down at the moment and I'm eager to get this completed. (sounddeadenershowdown.com)
Thanks in advance for the help!! cant wait to see the rest of your build.
__________________
2003 7.3L diesel Penthouse
1996 7.5L gasser
|

|

|
|
02-10-2019, 09:51 AM
|
#22
|
|
Senior Member
Join Date: May 2014
Location: Scottsdale, AZ
Posts: 225
|
Quote:
Originally Posted by tjgaskill

Great work! I'm a fan of your technique and I'm doing my cab area at the moment. I've used sound deadening throughout and I have enough of the 3/8 neoprene foam to put a layer down in the cab (same that you used in the ribs of the van) Do you think I could use that instead of the closed cell foam and get some similar results? I'm worried the sheet vinyl wont adhere very well to this neoprene without another layer on top, but maybe I'm wrong. Their site is down at the moment and I'm eager to get this completed. (sounddeadenershowdown.com)
Thanks in advance for the help!! cant wait to see the rest of your build.
|
I only used spray adhesive in the passenger/cargo area where the rubber floor is on top of plywood. In the driver compartment, the flooring lays directly on the MLV. I'm using the seats, door sills and doghouse to keep it held down. No issues thus far.
|
|
|
|
|
02-10-2019, 10:05 AM
|
#23
|
|
Senior Member
Join Date: May 2014
Location: Scottsdale, AZ
Posts: 225
|
Filthy, just how it shoulda be.
Not a lot of action lately, mostly planning.

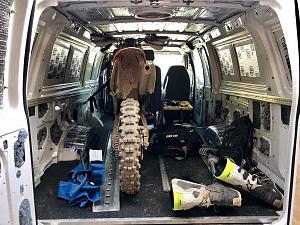
Mocked up a rear door panel, 5mm birch ply. These will get wrapped in some type of covering, either fabric or vinyl. TBD.
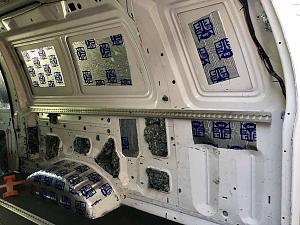
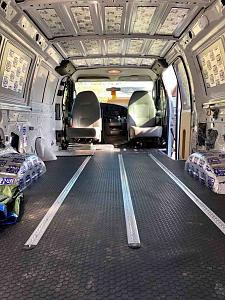
Started hanging more L-Track in the side wall. This is how I plan on attaching interior paneling, as well as some type of removable bed platform. Started on insulating as well. Stuffing all cavities in the walls and doors with recycled denim insulation. Planning on ordering some Thinsulate for the roof and window blank areas.
|
|
|
|
|
02-16-2019, 06:58 AM
|
#24
|
|
Senior Member
Join Date: Jan 2011
Location: Reynoldsburg, Ohio
Posts: 3,774
|
I'm a bit late here but I notice you're placing the sound deadening material on the interior surfaces of doors--those surfaces to which the interior trim is attached. I'd strongly suggest (if its not already too late) placing the material inside the door cavities against the outside or skin of the doors.
The only real concern doing it this way is making sure the front door glass can operate without insulation or other materials interfering with its movement. Side doors---assuming you're not using the cavities for storage etc--can be filled with any sort of insulation.
Both practices make for more overall quiet, the doors sounding much less hollow, road noise greatly reduced too.
Nice progress so far! 
|
|
|
|
|
02-21-2019, 06:39 AM
|
#25
|
|
Junior Member
Join Date: Jan 2018
Location: Kentucky
Posts: 3
|
Cruise control swap question? Is it possible to get contact information from "your friend at Ford" to help with the programming on my E350. I did the swap, but have not been able to find anyone to actually succeed in doing the programming. I've had three Ford shops and one highly recommended Ford diesel mechanic have a go, and not happening. Love your build and the pics...
|
|
|
|
|
02-23-2019, 01:36 PM
|
#26
|
|
Senior Member
Join Date: May 2014
Location: Scottsdale, AZ
Posts: 225
|
Quote:
Originally Posted by pamadams1025
Cruise control swap question? Is it possible to get contact information from "your friend at Ford" to help with the programming on my E350. I did the swap, but have not been able to find anyone to actually succeed in doing the programming. I've had three Ford shops and one highly recommended Ford diesel mechanic have a go, and not happening. Love your build and the pics...
|
You'll need the Ford dealer software and OBDII interface module. The specifics vary by year and vehicle options, my van is an 06 with the 5.4L gas motor. The option that needs to be enabled is VSC, or vehicle speed control. Any dealer should be able to switch it on for you.
|
|
|
|
|
02-23-2019, 01:39 PM
|
#27
|
|
Senior Member
Join Date: May 2014
Location: Scottsdale, AZ
Posts: 225
|
Quote:
Originally Posted by JWA
I'm a bit late here but I notice you're placing the sound deadening material on the interior surfaces of doors--those surfaces to which the interior trim is attached. I'd strongly suggest (if its not already too late) placing the material inside the door cavities against the outside or skin of the doors.
The only real concern doing it this way is making sure the front door glass can operate without insulation or other materials interfering with its movement. Side doors---assuming you're not using the cavities for storage etc--can be filled with any sort of insulation.
Both practices make for more overall quiet, the doors sounding much less hollow, road noise greatly reduced too.
Nice progress so far! |
Thanks for the input. I covered most of the outer door skins with CLD (dynamat etc) and then covered the inner door with a full layer of mass load vinyl backed with closed cell foam. This seemed to be the most common practice in the car stereo world.
|
|
|
|
|
07-07-2019, 03:57 PM
|
#28
|
|
Junior Member
Join Date: Apr 2019
Location: Santa Cruz
Posts: 1
|
Van is looking badass man, you're lucky having a buddy to help you out mechanically! Thanks for posting as this is a huge help for anyone building or modifying.
|
|
|
|
|
08-12-2019, 09:03 PM
|
#29
|
|
Senior Member
Join Date: May 2014
Location: Scottsdale, AZ
Posts: 225
|
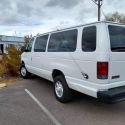
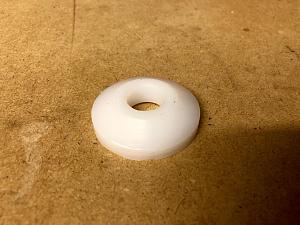
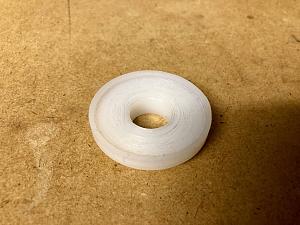
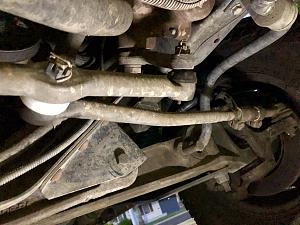
The Gnarhauler: Another white cargo van.
Nothing major to report, a few little upgrades over the past few months.
Swivels
The Fix. Little bushing that replaces the dustboot on the joint connecting the pitman arm drag link and outer tie rod. Supposed to tighten up the steering and reduce any bump-steer. Just installed, so no real feedback yet.
Real headlights to replace the terrible sealed beams. JW Speaker 8910 Evo. These are the Dual Burn (high and low beam simultaneously) with heated lens model.
Low beam
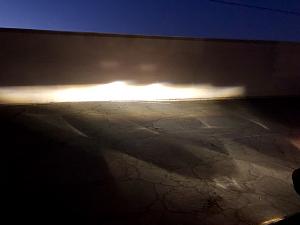
High beam

Nice, clean white light.
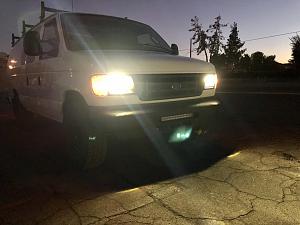
Working on the shopping list for the base components for the electrical system. Charge controller, cabling, fuse block etc.
|
|
|
|
|
08-17-2019, 06:32 AM
|
#30
|
|
Senior Member
Join Date: May 2017
Location: Lafayette, La
Posts: 206
|
Which brake pressure switch was bad when you added cruise control? The one on the pedal or master cylinder?
|
|
|
|
|
|
| Thread Tools |
|
|
| Display Modes |
 Linear Mode Linear Mode
|
 Posting Rules
|
You may not post new threads
You may not post replies
You may not post attachments
You may not edit your posts
HTML code is Off
|
|
|
|
 » Recent Threads
 |
|
|
|
|
|
|
|
|
|
|
|
|
|
|
|
|
|
|
|
|
|
|
|
|
|
|
|
|
|
|
|
|
|