Journey with Confidence RV GPS App RV Trip Planner RV LIFE Campground Reviews RV Maintenance Take a Speed Test Free 7 Day Trial ×


Reply
 
Thread Tools Display Modes
 
Old 01-01-2021, 01:31 PM   #31
Senior Member
 
aarcaris's Avatar
 
Join Date: Feb 2020
Location: Bend, OR
Posts: 309
Garage
Quote:
Originally Posted by SCSteve View Post
Did you cut off the top ledge of the plastic side door seal plate and then over wrap it with the Alum L edge? If so, how? Jig saw? Side grinder? Dremel?
I am not exactly sure what you mean. For the side door (60/40 door) I left the footwell plastic unmodified, and rolled my subfloor over the top of it. Then glued the flooring to the top of that as well as the face of the footwell. After that I trimmed it out using the L metal which I cut/bent, and then used Bondo to make it smooth. You can see how that came together on post #12

__________________
Vandit - 2013 E250 Ground Up Build
- Full Custom DIY Interior Build
- DIY U-Joint Off Road 6" 4x4 Conversion
aarcaris is offline   Reply With Quote
Old 01-02-2021, 03:19 PM   #32
Senior Member
 
aarcaris's Avatar
 
Join Date: Feb 2020
Location: Bend, OR
Posts: 309
Garage
A few more additions

-Knowing we will be adding rear curtains eventually and with the visibility already pretty poor we made the call to add an always on backup camera. I found a mirror replacement monitor and camera kit and got it all hooked up. It's pretty sweet! Not only does it have the rear camera it also has a dash camera, and even has adjustable parking lines when put into reverse.


-After having the van sitting for a while and staring at the mix matched tires with side walls bulging we made the call that we need to replace those before really going on a trip, so I did some research and read that we could probably level out the front of the van if installed some moog cc880 coils up front. So once those were on we headed down to discount to get ourselves some new bigger better tires.


-Now Vandit is looking like something special!


-We went ahead and tinted all the windows to match. They aren’t super dark, but that's what curtains are for! We did do a high level ceramic coating to all the windows that will hopefully help with summer heat. We didn't do the windshield, but we may eventually come back and do that at a later date. The pictures aren't the best, but it will have to do because its back in the garage for the start of the interior wall panels.


__________________
Vandit - 2013 E250 Ground Up Build
- Full Custom DIY Interior Build
- DIY U-Joint Off Road 6" 4x4 Conversion
aarcaris is offline   Reply With Quote
Old 01-02-2021, 06:06 PM   #33
Senior Member
 
marret's Avatar
 
Join Date: Nov 2016
Location: FL and VA
Posts: 1,952
Garage
Nice, looks great.
__________________
Chris
2008 GMC 3500 Quigley Weldtec 4x4 Savana SMB
marret is offline   Reply With Quote
Old 01-03-2021, 02:37 AM   #34
Senior Member
 
aarcaris's Avatar
 
Join Date: Feb 2020
Location: Bend, OR
Posts: 309
Garage
Quote:
Originally Posted by marret View Post
Nice, looks great.
Thanks, leveling it out and putting on new tires made a big difference.
__________________
Vandit - 2013 E250 Ground Up Build
- Full Custom DIY Interior Build
- DIY U-Joint Off Road 6" 4x4 Conversion
aarcaris is offline   Reply With Quote
Old 02-18-2021, 03:39 PM   #35
Senior Member
 
aarcaris's Avatar
 
Join Date: Feb 2020
Location: Bend, OR
Posts: 309
Garage
Wall Panel Subframe

-Got started on the interior wall panels. I decided to use some inspiration from cthayn build and chose to add some framing at the base between the floor and pinch weld, a middle support and a top support.


Testing the wall panel curve


-For the lower framing member I doubled up two pieces of ½” Baltic birch (glued and pin nailed together). I cut them to size ensuring a tight fit between the floor and the pinch weld. After getting them positioned about 1/16”-1/32” proud of the pinch weld I drilled a few pilot holes, painted them to prevent rust and put a few screws in just to make sure they don't wiggle loose over time.


-For the center supports I cut strips of ½” Baltic birch and attached them to the inner metal framing of the van using 1/4x20 rivnuts which I drilled and painted to prevent possible rust. I recessed the heads of the flat head bolts so they won't interfere with the wall panels. After doing an initial mock up of the wall curve I decided I needed to build this out more as the curve was too much on the lower section of wall. So I glued and pinnailed some additional ½” Baltic birch blocks that will become my attachment points.


-For the top supports I doubled up some strips of ½” Baltic birch with a 30° bevel on it to try to plain in with the upper frame member of the van. I repeated the same rivnut process to attach them.

__________________
Vandit - 2013 E250 Ground Up Build
- Full Custom DIY Interior Build
- DIY U-Joint Off Road 6" 4x4 Conversion
aarcaris is offline   Reply With Quote
Old 02-18-2021, 03:42 PM   #36
Senior Member
 
aarcaris's Avatar
 
Join Date: Feb 2020
Location: Bend, OR
Posts: 309
Garage
Wall Panel Start

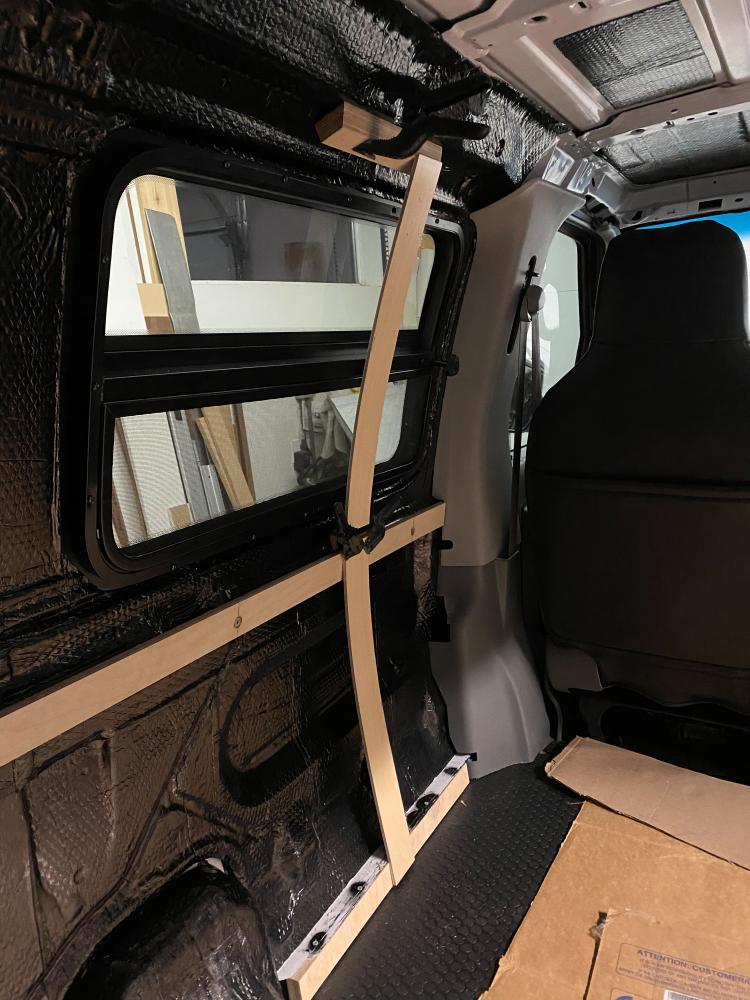
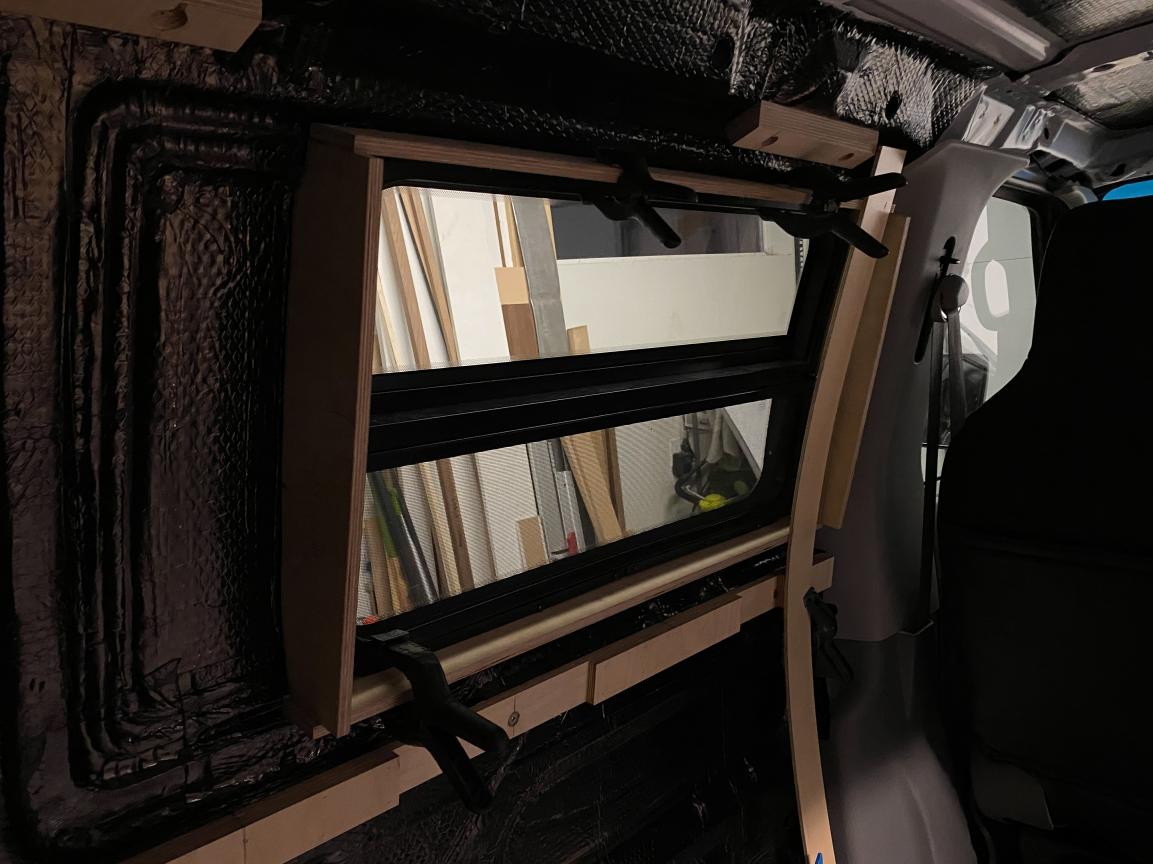
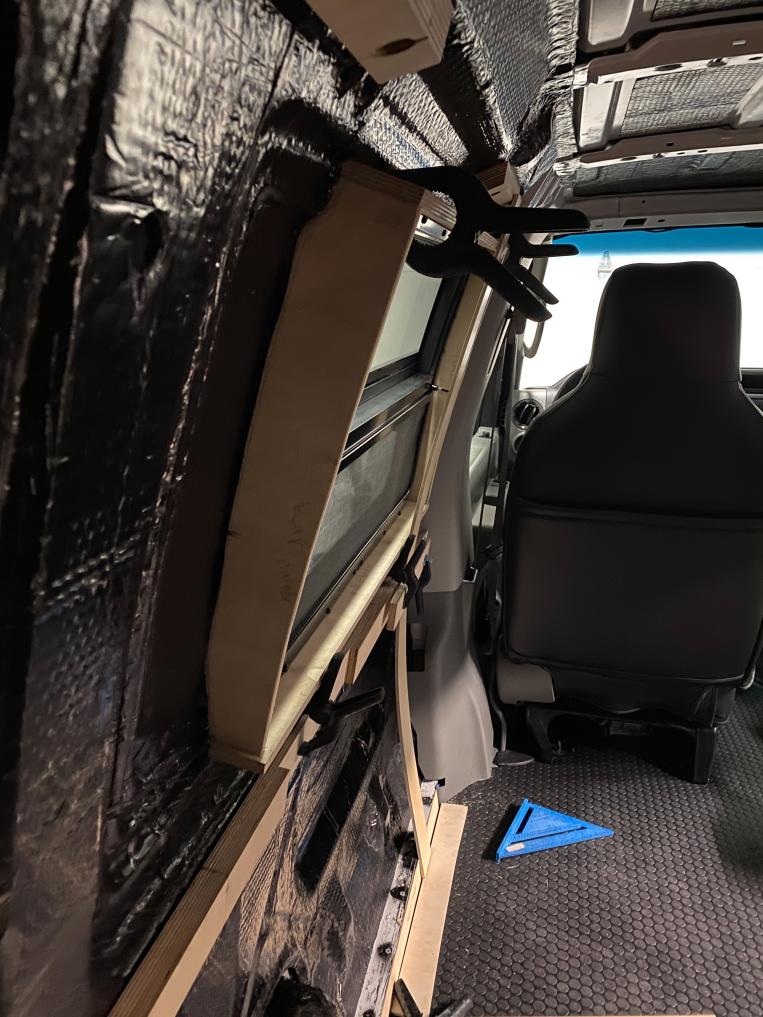
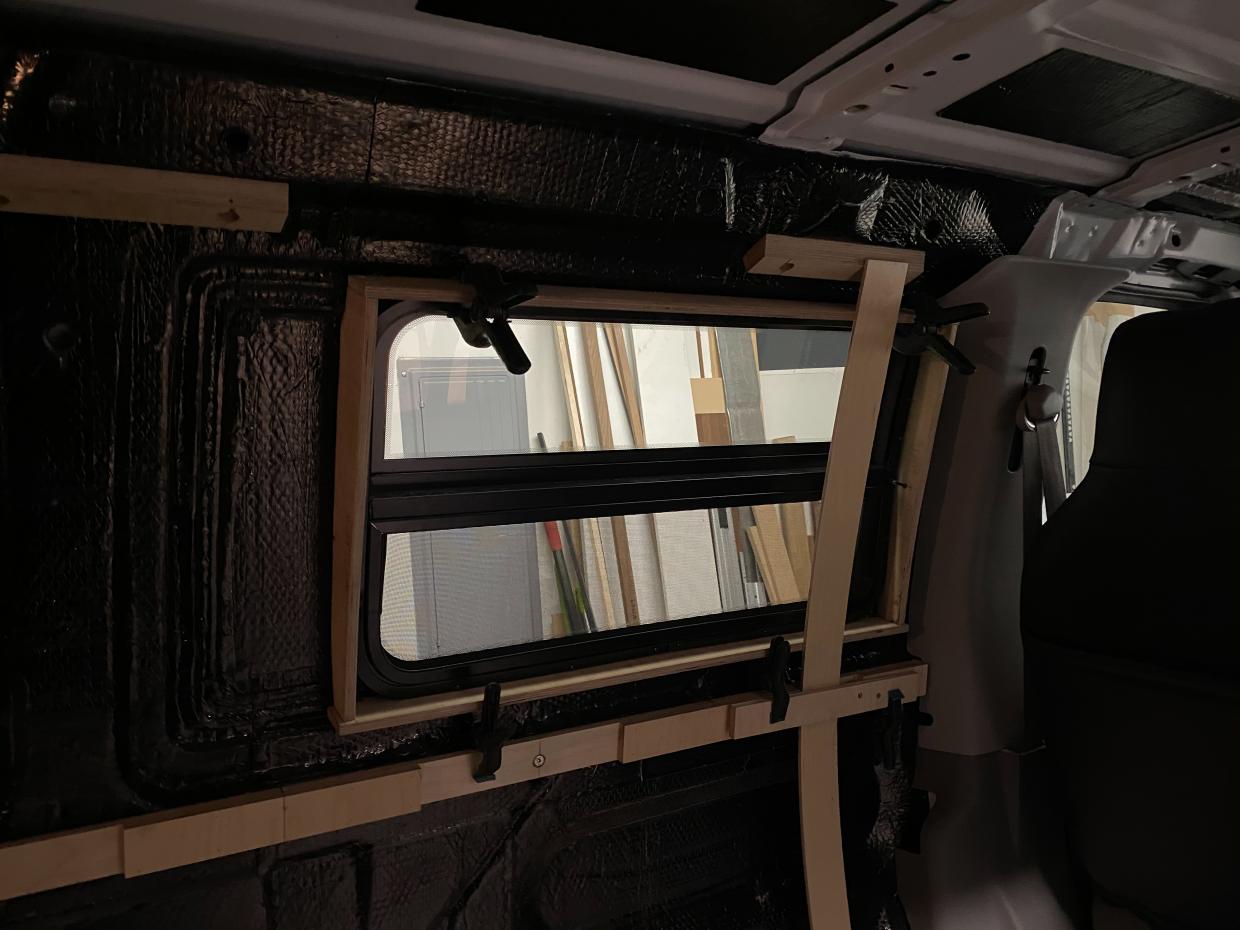
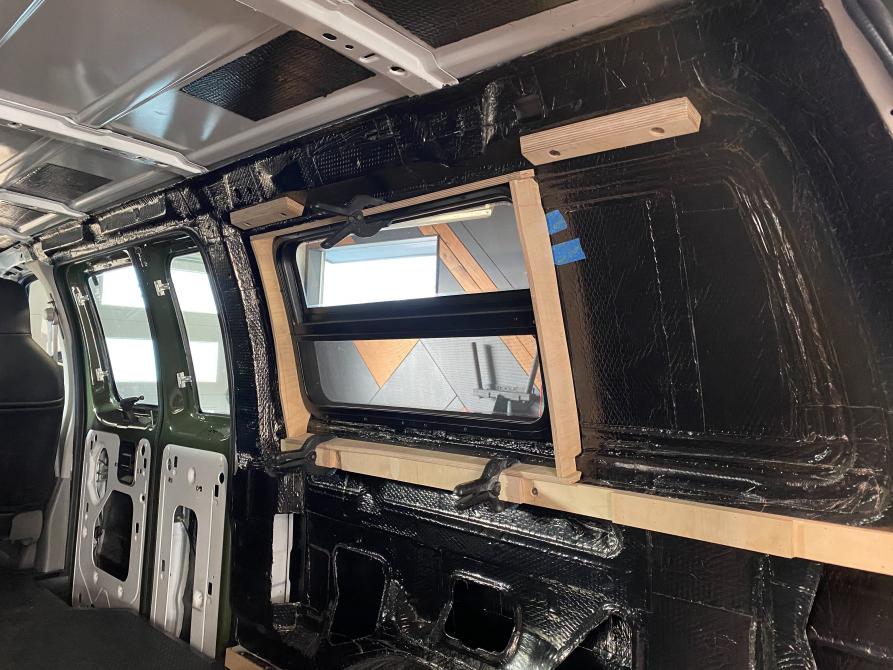
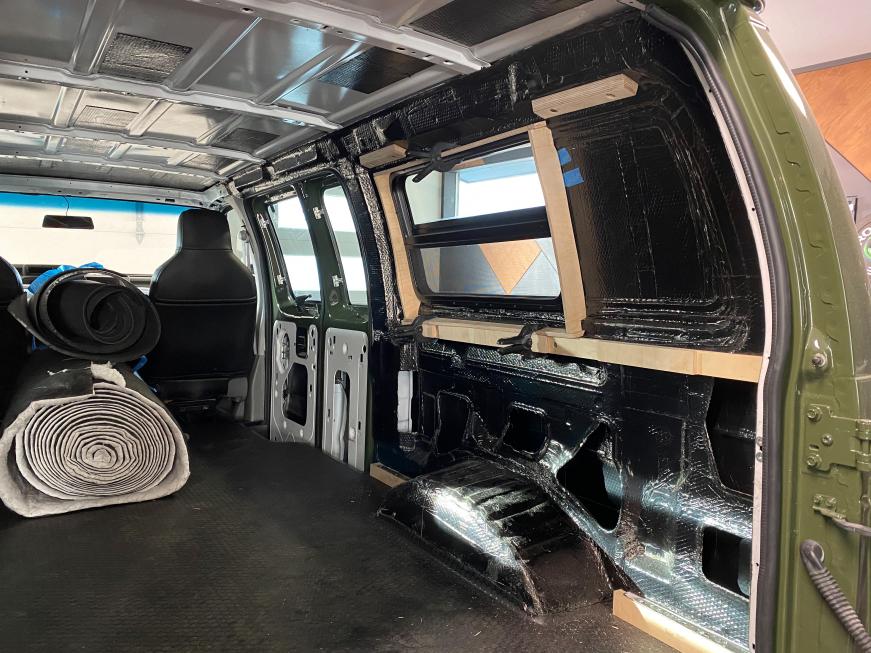
-I then started on the window boxes starting with the driver side. I used ½” Baltic birch to build a frame which was scribed to the van body. After getting the back scribed I used a small cut off of Ό” Baltic birch which I will be using for the wall panels to find the wall curve. After getting the window boxes roughed out I pulled them out and glue and screwed them together trimming up any remaining parts.


-I then went to the passenger side and repeated the process. The one difference on this side is I had to create more of a curve horizontally as I am trying to curve the wall panel in both directions so it planes in nicely with the 60/40 door pillar which sticks out further than the rest of the wall.


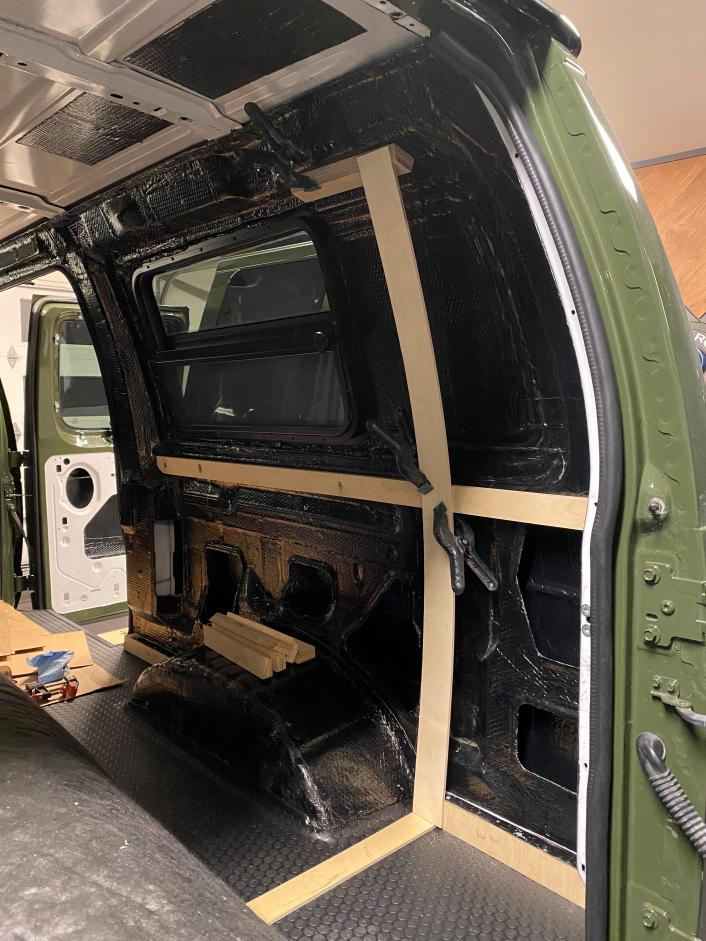
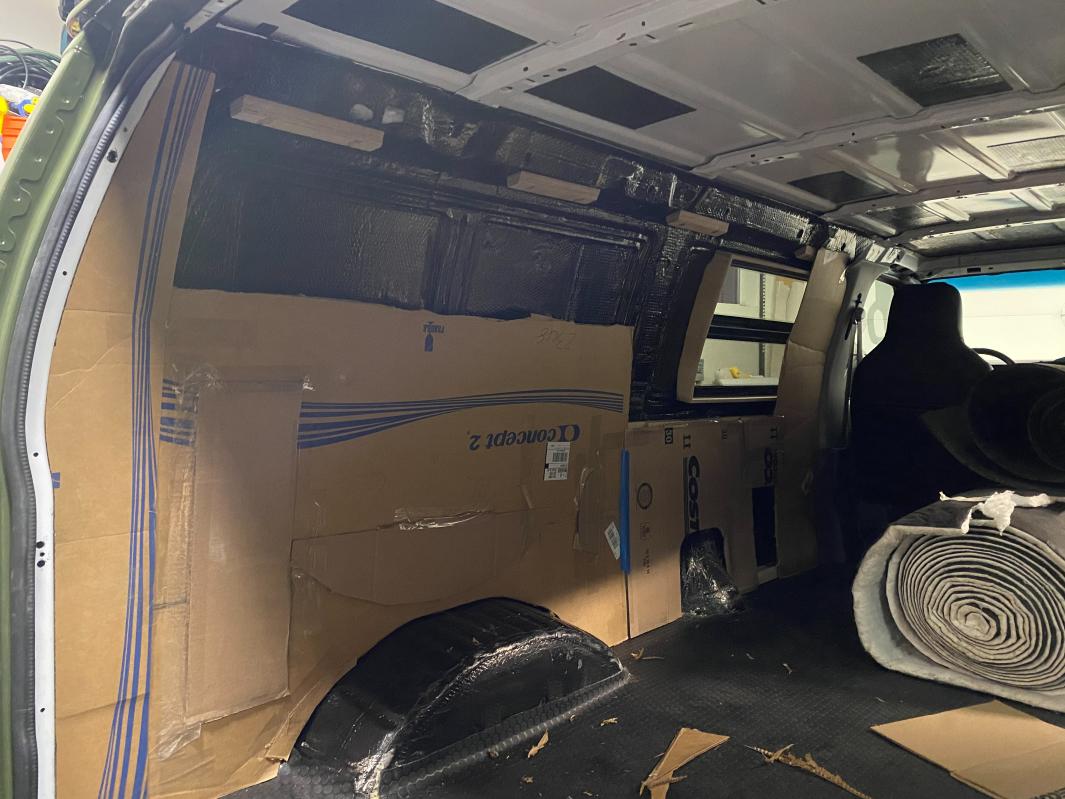
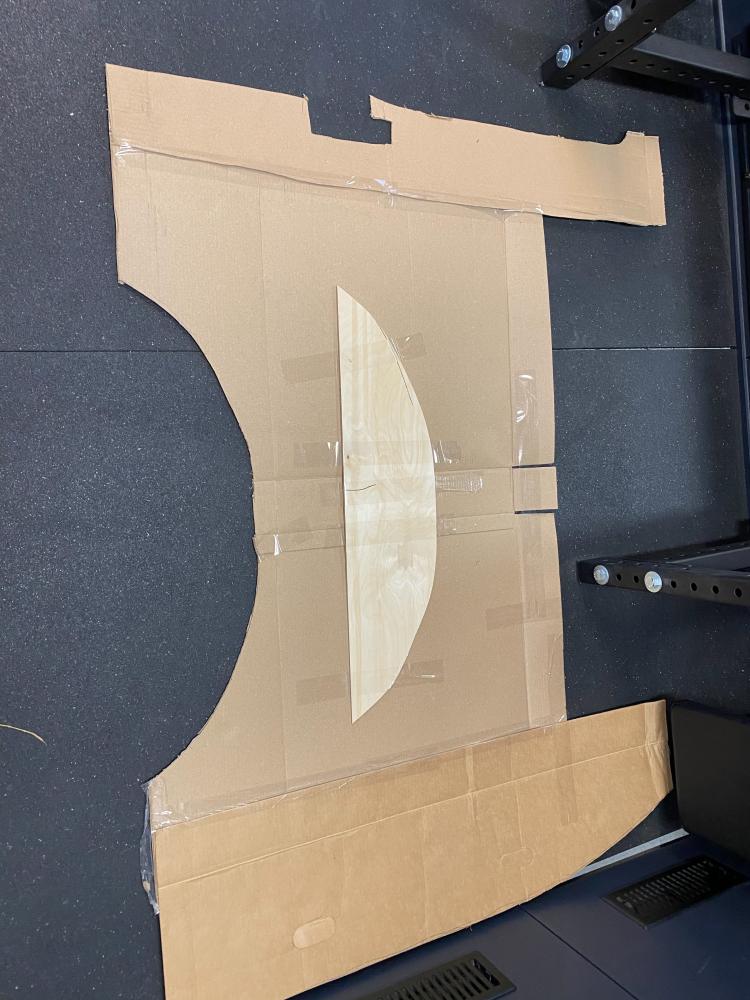
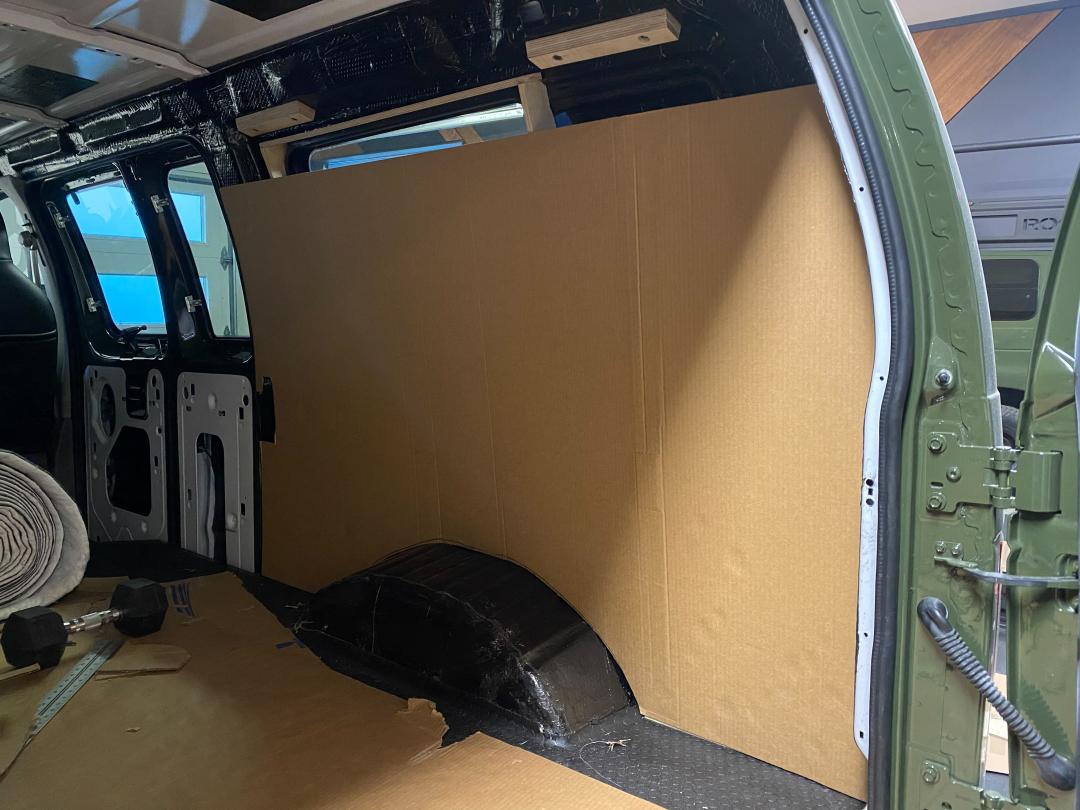
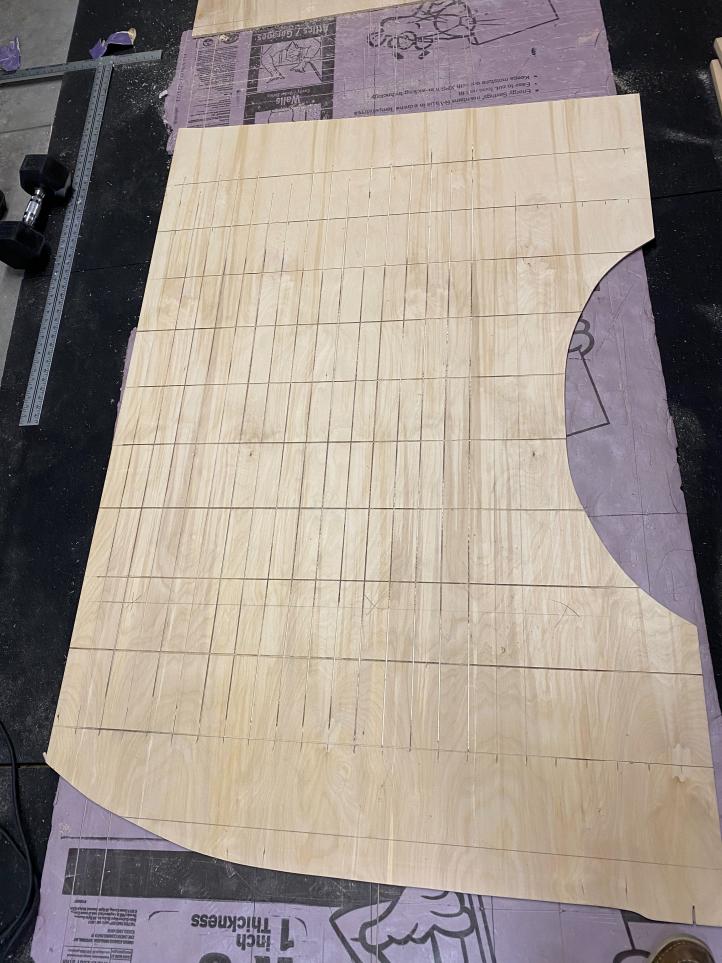
-After getting the window boxes done I started on templating for wall panels. Starting with the driver side I cut and scribed multiple pieces of cardboard together to get a rough template. After getting the rough template together I traced that template to a clean full length cardboard piece since I was worried the pieced together template wouldn't get me accurate enough cut lines.


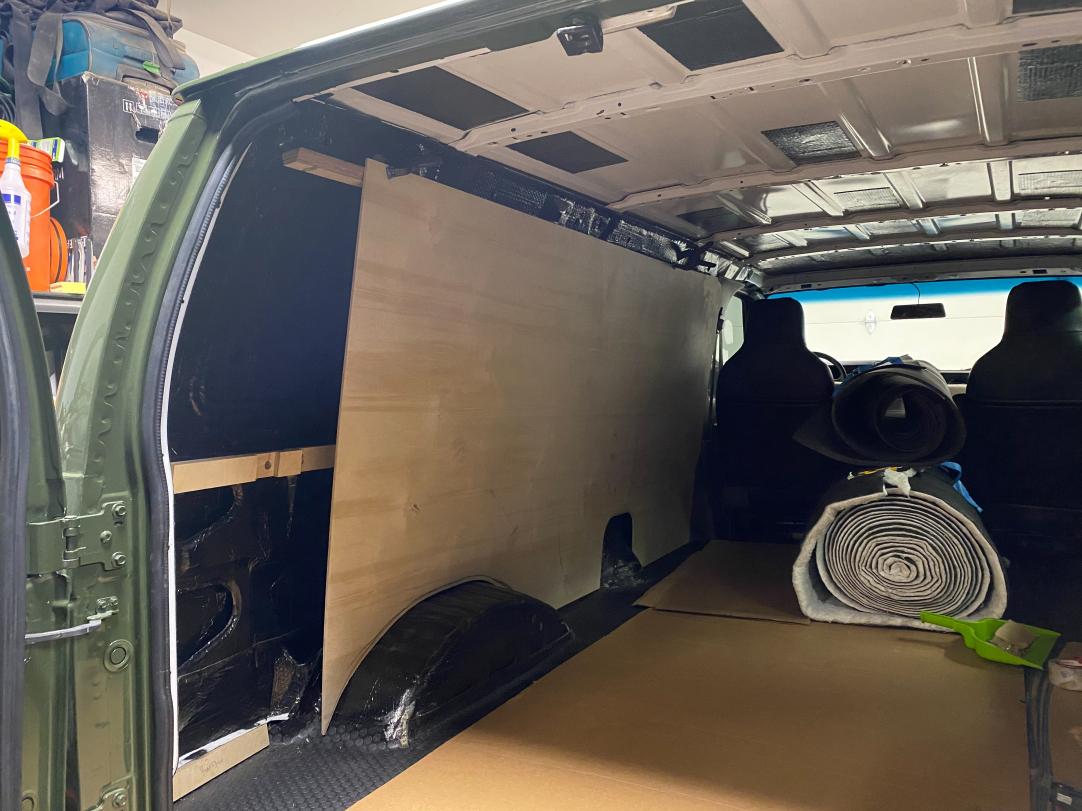
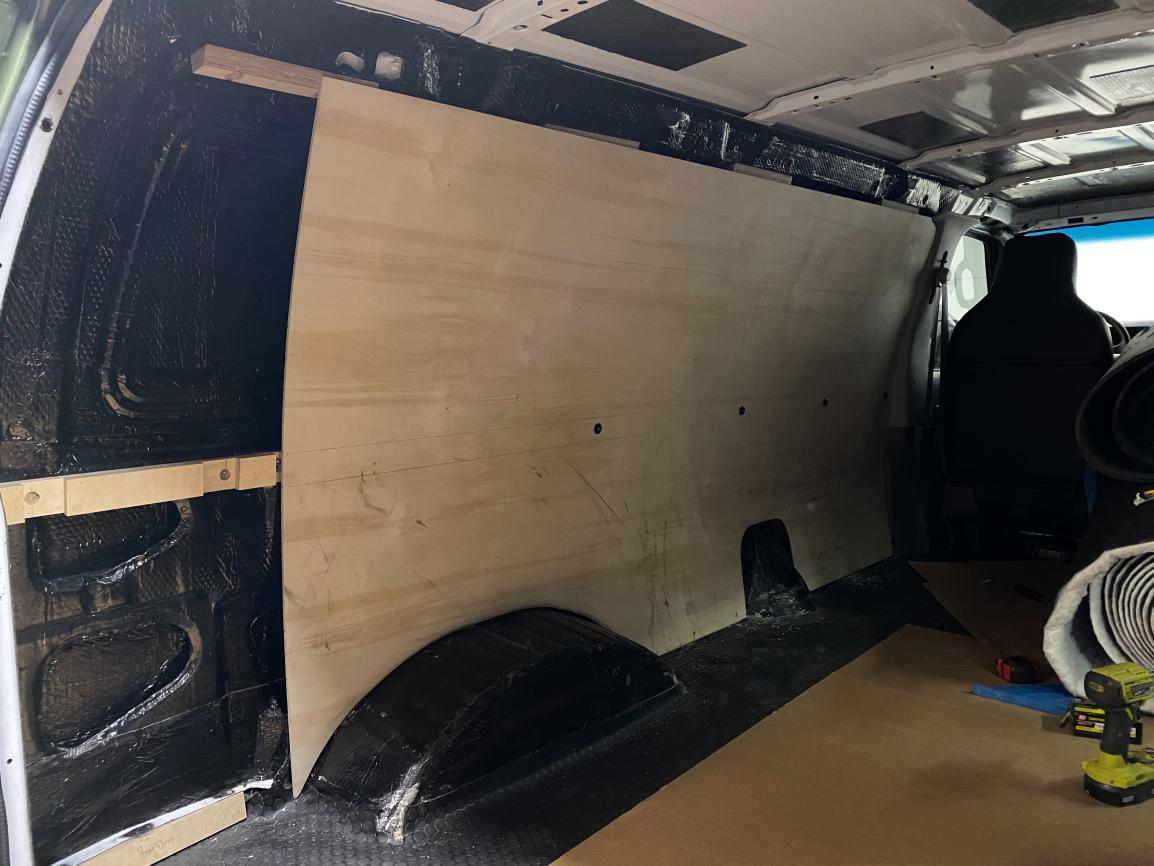
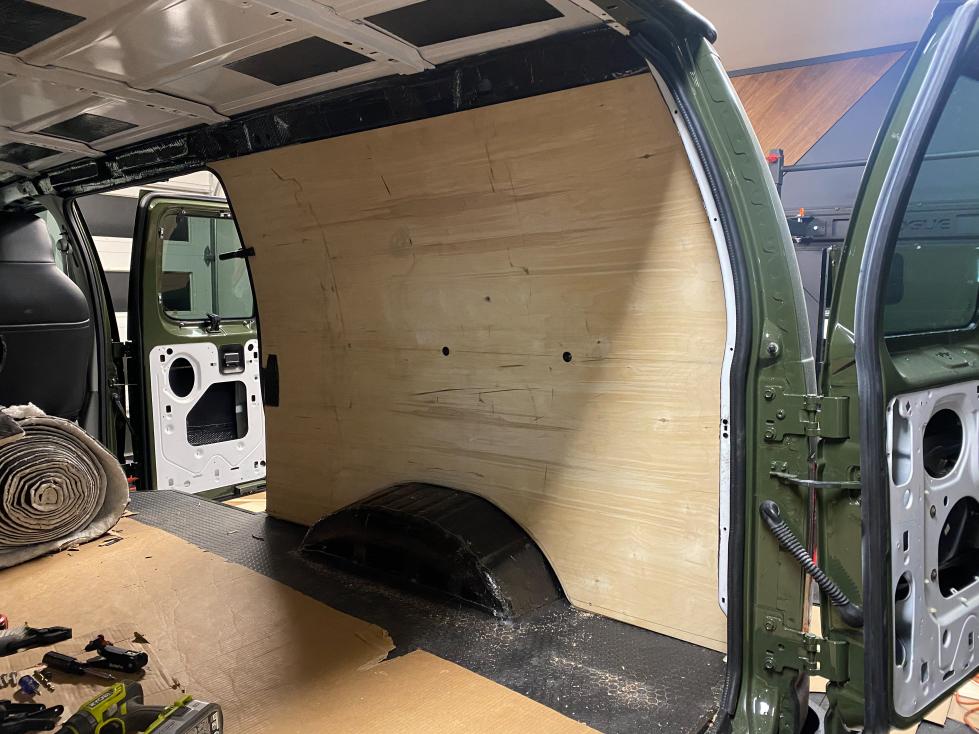
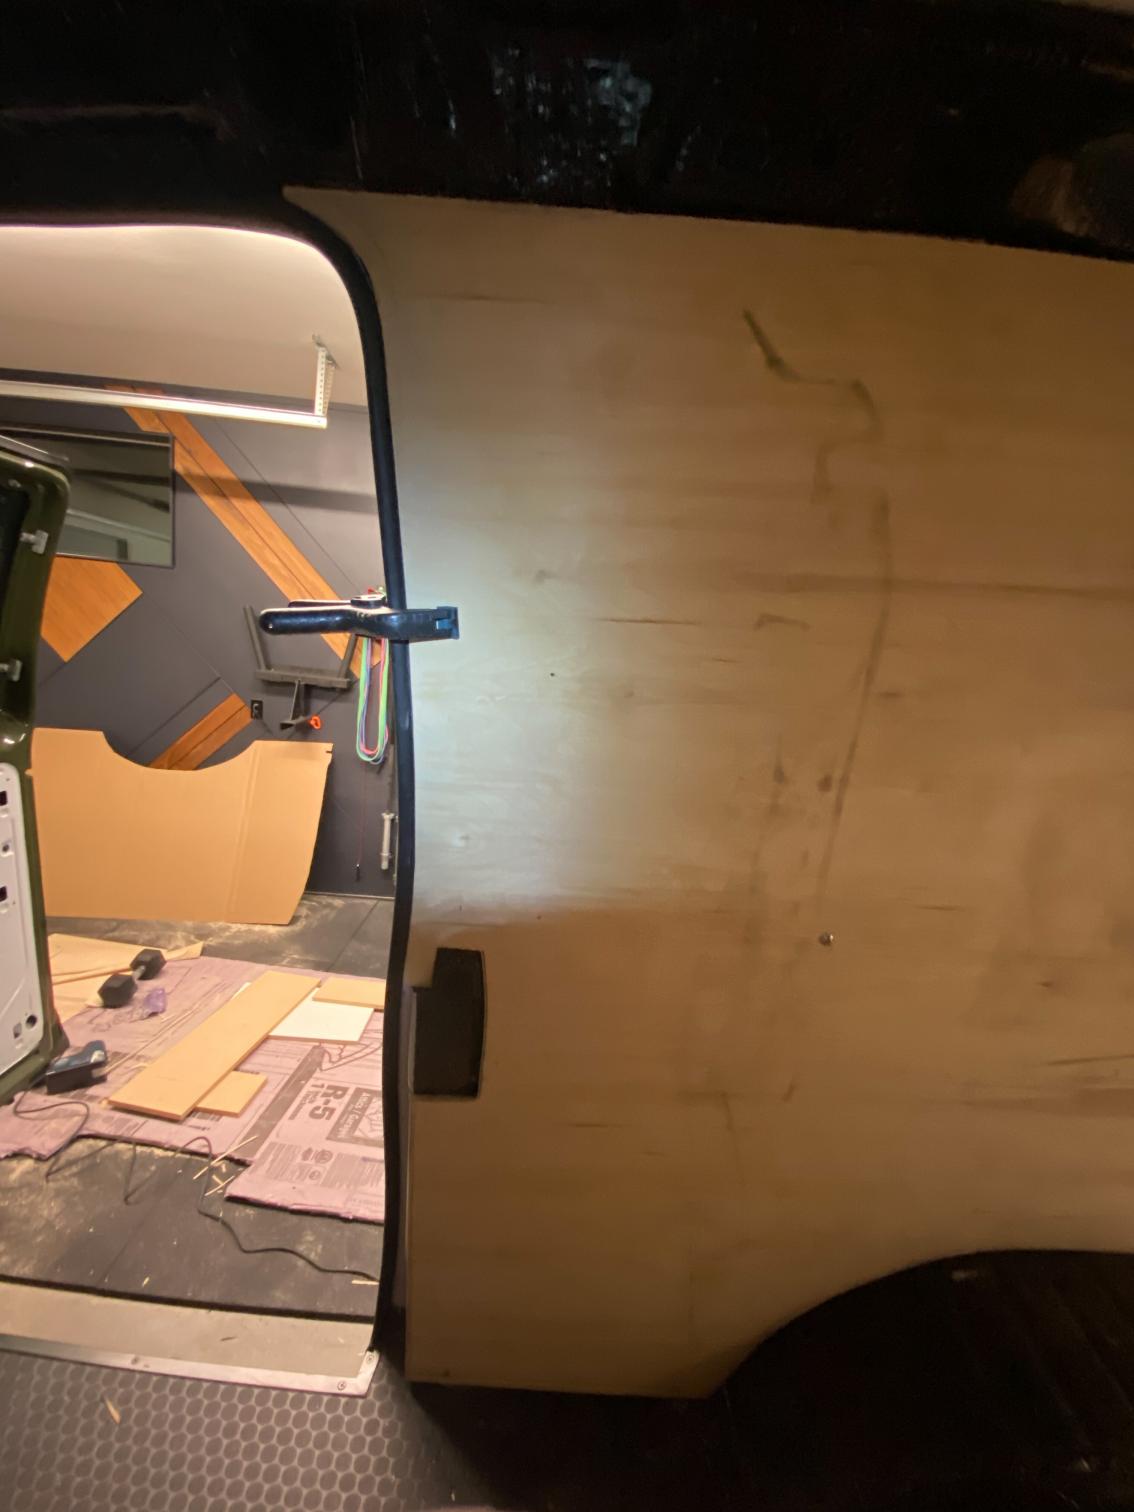
-After the template was done I cut out my wall panel. I am using Ό” Baltic birch which proved to be a little problematic. As you can see the wall panel did not want to conform to the van body.


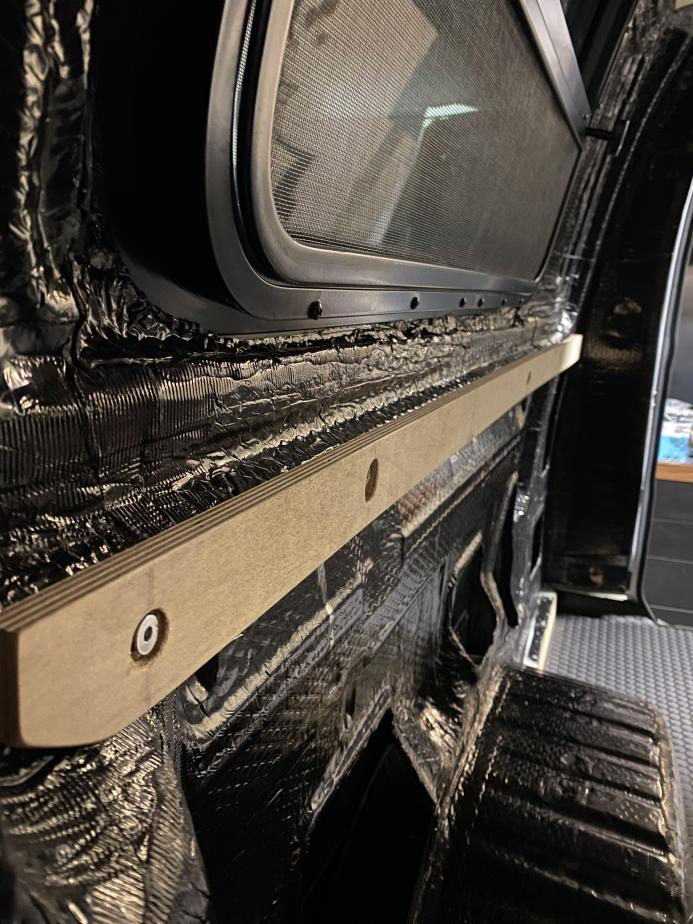
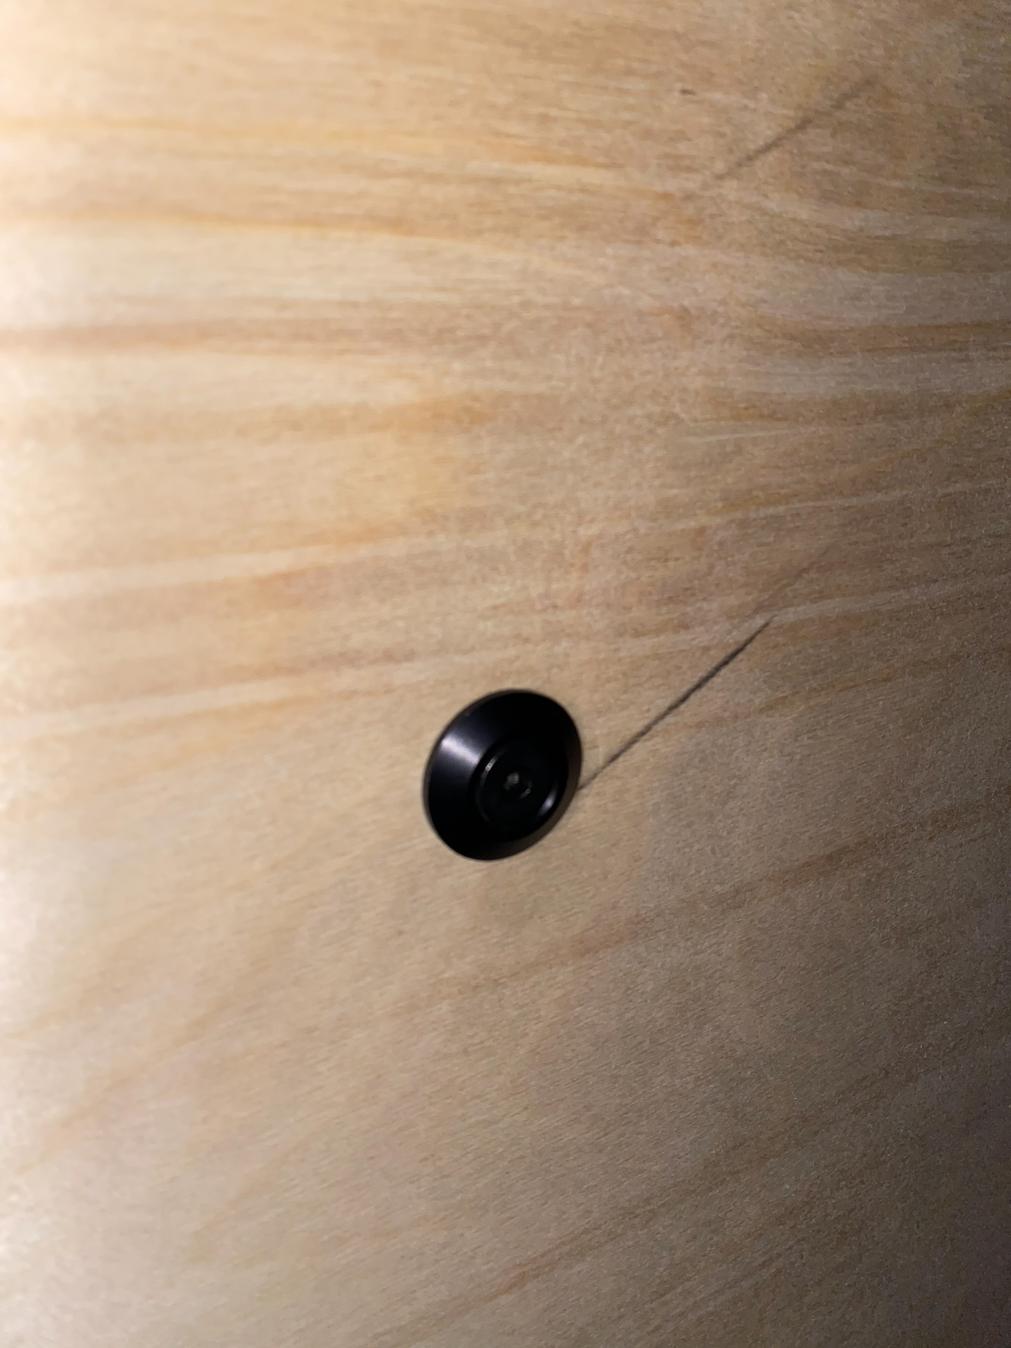
- I then pulled the panel back out and did some shallow kerf cuts in both directions to the entire backside of the panel. This helped a lot! I drilled out holes and used standard screws as temporary holders until I can install the Ό” x20 threaded inserts. I am using some aluminum finish washers and black coated stainless steel Ό”x20 bolts to attach all the panels.


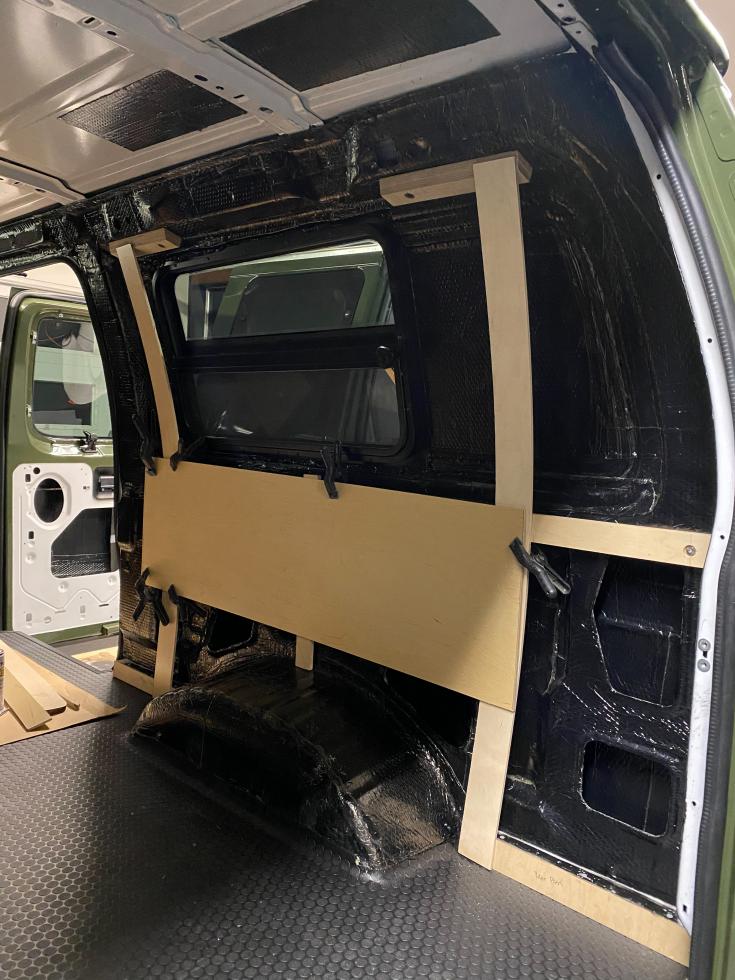
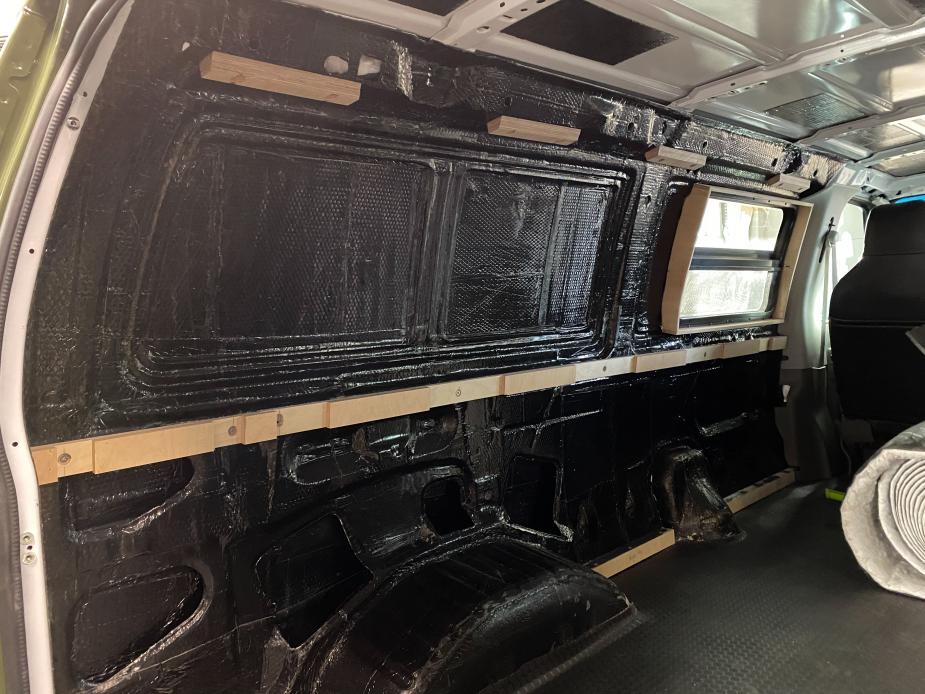
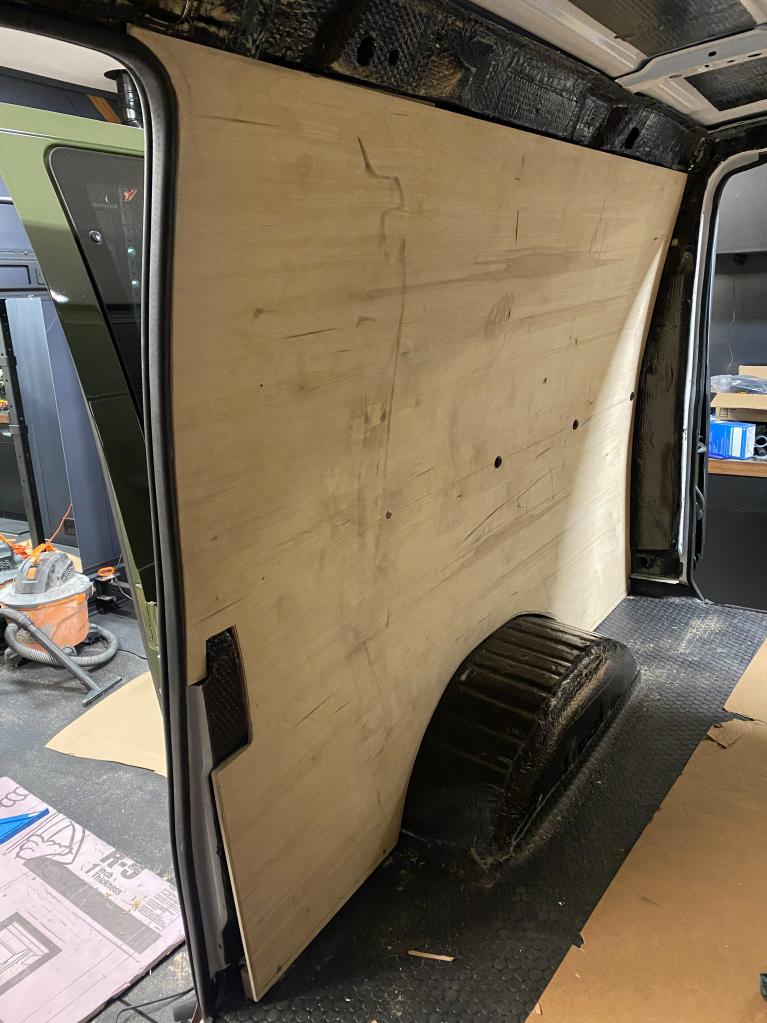
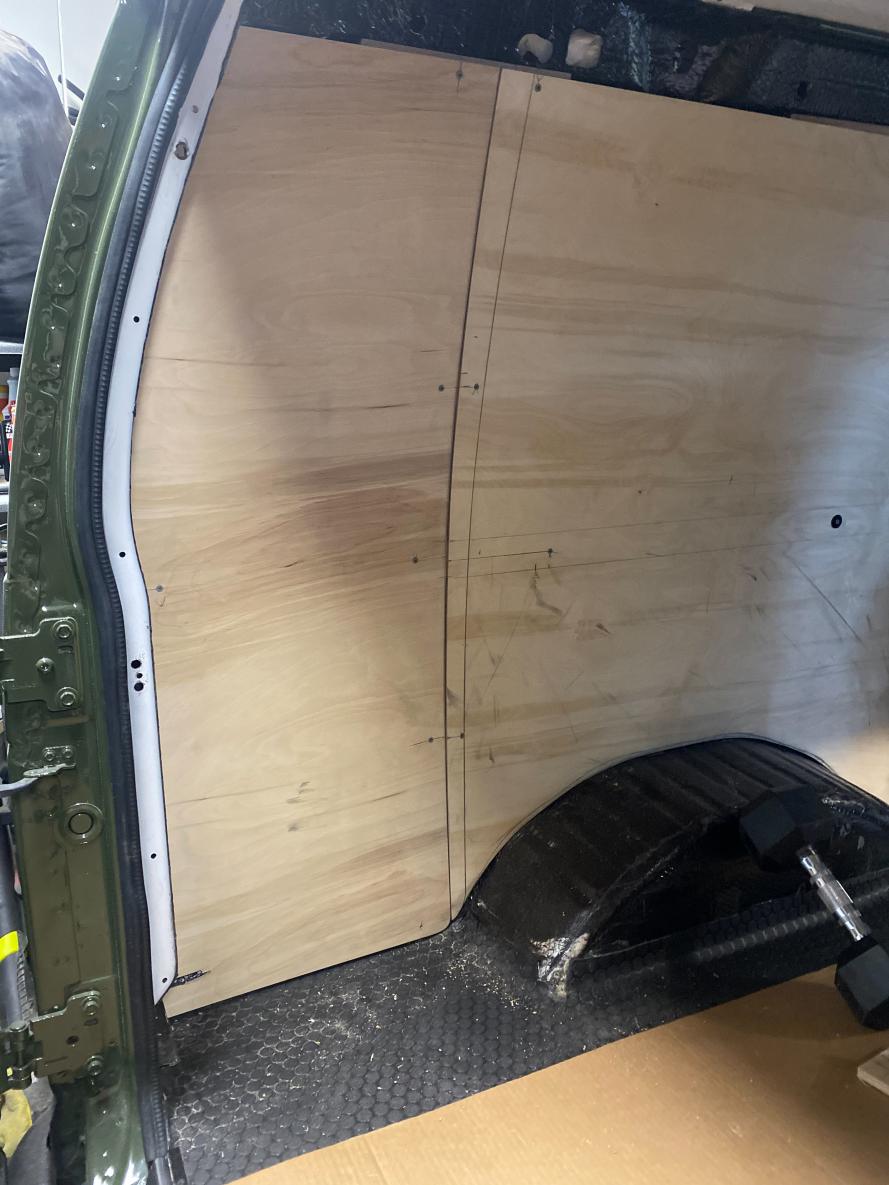
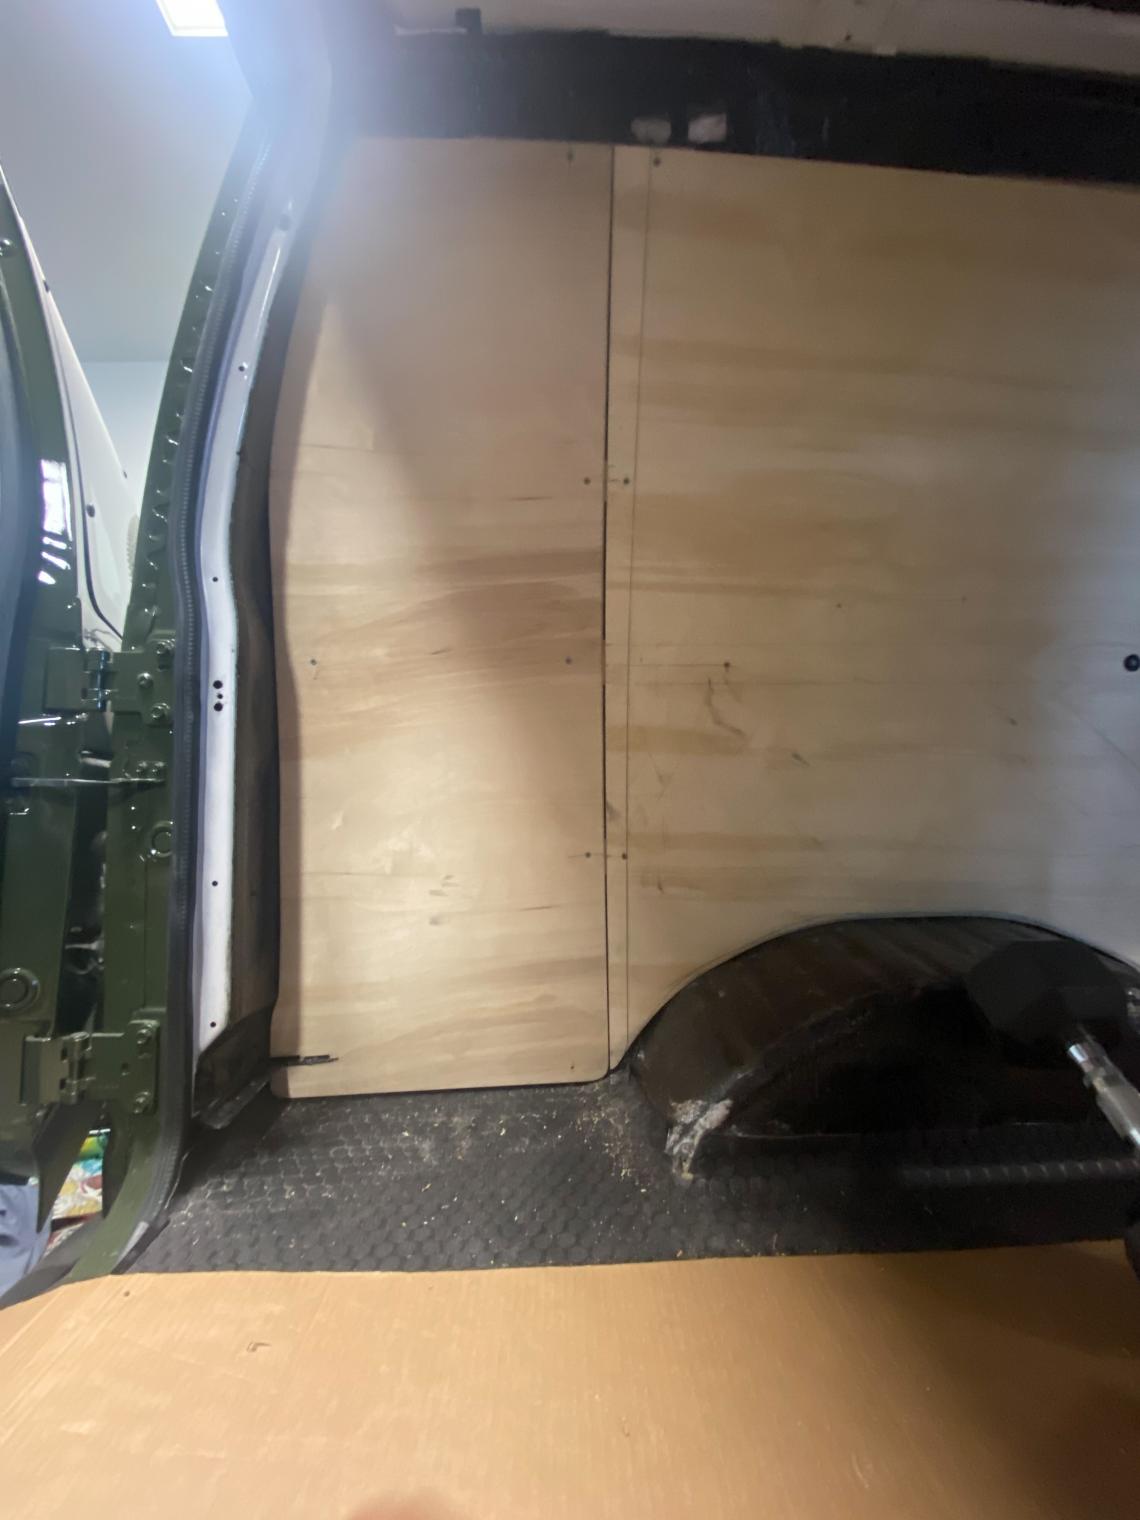
-After getting panel #1 on the driver side in I repeated the process on the passenger side. Like mentioned before I curved the panel and ran it all the way to the door seal which should allow me to tuck the fabric into the door seal once I do the upholstery. There is also a bump out that pretty much runs flush with the wall panel (the black section in the picture) which I plan on running the foam and fabric straight over to give a smooth panel look. EDIT: I found a picture and added it in. 
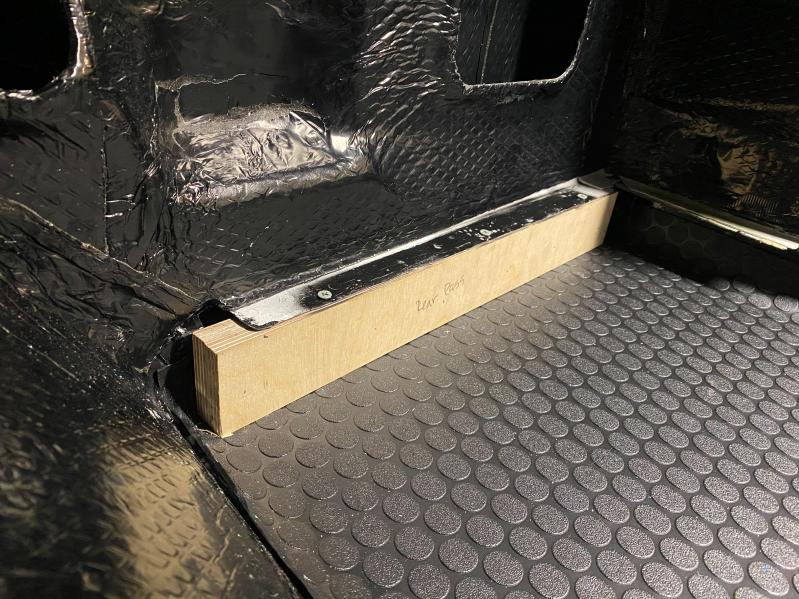
I also will add a small return piece to close up the gap on the bottom side near the door.


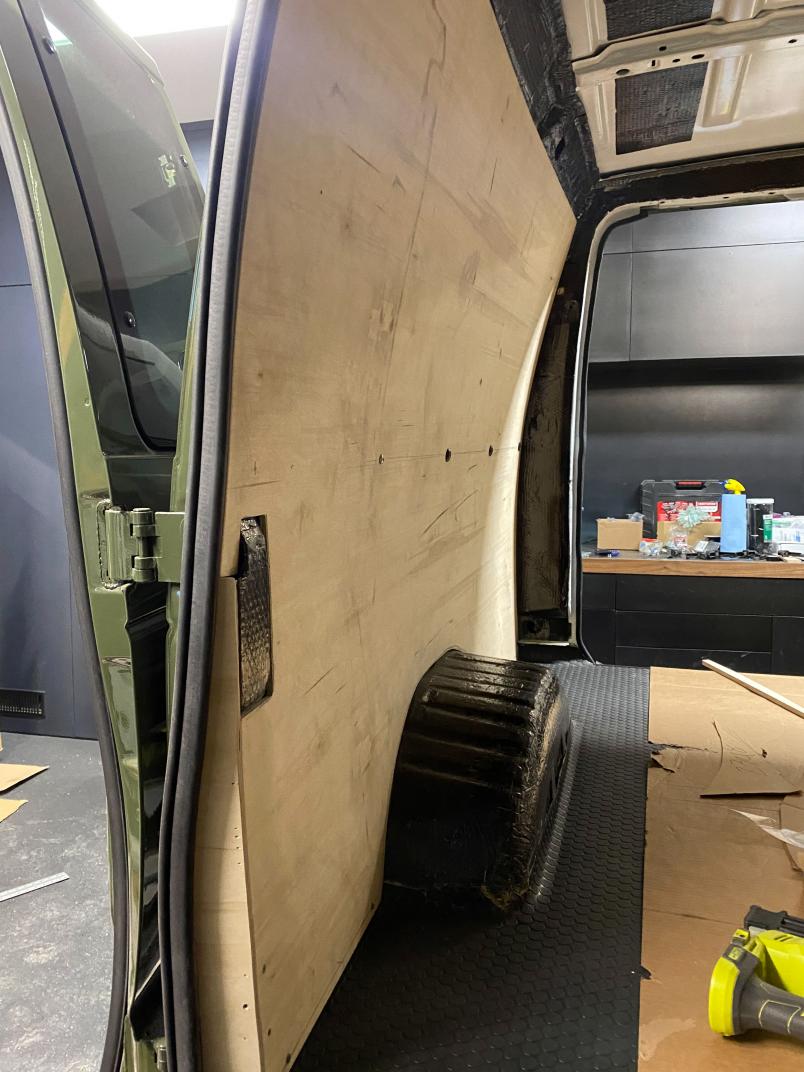
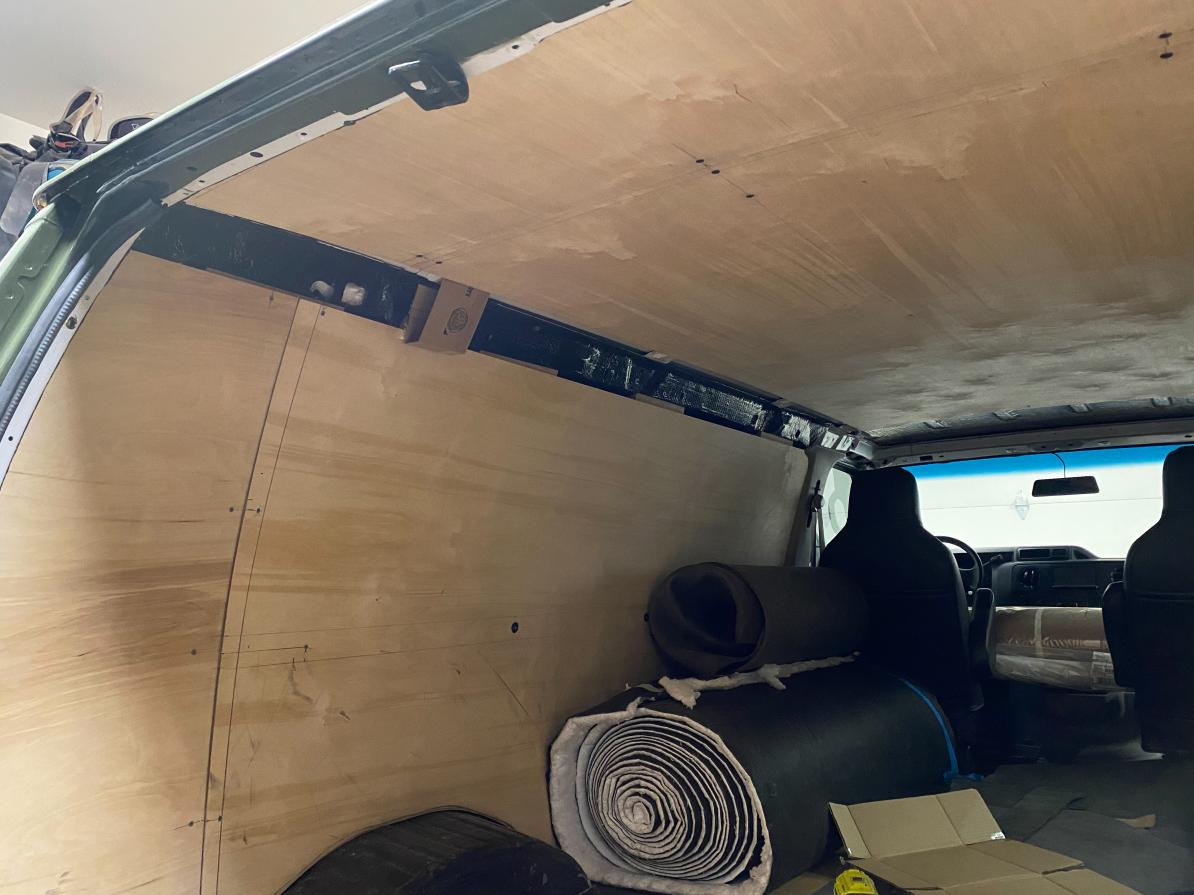
-I then went back over to the driver side for panel #2. I left a ⅛” gap between the two panels to allow for the fabric to roll around the edge and create a smooth transition. I also had to add some additional blocking to ensure that the curves of each panel would line up together. Pictures looks like the joint line is crooked, but I promise it's all straight.


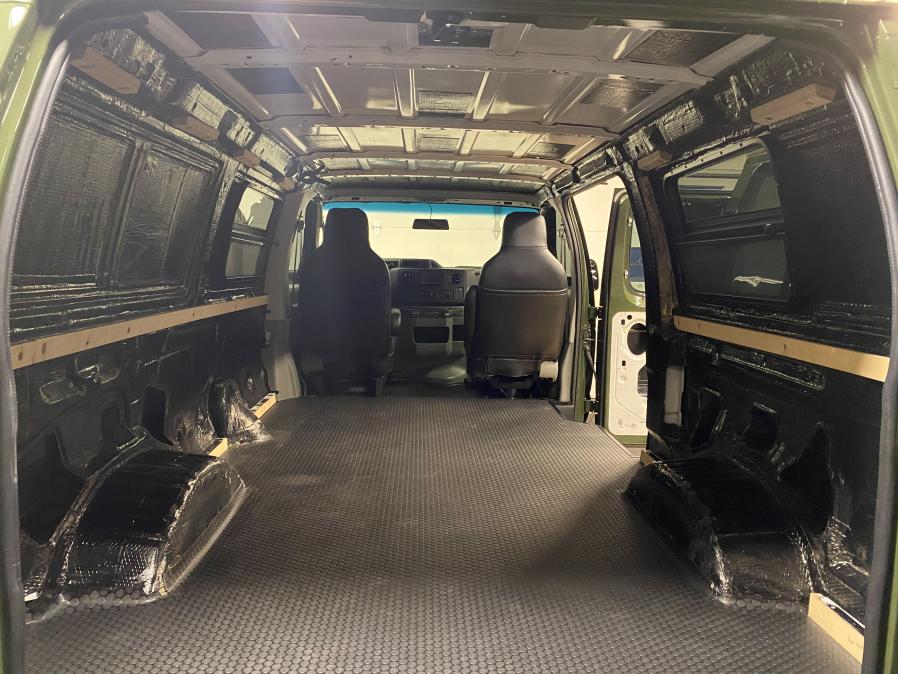
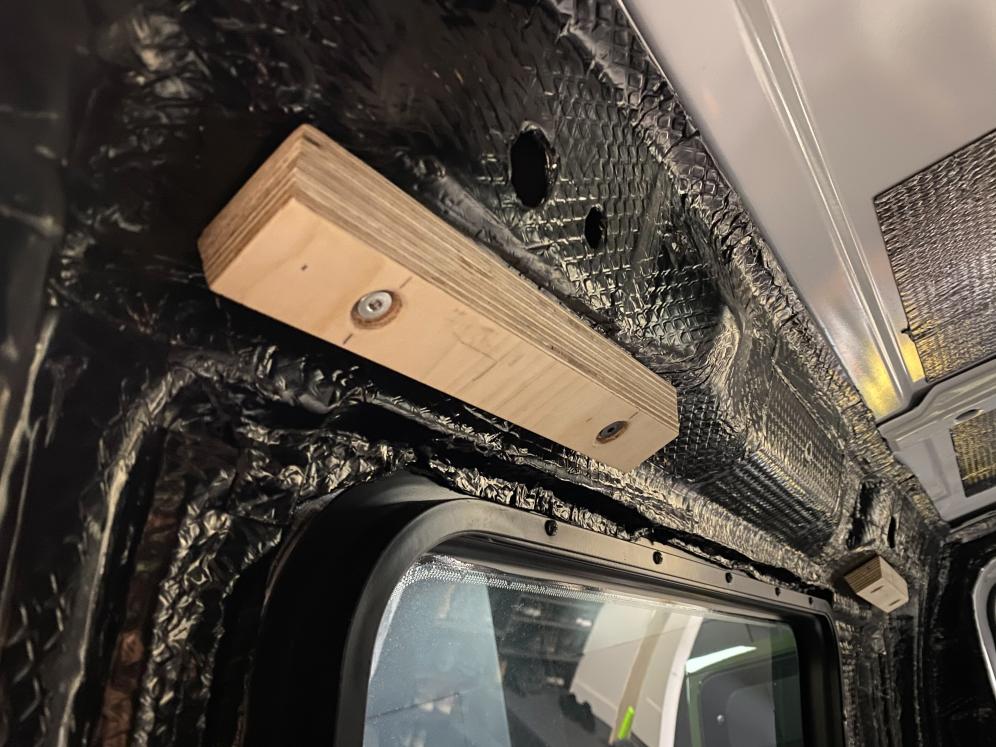
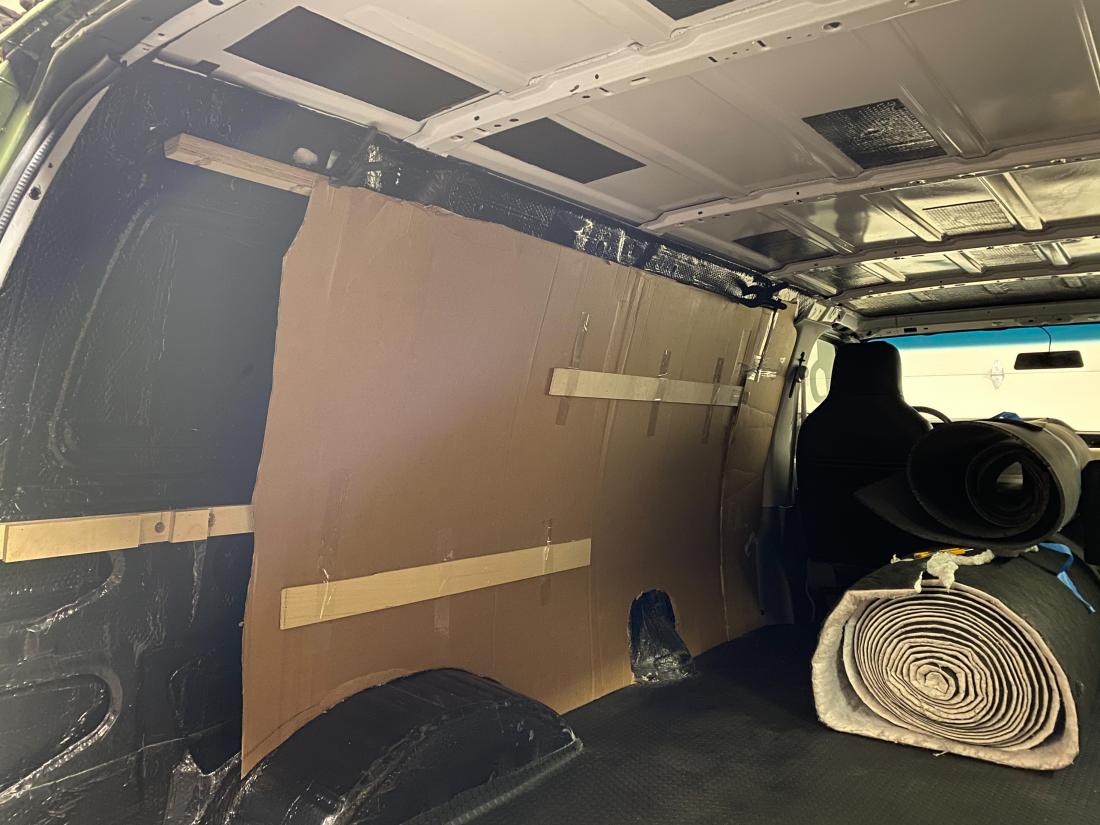
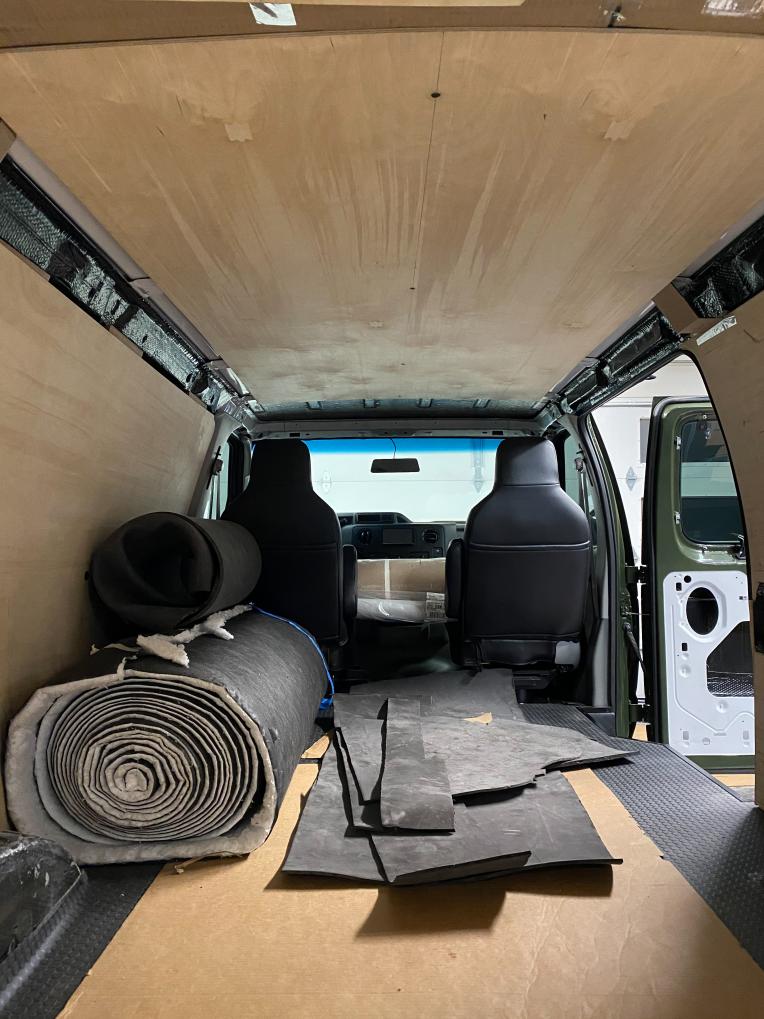
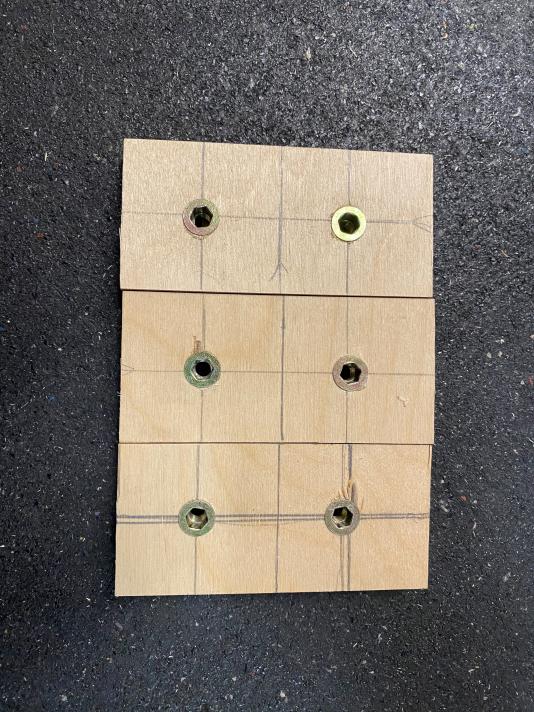
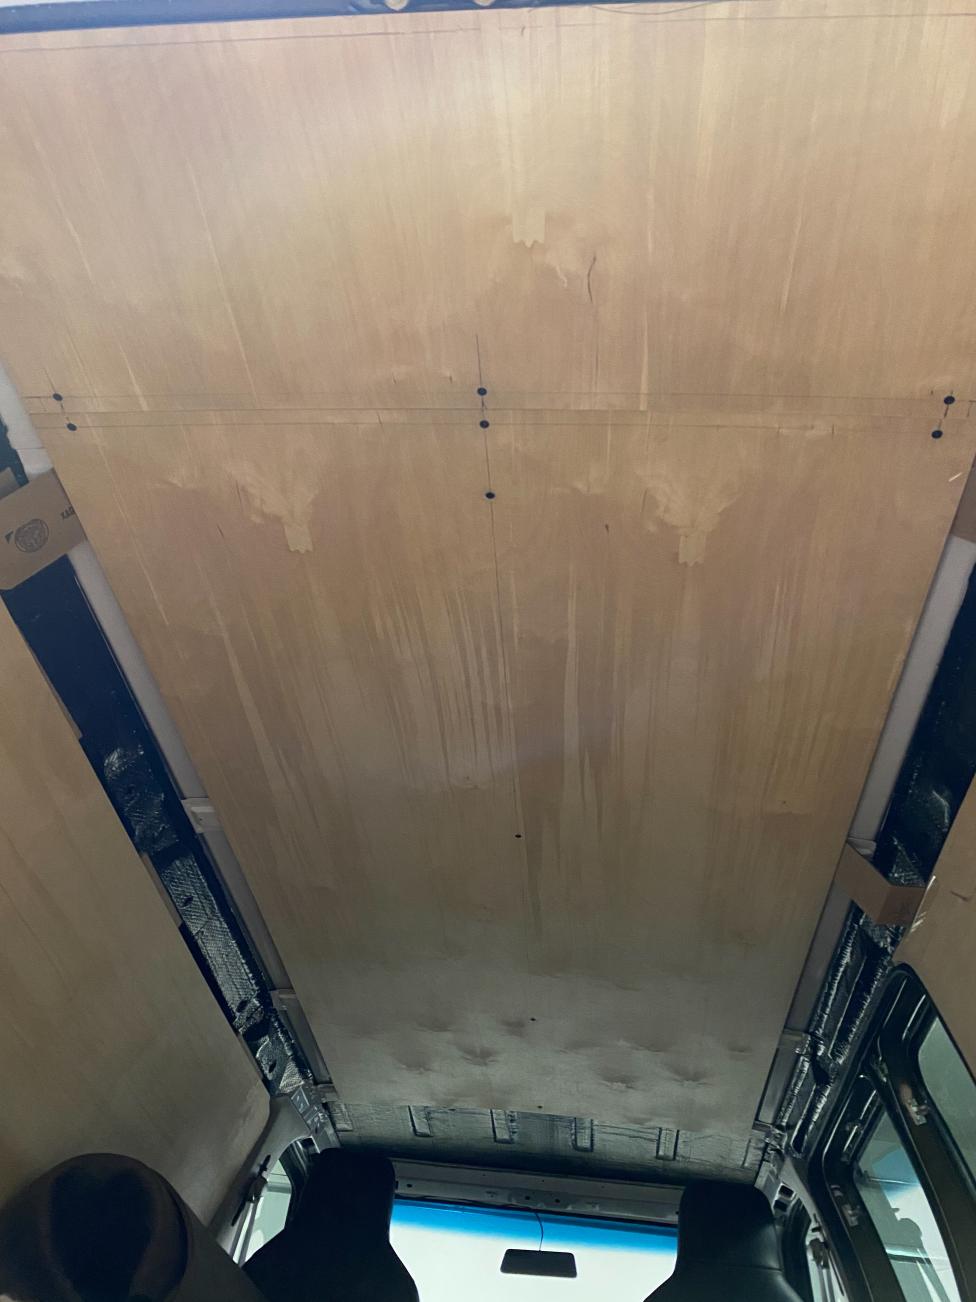
-I then went to the ceiling. For the ceiling I am using the same material and bolts. So I started with the nutsert process. There is a centerline slot on each cross member that I enlarged to insert the nutsert in and worked my way back. I then drilled the matching holes in the 4x8 Ό” Baltic birch and mounted it up in the van. This way nice not to have any scribing to do!


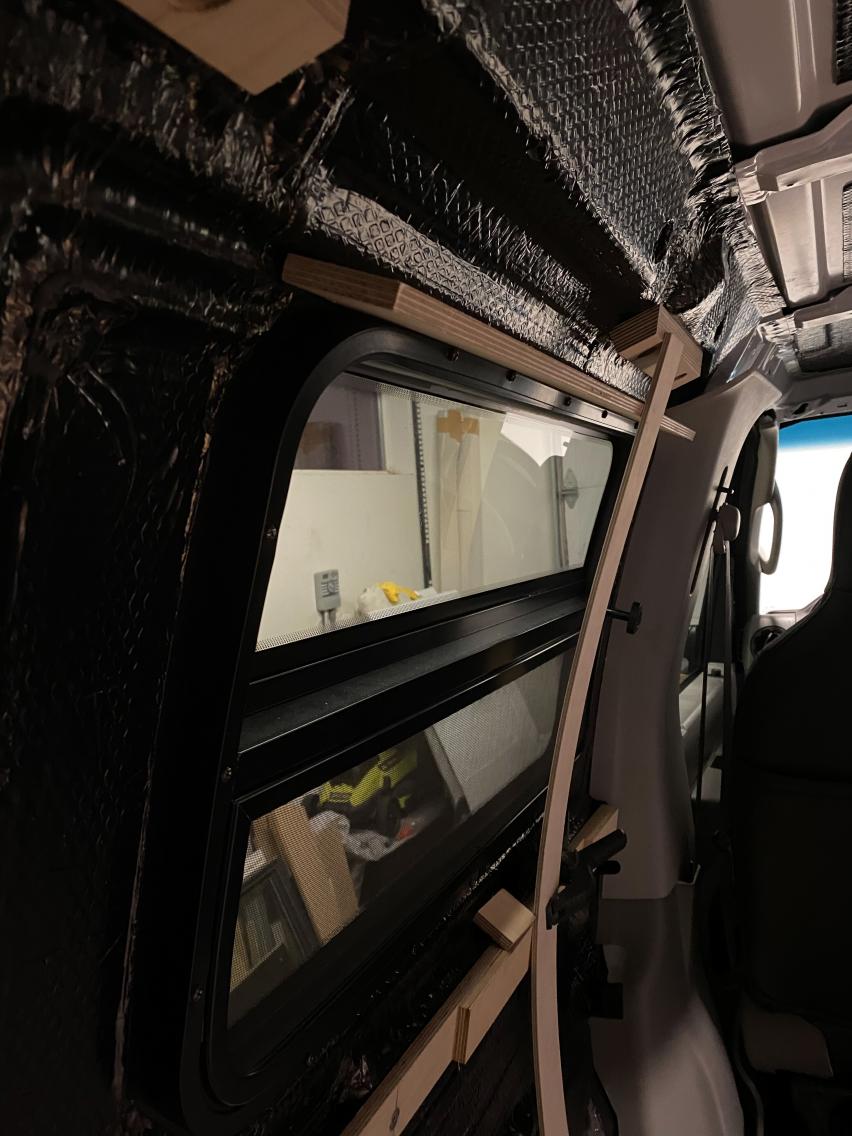
-Next up was the small section of roof in the rear that the 8’ sheet couldn't reach. I am going to try to join the two ceiling panels as one using some connection blocks and then upholstery it as one so there is no seam. The connection worked well as I used inserts in the blocks and bolts through the panels which will get buried under foam and fabric.. at least that's the plan for now.


-Next thing I did was drill out all the holes of where I am going to add bolts and inserts. Most will be into the wood substructure, but a few will be into the van metal which will require a nutsert. Probably have more attachment than needed, but I don't want any squeaks, so I figured more might help with that. (No pictures)


-I mocked up a few ideas for the transition pieces between wall and ceiling. I will be using this as a wire chase as well as a switch and controller mounting area so I am leaning toward the more complicated angled box structure, but I am still mulling it around. Does anyone have any suggestions or ideas?


Option #1


Option #1 & Option #2


Option #3

-Hopefully soon I will be ready to cut out the windows and start pulling things apart to do the wiring, insulation and then upholstery!
__________________
Vandit - 2013 E250 Ground Up Build
- Full Custom DIY Interior Build
- DIY U-Joint Off Road 6" 4x4 Conversion
aarcaris is offline   Reply With Quote
Old 02-18-2021, 03:46 PM   #37
Senior Member
 
aarcaris's Avatar
 
Join Date: Feb 2020
Location: Bend, OR
Posts: 309
Garage
Electrical Plan


-Also I did another thread to get some feedback on my electrical plan, and with the help of other members I think I have finalized the plan. So here is my wiring diagram that I put together.


The one thing I am now unsure of is if I am going to use the WFCO WF-8930/50 distribution box, or switch to using Blue Sea components. I like the clean simple look of the WFCO but worry I am going to tap out the DC circuits and then have to add another fuse block. If I did I am not sure where I would put the block or how not to make it look like an oversight and something I just had to throw into the system. So I have started designing and laying out an electrical cabinet with two Blue Sea 12 circuit fuse blocks which should give me plenty and may end up looking more intentional. Any inputs or recommendations on this topic or any electrical?
__________________
Vandit - 2013 E250 Ground Up Build
- Full Custom DIY Interior Build
- DIY U-Joint Off Road 6" 4x4 Conversion
aarcaris is offline   Reply With Quote
Old 02-18-2021, 05:11 PM   #38
Senior Member
 
bigriver's Avatar
 
Join Date: Feb 2014
Location: Columbia River Gorge
Posts: 651
Man that's a lot of work that looks great and an excellent addition to the Home Build knowledge base. Thank you and Good on ya!
__________________
Joe
2003 EB50 7.3L PSD Q4X4
2000 Chevy Express 3500 High Top EB37 - Sold
2003 EB30 - Sold
bigriver is offline   Reply With Quote
Old 02-18-2021, 05:23 PM   #39
Senior Member
 
marret's Avatar
 
Join Date: Nov 2016
Location: FL and VA
Posts: 1,952
Garage
Well done, coming along nicely. Ton of work, but it will be worth it in the end.

If you don’t get feedback on this post for the electric, you might post it in the electrical forum.
__________________
Chris
2008 GMC 3500 Quigley Weldtec 4x4 Savana SMB
marret is offline   Reply With Quote
Old 02-18-2021, 05:26 PM   #40
Senior Member
 
Twoxentrix's Avatar
 
Join Date: Mar 2015
Location: Maryland
Posts: 3,378
Garage
Yep, You've got skills!
__________________
TwoXentrix
"AWOL"
Twoxentrix is offline   Reply With Quote
Reply

Tags
build, build thread, homemade, homemadesmb


Posting Rules
You may not post new threads
You may not post replies
You may not post attachments
You may not edit your posts

BB code is On
Smilies are On
[IMG] code is On
HTML code is Off
Trackbacks are Off
Pingbacks are Off
Refbacks are Off

» Featured Campgrounds

Reviews provided by

Powered by vBadvanced CMPS v3.2.3
Disclaimer:

This website is not affiliated with or endorsed by Sportsmobile SIP or any of its affiliates. This is an independent, unofficial site.


All times are GMT -6. The time now is 05:15 AM.


Powered by vBulletin® Version 3.8.8 Beta 4
Copyright ©2000 - 2024, vBulletin Solutions, Inc.