|
|
 12-28-2018, 07:18 PM
|
#71
|
|
Senior Member
Join Date: Apr 2007
Location: Western Colorado
Posts: 1,228
|
Not the best photo of window placement but you get the idea.
__________________
Desert Solitaire
2003 7.3L EB 4x4
Timberline 4x4 conversion
|

|

|
|
12-29-2018, 07:40 AM
|
#72
|
|
Senior Member
Join Date: Jul 2011
Location: TN
Posts: 10,241
|
Looks great Shadetree! I can't offer any advice on window placement since it's completely personal preference. I prefer cabinets over the galley for accessibility which would probably put them at the rear above the bed. If they are sliders you'll appreciate the air flow up there when sleeping on warmer nights.

|
|
|
|
|
01-15-2019, 10:22 AM
|
#73
|
|
Senior Member
Join Date: Jun 2017
Location: Riverside, CA
Posts: 385
|
All good advise on the windows. As I've been working in the van I'm thinking I'll center the windows between the front and rear bulkheads. We've spent one night in the van with the new top on and it is awesome to have the room to stand up inside.
Towed our Jeep to Havasu for New Years and whatever I've done has decreased mileage. I was getting 12 MPG while towing the Jeep, this trip dropped to 9 MPG. It was extremely windy this trip though. I'm wondering how much the mileage is being affected by the light bar I added. Happily the high top did not seem to be affected by the wind. The van still drives just as stable, just thirstier.
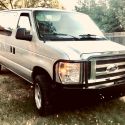
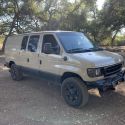
As evidenced by these pictures at Havasu, my buddies van doesn't seem so tall now. His is 4wd with a 6" lift, but a shorter high top so they are very similar in overall height. I can't quite stand up in his though. 
The new light bar may be affecting mileage but it throws a lot of light when we go places that need it. I put the switches for the front and rear LED light bars above the drivers seat in the new bulkhead, where they are easily accessible while camping. In the middle of the night, in the middle of the desert, it's nice to have lights to turn on quickly when you hear something outside. 
Got the awning reinstalled after replacing the 4 year old LEDs that were on it. The old LEDs were more blue in the spectrum. The new ones have twice the bulbs and are more natural looking colorwise. The difference in light output is substantially better now. I had purchased the gutter mount awning brackets from 1der, but decided not to use them. Instead I welded up some standoff brackets and bolted the awning tightly to the high top about 3" above the gutter.
__________________
Tim Potts
2012 Chevrolet Express 3500 6.0
|
|
|
|
|
01-15-2019, 11:25 AM
|
#74
|
|
Senior Member
Join Date: Jun 2017
Location: Riverside, CA
Posts: 385
|
Moving inside on Sunday I started building cardboard templates for the bulkheads. There's not a straight line in this top. When I was satisfied with the fit I transferred the designs to 1/4" maple plywood. I added stiffening strips of 3/4" plywood at the ceiling line and where it ties to the headliner. In the past I had glued and screwed aluminum angle to the high top where the bulkheads would mount, so I screwed 3/4" plywood to those to provide places to mount a fuse block and relays where I needed them.
The rear bulkhead has two AC vents cut into it. The area around the vents have 3/4" plywood behind the fascia to allow the depth needed for the vents to open and spin just like when they were stock. Since the vent height protruded into the storage area (as seen in the raw install pic) I faced the back of the hole with sheet metal to close it off from storage. The stock headliner AC plenum dumps into the new vents. There are still two stock vents in the headliner facing downwards. Hopefully that will be enough vents to keep the rear cool in summer. Probably not, but one can always hope... at least the rear seat occupants can direct some of the vents directly at themselves. The drivers seat should be fine, just sayin'.
Each bulkhead has switch banks, 12V outlets and USB charging ports. In each switch bank, one switch is to turn off the USB outlet. In my Volkswagen I had added 4 USB charging ports throughout the van, then wondered why my batteries were not staying charged anymore. Since then I've kept it safe and simple by adding switches to turn the USB's off when not needed.
Gluing the material inside the storage areas before mounting the bulkheads was fun. I set up a fan to blow fresh air up there, but spraying the glue, then sticking my head in there to smooth and trim the material was making me a little light headed. That new MaxxFan came in handy as it was raining outside and I was able to open it with its fan sucking the fumes out. I've left the vent open and the fan on this week as we're camping this weekend and it needs to air out even though its been pouring rain off and on. Have I mentioned I love this fan. 
The to do list is down to the new side windows and whatever cabinetry I come up with around them. And finishing up the wiring for the new switches and lights. Front and rear LED Bars are wired, but nothing else. As we're dry camping in the Ocotillo Wells desert this weekend I'll keep looking for anything else I can add/do to this van. Our granddaughter is going with us so I tested this small bed in between the front seats. I had built it last year before I built out this version of interior so I hoped it would still fit. It could be built a little wider than it currently is, but she's only 7 so it's plenty big for now.
The ceiling lights are wired to the stock wiring harness, which means they follow the doors and the timer that turns the light off after so long. It is cool they dim down as they are turning off just like stock. I added an On/Off/On switch on the pillar by the doors where I can control the lights to follow the door switch, turn them off completely, or on independently of the door position. These LED pucks provide the perfect amount of light for working, without being offensively bright. When I build the side cabinet above the kitchen area I'll add more lighting there for those times we don't want so much light. One of the switches in the front bulkhead is for those new lights. The front storage is so shallow it doesn't need a light inside, but the rear storage will get a short LED strip above the opening facing in.
As it will be in the low 50's, high 40's overnight in Ocotillo Wells this weekend, we'll have our Little Buddy Heater. It's too bad I'm running out of time before the trip. I have purchased a Chinese Diesel Heater with LCD Controller but won't have time to install it before we leave. I do have a Carbon Monoxide Detector to mount on one of the bulkheads before we leave. The Little Buddy sitting on the counter with a small USB fan behind it blowing the heat around warms the van so much it can't run all night even if I wanted it too.
__________________
Tim Potts
2012 Chevrolet Express 3500 6.0
|
|
|
|
|
01-31-2019, 10:15 PM
|
#75
|
|
Senior Member
Join Date: Jun 2017
Location: Riverside, CA
Posts: 385
|
The middle of January saw us dry camping in the Ocotillo Wells desert with a mix of Vans, Motor Homes, and Fifth Wheels, Tag Along Trailers, Tent Trailers, and even a Truck with a Slide In.
It's interesting to observe how our choice of camping vehicles influence our camping styles, or vice versa. The MH and Trailer dwellers rarely came outside, while us 3 Van Campers and the Tent Trailer dude all cooked and hung out under each others awnings. Kind of makes me wonder why I camp with those Motor Homers, you never see those guys except occasionally around the campfire at night. ")
Returning home it was time to get back to work. Not much left to finish the interior out. Before finishing the trim I needed to get the windows mounted. It gave me an excuse to buy a new Milwaukee 12V Jig Saw. This saw has been impressive. Light weight, and the modified handle really makes it easy to cut a straight line. I have several corded jig saws that will probably get thrown into a garage sale.
The windows have increased the natural light in the top, and make it feel a lot more open. I don't think the placement was as critical as just the fact that I have them at all. Even though they replaced some storage opportunities, I am glad I cut them in.
__________________
Tim Potts
2012 Chevrolet Express 3500 6.0
|
|
|
|
|
01-31-2019, 10:43 PM
|
#76
|
|
Senior Member
Join Date: Jun 2017
Location: Riverside, CA
Posts: 385
|
With the new windows opened and the ceiling fan on, it was the best I have had it while spraying adhesive inside. Still, I was glad to get all the material finished up that had to be glued while inside the van.
The distance between the front and rear bulkheads accidentally wound up being exactly 8 feet. With the windows placed in the middle of that 8 foot span, it left some areas to have some storage. In my buddies high tops, they built deep side storage cabinets, which leaves the vans feeling too closed in. Of course I have the windows to help prevent that, but I decided to go with a more minimalist approach than they did.
Up until I started cutting plywood, I had kept debating how I would build this upper storage. Just a shelf? How deep should I make them? Exactly how was I going to mount these pieces? Etc, etc. I had to get started building them just to stop the internal debate.
The vertical pieces are glued to the fiberglass shell and screwed to the window surrounds for strength. Front and rear cripples screwed to the bulk heads. Ultimately I decided to do some basic cubbies. During our Ocotillo trip it was apparent we really don't need this storage so I figured if it was deep enough to store a loaf of bread it would be big enough.
All I have left is to wrap the plywood fascia on the passenger side and figure out how to transition the bulkheads to the headliner a little more elegantly than butting them up together. The side fascias wrap over the headliner for a clean transition. I got a couple ideas to pursue for the bulk heads.
After that I'll finish up the wiring for my switch panels.
__________________
Tim Potts
2012 Chevrolet Express 3500 6.0
|
|
|
|
|
01-31-2019, 11:12 PM
|
#77
|
|
Senior Member
Join Date: Jun 2017
Location: Riverside, CA
Posts: 385
|
Getting this high top project close to completion, I wonder what's next? I haven't been happy with the sofa bed for several reasons. The worst is the foam I bought to unfold when its a bed. I cut the foam into three pieces to fold up for storage, then shoved all three pieces into a duvet cover. What a PITA that decision was. Leaning over the bed, trying to slide the foam pieces into a comfortable bed while they're inside the cover, when the foam doesn't slide across each other, sucks. When camping I like to make the bed back into a sofa during the day, but with this setup, I've just been leaving it made out.
This week I purchased a nice 4" memory foam tri fold short queen mattress to try next. Hopefully it will improve my experience. And maybe I'll be totally happy if it does.
But I recently discovered the RB15 interior and it has me thinking of rebuilding the bed area in its dinette layout. I like the fact we would have an indoor table for playing cards, eating dinner in inclement weather, etc.
I'm assuming the dinette makes into a full width bed. I would certainly build my version that way. I could see us sleeping on the two couches without even making out the bed if it was a quick overnighter. May be better in couch mode anyway, the dogs could sleep on the floor between us instead of stealing my blankets.
What I don't like too much is the sideways seating for passengers while driving. I see Sportsmobile has seat belts on those couches so it must be considered an acceptable solution.
Then again, 99% of the time nobody rides in the back anyway. I think I would prefer the dinette. Anyone have or had the dinette, and what is your opinion?
__________________
Tim Potts
2012 Chevrolet Express 3500 6.0
|
|
|
|
|
02-01-2019, 06:25 AM
|
#78
|
|
Senior Member
Join Date: Apr 2012
Location: Philadelphia, PA
Posts: 4,208
|
As have an EB-10(ish) layout with rear dinette. We love it. During the day it makes for a very livable space, where multiple people can kick back, read, etc. On the rare times we eat inside rather than outside (rain, bugs, etc.) its very comfortable. Our van has the inset walls feature, giving a precious extra few inches on both sides of the bed when opened up.
We like the walk-through design, but our van is an EB with two floor to ceiling cabinets at the very back of the van so were back and forth a lot. We rarely, if ever, have used the sideways seating while driving, as its just three of us traveling and we have a third captains chair. The few time my son sat there while driving he wasnt too keen on it. Id say its fine for short haul, but I wouldnt recommend it for road tripping.
|
|
|
|
|
02-01-2019, 06:51 AM
|
#79
|
|
Senior Member
Join Date: Oct 2018
Location: Richmond VA
Posts: 317
|
Quote:
Originally Posted by shadetreevanman

I haven't been happy with the sofa bed for several reasons. The worst is the foam I bought to unfold when its a bed. I cut the foam into three pieces to fold up for storage, then shoved all three pieces into a duvet cover. What a PITA that decision was. Leaning over the bed, trying to slide the foam pieces into a comfortable bed while they're inside the cover, when the foam doesn't slide across each other, sucks. When camping I like to make the bed back into a sofa during the day, but with this setup, I've just been leaving it made out.
|
You might want to try wrapping the foam pieces in a light, smooth fabric that will slide more easily. Just wrap and glue the overlap for a quick-and-dirty test.
|
|
|
|
|
02-01-2019, 07:50 AM
|
#80
|
|
Senior Member
Join Date: Nov 2016
Location: FL and VA
Posts: 1,951
|
Looking good. I have a walk through design as well and have on occasion used sideways seating on my gaucho right behind the driver. Don't have a dinette.
__________________
Chris
2008 GMC 3500 Quigley Weldtec 4x4 Savana SMB
|
|
|
|
|
|
 Posting Rules
|
You may not post new threads
You may not post replies
You may not post attachments
You may not edit your posts
HTML code is Off
|
|
|
|
 » Recent Threads
 |
|
|
|
|
|
|
|
|
|
|
|
|
|
|
|
|
|
|
|
|
|
|
|
|
|
|
|
|
|
|
|
|
|


 2008 GMC 3500 SMB
 Linear Mode